
TL;DR

Get business pricing on tools and workshop supplies
- Business-only prices and quantity discounts
- Tax-exempt purchasing
- Multiple users, one account, clear invoices
For a clean hand-plane edge, start from a flat reference face, secure the board, and use a sharp, evenly set iron taking fine shavings. Check square and straightness as you work, choose a longer plane for long edges, and stop at the line before easing a visible corner. A dry-fit glue joint should close evenly without force.
A board can look straight from across the shop and still open a hairline gap when you bring its edge to another board. That gap often comes from a small hollow, a rounded end, or a face that was never a trustworthy reference. A hand plane can leave a crisp, smooth edge with little sanding, but the result depends on preparation, a sharp blade, and steady checks.
This guide walks you through choosing a plane, setting its iron, reading the grain, and checking your work before you reach the pencil line. You’ll also see how to fix tear-out, taper, chatter, and edges that drift out of square. The aim is practical: a board edge you can trust for a glue joint or ease lightly for a finished piece.
Think of the process like fitting a door: remove material where it binds, check often, and keep the reference steady. A few thin shavings and a square tell you more than a dozen hurried strokes.
Use a flat reference face, secure the board, and mark the target width before planing.
Pick a longer bench plane to straighten long edges; save a block plane for end grain and quick adjustments.
Set a sharp iron for a thin shaving, and test grain direction before committing to a full pass.
Check straightness and square at several points, then dry-fit a glue joint before calling the edge done.
Use a light, consistent easing on visible corners and avoid sanding away a crisp arris.
Workshop Guide / Hand Tool Technique
Tips for Achieving Perfect Edge Finishes with Hand Planes
A clean, square edge starts with a trustworthy reference face, a secure board, and a sharp iron. Work in fine shavings, check often, and stop at the line before easing a visible corner.
Build a reliable reference
The face guides every check that follows. If it rocks or carries a twist, you may chase an error the plane did not create.
Check the face first
Use a straightedge to look for hollows or twist. Mark target width with a gauge or pencil before removing wood.
Secure without crushing
Clamp at a comfortable height. Add a scrap pad or support block under thin stock to reduce vibration and chatter.
Let pencil show highs
Draw lines along the edge. They disappear first where the iron cuts, revealing high spots that need selective attention.
Match plane length to the edge
Long soles bridge low areas. Short planes are easier to steer on small parts, while block planes suit end grain and small adjustments.
| Task | Useful plane choice | What to watch |
|---|---|---|
| Long board edge | Longer bench plane | Check straightness at several points |
| Short component | Shorter bench plane | Avoid tipping at either end |
| End grain or touch-up | Block plane | Use a fine cut and support corners |
Make each pass count
A fine shaving asks for more passes, but gives you more chances to inspect, correct, and protect the final width.
Sharp and even
Seat the blade and cap iron firmly. Align projection across the mouth so one side does not cut deeper and taper the edge.
Test before committing
Try scrap from the same board. If fibers lift, reverse direction or take a finer cut; grain can change along the length.
Stay level through the end
Use full, even strokes. Shift pressure from the front toward the rear as you move, and avoid twisting at the finish.
Stop at the line, then verify
Fine shavings and frequent checks prevent over-correction. A glue edge should close evenly without force or visible gaps.
Read the defect, adjust the cut
Small defects have useful clues. Correct the setup or stroke before making more passes.
Tear-out
Hone the iron, take a thinner shaving, try the opposite direction, or reduce the cutting angle where possible.
Taper or hollow
Check pressure and stroke overlap. Use a longer plane and measure at several points along the edge.
Out of square
Recheck lateral adjustment and grip. A shooting board or adjustable fence can guide the plane upright.
Chatter or rough marks
Secure the board, seat blade and cap iron firmly, support thin stock, and reduce cut depth.
Rounded ends
Keep the plane supported through the stroke. Avoid lifting or twisting as the tool leaves the work.
Chipped corners
Lightly chamfer the far corner before it breaks away, especially near the end of a pass.
From setup to trusted edge
Each check protects the next one. Keep the reference steady and let the work tell you where material remains.
For a glue joint, keep the edge straight and square along its full length. For a visible edge, add only a tiny, consistent easing so the arris stays crisp and durable.
Set up a reliable reference before your first pass
For a clean hand-plane edge, begin with a flat reference face and a board that cannot shift. Mark the target width, clamp the stock at a comfortable height, and check the edge against the face with a reliable square. If the face rocks on a straightedge or carries a twist, it can make a straight edge appear out of square even when your plane is behaving. This matters because every later check compares the edge to that face: an unreliable reference can lead you to correct the wrong surface and remove sound wood.
Clamp the board firmly without crushing a soft edge. A narrow strip of scrap between the clamp and the work spreads pressure, and a support block under thin stock keeps it from buzzing as the iron meets the wood. That vibration can leave chatter marks: tiny repeating ridges that catch light like ripples on water. Firm support lets the blade slice instead of making the board flex away from it; too much clamp pressure, though, can dent the stock or bow a thin piece, so secure it only enough to resist the push of the plane.
Mark the target width with a marking gauge or pencil, then add a few pencil lines along the edge. As you plane, those lines reveal high spots; where they disappear first, the iron is cutting. On a 600 mm cabinet rail, for example, you might find the middle is high while both ends still show pencil. That tells you to work the middle selectively rather than take full-length passes that could lower the ends and create a hollow.
Keep a square, straightedge, and pencil close by. A square checks the relationship between face and edge; a straightedge reveals hollows and bumps. These tools answer different questions, so one cannot substitute for the other: an edge can be straight but out of square, or square at one spot but bowed along its length. This depends on preparation: a bad reference can send you chasing an error that the plane did not create.
Popular right now

Ninja Foodi 10-Qt DualZone Smart XL Air Fryer, 6-in-1, DZ550

Dyson Airwrap i.d. Multi-Styler for Straight and Wavy Hair

De'Longhi Rivelia Automatic Espresso Machine with Milk Frother
As an affiliate, we earn on qualifying purchases.
Choose a plane that can reach the length you need
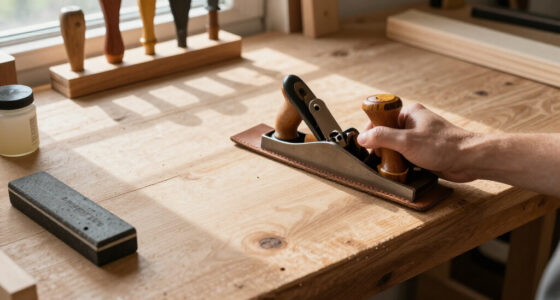
A longer bench plane is usually the better choice for straightening a long board edge because its sole bridges low spots instead of dropping into each dip. A shorter plane feels easier to steer on a small part, while a block plane excels at quick touch-ups and end grain. The right tool depends on how much length you need to true and how much control the piece requires.
Imagine leveling a bumpy path with a long board: the board rests on the high points and spans the hollows. A long plane works in much the same way. A shorter plane can follow the local shape, so it may polish an edge that still bows over the full length. For a 900 mm shelf, a longer bench plane gives you a useful reach; for a 120 mm drawer front, a shorter plane may feel more manageable.
A block plane is handy for a tiny bevel, a sharp corner, or a quick adjustment, but it usually is not the easiest way to true a long glue edge. If the edge needs to stay square, a shooting board or adjustable fence can guide the plane and reduce the chance of leaning it. A shooting board also helps when you need a square end on a short part.
Plane design and blade steel can improve consistency or edge retention, but they do not replace setup. A well-tuned budget plane with a sharp iron can outperform an expensive plane with a dull one. Match plane length to edge length, then match the setup to the finish.
| Task | Useful plane choice | What to watch |
|---|---|---|
| Long board edge | Longer bench plane | Check straightness at several points |
| Short component | Shorter bench plane | Avoid tipping at either end |
| End grain or touch-up | Block plane | Use a fine cut and support corners |
Tune the iron for thin, clean shavings
A sharp, securely seated iron should take a thin, continuous shaving without demanding excessive force. If the blade crushes fibers, skips, or leaves a ragged track, stop and check the edge, depth, and alignment before making more passes. A clean cut feels controlled; it does not require you to lean your shoulder into the plane. That low effort is more than a comfort issue: excess force makes it harder to hold the plane upright and consistent, which can turn a sharpening problem into a squareness problem.
Set the iron for a fine shaving and check that it projects evenly across the mouth. A blade that sticks out farther on one side can cut a tapered edge or leave a track. The cap iron and blade should sit firmly together; looseness can contribute to chatter, especially on a board that is not well supported. A fine setting removes less wood per stroke, so it gives you more chances to inspect and correct the edge; the tradeoff is that it takes more passes, making steady technique and a secure setup important.
Steel type is only part of the setup. Some modern irons, including A2 and PM-V11, can offer different edge-retention characteristics, but sharpening and adjustment still decide how the plane cuts. An iron that holds an edge longer can reduce interruptions during a large job, while a steel that is quicker for you to sharpen may be preferable for occasional work. For a home shop, a dependable sharpening routine and a consistent edge often matter more than buying a premium iron before you have the plane tuned.
Try a test pass on scrap from the same board. If the shaving comes off in a thin ribbon and the surface looks even in raking light, the setup is close. If the plane takes a thick bite and leaves a torn patch, retract the iron slightly and hone the edge. Scrap reveals the cut before you commit to the final width, where a correction might shorten the part. A sharp blade saves effort and helps prevent crushed fibers.
Follow the grain and control each full stroke
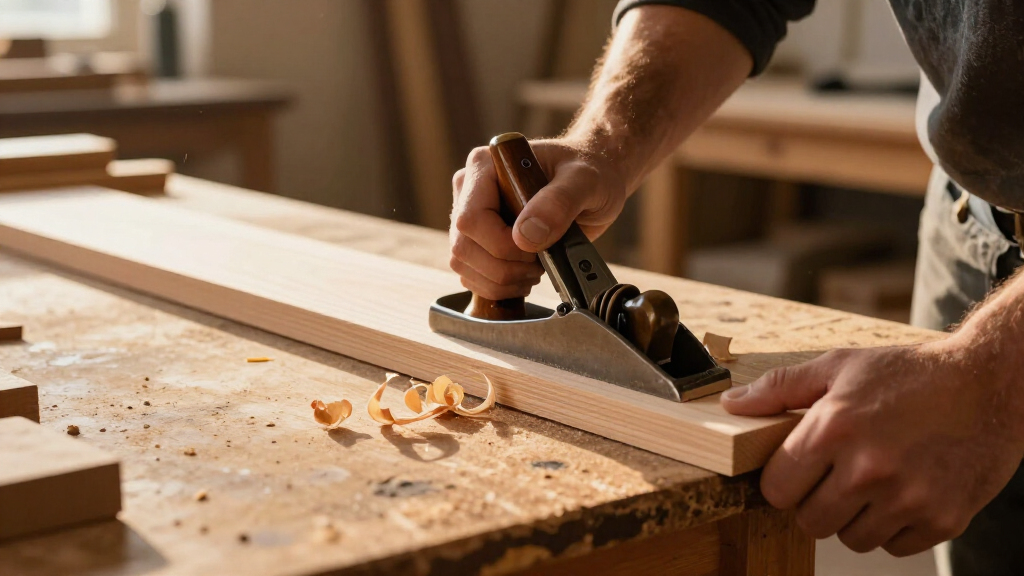
To get a smooth edge, take full, even strokes with the grain where the board allows it, and keep the plane upright as it travels. Grain direction can change along a board, so make a test pass and watch whether the fibers lie down cleanly or lift ahead of the blade. If the cut tears, reverse direction or reduce the shaving thickness. Torn fibers leave a damaged surface below the apparent edge, so simply sanding the roughness can widen the edge or soften its corners without fully correcting the cause.
At the start of a stroke, press down near the front knob so the toe stays planted. As the plane moves forward, shift pressure toward the rear handle; this keeps the heel engaged as the toe leaves the board. Keep the plane level and avoid twisting at the end. That last little wrist roll can round the edge or leave one end tapered. The pressure shift follows the part of the sole that is actually supported: too much downward force at the wrong end can make the plane pivot and remove more wood there.
Overlap strokes enough to avoid narrow ridges, but do not scrub back and forth without checking. On a 700 mm piece of maple, you might find the grain runs cleanly for the first half and begins to rise toward the far end. A lighter pass in the opposite direction may cut cleanly there. The board’s grain gets the final vote. Reversing direction may improve the surface, but it also changes where the shaving exits, so support the far corner and take a thinner cut near the end to limit breakout.
If the wood is thin or narrow, support it against a stop or in a bench hook so it cannot chatter. Take a fine shaving near the ends, where a full-depth pass can break out a corner. These tips for achieving a clean surface are mostly about keeping the tool supported and letting the iron do the work.
Check square and straightness before you reach the line
A board edge is ready when it stays straight along its length and meets the reference face at the angle your project needs. Check it with a square across the face and edge, then use a straightedge or careful sighting to find hollows and high spots. Measure at more than one point; one perfect-looking patch cannot tell you what the other 600 mm are doing. These checks are independent: straightness determines whether mating edges meet along their length, while square determines whether the board keeps its intended width and sits correctly in the assembly.
- Mark the target: Set the width with a gauge or pencil and leave a clear reference line.
- Plane the high spots: Use pencil marks to show where the iron is cutting, keeping passes controlled.
- Check the length: Hold a straightedge to the edge and look for light gaps; use winding sticks if you suspect twist.
- Check square: Test near both ends and the middle, then adjust the iron or your grip if the angle drifts.
- Stop and dry-fit: For a glue edge, bring the mating boards together and look for an even closure without force.
A slight camber on a general-purpose bench-plane iron can help avoid track marks, while a straight or very lightly cambered edge can suit fine edge work. Either way, your checks should guide the cut. A cambered iron tends to leave a shallow hollow across the width if you use it carelessly, while a straight edge may leave fine tracks if its corners protrude. If one side of the edge is consistently high, correct the iron’s lateral alignment or use a fence rather than trying to twist the plane into submission.
A dry-fit tells you whether the joint closes across its length. If you see a sliver of light near the middle, the edge may be hollow; if the ends meet and the center opens, adjust the high areas gradually. A close fit without force matters because clamps can disguise a poor edge by bending the boards together, leaving stored stress that may show up as a gap after glue-up. Frequent checks keep a small error from becoming a tapered board.
Fix tear-out, chatter, and rounded corners without guessing
Tear-out, chatter, taper, and chipped corners each point to a different problem, so read the mark before changing your technique. Tear-out looks like torn fibers or a rough crater; chatter leaves repeated ridges; taper shows up when measurements or straightedge checks change along the length. Identifying the defect first keeps you from removing good wood in the wrong place. It also helps distinguish a surface blemish from a geometry problem: polishing a rough patch may improve its appearance, but it will not straighten a hollow or restore a chipped corner.
- Tear-out: Hone the iron, take a thinner shaving, and test the opposite planing direction. Difficult grain may need a scraper or careful sanding as a last step.
- Chatter: Clamp the board more firmly, check that the blade and cap iron are seated, and reduce cut depth.
- Taper or hollow: Check stroke overlap and pressure, use a longer plane for a long edge, and measure at several points.
- Out-of-square edge: Check lateral blade adjustment and hold the plane upright; use a fence or shooting board when the part is awkward.
Suppose a cherry rail develops a torn patch near a knot. More pressure will not fix it; a finer cut or a change in direction may. If the grain keeps lifting, a scraper can clean the small damaged area without forcing the plane through fibers that turn abruptly. The scraper is slower and removes less predictably than a well-set plane, but for a small patch it may preserve more of the surrounding edge than repeated attempts with a blade that keeps tearing.
To avoid a chipped far corner, lightly chamfer it before a pass reaches the end, then keep the plane supported through the stroke. This tiny bevel acts like a sacrificial ramp: the blade exits gradually instead of levering the corner away. The bevel must be small enough to disappear when the edge is finished; a large chamfer protects the corner but changes the final dimensions and appearance. Match the fix to the mark, and you will preserve more of your reference edge.
Choose a crisp glue edge or a gently eased visible edge
The best edge finish depends on where the edge will live: a glue edge needs to be straight, square, and clean, while a visible edge often benefits from a tiny, consistent easing of its corners. Sanding is not automatically required after a sound planed cut. If you sand aggressively, you can round the arris and weaken the crisp fit you just worked to create.
For a panel glue-up, bring the boards together dry and check the seam along its length. A well-fitted joint closes evenly without you forcing it shut; a clamp should hold the assembly together, not bend two bad edges into alignment. If the joint shows a gap, return to the plane and remove only the high spots.
For a table apron or cabinet door edge that hands will touch, one or two light passes can break the sharp corner without turning it into a visible round-over. Run a finger lightly along the edge and inspect under side light. You want the fragile razor corner gone, not a broad bevel that changes the part’s appearance.
A visible edge can also show planing tracks more readily under a clear finish, so use a fine final pass and inspect the surface before applying finish. If a tiny mark remains, a scraper or light sanding may help, but protect the corner. Clean edge finishes come from deciding what the edge must do before choosing how smooth or soft it should look.
A glue edge should meet without force; a finished edge should feel intentional under your fingertips.
Frequently Asked Questions
How sharp should a plane iron be?
Sharp enough to take a thin, continuous shaving without excessive force or crushed fibers. If it skips, tears, or needs a hard push, hone it and test again on scrap.
Which hand plane works best for a board edge?
A longer bench plane is generally useful for straightening a longer edge because it bridges low spots. A shorter plane suits small parts, and a block plane is handy for touch-ups and end grain.
Should I plane with or against the grain?
Follow the grain where the cut stays clean, but inspect the board along its length because grain direction can change. A test pass tells you whether to continue, reverse direction, or take a finer shaving.
How do I keep a planed edge square?
Set the iron evenly, keep the plane upright, and check with a square at the ends and middle. A fence or shooting board can help when the part is short or awkward to hold.
How can I tell if the edge is straight enough for glue?
Check it with a straightedge and dry-fit the mating boards. A sound glue edge closes evenly along its length without force; visible gaps point to hollows or high spots that need another controlled pass.
Do I need to sand after planing?
Often, no. A clean planed surface may be ready for finish or glue, while a scraper or light sanding can address a minor mark. Keep abrasives off the corner if you need a crisp arris.
Conclusion
For a reliable hand-planed edge, keep the work stable, take thin shavings with a sharp iron, and let repeated square and straightedge checks direct your next pass. A long edge rewards a longer plane; a finished edge deserves only the easing its design calls for.
Stop when the line is clean and the joint closes evenly. Then put a fingertip on the edge: it should feel deliberate, not fragile or fuzzy.