TL;DR
Open a free Amazon Business account
Business pricing, bulk buying and tax-exempt orders.
Create a free accountAs an affiliate, we earn on qualifying purchases.
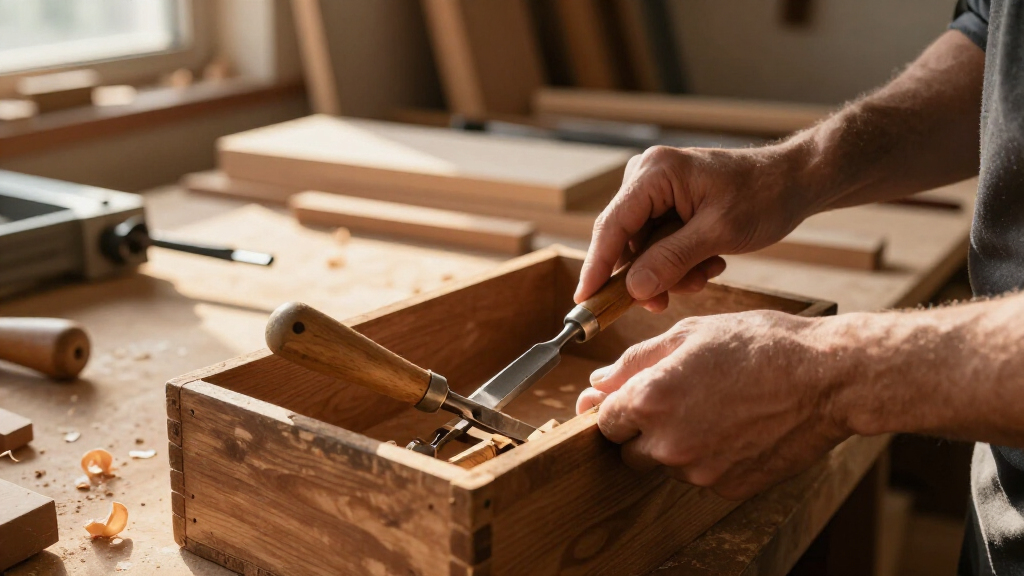
For fine woodworking, choose bevel-edge bench chisels in A2 or O1 tool steel, starting with a 1/4″, 1/2″, 3/4″, and 1″ set. Proper honing at 25-30° matters more than brand — a $40 chisel sharpened well outcuts a $200 chisel that’s dull.
The first time you pare a hinge mortise with a truly sharp chisel, something clicks. The blade slices through maple like it’s cold butter — no crushing, no tear-out, just a clean wall and a flat bottom. That experience is 90% sharpening and 10% the chisel itself, which is exactly why buying chisels confuses so many people.
Walk into any woodworking supplier and you’ll face a wall of options: Japanese vs Western, O1 vs A2 steel, bevel-edge vs mortise, $25 sets vs $70-per-tool handmade blades. This guide cuts through that noise. You’ll learn which blade material and steel actually matters, which sizes earn their spot in a small shop, and where the budget-versus-pro line really sits.
Here’s my bias up front: I run a two-car-garage shop and I’ve made every buying mistake on this list. What follows is what I wish someone had told me before I spent money on tools I didn’t need.
Start with four bevel-edge bench chisels — 1/4", 1/2", 3/4", and 1" — rather than a big set; add sizes per project.
A2 steel offers the best edge-retention-to-forgiveness ratio for a hobbyist; O1 takes a finer edge but needs honing every 20-30 minutes of work.
Grind at 25°, hone a 30° micro-bevel for mallet work, and drop to 20° only for hand-pressure paring in soft woods.
Sharpening skill beats brand prestige — a properly honed $35 chisel outperforms a dull $200 one every time.
Flatten the back of every new chisel before first use; it’s a one-time chore that determines mortise quality forever.
Choosing the Right Chisels for Fine Woodworking
A truly sharp chisel slices maple like cold butter — no crushing, no tear-out. That experience is 90% sharpening and 10% the tool itself, which is exactly why buying chisels confuses so many people. This guide cuts through the noise: which steel matters, which sizes earn their spot, and where the budget-versus-pro line really sits.
Steel Matters More Than the Brand on the Handle
Fine woodworking chisels are made from high-carbon and tool steels — O1, A2, and occasionally S7 or powder metals. The differences are practical, not marketing fluff: how sharp it gets, and how long it stays that way. Japanese makers laminate a hard cutting layer to a tough body — a design refined over centuries.
| Steel | Edge Sharpness | Edge Retention | Best For | Price Tier |
|---|---|---|---|---|
| O1 High-Carbon | ✓ Excellent — hone whittles end grain | ~ Fair — hone every 20–30 min | Fine paring, hand-cut joinery | Mid |
| A2 Tool Steel | ✓ Very good — slightly coarser grain | ✓ Excellent — 2–3× longer than O1 | General bench work, mortising | Mid–High |
| PM-V11 Powder Metal | ✓ Excellent | ✓ Excellent | Users who hate sharpening | High |
| Japanese White/Blue Paper | ✓ Exceptional — Rc 64+ | ✓ Good — but brittle edges | Detail work, exacting joints | High |
Four Sizes That Actually Earn Their Spot
Most woodworkers need exactly four bench chisels to start. Every other size is a convenience, not a necessity. Resist the 12-piece set — sets are how manufacturers move the sizes you’ll never touch. Buy four at the best quality you can afford, then add sizes project by project.
Dovetail cleanup, tight mortise corners, trimming small tenons, inlay work — it lives in your hand.
General joinery and chopping small mortises. Sized to common dovetail layouts.
The everyday tool for most bench tasks — the one you reach for without thinking.
Paring, hinge gains, cleaning wide cheeks, and general heavy chopping work.
Shape matters too. Bevel-edge bench chisels are the versatile default — the side bevels reach into dovetail corners. Mortise chisels are thick and built to be struck hard. Paring chisels are long and slender for hand-pressure-only slicing. Three different jobs; no single chisel does all three well.
Japanese vs. Western: Fit Your Workflow, Not the Romance
Japanese chisels (nomi) laminate white or blue paper steel — extremely hard at the edge, hardened to Rc 64+. Western chisels run softer monolithic O1 or A2 with a more forgiving geometry. The choice comes down to how you work, not which tradition is “better.”
Japanese Nomi
Laminated · Rc 64+ · Struck with metal hammerTakes and holds a screaming edge. Hard laminated steel slices hardwood end grain like nothing else — perfect for shoji screens and exacting joinery.
The catch: that hardness is brittle. Strike a hidden nail or twist in a knot and you can chip the edge — sometimes badly.
Western Bench
Monolithic O1/A2 · Rc 58–62 · Wooden malletRuns softer and is more forgiving of incidental contact in a real shop — knotty lumber, shop fixtures, accidental meetings.
Edges are sturdier at the same sharpness, and you can regrind without ceremony. A mid-priced A2 honed properly handles 95% of hobbyist work.
Rockwell Hardness Scale (HRC) · Softer → Harder
The 25° vs. 30° Decision Nobody Explains Clearly
Bevel angle is where chisels go from good to magical — and it’s the spec most beginners ignore. Lower angles cut with less force and leave a cleaner surface, but are physically weaker at the apex. Higher angles stand up to mallet blows but can crush delicate fibers instead of slicing them.
Primary Grind Bevel
The standard grind on bench chisels. Your baseline geometry — the reference from which all secondary bevels are honed.
Micro-Bevel · Mallet Work
Hone a 30° secondary on every chisel that gets struck. Tougher at the apex, it stands up to chopping and mallet blows.
Paring · Hand Pressure Only
Drop to 20–25° for fine paring in soft woods — cleaner surface, less force, but never strike it with a mallet.
- Grind the primary bevel at 25°, then hone a 30° micro-bevel on chisels used with a mallet.
- Lower angle = cleaner cut, weaker edge. Use only for hand-pressure paring in soft woods.
- Higher angle = tougher apex that survives mallet work, but needs more push force.
- Flatten the back of every new chisel before first use — a one-time chore that determines mortise quality forever.
- Diamond plates and honing jigs have made maintaining a razor edge far simpler than the old oil-stone era.
A 5-Step Sharpening Routine That Takes Two Minutes
Sharpening is not a chore — it’s the difference between woodworking and wood fighting. A $40 chisel honed well outcuts a $200 chisel that’s dull, every single time.
Flatten the Back
Work the back on progressively finer grits until it’s mirror-flat behind the edge.
Grind 25° Primary
Establish the primary bevel — by grinder, diamond plate, or coarse stone.
Hone 30° Micro
A few strokes per grit raise a crisp secondary micro-bevel.
Polish & Strop
Finish on fine stone and strop to remove the wire edge completely.
Test on End Grain
A truly sharp chisel whittles end grain cleanly — no crushing, no tear-out.
Sharpening Skill Beats Brand Prestige
- Start with four bevel-edge bench chisels — ¼”, ½”, ¾”, 1″ — not a big set; add sizes per project.
- A2 steel offers the best edge-retention-to-forgiveness ratio for a hobbyist; O1 takes a finer edge but needs honing every 20–30 minutes.
- Grind 25°, hone a 30° micro-bevel for mallet work; drop to 20° only for hand-pressure paring in soft woods.
- Flatten the back of every new chisel before first use — it determines mortise quality forever.
- Revered brands — Lie-Nielsen, Veritas, Pfeil — earn their reputation, but only after the edge is properly honed.
Why Blade Steel Matters More Than the Brand Name on the Handle
Blade steel determines two things you’ll feel every single time you pick up the tool: how sharp it gets, and how long it stays that way. Fine woodworking chisels are made from high-carbon steel and tool steels — O1, A2, and occasionally S7 — and the differences between them are practical, not marketing fluff.
O1 (oil-hardening) steel takes the keenest edge of the bunch. It’s the traditional choice, and old-school cabinetmakers swear by it because you can hone it to a polish that literally whittles end grain cleanly. The tradeoff: it dulls faster. Expect to touch up the edge every 20-30 minutes of hard paring.
A2 steel is the modern workhorse. It holds its edge roughly two to three times longer than O1, which is why brands like Lie-Nielsen and Veritas offer it as their default. The catch is a slightly coarser grain structure — the edge is tough but never quite as razor-fine as O1. For a hobbyist who sharpens reluctantly, that trade is worth it.
| Steel | Edge Sharpness | Edge Retention | Best For | Typical Price Tier |
|---|---|---|---|---|
| O1 High-Carbon | Excellent | Fair (hone often) | Fine paring, hand-cut joinery | Mid |
| A2 Tool Steel | Very good | Excellent | General bench work, mortising | Mid to high |
| PM-V11 (powder metal) | Excellent | Excellent | Users who hate sharpening | High |
| Japanese White/Blue Paper Steel | Exceptional | Good | Detail work, exacting joints | High |
Some manufacturers now use laser-cut edges and laminated construction, where a hard cutting layer is forge-welded to a softer, tougher body. Japanese chisels have used this lamination approach for centuries — hard steel at the edge, springy steel behind it — and it’s still one of the smartest designs out there.
My honest take for a garage shop: a mid-priced A2 chisel, honed properly, will handle 95% of what a hobbyist ever does. Buy the exotic steels later, when you know what your hands actually prefer.
As an affiliate, we earn on qualifying purchases.
The Four Chisel Sizes That Actually Earn Their Spot in Your Drawer
Most woodworkers need exactly four bench chisels to start: 1/4″, 1/2″, 3/4″, and 1″. That’s it. Every other size is a convenience, not a necessity — and I say that as someone who owns eleven.
The 1/4″ chisel is your detail tool. Dovetail cleanup, tight mortise corners, trimming small tenons — it lives in your hand. The 1/2″ and 3/4″ are your workhorses, sized to match common dovetail and mortise layouts. The 1″ handles paring, hinge gains, and general chop work.
Sizes run from small detail chisels around 1/4″ up to 2″ and wider, but resist the urge to buy a 12-piece set. Sets are how manufacturers move the four sizes you’ll never touch. Instead, buy the four you need at the best quality you can afford, then add sizes project by project. When I built a cherry blanket chest with 3/4″ through-mortises, I added a dedicated 3/4″ mortise chisel — a tool I’d skipped for years and suddenly couldn’t live without.
- 1/4″ — dovetail corners, detail cleanup, inlay work
- 1/2″ — general joinery, chopping small mortises
- 3/4″ — the everyday workhorse for most bench tasks
- 1″ — paring, hinge mortises, cleaning wide cheeks
Shape matters too. Bevel-edge bench chisels are the versatile default — the side bevels let you reach into dovetail corners. Mortise chisels are thick, stiff, and built to be struck hard. Paring chisels are long and slender for fine, hand-pressure-only slicing. They’re three different jobs, and no single chisel does all three well.
As an affiliate, we earn on qualifying purchases.
Japanese vs Western Chisels: Which One Fits Your Hands and Your Workflow
The choice between Japanese and Western chisels comes down to how you work, not which tradition is “better.” Japanese chisels (nomi) use laminated white or blue paper steel — extremely hard at the edge — while Western chisels use monolithic O1 or A2 steel with a more robust, forgiving geometry.
Japanese chisels take and hold a screaming edge. The hard laminated steel, often hardened to Rockwell 64+, slices hardwood end grain like nothing else. But that hardness is brittle. Strike a hidden nail or twist the blade in a knot and you can chip the edge — sometimes badly. They’re also traditionally designed to be struck with a metal hammer on the hooped handle, not a wooden mallet.
Western chisels run softer, typically Rc 58-62 in A2. They’re more forgiving of the incidental contact that happens in a real shop, and you can reground them without ceremony. The edges are sturdier at the same sharpness level.
Here’s the analogy that helped me decide: a Japanese chisel is like a chef’s knife — precise, brilliant, and unforgiving of abuse. A Western chisel is like a German chef’s knife — slightly less laser-like, but it survives the dishwasher. (Metaphorically. Never put either in the dishwasher.)
For instance: a friend of mine does shoji screen work and swears by his blue-steel nomi. I chop a lot of joinery in knotty construction lumber for shop fixtures, so my A2 Western chisels survive my workflow better. Match the tool to your actual projects, not to the romance of the tradition. Plenty of excellent woodworkers own both and reach for whichever suits the cut at hand.
As an affiliate, we earn on qualifying purchases.
Edge Geometry: The 25° vs 30° Decision Nobody Explains Clearly
Bevel angle is where chisels go from good to magical, and it’s the spec most beginners ignore. Standard bench chisels ship ground at 25°, and you add a secondary micro-bevel at 30° for chopping, or drop to 20-25° for fine paring.
Why the range? Lower angles cut with less force and leave a cleaner surface — but they’re physically weaker at the apex. High angles are tougher and stand up to mallet blows, but require more pressure and can crush rather than slice delicate fibers.
The practical system I use in my shop: grind the primary bevel at 25°, then hone a 30° micro-bevel on chisels that get struck with a mallet. For dedicated paring chisels that only see hand pressure, I go all the way down to 20° for silk-smooth cuts on pine and cherry. On exotic hardwoods like cocobolo or wenge, I bump back up to 30° because low angles fold over at the edge.
Rule of thumb: the harder the wood and the harder the use, the higher the angle. The softer the wood and the lighter the cut, the lower the angle.
One more thing that matters more than people admit: a flat back. The back of a chisel is a reference surface — you register it against your work to control depth and angle. A back with machine marks or low spots will never produce flat mortise bottoms. Flattening the back is tedious (start at 120 grit, work through 8000), but you only do it fully once in a chisel’s life. Cheap chisels sometimes need an hour of lapping per tool; quality ones need five minutes. That’s part of what you’re paying for at the higher tiers.
As an affiliate, we earn on qualifying purchases.
Handles, Hoops, and Why Comfort Decides Your Precision
A chisel handle does more than give you something to grip — it transmits force, protects your hand, and controls how precisely you can steer the blade. Handle material and shape directly affect fatigue and accuracy over long sessions.
Traditional handles are hardwood — beech or hornbeam — often fitted with a steel hoop at the top so the handle doesn’t split under repeated mallet strikes. Japanese chisels use hooped red or white oak for the same reason. Plastic and composite handles shrug off drops and shop humidity, which matters in an unheated garage like mine where wood handles check and loosen seasonally.
Ergonomics is real, not a buzzword. I once did a day of mortising with cheap, thin, cylindrical handles and lost feeling in my thumb for two days. Oval handles index naturally in your grip — you can feel the blade’s orientation without looking, which is exactly what you want when paring to a knife line. Fatter handles fill the palm for heavy chopping; slimmer handles suit fine paring where control beats clout.
Some newer chisels offer interchangeable or modular handles, letting you swap grip styles for different tasks. It’s a clever idea, though honestly, in a small shop, a well-shaped fixed handle serves most of us fine.
Whatever you buy, check the tang-to-handle fit. A loose handle flexes under mallet blows and eventually cracks. A properly seated handle, optionally reinforced with a hoop, will outlast you.
Budget vs Pro: What a Hobbyist Should Actually Spend
You do not need $400 chisels to do fine work. Proper sharpening matters more than brand or price — a $35 chisel honed to 8000 grit will out-cut a dull $200 chisel every single time. According to Werkbericht’s tool research, sharpening discipline outranks manufacturer reputation as the top factor in fine results.
That said, there are real quality tiers, and the differences show up in the grind, the steel consistency, and the back flatness:
| Tier | Price Range | What You Get | Shop Verdict |
|---|---|---|---|
| Entry (e.g., big-box sets) | $30-60/set | Uneven grinds, soft steel, bowed backs | Fine after regrinding — good learners |
| Mid-tier (e.g., Narex, Irwin Marples) | $15-30 each | Decent steel, usable backs, solid value | Best bang for buck in a garage shop |
| Pro (Lie-Nielsen, Veritas) | $70-130 each | Flat backs, consistent A2/PM-V11, perfect grinds | Buy-one-cry-once quality |
| Handmade/Japanese | $50-200 each | Laminated steel, exceptional edges | For when you know what you want |
My advice after years of both wasting and spending well: start mid-tier. Learn to sharpen on affordable steel, because your first flattening and honing attempts will be clumsy and you’ll feel better about scratching a $25 blade than a $120 one. Then upgrade the sizes you use most — most people upgrade their 1/2″ and 3/4″ first — and keep the cheap ones for the rough, dirty jobs like opening paint-can-lid gaps in reclaimed lumber.
Reclaimed wood deserves its own warning: old nails hide in it like landmines. Never chop blind into salvage lumber with your good chisels. A rare-earth magnet sweep takes ten seconds and saves a $100 blade.
Keep the Edge: A 5-Step Sharpening Routine That Takes Two Minutes
Sharpening is not a chore — it’s the difference between woodworking and wood fighting. Modern gear makes it fast: diamond plates, honing guides, and micro-bevel techniques mean a touch-up takes under two minutes. Here’s the routine I run at the bench:
- Hone the bevel at 30° on a 1000-grit diamond plate or waterstone until you feel a wire edge form on the back.
- Move to 4000 grit — a few light strokes, still in the honing guide, refining the micro-bevel.
- Polish at 8000 grit — five or six strokes. This is where the mirror and the scary sharpness come from.
- Flatten the back on the same progression, just at the edge’s last half-inch, to remove the wire edge.
- Strop on leather with compound — ten pulls bevel-down. If it shaves arm hair, you’re done.
Do this before the chisel feels dull, not after. The pros’ secret isn’t better tools — it’s touching up an edge that’s 90% sharp, which takes seconds, instead of regrinding one that’s gone to the bone.
Storage matters too. Chisels rattling around in a drawer will chip each other’s edges faster than any hardwood will. A simple canvas roll, a wall rack, or even dowels drilled into a 2×4 keep edges separated. And wipe blades with a light coat of camellia oil or even paste wax — bare carbon steel fingerprints into rust within days in a humid shop.
Frequently Asked Questions
What size chisels should a beginner buy first?
Start with a 1/4″, 1/2″, 3/4″, and 1″ bevel-edge set. These four cover dovetails, mortises, hinge gains, and paring. Avoid 12-piece sets — most sizes in them will never leave the box. Buy quality in the four core sizes and add specialty chisels (like a dedicated mortise chisel) only when a project demands it.
Are expensive chisels like Lie-Nielsen or Veritas worth it for a hobbyist?
They’re excellent tools, but they’re not necessary for fine results. Premium chisels arrive with flat backs and perfect grinds, saving you setup time. Mid-tier chisels ($15-30 each) from brands like Narex perform nearly as well once flattened and sharpened. A fair strategy: learn on mid-tier steel, then upgrade the one or two sizes you use most.
Japanese or Western chisels — which should I choose?
It depends on your work. Japanese chisels use laminated hard steel that takes an exceptional edge but chips if abused; they suit careful, precise work and are struck with steel hammers. Western chisels are more forgiving and handle incidental contact better. Many woodworkers own both. If you chop joinery in varied or reclaimed lumber, Western is safer; for fine detail in clean hardwood, Japanese shines.
What’s the best angle to sharpen a chisel?
Grind the primary bevel at 25° and hone a secondary micro-bevel at 30° for general and mallet work. For paring chisels used with hand pressure only, use 20-25° for cleaner cuts. On very hard exotic woods, stay at 30° — lower angles fold at the edge. Always keep the back flat and polished for reference accuracy.
How do I keep my chisels from rusting and losing their edge in storage?
Wipe blades with a light coat of camellia oil or paste wax after each use — carbon steel rusts from fingerprints alone within days in humid shops. Store chisels in a canvas roll, wall rack, or a drilled 2×4 so edges never touch each other. And hone briefly before the edge feels dull; touching up a 90%-sharp edge takes seconds versus minutes for a fully dull one.
Conclusion
Here’s the whole decision in one sentence: buy four mid-tier bevel-edge chisels in A2 or O1 steel, flatten their backs once, learn to hone a 30° micro-bevel, and you’ll produce finer work than someone with a drawer full of premium blades they can’t sharpen. The steel matters, the geometry matters — but the sharpening habit matters most.
Start small, sharpen often, and upgrade the tools your hands reach for every day. Ten years from now, the chisels you actually wore thin will tell the story better than any buying guide could.
NFL season / tailgating Picks
team gear
As an affiliate, we earn on qualifying purchases.