
TL;DR

Get business pricing on tools and workshop supplies
- Business-only prices and quantity discounts
- Tax-exempt purchasing
- Multiple users, one account, clear invoices
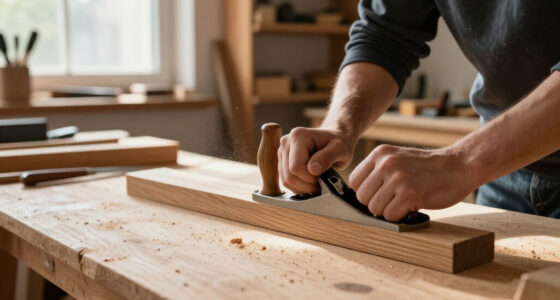
To properly sharpen and tune a hand plane, hone the iron to a clean edge, check that its back and chipbreaker fit are sound, then set the blade projection and lateral alignment for the cut. Start with a bevel around 25–30 degrees on a typical bevel-down bench plane, make fine adjustments, and judge the setup by the shavings it produces on your actual workpiece.
A hand plane can leave a board silky enough to catch the light—or chatter across it like a shopping cart with a bad wheel. The difference often comes down to a few small things: a keen edge, a chipbreaker that sits flush, and a blade set to take the shaving you actually need.
This guide walks you through how to properly sharpen and tune a bench plane without turning setup into a restoration project. You’ll learn where to spend your time, how to set the iron, and what to check when a plane tears grain or leaves one side of the board rough. The goal is simple: clean, even shavings and a tool you can adjust with confidence.
Check the plane’s mouth, blade seating, adjusters, and sole before sharpening; flatten only defects that affect the cut.
Polish the iron’s back near the cutting edge, then hone a typical bevel-down bench-plane iron around 25–30 degrees as a starting point.
Use a flat surface and repeatable grit progression; a honing guide helps beginners, while freehand honing works with practice.
Fit the chipbreaker flush to the iron, and adjust blade projection and mouth opening to suit fine smoothing or heavier stock removal.
Judge sharpness and tuning by continuous, even test shavings on the wood you plan to plane.
Workshop field guide · Edge to shaving
How to Properly Sharpen and Tune Your Hand Planes
A keen iron, a chipbreaker that fits, and a few careful adjustments turn a fussy plane into a predictable cutting tool. Work toward clean, even shavings on the wood in front of you.
Typical bevel-down bench plane
Focus near the cutting edge
Controlled projection changes
Continuous shavings across the iron
01 / Inspect before sharpening
Five checks that save time at the stone
A perfect edge cannot compensate for a blade that will not seat, a blocked mouth, or parts that cannot hold their settings. Clean and inspect the plane first; fix only what interferes with performance.
Clean the working parts
Brush pitch, rust, and packed shavings from the frog, mouth, and adjusters.
Check the iron’s edge
Bright gaps reveal nicks. A rounded or badly damaged edge may need grinding.
Confirm secure seating
Make sure the iron sits firmly and the lever cap and depth adjuster move smoothly.
Inspect the mouth
Clear debris and confirm the opening is appropriate for the cut you want.
Check the sole in use
Use a straightedge. Correct low or high spots only when they affect registration or the cut.
02 / Sharpen the iron
Make a reliable edge, repeatably
Keep the sharpening routine simple. Flat surfaces and a repeatable angle matter more than a mirror finish or an elaborate collection of abrasives.
Flatten the back at the edge
Lay the iron flat and polish the area near the cutting edge, about the first inch. Keep it face down so you do not round the back.
Hone the bevel
Start around 25–30° for a typical bevel-down bench plane. A honing guide helps hold the angle; freehand honing works with practice.
Raise, then remove the burr
Hone until a small, even burr reaches across the edge. Turn the iron over and remove it with light strokes on the back.
Refine only as needed
Use coarse abrasives for nicks or reshaping; use finer surfaces for routine honing. A narrow secondary bevel, a few degrees steeper, speeds touch-ups.
03 / Choose a system
One repeatable routine beats guesswork
Waterstones, oilstones, diamond plates, and abrasive paper can all produce a keen edge. Keep the surface flat, follow the maker’s grit guidance, and use a progression you can repeat.
Waterstones
Cut quickly and need periodic flattening. Slurry can spread across the bench.
Oilstones
Durable and consistent, though some cut more slowly than other options.
Diamond plates
Useful for flattening and honing; choose suitable grits and care for the surface.
Abrasive paper
Fix paper to a known-flat surface and use a consistent grit progression.
04 / Tune and test
From sharpened iron to clean shaving
Assemble carefully, make small adjustments, and let the cut on your actual workpiece tell you what to change.
One side cuts heavier
Adjust lateral alignment until the edge takes an even shaving across its width.
Chatter, tear-out, or clogging
Check sharpness, seating, chipbreaker fit, mouth opening, and cut depth. Plane with the grain where possible.
Fine finish or heavy stock removal?
Fine cuts call for shallow projection and a narrow mouth. Heavier cuts need more depth and clearance.
Check These Five Things Before You Touch a Sharpening Stone
Before you sharpen a hand plane, inspect the tool: clean its parts, check for blade damage, confirm that the mouth is clear, and look for sole problems that affect the cut. This quick check prevents you from honing a perfect edge only to bolt it into a plane that cannot hold or control it.
Brush away packed shavings, pitch, and rust, especially around the frog, mouth, and adjustment mechanism. Move the lever cap and depth adjuster through their range; they should operate smoothly and hold their settings. Look at the iron’s edge under a bright light. A deep nick shows up as a bright gap, and a badly rounded edge may need grinding before honing.
Check the sole with a reliable straightedge, paying attention around the toe, mouth, and heel. A vintage No. 5 with a small hollow behind the mouth may still work beautifully. If a low spot does not interfere with registering the plane or making the cut, leave it alone; removing too much metal can cost hours and shorten the tool’s useful life.
For example, if a plane skips over a narrow board but cuts well on a wide one, first check whether the sole rocks on that board and whether the iron sits securely. Extensive flattening is not the first answer. Correct only problems that show up in use, and keep electrical grinding equipment guarded, with eye protection and dust control in place.
As an affiliate, we earn on qualifying purchases.
Flatten the Iron’s Back Where the Cutting Happens
To sharpen a plane iron, flatten and polish its back near the cutting edge, then hone the bevel until the edge is keen and free of burrs. You do not need to polish the full length of the iron; a smooth, defect-free band at the edge is the part that matters for cutting wood cleanly.
Lay the back flat on a coarse, flat stone or abrasive surface and work the first inch or so near the edge. Keep the blade face down; tipping it will round the back and make it harder to remove the burr later. If the iron rocks or the abrasive cuts only in isolated spots, check that your stone or plate is flat before blaming the steel.
For a typical bevel-down bench plane, a bevel near 25–30 degrees is a practical starting point. A honing guide helps you hold that angle while you learn the feel. A secondary bevel just a few degrees steeper gives you a narrow strip to renew at the stone, much like touching up only the sharpened tip of a kitchen knife instead of grinding the whole blade every time.
Work from a coarse surface only when you need to remove a nick or reshape an edge; otherwise, spend your time on the honing surface. Once a continuous burr forms along the blade, turn the iron over and remove it with light strokes on the back. A small, uniform burr is evidence that you reached the edge, not a goal to make larger.
As an affiliate, we earn on qualifying purchases.
Pick One Sharpening System and Make It Repeatable
A sharpening system works best when its surfaces stay flat and you can repeat the same angle and grit progression each time. Waterstones, oilstones, diamond plates, and abrasive papers can all produce a sharp plane iron; the reliable setup is the one you maintain and use without guesswork.
Waterstones cut quickly but need periodic flattening, and they can leave a slurry that coats your bench. Oilstones are steady and durable, though many cut more slowly. Diamond plates offer a hard, convenient surface for flattening and honing, while abrasive paper fixed to a known-flat surface can keep the startup cost low. Labels such as “fine” vary by maker and material, so follow the manufacturer’s guidance rather than treating grit numbers across systems as perfectly interchangeable.
A honing guide is useful if your bevel wanders or you are new to sharpening. Freehand honing is faster once you can hold the angle consistently, but speed is not the test: a repeatable edge is. A garage-shop woodworker might keep a coarse diamond plate for repairs and a medium-to-fine stone for routine work, with a spray bottle and towel close at hand.
Modern blade steels and aftermarket irons can hold an edge longer, but harder steel may take more effort to grind. Fit still matters: a premium iron that does not sit properly in the plane can perform worse than the original blade. Skip the mirror-polish contest; the edge needs to be keen and free of defects. Fine shavings tell you more than a shiny bevel does.
iron sharpening stone for woodworking
As an affiliate, we earn on qualifying purchases.
As an affiliate, we earn on qualifying purchases.
Fit the Chipbreaker So Shavings Cannot Catch at the Edge
A chipbreaker helps control the shaving and reduce tear-out when it sits firmly against the iron with no gap at its leading edge. If a shaving can wedge under that edge, it can clog the mouth or lift wood fibers even when the blade itself is sharp.
Remove the chipbreaker and inspect its contact edge. It should meet the iron cleanly across its width; a bright line or visible gap near the cutting edge can point to a poor fit. Clean off rust and debris, then check again. A small mismatch can often be corrected by careful honing of the chipbreaker’s leading face, but avoid removing metal without checking that you are working on the contact surface.
For a fine finishing cut, position the chipbreaker close to the cutting edge, then set a narrow mouth and a very small blade projection. That arrangement keeps the shaving controlled as it curls up through the plane. For heavier stock removal, you can open the mouth and move the chipbreaker farther back to allow a thicker shaving to pass.
Imagine planing figured maple for a cabinet door: the grain changes direction within a few inches, and an open gap at the chipbreaker can turn a clean surface into little torn craters. A sound fit helps, but it cannot fix every setup problem. Sharpness, grain direction, cut depth, and mouth opening all work together, so change one setting at a time when you are troubleshooting.
As an affiliate, we earn on qualifying purchases.
Set Blade Projection and Alignment in Small, Controlled Moves
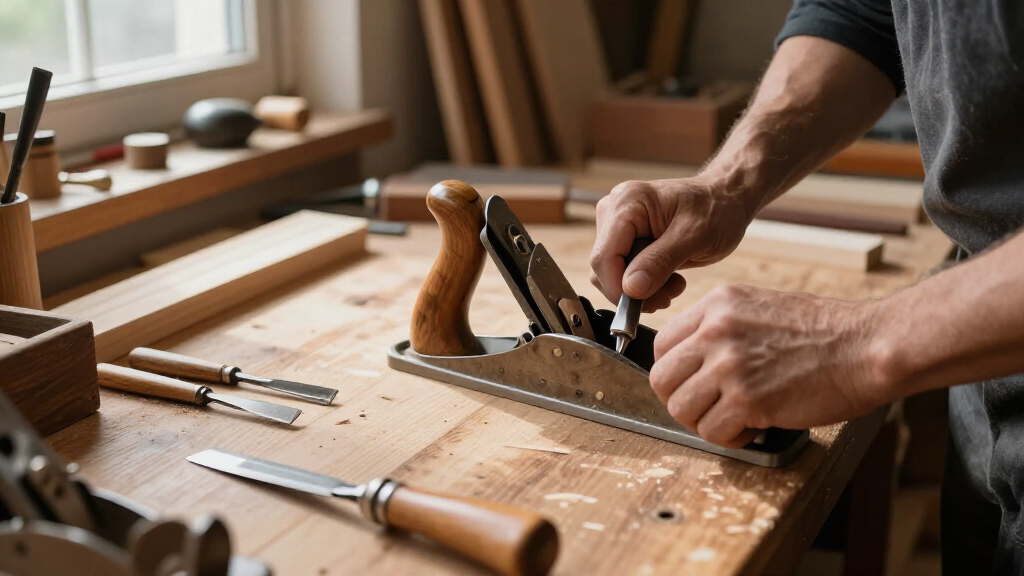
To tune a hand plane, install the iron and chipbreaker securely, then set a shallow blade projection and align the cutting edge across the mouth. Small changes are easier to judge than a large adjustment; a fraction of a turn on the depth adjuster can change a fine shaving into a heavy cut.
Seat the iron assembly against the frog, fit the lever cap, and tighten it enough to hold the blade without forcing the lever. Too much pressure makes adjustment stiff and can make the tool awkward to set. Look through the mouth and adjust the lateral lever until the exposed edge runs parallel to the mouth and sits evenly from side to side.
Advance the iron gradually until you can just see a thin line at the cutting edge. Make a test pass, then adjust the projection if the plane takes no shaving or bites too deeply. A smoothing plane taking a wispy shaving on a cabinet panel needs a different setting from a jack plane removing a high spot on a rough board. Match projection and mouth opening to the work, not to a fixed number of lever movements.
Here is a useful setup sequence:
- Seat the iron and chipbreaker flat against the frog, then secure the lever cap.
- Set the lateral lever so the edge looks parallel to the mouth.
- Advance the blade until a faint line appears at the mouth.
- Take a test shaving and adjust projection in small steps.
- Close the mouth for a fine cut or open it for thicker shavings.
On a typical bevel-down bench plane, a bevel around 25–30 degrees is a starting point; the best edge angle and settings still depend on the plane’s design, blade support, and wood.
Read the Shavings to Find Out What Needs Fixing
Clean shavings tell you that a plane is cutting well: they should be continuous, even across the blade, and suited to the cut you set. When the shavings turn ragged, narrow on one side, or stop altogether, use them as clues about alignment, sharpness, and blade depth.
Start with a flat scrap of the same species and grain direction as your project. Take several passes with the grain where possible and look at both the shaving and the board. If one side cuts more heavily, adjust the lateral lever. If the plane chatters, check that the iron is seated and held securely, and reduce excessive projection before changing several other settings at once.
Tear-out usually means fibers lifted before the edge sliced them cleanly. Check for a dull edge, a cut that is too deep, an overly open mouth, or a chipbreaker that does not fit. Then try a lighter cut and plane with the grain. On curly maple, the grain can reverse within a short distance, so the board may need a different planing direction or a finer setting in the problem area.
If the plane clogs, inspect the chipbreaker fit and make sure the mouth has enough clearance for the shaving. Uneven shavings can also point to a nicked edge or incorrect lateral alignment. Change one setting, then make another test pass; otherwise, you will not know which adjustment helped. A smooth, pale shaving curling onto the bench is a better sharpness test than a paper or hair test.
Keep the Setup Simple for Your Shop and Your Wood
A small, consistent sharpening setup is enough for most home shops: one way to repair an edge, one or two honing surfaces, and a method for keeping them flat. You do not need a large grinder or an expensive set of stones to sharpen a plane iron; you need a reliable routine and a safe place to use it.
If you only plane pine and poplar for shop fixtures, a modest abrasive setup may serve you well. If you work hard maple every weekend, a more durable honing surface and an efficient way to flatten it can save time. In either case, keep your stones or plates clean, store them dry when appropriate, and protect the sharp iron from knocks that can roll or nick the edge.
For a garage shop, control the dust and grit around sharpening surfaces. Fine abrasive particles can scratch a polished back or contaminate a stone. Keep the sharpening station separate from the grinder’s sparks and wood dust, wear eye protection when grinding, and follow the tool maker’s safety directions. Electrical work needed to add a circuit or change a receptacle belongs with a licensed electrician; switch power off before permitted service work and use suitable PPE.
Sharpen when the plane needs more force, the shaving quality drops, or the edge begins tearing fibers instead of slicing them. There is no fixed schedule: a plane used on abrasive reclaimed lumber may dull quickly, while one used occasionally on clean cherry can stay keen much longer. A few minutes of timely honing often beats pushing a dull iron until the whole bevel needs repair.
Frequently Asked Questions
How sharp does a hand-plane blade need to be?
Sharp enough to take a clean, continuous shaving without excessive force or torn fibers. If the plane burnishes or scrapes the wood, hone the edge and try again on a test board.
What angle should I use to sharpen a plane iron?
About 25–30 degrees is a common starting point for a bevel-down bench-plane iron. The suitable angle depends on the plane’s design, blade support, and the wood you are planing.
Do I need a honing guide?
No. A honing guide helps you hold a consistent bevel while you learn, and freehand honing works well once you can control the angle. Choose whichever method gives you a repeatable edge.
Why does my plane tear out the grain?
Common causes include a dull blade, too deep a cut, an open mouth, a chipbreaker gap, or planing against the grain. Try a lighter cut and check the setup before making major changes.
Should I flatten the sole of a new or vintage plane?
Only if unevenness interferes with registering or cutting. Check the sole with a reliable straightedge around the toe, mouth, and heel, and avoid removing metal without a clear reason.
Can I sharpen a plane iron without a grinder?
Yes. A coarse stone, diamond plate, or abrasive paper can repair a bevel before you hone and deburr the edge. A grinder is useful for substantial damage, but routine sharpening does not require one.
Conclusion
Remember the order: inspect the plane, make the edge keen, fit the chipbreaker, then tune the blade for the cut. Start with a light projection and let the test shavings tell you what to change.
When the iron slices cleanly, the plane stops fighting your hands. You hear a soft, steady whisper and see a thin ribbon of wood curl across the bench—that is the setup worth repeating.
Fall Picks
fall essentials
As an affiliate, we earn on qualifying purchases.