TL;DR
Listen free for 30 days with Audible
Thousands of audiobooks and originals — cancel anytime.
Start your free trialAs an affiliate, we earn on qualifying purchases.
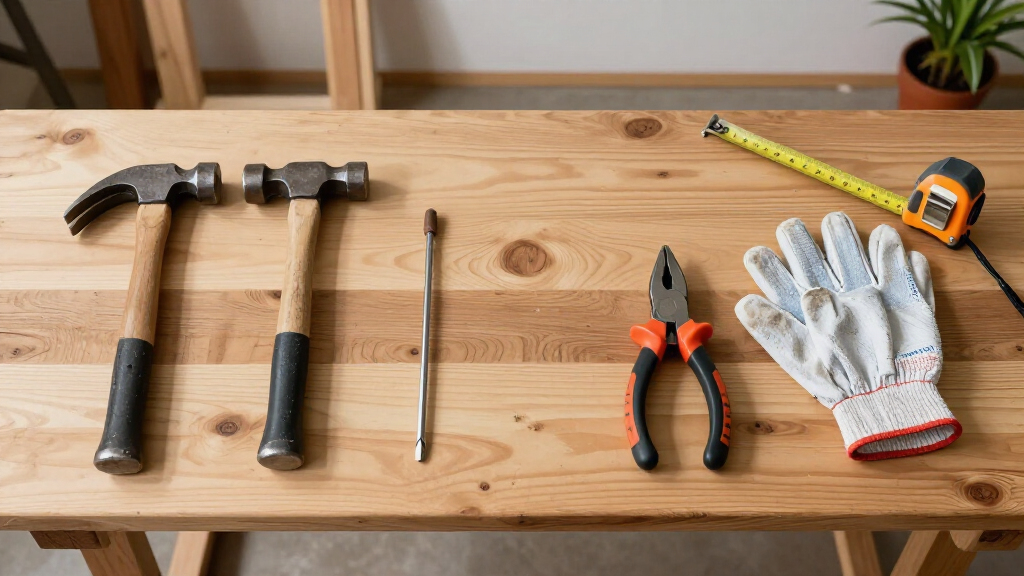
A practical starter workshop should cover five core jobs: measuring, marking, cutting, fastening, and holding. Buy a compact set of dependable tools in a sensible order — measuring tools and screwdrivers first, chisels and clamps next — rather than a large inexpensive kit full of rarely used sizes. Spend more on tools where accuracy and edge retention matter (squares, drivers, chisels) and save on hammers, pry bars, and hex keys.
I once watched a friend build an entire workbench with a $40, 108-piece toolkit from a big-box store. Two screwdrivers rounded out on the first sheet of plywood, the square was out by almost a degree, and the ratchet slipped so badly he finished the job with a stub of hex key and a lot of swearing. The bench stands. The kit went in the trash within a year.
That’s the trap most beginners fall into: volume over quality. A small set of dependable hand tools will outperform a giant cheap kit every single time, because the giant kit’s extra pieces are usually sizes you’ll never touch — and the tools you do use daily are the weak ones.
In this guide, you’ll learn exactly which hand tools a basic workshop actually needs, what order to buy them in, where spending extra money pays off, and where midrange is genuinely good enough. I’ve run a two-car-garage shop for years, so everything here is filtered through what a real small shop demands — not a catalog fantasy.
Cover five core jobs — measuring, marking, cutting, fastening, and holding — before buying anything specialized; a dozen dependable tools outperform a 100-piec…
Spend on accuracy and edges: combination squares, driver bits, pliers, ratchets, and chisels. Save on hammers, pry bars, hex keys, and utility knives where mid…
Test a combination square in 30 seconds by flipping and scribing two lines — diverging lines mean return it.
Buy in a project-driven order: measuring and marking first, drivers second, vise and specialty tools last — only when a real job demands them.
Four medium bar clamps plus two quick-grips is a workable starting clamp count; a bench vise is the highest-value first upgrade for a small shop.
Best Hand Tools for Building a Basic Workshop
A practical starter workshop covers five core jobs — measuring, marking, cutting, fastening, and holding. Buy a compact set of dependable tools in a sensible order rather than a giant cheap kit full of sizes you’ll never touch.
The 5 Jobs Every Starter Workshop Must Cover
Every hand tool you buy falls into one of these categories — and if a tool doesn’t serve one of them, it doesn’t belong on your first shopping trip. Miss a category and you’ll feel it immediately. Skip “holding,” the most commonly skipped one, and you’re sawing a board pinned against your knee.
Measure & Mark
- Tape measure
- Combination square
- Spirit level
- Steel rule
- Marking knife
Cut & Shape
- Hand saw
- Utility knife
- Chisels
- Files & rasp
- Hacksaw
Fasten
- Screwdrivers
- Bit driver
- 16-oz claw hammer
- Socket set
- Hex keys
Grip & Hold
- Pliers
- Locking pliers
- Bar clamps
- Quick-grips
- Bench vise
Strike & Pry
- Rubber mallet
- Nail set
- Pry bar
- Punch set
- Dead-blow hammer
Where to Spend — and Where Midrange Is Enough
Spend more on tools where accuracy and edge retention are the entire product. Save on tools where a midrange version does the same job. A sharp cheap chisel beats a dull expensive one — put the savings into a sharpening setup instead.
| Tool Category | Verdict | Why It Matters | Suggested Budget |
|---|---|---|---|
| Combination square | SPEND | A square out by half a degree racks every joint in a cabinet; accuracy is the entire product. | $40–60 |
| Chisel set | SPEND | Soft budget steel loses its edge mid-mortise; heat-treated midrange steel holds noticeably longer. | $60–120 |
| Driver bits & pliers | SPEND | Poorly fitting drivers strip fasteners — one of the three classic cheap-kit failure points. | Midrange+ |
| Claw hammer | SAVE | A basic 16-oz claw hammer from a decent brand drives nails perfectly well. | Midrange |
| Pry bar & hex keys | SAVE | Simple geometry, low precision demands — midrange is genuinely good enough. | Midrange |
| Utility knife | SAVE | Replaceable blades matter more than the handle; buy blades, not brand prestige. | Budget |
| 108-piece bargain kit | AVOID | Extra pieces are sizes you’ll never touch; the daily-use tools are the weak ones. | — |
A 5-Phase Buying Order So You Never Overbuy
The smartest way to build a workshop is buying gradually, in order of frequency of use, guided by actual projects rather than hypothetical ones. Vise and specialty tools come last — only when a real job demands them.
Measuring & Marking
Tape measure, combination square, level, steel rule, marking knife. The foundation of every cut.
Drivers & Fastening
Bit driver, Phillips/slotted/Torx drivers, 16-oz hammer. Touched on every single project.
Cutting & Chisels
Hand saw, utility knife, hacksaw, 6–25 mm chisels — plus a sharpening setup.
Clamps & Holding
Four medium bar clamps, two quick-grips, pliers. Secure work is safer work.
Vise & Specialty
Bench vise — the highest-value first upgrade — then specialty tools only as jobs demand.
Test a Combination Square Before You Trust It
A $10 square can be out of square; a $40–60 one from a reputable maker is ground and checked. Run this test the day you buy it — on any square, at any price. I’ve caught errors on supposedly good midrange squares this way.
Hold & scribe
Press the square against a board with a clean, machined factory edge. Scribe a fine line with a marking knife.
Flip 180°
Rotate the square so the same blade edge sits directly on the line you just scribed.
Scribe again
Scribe a second line from the same starting point along the flipped blade edge.
Read the lines
If the two lines diverge, the square is out — return it. Perfectly overlapping lines mean it’s true.
Upgrade Priority for a Small Shop
Relative long-term value of the first five upgrades in a two-car-garage shop, filtered through what a real small workshop demands — not a catalog fantasy.
“A small set of dependable hand tools will outperform a giant cheap kit every single time — because the giant kit’s extra pieces are usually sizes you’ll never touch, and the tools you do use daily are the weak ones.”
How to Judge Any Hand Tool in the Store
Steel labels alone don’t guarantee quality — manufacturing consistency and heat treatment matter far more. Check these six signals before you buy.
Correct type & size
A well-made tool cannot compensate for poor fit — the wrong size rounds fasteners no matter the brand.
Material & heat treatment
Chrome-vanadium is common but not a promise. Consistent heat treatment is what keeps an edge.
Handle feel
No sharp seams, no excessive bulk. Handles should suit your hand — you touch these daily.
Etched, not printed
Etched or stamped sizes stay readable for years; printed markings wear off within months of use.
Replaceable parts
Replaceable blades, bits, jaws, and springs extend a tool’s useful life far beyond its price.
Edge guards
Chisels rolling in a drawer with wrenches will chip. A simple guard saves a $25 blade instantly.
The 5 Jobs Every Starter Workshop Must Cover
A practical starter workshop should cover five core jobs: measuring, marking, cutting, fastening, and holding. Every hand tool you buy falls into one of those categories, and if a tool doesn’t serve one of them, it doesn’t belong in your first shopping trip. This framework keeps you from the “shiny tool aisle” problem where you come home with a router trimmer and no tape measure.
Think of it like a kitchen. You can cook almost anything with a chef’s knife, a cutting board, two pans, and a spatula. The sous-vide circulator can wait. Your workshop has the same shape: a dozen core tools, chosen well, handle maybe 90% of household repairs and beginning woodworking.
Beginners usually benefit more from a compact set of dependable tools than from a large, inexpensive kit. The cheap kit fails you in three places at once — inaccurate measuring, poorly fitting drivers that strip fasteners, and cutting edges that dull after a weekend. Fix those three failure points and you’ve solved most of what makes early projects frustrating.
Here’s the framework at a glance:
- Measuring & marking: tape measure, combination square, level, steel rule, marking knife
- Cutting & shaping: hand saw, utility knife, chisels, files, hacksaw
- Fastening: screwdrivers, bit driver, 16-oz claw hammer, socket set, hex keys
- Gripping & holding: pliers, locking pliers, clamps, bench vise
- Striking & prying: mallet, nail set, pry bar, punches
Miss a category and you’ll feel it immediately. Skip “holding” — the most commonly skipped one — and you’re trying to saw a board while pinning it against your knee with one hand. That’s how fingers get hurt and cuts wander off the line.
best hand tools for woodworking starter kit
As an affiliate, we earn on qualifying purchases.
As an affiliate, we earn on qualifying purchases.
Measuring and Marking: Where Accuracy Lives (Spend Here First)
Your measuring and marking tools are the foundation of everything else, because a cut is only as good as the line it follows. If your square is off by half a degree, every joint in a cabinet racks slightly, and no amount of sanding fixes cumulative error across eight corners.
The core set is short: a 16–25 ft (5–8 m) tape measure, a quality combination square, a 24-inch spirit level, and a steel rule for short precise work. Add a marking knife and an awl — a knife line is finer than any pencil line and actually severs wood fibers so your chisel has a groove to register in.
The combination square deserves special attention because it earns its price. A $10 square can be out of square; a $40–60 one from a reputable maker is ground and checked. Here’s the test, and it takes thirty seconds:
- Hold the square against a straight-edged board with a clean, machined factory edge.
- Scribe a fine line across the face with a marking knife.
- Flip the square 180° so the same blade edge sits on your line.
- Scribe a second line from the same starting point.
- If the lines diverge, the square is out — return it.
Run that test the day you buy it, on any square, at any price. I’ve caught errors on supposedly good midrange squares this way.
Where to spend versus save: spend on the combination square and steel rule, where accuracy is the entire product. Save on the level — a basic machined 24-inch spirit level from a midrange brand is plenty for furniture and shelf hanging. A digital caliper ($25–40 range) is a nice-to-have later for thicknesses and diameters, not a day-one purchase.
dependable combination square for woodworking
As an affiliate, we earn on qualifying purchases.
As an affiliate, we earn on qualifying purchases.
Cutting and Shaping Tools That Do Real Work Without Power
Cutting tools are where hand tools still beat cheap power tools for a beginner. A decent general-purpose crosscut hand saw will break down plywood and dimension lumber quietly, safely, and with zero setup — no dust collector, no blade guard, no 15-amp circuit. For a garage shop still figuring out dust collection, that matters more than you’d think.
Your cutting starters: a universal or crosscut hand saw (8–10 points per inch handles both ripping and crosscutting acceptably), a utility knife for sheet goods and scoring, a hacksaw for metal, bolts, and PVC pipe, and a small set of bench chisels covering roughly 6–25 mm (¼–1 inch).
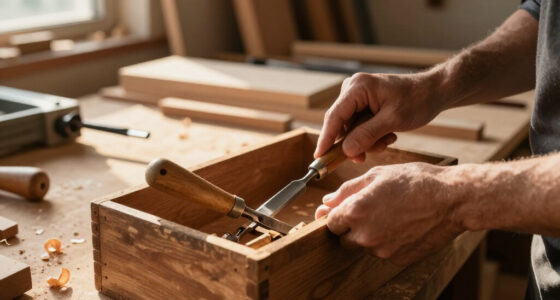
The chisels deserve honest talk. This is a category where the budget-versus-pro split is dramatic. A $30 five-piece set will cut, but the steel is often soft — it loses its edge mid-mortise and you’ll spend more time honing than chopping. A midrange set ($60–120) with properly heat-treated steel holds an edge noticeably longer. The compromise most of us land on: buy midrange chisels and spend the savings on a sharpening setup, because a sharp cheap chisel beats a dull expensive one every time.
Round out shaping with flat, half-round, and round files, a rasp for wood, and sandpaper in several grits (80, 120, 180, 220 covers most work) with a cork or rubber sanding block. The block isn’t optional trivia — it prevents your fingertips from cutting grooves into flat surfaces, which is the single most common beginner sanding mistake.
One habit worth adopting immediately: protect the edges. Chisels rolling around in a drawer with wrenches will chip. A simple edge guard or a dedicated shelf slot costs almost nothing and saves a $25 chisel.
compact set of woodworking screwdrivers
As an affiliate, we earn on qualifying purchases.
As an affiliate, we earn on qualifying purchases.
Fastening, Gripping, and Holding: The Tools You Touch Every Single Day
Fastening and holding tools are the workhorses you’ll reach for on every project, so fit and comfort matter more than raw material specs here. The starting list: a bit driver with a good bit set (Phillips, slotted, Torx, Pozidriv), a 16-ounce claw hammer, a rubber or wooden mallet, metric and imperial hex keys, and a basic socket set with ratchet.
Correct bit fit is the whole game with drivers. A Phillips bit that’s worn or slightly undersized cams out, strips the fastener, and turns a five-minute repair into a drill-and-extract ordeal. That’s why I’d put driver bits in the “spend” column — quality bits are a few dollars more and last ten times longer.
For gripping: slip-joint pliers for general work, needle-nose for tight spots and wire, tongue-and-groove for pipes and fittings, locking pliers for rounded fasteners, and diagonal cutters dedicated to wire only. Never cut wire with your general pliers — it dents the jaws and ruins them for everything else.
Then holding, the underrated category. Start with four medium bar or F-style clamps plus two quick-grip clamps. The old woodworker’s joke — “you can never have too many clamps” — exists because it’s true, but four is a workable floor for glue-ups. And the single best upgrade for a small shop: a bench vise. Clamping a workpiece to a bench so both your hands are free transforms sawing, filing, and chiseling. It’s not mandatory on day one, but it’s the first big add-on I’d save for.
| Job | Starter tool | Spend or save? |
|---|---|---|
| Driving screws | Bit driver + quality bits | Spend — bits and driver take daily abuse |
| Hammering | 16-oz claw hammer + mallet | Save — midrange is fine |
| Bolts and machinery | Basic socket set, ratchet | Spend on the ratchet; cheap ones slip |
| Gripping | Pliers set, locking pliers | Spend — jaw quality and pivot wear show fast |
| Holding work | 4 bar clamps + quick-grips | Moderate — midrange clamps hold fine |
| Prying | Small flat pry bar | Save — a $10 bar lasts decades |
That pry bar line is worth repeating out loud: stop prying with screwdrivers. A screwdriver is not a pry bar, a chisel, or a punch. Bent shafts and split handles fail suddenly, and a slipping steel rod near your hand is a real injury. The $10 pry bar is the cheapest safety equipment you’ll ever buy.
high quality chisels and clamps for beginners
As an affiliate, we earn on qualifying purchases.
As an affiliate, we earn on qualifying purchases.
A 10-Step Buying Order So You Never Overbuy
The smartest way to build a workshop is buying gradually, in order of frequency of use, guided by actual projects rather than hypothetical ones. Buy a tool when a job creates a clear need, and you’ll never own a drawer full of never-used sizes. Think of it like stocking a pantry: you buy salt, flour, and oil because every recipe needs them — you don’t buy saffron “just in case.” Here’s the order I’d hand a friend starting from zero:
- Tape measure, pencil, combination square, level — you can’t even plan a cut without these. Real-world trigger: hanging a single shelf or picture frame exercises all four.
- Screwdriver or bit-driver set — day-one household utility. Example: tightening a loose cabinet hinge or assembling flat-pack furniture, both of which strip cheap bits fast.
- Claw hammer and mallet — cheap, essential. Picture hanging, nail-pulling, and tapping joints together during assembly.
- Utility knife and general-purpose hand saw — your first real cutting capability, like breaking down a 2×8 for a simple garden bench or opening sheet goods.
- Pliers, needle-nose, wire cutters — gripping and electrical-adjacent tasks, such as replacing a lamp cord fitting or straightening a bent bike fender bracket.
- Adjustable wrench, hex keys, basic socket set — furniture assembly, bikes, machinery. Scenario: the kitchen faucet nut that no plier will grip cleanly, but a 10 mm socket handles in seconds.
- Several clamps — start with four medium bar clamps. The first time you glue up a cutting board or picture frame, you’ll understand exactly why.
- Files, sandpaper, chisels — shaping and finishing work begins here, like easing the edges of that bench or paring a hinge mortise so a door closes cleanly.
- Hacksaw and locking pliers — metal cutting and stubborn fasteners, e.g. shortening a bolt or gripping the rounded shower-head nut the last owner destroyed.
- Bench vise and project-specific tools — added only as real projects demand them, the same way a home cook only buys a pasta roller after deciding to make pasta.
Notice what’s deliberately last: the bench vise and specialized tools. Beginners often buy the fun stuff first — a mortise chisel, a fancy dovetail saw — before they’ve built anything that needs one. That’s like buying a wedding-tier cake pan before you’ve baked a batch of brownies. Flip that. After each finished project, ask yourself one question: which missing tool would have saved time, improved accuracy, or made the work safer? Buy that tool next. That single habit builds a workshop with zero dead weight.
It also spreads the cost. Steps one through four might run $100–150 total from midrange brands. Steps five through nine add another $150–250 over a few months. Compare that to a $400 mega-kit, and you end up with better tools you actually use.
How to Judge Quality When You Can’t Trust the Brand Name
You judge hand-tool quality by fit, finish, and material treatment — not by the logo or the steel label on the box. “Chrome-vanadium steel” appears on $8 wrenches and $80 wrenches alike; the difference is manufacturing consistency and heat treatment, which you can’t see on a spec sheet but can absolutely feel in the tool.
Handle-test before buying whenever possible. Ratchets should snap between directions cleanly with minimal back-drift — cheap ones have 20+ degrees of swing arc, good ones under 5. Pliers should open and close without binding or side play. A rubber-coated handle that feels squishy will wear through and trap grime; hard textured grips age better.
- Markings: etched or stamped sizes outlast printed ones, which rub off within months.
- Replaceable parts: blades, bits, jaws, and springs extend tool life — a rebuildable ratchet outlives three disposable ones.
- Warranty: often worth more than an oversized accessory bundle. A real lifetime warranty on a driver set beats 40 extra bits you’ll never use.
- Certification for electrical: a rubber handle is not an insulated tool. Only properly certified and rated insulated tools protect you, and home electrical work still calls for a licensed electrician beyond simple, code-permitted tasks.
Used tools deserve a mention too — they’re where smart money goes. Vises, hammers, older wrenches, and quality files are excellent secondhand buys at flea-market prices; I paid $25 for a 5-inch machinist vise that would cost $150 new. Just inspect carefully: check vises for cracked jaws and bent screws, hammers for loose heads, files by drawing a fingernail across the teeth (a sharp file grabs; a dull one slides). Be cautious with used insulated electrical tools, torque tools, and anything with a damaged striking face — if you can’t verify its safety rating, pass.
The blunt rule: expensive brands are not always better, but extremely cheap kits are almost always worse. Midrange from a reputable maker hits the sweet spot for most of a starter shop.
Safety and Maintenance: The Boring Stuff That Keeps Tools (and Fingers) Working
Safety gear and basic maintenance belong on your shopping list alongside the tools themselves, because a workshop without them isn’t a workshop — it’s an accident waiting for a schedule. Before you make your first cut, have safety glasses, hearing protection for striking work, a dust mask for sanding, a first-aid kit, and decent lighting at the bench.
One nuance most beginners miss: gloves are not universal protection. For material handling, yes. For precision work with chisels or near anything rotating, gloves reduce your feel and can become an entanglement hazard. Bare hands, sharp tools, and hands-behind-the-cutting-edge is the safer combination for hand-tool woodworking.
Maintenance is five minutes per session and it’s what separates tools that last decades from tools that rust in a drawer:
- Wipe tools clean and dry after use — moisture and fingerprints start rust overnight.
- Apply a light corrosion inhibitor or oil to exposed steel.
- Sharpen chisels and knives regularly; a dull tool needs more force, and more force means less control.
- Lubricate plier joints and ratchets sparingly.
- Inspect before each use: replace mushroomed striking faces, cracked handles, damaged insulation, and worn driver tips.
Storage finishes the job. Group tools by task, protect cutting edges, keep precision squares away from hammers, and store everything dry. Drawer liners stop tools from sliding and dulling each other. Pegboards make missing tools instantly visible — which doubles as theft detection and a reminder to put things back.
And repeat the golden rule of misuse: no screwdrivers as chisels, no pliers as wrenches, no adjustable wrenches as hammers. Every one of those shortcuts ends with a broken tool, a damaged fastener, or a trip to the first-aid kit. Usually all three.
Frequently Asked Questions
Should I buy a complete toolkit or individual tools?
A small kit covers convenient basics, but individually selected tools usually deliver better quality and skip duplicates. The practical hybrid: buy a compact core bit-driver set, then upgrade individual frequently used pieces as quality matters. Avoid giant multi-piece kits — most of the pieces are sizes you’ll never use.
How much should a beginner spend on a starter workshop?
There’s no fixed amount, but a staged approach works: roughly $100–150 for measuring, marking, and basic fastening tools, then another $150–250 over a few months for pliers, sockets, clamps, and chisels. Prioritize accurate measuring tools, properly fitting drivers, and safe workholding over sheer quantity.
How many clamps does a beginner actually need?
Four medium-size bar or F-style clamps plus two quick-grip clamps are a workable starting point for typical projects. Most woodwriters eventually want more — the old joke about never having enough clamps exists for a reason — so add capacity as your project sizes grow.
What’s the best general-purpose hammer weight?
A 16-ounce claw hammer suits most household and woodworking tasks. Lighter hammers (12–13 oz) offer more control for finish work; heavier models drive large nails faster but cause more fatigue. Most beginners need only one, and midrange quality is completely fine here.
Can I use regular screwdrivers for electrical work?
No. Standard plastic or rubber handles are comfort grips, not insulation. Electrical work requires correctly rated, certified insulated tools along with proper testing equipment — and for anything beyond simple permitted tasks, hire a licensed electrician. Verify the certification marking, don’t assume.
Is buying used hand tools worthwhile?
Yes, especially for vises, hammers, older wrenches, sharp files, and quality woodworking tools — often at a third of new prices. Inspect for cracks, seized joints, bent components, and unsafe modifications. Be cautious with insulated electrical tools, torque tools, and damaged striking tools, where safety ratings can’t be verified.
Do I need both metric and imperial tools?
It depends on what you repair. Imported furniture, bicycles, and most modern vehicles use metric; older American machinery often uses SAE. Never force a nearly fitting size on a tight fastener — that rounds heads off. If you service mixed equipment, budget for both hex key and wrench sets.
Conclusion
Build your workshop around the five core jobs and buy in order of use, not in order of excitement. Ten accurate, comfortable tools you reach for every week will carry you further than a hundred mediocre ones — and the discipline of buying only what a finished project proved you needed means zero dead weight in your drawers.
Start this week with step one: a good tape measure, a combination square you’ve flip-tested, and a pencil. Then build something small — a sawhorse, a tool tote — and let that project tell you exactly what to buy next. The best workshop isn’t assembled in one shopping trip. It’s earned, one project at a time.
NFL season / tailgating Picks
team gear
As an affiliate, we earn on qualifying purchases.