TL;DR
Play games included with Prime
Start a Prime free trial and play with Amazon Luna on your devices.
Start playingAs an affiliate, we earn on qualifying purchases.
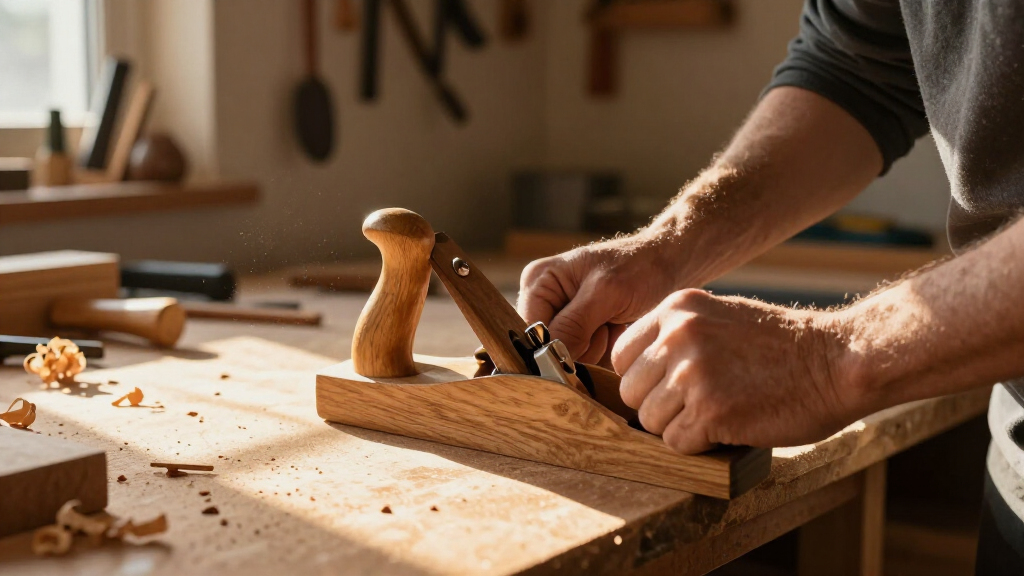
The best first hand plane for beginners is a No. 5 jack plane, which can flatten boards, remove milling marks, straighten edges, and smooth reasonably well — all in one tool. Add a low-angle block plane for end grain and small trimming, budget seriously for sharpening equipment, and add a No. 4 smoother only when fine surface prep becomes a priority. Sharpness and setup matter far more than price or branding.
The first hand plane most beginners buy is the wrong one — usually a third plane bought before they’ve learned to sharpen the first. I’ve watched friends drop $600 on a quartet of bench planes and then fight tear-out for months because every iron in the batch was dull from the box. The tool wasn’t the problem. The edge was.
Here’s the truth from a small garage shop: you need exactly one bench plane to start, plus the sharpening gear to keep it cutting. Everything else can wait for the work that demands it.
In this guide, you’ll learn which planes matter, in what order, what a No. 5 actually does that a No. 4 can’t, how vintage compares to new, and the setup steps that separate a plane that whispers through oak from one that skips and chatters. No roundups, no affiliate noise — just what a beginning woodworker genuinely needs.
Start with a No. 5 jack plane, a low-angle block plane, and real sharpening gear — a single well-tuned jack can perform much of the work of both a smoother and…
Sharpness beats price: a $400 plane with a dull iron cuts worse than an $80 vintage plane with a honed edge. Budget $80–$150 for sharpening before buying a sec…
Sole length is a function choice, not a quality grade — short planes smooth, long planes flatten, and plane numbers (No. 4, No. 5, No. 7) describe size pattern…
Fix tear-out in order: sharpen, take thinner shavings, close the mouth, set the cap iron closer, raise the cutting angle, skew the cut, or reverse planing dire…
Don’t over-restore vintage planes — flatten soles only at the toe, heel, and around the mouth, and never grind a collectible sole just because a forum post sai…
Essential Hand Planes for Beginners
The first hand plane most beginners buy is the wrong one — usually a third plane bought before they’ve learned to sharpen the first. The truth: one well-tuned No. 5 jack plane plus sharpening gear covers flattening, milling-mark removal, edge straightening, and respectable smoothing. Everything else can wait for the work that demands it.
Plane Numbers Are Sizes, Not Quality Grades
A short sole follows every dip and bump — great for smoothing, terrible for flattening. A long sole bridges hollows and knocks down only the high spots. The No. 5 sits in the middle: long enough to straighten a face at furniture scale, short enough not to exhaust your forearms.
Which Planes Matter, and When
The practical beginner kit is three things: a No. 5 jack, a low-angle block plane, and reliable sharpening equipment. Not six planes — two cutting tools and a way to keep them sharp. Add the rest based on the work you actually do.
No. 5 Jack Plane
The most versatile first bench plane you can own. Flattens boards, removes milling marks, straightens edges, and smooths — one body, four jobs. With a cambered iron it removes material surprisingly fast, which is why the jack has been the workhorse of bench planes for over a century.
Buy FirstLow-Angle Block Plane
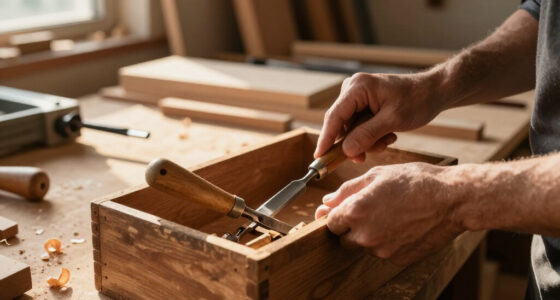
Compact, one-handed, apron-pocket-sized. The low cutting angle slices dense end-grain fibers instead of crushing them. Trims end grain, eases sharp edges, flushes proud dovetail pins, chamfers after routing, and handles a dozen quick adjustments per project.
Buy SecondNo. 4 Smoother
Its short sole follows small surface variations to produce a clean final surface before finish — but it works best after the board is already reasonably flat. Add it when surface preparation becomes a priority and you’re producing finished furniture surfaces.
Add When NeededNo. 7 / No. 8 Jointer
A long sole flattens large surfaces and straightens long edges for edge-glued panels. Useful at furniture scale, but heavy, expensive, and unnecessary for a beginner working on smaller projects. Add only when regularly jointing long boards.
Later AdditionRouter Plane
Cleans and levels the bottoms of grooves, dados, and hinge recesses. Often more useful than beginners expect — a strong early addition if you’re cutting joinery by hand.
Joinery StageShoulder / Rabbet Plane
Refines tenon shoulders, cheeks, and rabbets. A specialist tool, not an essential first purchase — wait until the work demands it.
Specialist ToolSharpening Matters More Than What You Paid
What “Sharp” Actually Means
The back of the cutting edge must be flat and polished where it matters, and the bevel must meet it in a clean, crisp intersection. A common starting geometry: a 25° primary bevel with roughly a 30° honing bevel — tough woods and blade steels may justify different angles, but that pairing covers most work.
Hone Frequently and Lightly
Thirty seconds on a fine stone when cutting effort rises beats twenty minutes of regrinding a dead-dull blade. Consistency beats method — diamond plates, ceramic stones, guided systems, or abrasive film on glass all work. Inconsistent geometry is the most common beginner mistake, leaving you chasing an edge that never quite arrives.
Traditional Bench Planes
The frog or bed angle largely determines the cutting angle. The bevel faces downward and provides clearance behind the edge. Cap iron position matters for tear-out control.
Low-Angle Planes
The blade’s bevel contributes directly to the cutting angle — changing the sharpening angle changes how the plane behaves. Lower angles work well on end grain; higher angles help difficult grain. “Low-angle” isn’t automatically better for every task.
Fix Tear-Out in This Order
Planing against rising grain lifts fibers and causes tear-out — and grain may reverse within a single board, especially around knots or figured areas. Work through these fixes from cheapest to most drastic:
Sharpen
The iron itself — a dull edge tears no matter what else you change.
Thinner Shaving
Back off the depth of cut to a whisper-thin shaving.
Close the Mouth
A tighter mouth supports the fiber right ahead of the edge.
Set Cap Iron Closer
On bevel-down planes, the cap iron breaks shavings early.
Raise Cutting Angle
Higher angles shear difficult grain instead of lifting it.
Skew & Reverse
Skew the cut, or reverse planing direction entirely.
Getting a New-to-You Plane Actually Cutting
A usable plane needs several things working together — and assuming a newly purchased plane is ready to use is the classic beginner mistake. Check each item before blaming the tool.
| Check | Why It Matters | Beginner Status |
|---|---|---|
| Sharp iron | Flat, polished back meeting a clean 30° honing bevel | ✓ Non-negotiable first |
| Secure blade bedding | Iron sits solidly on the frog — chatter comes from movement | ✓ Required |
| Minimal unwanted movement | Adjusters and tote must be tight and play-free | ✓ Required |
| Sole flatness | Flatten only at toe, heel, and around the mouth — never over-restore or grind a collectible sole | ~ Spot-check only |
| Correct mouth opening | A narrow mouth supports fibers and controls tear-out | ~ Adjust per cut |
| Cap iron set | Close cap-iron setting breaks shavings on difficult grain | ~ As needed |
Vintage vs. New — Either Works
The path that doesn’t work is buying four planes and zero sharpening stones. Choose your path, then budget for the edge.
Sound Vintage
- $40–$80 at flea markets and estate sales
- Needs 1–3 hours of cleanup to perform
- Flatten soles only at toe, heel, and around the mouth
- Never grind a collectible sole because a forum post said so
- With a honed edge, matches premium results
Premium New
- $200–$450, arrives nearly ready to use
- Still needs sharpening — dull-from-the-box irons cause months of tear-out fights
- Less restoration work, more upfront cost
- The tool was never the problem — the edge was
- Either path works if the iron is razor-sharp
Your First Plane Should Be a Jack Plane — Here’s Why
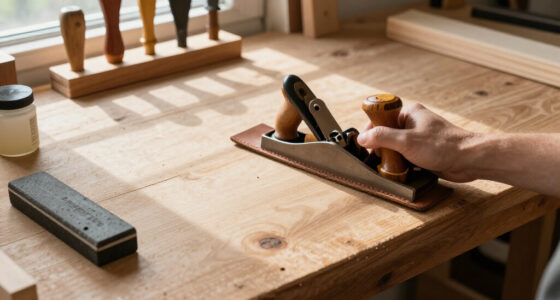
Essential hand planes for beginners start with one tool: the No. 5 jack plane, the most versatile first bench plane you can own. It can flatten boards, remove milling marks, straighten edges, and do respectable smoothing — one body, four jobs. With a slightly curved (cambered) iron, it also removes material surprisingly fast, which is why the jack has been the workhorse of bench planes for over a century.
Think of plane sizes as a spectrum of sole lengths, not quality grades. A short sole follows every dip and bump — great for smoothing, terrible for flattening. A long sole bridges hollows and knocks down only the high spots. The No. 5 sits in the middle at about 14 inches, long enough to straighten a board’s face on furniture-scale work, short enough to handle without exhausting your forearms.
Here’s a concrete scenario. You buy a rough walnut board from a small mill, 8 inches wide and 4 feet long. It’s cupped a hair and carries ugly milling marks from the planer. A No. 5 with a cambered iron takes aggressive crossing passes to knock the cup out of it, then a straight pass or two down the grain, then — with the blade set for a whisper-thin shaving — it leaves a surface that needs only light smoothing before finish.
Plane numbers confuse everyone at first. Stanley-style numbering describes common size patterns, not grades of quality — a No. 4 isn’t “better” than a No. 3, it’s just bigger. Dimensions also vary slightly between manufacturers, so trust the sole length, not just the number.
One honest caveat: if all your lumber arrives power-planed and your projects are small boxes and cutting boards, a No. 4 smoother might actually serve you better as a first plane. But for general furniture work, the No. 5 wins.
As an affiliate, we earn on qualifying purchases.
The Beginner Kit: Two Planes and a Sharpening Station
The practical beginner kit is three things: a No. 5 jack plane, a low-angle block plane, and reliable sharpening equipment. That’s it. Not six planes. Not a wall-mounted cabinet of rosewood-infilled beauties. Two cutting tools and a way to keep them sharp.
Why the block plane second? Because it does jobs a bench plane physically can’t. It’s compact, one-handed, and lives in your apron pocket. It trims end grain (a low-angle version is especially effective there because the lower cutting angle slices the dense, tightly packed end-grain fibers instead of crushing them), eases sharp edges, fits small components, and handles the dozen quick adjustments every project throws at you. Chamfering an edge after routing, flushing a proud dovetail pin, easing the arris on a tabletop — that’s block plane territory.
After those two, add planes based on the work you actually do:
- No. 4 smoother — add it when surface preparation becomes important, meaning when you’re producing finished furniture surfaces rather than just dimensioning parts.
- Jointer plane (No. 7 or No. 8) — its long sole flattens large surfaces and straightens long edges for edge-glued panels. Useful at furniture scale, but heavy, expensive, and unnecessary for a beginner on smaller work.
- Router plane — cleans and levels the bottoms of grooves, dados, and hinge recesses. Often more useful than beginners expect, and a strong early addition if you’re cutting joinery by hand.
- Shoulder or rabbet plane — refines tenon shoulders and rabbets. A specialist tool, not an essential first purchase.
Budget-wise, be realistic. Premium new planes run $200–$450 and arrive nearly ready to use. Sound vintage jack planes often go for $40–$80 at flea markets and estate sales but need an hour or three of cleanup. Either path works. The path that doesn’t work is buying four planes and zero sharpening stones.
As an affiliate, we earn on qualifying purchases.
Sharpening Matters More Than What You Paid for the Plane
A $400 plane with a dull iron cuts worse than an $80 plane with a razor edge. This is the single most important fact in hand planing, and it’s the one beginners skip. Even an expensive plane performs poorly with a badly prepared iron, while a sharp, properly set blade in a cheap or restored plane produces excellent results.
What “sharp” actually means: the back of the cutting edge must be flat and polished where it matters, and the bevel must meet it in a clean, crisp intersection. A common starting geometry is a 25-degree primary bevel with roughly a 30-degree honing bevel. Tough woods and blade steel may justify different angles, but that pairing covers most work.
Here’s the habit that changes everything: hone frequently and lightly. Thirty seconds on a fine stone when you feel cutting effort rise beats twenty minutes of regrinding a completely dull blade. I keep a 1000/6000-grit combination waterstone beside the bench. When the shavings stop coming off clean and start tearing, the iron gets touched up. It’s like honing a kitchen knife mid-prep rather than waiting until it crushes tomatoes.
Your sharpening system can be anything repeatable: diamond plates, ceramic stones, guided honing systems, or abrasive film on glass. According to long-time hand-tool woodworkers, the specific method matters far less than consistency — sharpening repeatedly without maintaining consistent geometry is one of the most common beginner mistakes, and it leaves you chasing an edge that never quite arrives.
Before buying a second plane, budget for sharpening. Stones, a guide, and a strop typically cost $80–$150 — less than one mid-tier plane, and they make every plane you’ll ever own cut better.
As an affiliate, we earn on qualifying purchases.
Bevel-Down vs. Bevel-Up: Which Design Does What
Bevel-down and bevel-up planes differ in where the cutting angle comes from, and that difference shapes how each design behaves on different woods and cuts. In a traditional bevel-down bench plane, the frog or bed angle (typically 45 degrees) largely determines the cutting angle — the bevel faces downward and just provides clearance behind the edge. In a bevel-up plane, the blade’s bevel contributes directly to the cutting angle, so changing your sharpening angle changes how the plane cuts.
Why that matters in practice:
| Factor | Bevel-Down | Bevel-Up |
|---|---|---|
| Cutting angle | Fixed by frog (usually 45°) | Adjustable via blade bevel |
| End grain | Works, but higher angle takes more effort | Lower angles slice cleanly |
| Wild grain / tear-out | Use a York pitch (50°) or higher frog | Hone a steeper bevel, e.g. 38–50° |
| Mouth adjustment | Frog position, fiddlier | Simple adjustable mouth plate |
| Typical example | Vintage Stanley No. 4 / No. 5 | Modern low-angle jack |
The practical takeaway: lower effective cutting angles work well on end grain, while higher angles help control difficult, figured grain by slicing fibers at a steeper angle rather than levering them out. But — and this trips people up — “low-angle” does not automatically mean better for every task. A low-angle plane set aggressively on reversing curly maple will tear out just as badly as anything else.
Modern manufacturers have popularized bevel-up jack and smoother planes precisely because one body with interchangeable blades at different bevel angles can serve several tasks. That’s genuinely useful. But a traditional bevel-down jack is equally valid and much easier to find used, often for a third of the price.
As an affiliate, we earn on qualifying purchases.
Sole Length and Grain Direction: The Two Rules That Explain Every Result
Sole length determines whether a plane follows a surface or flattens it. Short planes ride dips and are effective for local smoothing; long planes bridge hollows and remove only the high spots, making them better for flattening and straightening. Neither makes a board flat automatically — technique and regular checking with a straightedge and winding sticks do that. The plane is a cutting tool, not a magic straightening machine.
Grain direction is the second rule, and ignoring it is the fastest route to frustration. Planing with the grain produces clean, translucent shavings that smell like the forest the board came from. Planing against rising grain lifts fibers and causes tear-out — chunks ripped from the surface that no amount of sanding fully hides.
The tricky part: grain can reverse within a single board, especially around knots and figured areas. Last winter I smoothed a cherry drawer front that cut perfectly for two-thirds of its length, then tore out viciously near one end. The grain had flipped. The fix took two minutes: reverse planing direction for the last third.
When tear-out appears, work through this list in order:
- Hone the iron — a sharper edge cuts fibers before they lift.
- Take a thinner shaving — retract the blade slightly.
- Close the mouth where the plane allows, so the chipbreaker and sole press fibers down ahead of the cut.
- Set the cap iron closer to the edge (bevel-down planes) — a powerful and underused control.
- Increase the cutting angle — swap to a higher bevel or a steeper frog.
- Skew the plane during the cut to lower the effective angle and slice rather than chop.
- Change planing direction — sometimes the only answer on reversing grain.
Also: a hand plane cuts wood, it doesn’t abrade it. That’s why it can leave a finished surface with no sanding when grain cooperates — a surface with crisp facets and real depth that sandpaper alone never quite matches.
Vintage vs. New: Where Your Money Goes Furthest
Vintage planes offer excellent value in sound condition and expensive education in damaged condition — the difference between the two is knowing what to inspect. Older cast-iron planes from Stanley, Record, and similar makers cost a fraction of new premium tools and often cut just as well once cleaned and sharpened.
When evaluating a used plane, check for:
- Cracks or welded repairs, especially around the mouth and cheeks
- Missing or incompatible parts — replacement frogs and levers for odd patterns can be unfindable
- Severe rust or deep pitting near the cutting edge of the iron
- Damaged or sloppy adjustment mechanisms
- A sole distorted by previous grinding
- An iron too short for continued sharpening
New planes flip the tradeoff: you pay for predictable condition, replacement parts, warranties, and far less restoration work. Premium models arrive nearly ready to use — though the iron still benefits from honing, because factory edges are ground, not honed. Budget-friendly new planes can perform well after sharpening and basic tuning, but quality control is less consistent, and problems like poor blade bedding or weak adjusters can make the cheapest options genuinely frustrating.
Two warnings from the restoration side. First, collector value and working value are not the same — a rare Type 11 Stanley with original finish belongs on a shelf, not in your shop, and sanding its sole flat destroys its value. Second, experienced users increasingly warn against automatically flattening every sole to mirror polish. The sole only needs to be flat at the bearing areas — around the mouth, toe, and heel. A quick rub on 220-grit abrasive on a known-flat surface, checking for even scratch patterns, tells you all you need to know. Excessive restoration wastes an evening; grinding a vintage sole can permanently reduce both its value and, if done badly, its performance.
My honest recommendation for a first plane: a common vintage No. 5 in sound condition, $50–$90, plus a $40 aftermarket iron if the original is pitted. That combo planes circles around a cheap new plane and teaches you more along the way.
Setup: Getting a New-to-You Plane Actually Cutting
A usable plane needs seven things working together, and assuming a newly purchased plane is ready to use is the classic beginner mistake. Every plane — new, vintage, or premium — benefits from a setup pass before its first real cut.
- Sharpen and camber the iron. Hone to a clean edge; for a jack plane, put a slight camber (maybe 0.004–0.008 inch of crown) on the edge so shavings release at the sides instead of leaving plane tracks.
- Flatten the back of the iron. Polish the last inch or so behind the cutting edge until it’s uniformly reflective. This is tedious exactly once.
- Check the chipbreaker fit. It must meet the iron with no visible gap — a gap lets shavings wedge between them and jam the mouth.
- Check sole flatness at the bearing points. Toe, heel, and around the mouth. Skip the mirror polish.
- Seat the iron securely on the frog — unwanted movement causes chatter, which beginners often confuse with tear-out.
- Set lateral adjustment evenly — retract fully, advance slowly, and look at the shaving or use a light check until the iron projects evenly across the mouth.
- Wax the sole. A small amount of paste wax on the sole substantially reduces pushing effort. This one habit surprises everyone who tries it.
Then, technique: set the cutting depth for a shaving thin enough to see through, start the cut with pressure on the toe of the plane, shift pressure to the heel as you exit, and let the plane’s mass do the work. Applying heavy downward pressure throughout the stroke is a common error — the plane should glide, not be muscled.
Workholding completes the picture. A plane is only as good as the bench holding the work. If the board flexes or slides, no setup on earth will save the cut. Dogs, holdfasts, or even a simple planing stop beat clamps every time, because clamps get in the stroke’s path and bow the workpiece.
Frequently Asked Questions
Which hand plane should a beginner buy first?
A No. 5 jack plane is usually the most versatile first purchase because it can flatten, dimension, straighten edges, and smooth in one tool. Woodworkers focused on small projects or power-tool-prepared lumber may prefer a No. 4 smoother instead. A block plane is extremely useful but works best as a supplement, not your only plane.
Do I need both a No. 4 and a No. 5?
Not initially. A No. 5 with a sharp, well-set iron handles flattening, edge work, and respectable smoothing. Add the No. 4 when you’re consistently producing fine finished surfaces — its short sole follows small variations better and leaves the final surface ready for finish.
Can a hand plane replace sanding?
Often, yes — especially on straight-grained solid wood, where a sharp smoother leaves a finished surface with better clarity than sanding. Difficult grain, curved surfaces, plywood veneers, or projects needing even coloration may still call for a card scraper or light sanding.
Does the sole of a plane have to be perfectly flat?
No. The sole needs to be sufficiently flat at the bearing areas — around the mouth, toe, and heel. A mirror-polished sole is unnecessary for normal woodworking, and aggressive flattening can waste time or permanently reduce a vintage plane’s value.
Why am I getting tear-out when planing?
Usually one of three causes: cutting against rising grain, a dull iron, or a shaving that’s too thick. Fix it in order — sharpen, take a thinner cut, close the mouth, set the cap iron closer to the edge, raise the cutting angle, skew the plane, or reverse planing direction on reversing grain.
Are cheap hand planes usable?
Many are, after sharpening and basic tuning, but quality control is inconsistent. Poor blade bedding, weak adjusters, badly fitted chipbreakers, or distorted castings can make the cheapest options frustrating. A sound $60 vintage plane is often a better bet than a $40 new one.
Can I use a plane on end grain?
Yes. Use a very sharp iron, take light cuts, and skew the plane to lower the effective cutting angle. Prevent breakout at the far edge by supporting it with a sacrificial block or by working inward from both ends. A low-angle block plane excels here.
Conclusion
If you remember one thing: buy one good jack plane and the sharpening equipment to keep it terrifyingly sharp. Everything else — the smoother, the jointer, the router plane — earns its place when specific work demands it, not before. The woodworker with one sharp plane and a decade of skill will out-build the woodworker with twelve dull ones every single time.
So flatten that first board, listen to the shaving come off in one unbroken curl, and smell the fresh-cut grain. That sound — a thin, steady whisper instead of a crunch — is the whole hobby in one moment. Get there before you buy anything else.
NFL season / tailgating Picks
team gear
As an affiliate, we earn on qualifying purchases.