
TL;DR

Get business pricing on tools and workshop supplies
- Business-only prices and quantity discounts
- Tax-exempt purchasing
- Multiple users, one account, clear invoices
How to maximize storage space in a small workshop: use walls, corners, cabinet sides, and overhead areas before adding more floor cabinets. Keep daily tools between waist and shoulder height, store heavy items low, use mobile and fold-down furniture, and label every bin so the system stays usable. A clear floor, sensible dust control, and regular decluttering matter as much as raw capacity.
A two-car garage can feel full after one table saw, a stack of plywood, and three boxes of fasteners move in. The problem usually is not a lack of storage space in a small workshop. It is that valuable wall height, corners, cabinet sides, and the space under your bench are sitting empty while the floor carries everything.
This guide shows you how to maximize storage space in a small workshop without turning the room into a packed maze. You will learn where to place daily tools, how to store lumber and sheet goods, when to choose pegboard or French cleats, and how to build a system that survives your next dusty weekend project.
Use walls, cabinet sides, corners, and ceiling zones before adding more floor storage.
Keep daily tools between waist and shoulder height, while heavy items stay low and overhead storage holds only lightweight or rare-use items.
Combine open shelves, closed cabinets, clear bins, mobile bases, and fold-down surfaces according to each tool’s access and protection needs.
Store lumber vertically with support, separate usable offcuts from waste, and protect materials from moisture.
Label every container, mark parking spots, and review the layout after major projects so the system remains easy to maintain.
How to Maximize Storage Space in a Small Workshop
Build capacity upward, keep daily tools within one easy reach, and make every footprint do more than one job. The goal is not a packed room—it is a clear, adaptable workshop that stays usable after the next dusty weekend project.
“Store the right thing in the right zone, not simply more things in one cabinet.”
Use walls, corners, cabinet sides, and ceiling zones first.
Keep the most-used tools between waist and shoulder height.
Reduce tipping risk and lifting strain with sturdy lower storage.
Every bin needs a visible home so the system survives real work.
Find the storage you already have
A small workshop gains usable capacity fastest when empty surfaces become intentional zones. Measure before buying another floor cabinet, and protect walking paths, electrical panels, vents, fire equipment, and exits.
Build up the walls
Use French cleats, pegboards, slatwalls, shallow shelves, and wall-mounted cabinets to move tools away from the work zone.
Activate edges
Cabinet sides, bench ends, corners, narrow gaps, and the space beneath a bench can hold clamps, bins, racks, and small carts.
Reserve the ceiling
Use ceiling racks for lightweight or infrequently used items, never for unstable loads or anything difficult to retrieve safely.
Put the right tool in the right reach zone
Storage efficiency is measured in completed actions, not only in how many objects fit inside a cabinet. Group tools by the sequence of your real projects, then adjust the layout after using it.
The three-zone rule
Open access, protected storage, or movement?
Different objects need different levels of visibility, dust protection, and retrieval speed. Combine systems rather than forcing every tool into one storage format.
| System | Best for | Strength | Watch out for |
|---|---|---|---|
| French cleat | Cases, holders, modular cabinets | ✓ Repositionable | ~ Needs wall depth |
| Pegboard | Chisels, pliers, squares, layout tools | ✓ Fast visibility | ~ Lighter loads |
| Closed cabinet | Cutters, batteries, dust-sensitive supplies | ✓ Protection | ✗ Hidden contents |
| Clear bins | Fasteners, bits, sanding discs | ✓ Quick inventory | ~ Needs labels |
| Mobile base | Planer, bandsaw, small jointer | ✓ Shared footprint | ~ Must park precisely |
Let furniture change jobs
A rolling workbench, narrow tool cart, or wall-mounted drop-leaf bench can support storage, assembly, and access at different times of day. Flexibility beats a permanent cabinet when every square foot has to earn its keep.
Roll the footprint
Choose casters rated for the loaded bench. Locking wheels matter: a bench that shifts while chiseling creates instability. Mark the parking spot so the machine returns to a predictable home.
Fold the surface
A 24-inch-deep wall bench can handle sharpening, hand-tool work, or small assemblies, then fold flat after cleanup. Use rated brackets or a supported leg above the expected load.
The best small-workshop furniture is useful in more than one mode: store, work, then disappear.
Build a system you can keep organized
Labels, parking spots, and a short review after each major project turn storage from a one-time makeover into a repeatable habit.
Sort
Separate daily, weekly, yearly, duplicate, broken, and waste items.
Zone
Place each group according to access frequency, weight, and dust exposure.
Label
Mark every bin, shelf, drawer, and mobile machine parking spot.
Use
Notice where a real project causes extra walking, digging, or unsafe lifting.
Review
Move the system toward actual behavior after the project is complete.
A workshop that stays usable
Capacity only helps when you can find, use, and return what you need. Before adding more storage, run this quick maintenance check.
- Daily tools sit between waist and shoulder height.
- Heavy equipment is low, stable, and easy to move safely.
- Overhead racks hold only lightweight or rare-use items.
- Lumber and sheet goods are supported, vertical, and moisture-protected.
- Clear bins show their contents and carry consistent labels.
- Walkways, exits, electrical panels, and fire equipment remain clear.
- Dust-sensitive tools and cutters have protected storage.
- Unused, broken, duplicate, or obsolete items are reviewed regularly.
How to Maximize Storage Space in a Small Workshop by Building Up
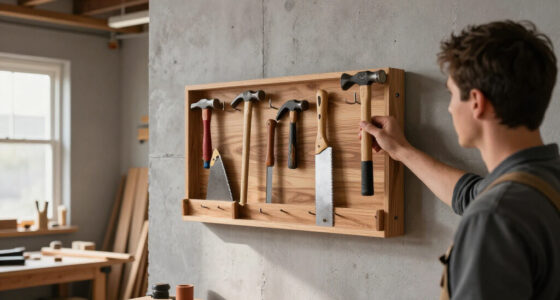
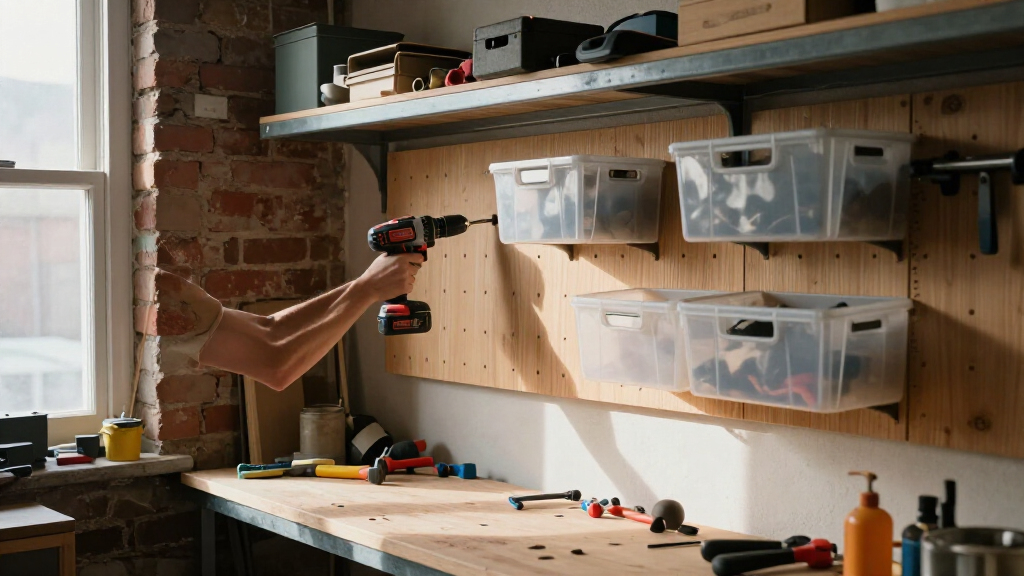
How to maximize storage space in a small workshop starts with the walls, not another floor cabinet. Wall-mounted shelves, French cleats, pegboards, slatwalls, and shallow cabinets can hold tools while leaving the center of the room open for cutting, assembly, and sweeping. Walls are often the largest unused storage surface in a garage or shed, but their value is not just the extra volume. Moving storage upward separates tools from the work zone, which reduces trip hazards and lets one clear floor area serve several machines or projects.
- Measure clear wall sections, avoiding electrical panels, windows, vents, fire extinguishers, and emergency exits.
- Use a French cleat or slatwall for items that may change position as your tool collection grows.
- Keep shelves shallow enough that handles and cases do not project into your walking path.
- Mount frequently used tools between roughly waist and shoulder height.
A French cleat made from a ripped strip of plywood can carry a surprising amount of weight when it spans several studs. Its main advantage is not only strength; it lets you move cabinets and holders without drilling a new pattern of holes every time your workflow changes. Pegboard costs less and works beautifully for chisels, squares, pliers, and layout tools, but it is better suited to lighter, frequently handled items. A practical wall may use both: French cleats for a router case or cordless-tool rack, pegboard for the small hand tools you grab every few minutes.
There is a tradeoff between capacity and reach. A deep shelf stores more, but it makes the front row hide the back row and can turn retrieval into a small excavation. Leave breathing room around each holder and keep the most-used tools closest to the work surface. A wall packed so tightly that you must remove three tools to reach one has become a second junk drawer. The wall should act like a well-marked road, guiding your hands directly to the next tool.
wall-mounted workshop storage shelves
As an affiliate, we earn on qualifying purchases.
As an affiliate, we earn on qualifying purchases.
Put the Tools You Use Every Day Within One Easy Reach
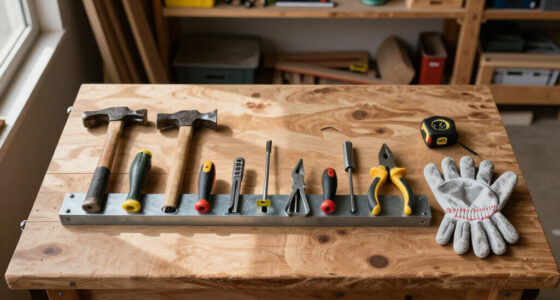
How to maximize storage space in a small workshop also means deciding what deserves prime real estate. Keep daily tools near the main bench, occasional-use equipment in higher cabinets, and duplicate or seasonal items in labeled containers. This is a form of time-based zoning: the closer an item is to the point of use, the more often it should earn that space. A tool that takes five minutes to find steals more time than its price tag suggests, especially when the search interrupts a measurement or breaks concentration during assembly.
Think about your last three projects. If you reached for a combination square, tape measure, marking knife, drill, driver, and sanding block every time, place those tools in the same work zone. Grouping them by actual sequence matters more than grouping them by category. A “measuring tools” drawer across the room may look tidy, but it creates extra walking if measuring is followed immediately by cutting at the bench. Store a biscuit joiner, specialty router bit set, or rarely used molding plane farther away, but label the location clearly.
For example, a small cabinetmaker may keep a cordless drill, impact driver, batteries, bits, and screws beside the assembly bench. The planer blades and dado set can live in a closed cabinet across the room. This arrangement shortens the path for daily work while protecting expensive cutters from airborne dust. The implication is that storage efficiency should be measured in completed actions, not only in how many objects fit inside a cabinet.
Use a simple frequency test: daily tools at hand height, weekly tools within a few steps, and yearly tools high or out of the main zone. Heavy tools belong low, where they are less likely to tip a cabinet or strain your back. The system will not be identical for every owner: a furniture maker, repair technician, and hobbyist may use the same tools at different frequencies. Review the layout after real projects so convenience reflects your work rather than an imagined ideal. That one decision often makes a cramped shop feel calmer before you add any new storage.
adjustable pegboard tool organizer
As an affiliate, we earn on qualifying purchases.
As an affiliate, we earn on qualifying purchases.
Use Mobile and Fold-Down Furniture to Recover the Floor
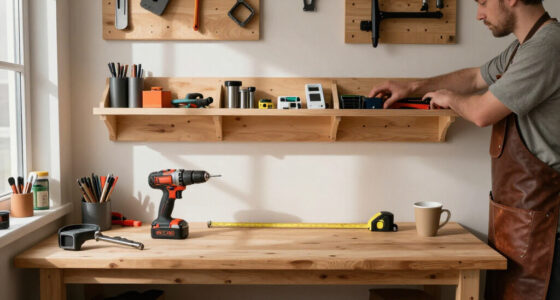
How to maximize storage space in a small workshop without losing workspace is to make the furniture move or fold. A rolling workbench, mobile machine base, narrow tool cart, or wall-mounted drop-leaf bench can serve several jobs and then disappear against a wall. Flexibility beats a permanent cabinet when every square foot has to earn its keep because the same footprint can support storage, assembly, and access at different times of day.
A rolling workbench can hold drawers, a vise, clamps, and a top for assembly. During a sheet-goods cut, you can push it aside and open a clear lane from the garage door to the saw. Locking casters matter; a bench that shifts while you are chiseling feels like trying to write on a floating dock. They also add cost, height, and a small amount of rolling resistance, so choose casters rated for the loaded bench and check that the locked wheels do not introduce wobble.
Fold-down surfaces work well in very narrow shops. A 24-inch-deep wall bench may be enough for hand-tool work, sharpening, or small assemblies, then fold flat after cleanup. Add a support leg or heavy-duty folding brackets rated above the expected load, and keep the hinges free of sawdust. The compromise is setup time and limited load capacity: a fold-down top is excellent for light, temporary work but may be less comfortable than a fixed bench for heavy planing or prolonged clamping.
Mobile bases also help stationary machines share one footprint. A planer, bandsaw, or small jointer can roll into use and return to a marked parking spot. That saves floor area only if the movement is easy enough that you will actually do it; a machine that is difficult to disconnect or steer will eventually remain parked in the middle of the shop. Keep dust-collection hoses long enough for movement but short enough that they do not become a trip loop; a compact shop still needs practical airflow, often around 350 to 600 CFM at a small machine, depending on the tool and collector.
As an affiliate, we earn on qualifying purchases.
Choose Open Shelves, Cabinets, or Bins for the Right Job
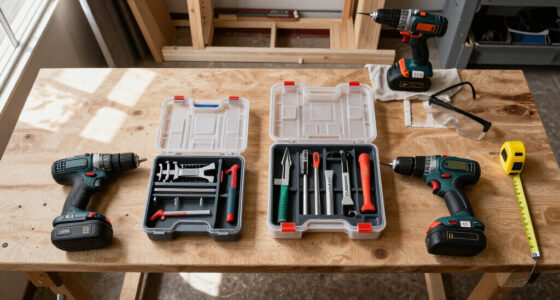
How to maximize storage space in a small workshop depends on matching each container to what it protects and how often you need it. Open shelves make tools visible and fast to grab, closed cabinets reduce sawdust, and clear bins keep small parts from vanishing into a dark box. The choice affects more than appearance: open storage lowers retrieval time but increases cleaning, while closed storage protects delicate items but adds doors, hinges, and an extra step before use. The best layout uses all three instead of forcing every item into one storage style.
| Storage type | Best use | Main tradeoff |
|---|---|---|
| Open shelves | Clamps, cases, finishing supplies, and visible stock | Fast access but more dust |
| Closed cabinets | Blades, measuring tools, electronics, and dust-sensitive items | Cleaner storage but slower access |
| Clear bins | Screws, nails, connectors, drill bits, and sanding discs | Excellent visibility but limited protection from humidity |
| Opaque containers | Rarely used items and light-sensitive materials | Better protection but labels become mandatory |
Keep saw blades in protective sleeves or shallow drawers rather than tossing them into a metal bucket. A sharp 40-tooth combination blade deserves a clean, dry home, just like a precision square. Store batteries in a dry, ventilated charging station away from direct heat, and keep chargers off the floor where dust and dropped hardware collect. The small amount of space used for protection can prevent damaged tools, inaccurate cuts, and avoidable replacement costs.
Small parts deserve their own logic. Sort screws by type, diameter, and length, then label bins such as “#8 x 1-1/4 inch cabinet screws” instead of writing only “screws.” Detailed labels reduce decision time and prevent buying duplicates, but excessive sorting can become its own burden. Separate parts only when the distinction helps you choose the right item; otherwise, use a broader category with a useful sublabel. That level of detail saves a trip to the hardware store when a project pauses at 9 p.m.
As an affiliate, we earn on qualifying purchases.
Turn Corners, Cabinet Sides, and Ceiling Space into Storage
How to maximize storage space in a small workshop means reclaiming the awkward areas that standard cabinets ignore. Corners can hold triangular shelves, narrow rolling carts, or vertical clamp racks; cabinet sides can carry magnetic strips and shallow holders; ceilings can support lightweight seasonal items. These spaces add capacity without narrowing the main work lane, but each has a different access cost. A corner may be difficult to see into, a cabinet side may be blocked when a door opens, and overhead storage may require a ladder, so reserve these locations for items whose retrieval frequency matches the inconvenience.
A 10-inch-wide rolling cart may fit between a cabinet and the garage door, yet hold router bits, glue, measuring tools, and sanding supplies on four shelves. A cabinet side can carry a row of spring clamps or a magnetic bar for hex keys. Small gains multiply when every surface has a defined job, but only if the added holder does not interfere with doors, machine infeed, or walking clearance. Measure the space during normal use, including open doors and extended workpieces, rather than measuring an empty room.
Use overhead racks for empty storage totes, camping gear, light trim, or rarely used jigs. Do not place heavy tools, loose steel, or unstable lumber above a workbench or walking route. A falling box does not care how carefully you planned the floor layout. Overhead capacity is therefore a safety tradeoff, not free storage: the farther an item is above your head, the more important its low weight, secure retention, and infrequent access become.
Before fastening anything overhead, check the framing and use hardware rated for the load. Do not block lights, ventilation, garage-door movement, sprinklers, or access to electrical equipment. If the installation affects structural members or involves new electrical work, ask a licensed professional and follow local code and permit rules. A few extra minutes spent checking load paths and clearances can prevent a storage project from creating a new structural, fire, or access hazard.
Store Lumber, Sheet Goods, and Offcuts Without Feeding the Clutter
How to maximize storage space in a small workshop requires a separate plan for materials. Store long boards vertically or on wall brackets, keep sheet goods in a supported vertical slot, and give short offcuts a narrow bin with a clear size limit. When every scrap shares one unstable pile, the pile slowly becomes the shop’s largest piece of furniture. Material storage is different from tool storage because boards are long, heavy, and consumed over time; the system must make selection easy while preventing the stock itself from becoming an obstacle.
A vertical lumber rack near the entrance lets you slide in boards without carrying them across the room. Separate hardwood, construction lumber, and thin stock so you can pull one board without unloading the whole rack. Store plywood upright with full-height support so sheets do not bow, and keep the heaviest sheets closest to the floor. The added separation uses some capacity, but it reduces handling damage and makes it possible to inspect what you own before buying more.
Offcuts need a rule. Keep pieces longer than 24 inches in one bin, shorter pieces in another, and discard warped or damaged scraps during a monthly review. A 6-inch oak strip may save a future drawer project, but twenty splintered scraps that cannot yield a useful part are paying rent without working. Size limits turn “maybe useful” into a practical decision and protect the floor space needed to process full-size material safely.
Protect lumber from moisture, especially in a basement or shed. Leave a little air around stacks, keep material off concrete with spacers, and watch for roof leaks or condensation. Wood that absorbs moisture can warp after it has been stored, so the rack should support the material while it acclimates rather than merely hide it. Your storage system should protect the material, not merely hide it.
Design Storage Around Dust, Safety, and Your Actual Workflow
How to maximize storage space in a small workshop works best when storage follows the build sequence: material preparation, cutting, joinery, assembly, finishing, and cleanup. Keep sheet goods near the saw, clamps near assembly, and finishes in a clean, suitable cabinet away from sparks and heat. A shop can hold more tools yet work worse if storage interrupts those paths. The key measure is not the distance between cabinets on a plan; it is whether materials and tools move through the room without crossing the same traffic lane repeatedly.
Dust changes where items belong. Open shelves near a table saw collect a gray film that works into drawer slides, router adjustments, and battery vents. Put dust-sensitive tools in closed cabinets, keep collection hoses routed without sharp kinks, and leave room to sweep around mobile bases. Closed storage reduces maintenance, but it should not become an excuse to ignore collection at the source. If a cabinet fills with dust every week, the layout may be exposing the wrong tools or signaling that the collection system needs attention.
Safety has a firm place in the layout. Keep sharp blades covered, heavy items low, chemicals in appropriate containers, and walkways clear. Flammable liquids, compressed-gas cylinders, and hazardous chemicals need storage that follows local fire and safety rules; never improvise a cabinet for materials that require rated protection. These choices may consume space that could otherwise hold tools, but that space is part of the workshop’s operating margin. A layout with no room for safe handling is effectively over capacity.
Mark parking spots on the floor with tape for the planer, cart, and shop vacuum. That small visual cue tells the room where each tool belongs after a project and exposes when a machine is blocking a required path. Good storage behaves like a quiet shop assistant: it returns things to their place before clutter gets a vote.
Build a Storage System You Can Keep Organized
How to maximize storage space in a small workshop is not a one-weekend makeover; it is a repeatable habit supported by simple labels and regular reviews. Give every storage area one purpose, label containers on the front and top, and remove broken, duplicated, or obsolete items before buying more shelves. A system that takes thirty seconds to maintain will beat a clever system you avoid. Maintenance is part of capacity: a full bin that cannot be searched or a shelf whose contents are never returned provides less usable storage than a smaller, orderly one.
Start with a full shop reset. Put every tool and material into broad groups, then test the layout against your real projects rather than an imagined perfect shop. If you build cabinets, your storage should make measuring, cutting, edge treatment, assembly, and finishing easy to move between. Broad groups are a useful starting point because premature precision can create too many categories, but the groups should become more specific wherever confusion or repeated searching appears.
- Clear the floor and photograph the empty walls, corners, and ceiling zones.
- Group tools by task and mark daily, weekly, and rare-use items.
- Measure wall spans, door swings, machine footprints, and safe access paths.
- Install the simplest wall storage first: cleats, shelves, bins, and tool hooks.
- Run one project and record every awkward reach, blocked path, or missing label.
- Review the layout after major projects and declutter at least once or twice a year.
Use matching bins where practical, but do not buy a whole storage system before measuring. Reclaimed cabinets, shipping crates, surplus plywood, and 3D-printed inserts can solve unusual problems cheaply. Spend more on load-rated hardware, locking casters, dust protection, and safe electrical work; save money on cosmetic finishes that do not improve access. The best system is allowed to evolve: project feedback reveals which storage deserves more capacity, which location is inconvenient, and which items no longer justify their footprint.
Frequently Asked Questions
How can I add storage without losing workspace?
Use wall-mounted storage, cabinet sides, corners, overhead racks, and fold-down furniture before adding another floor cabinet. Keep the center open for movement and assembly. A narrow rolling cart can add drawers and shelves while still moving out of the way.
Is pegboard or French cleat storage better?
Pegboard is inexpensive and works well for light hand tools that you use often. French cleats usually handle heavier holders and make it easier to reposition storage as your shop changes. Many small workshops use pegboard for small tools and cleats for cabinets, cases, and larger racks.
What should I store overhead?
Use overhead storage for lightweight, bulky, or rarely used items such as empty totes, seasonal gear, and light trim. Keep heavy tools, loose steel, and unstable materials low. Never block lights, ventilation, emergency equipment, or access to electrical panels.
How should I store screws and other small parts?
Use divided drawers or transparent bins and label them by type, size, and purpose. “#8 x 1-1/4 inch cabinet screws” tells you far more than “wood screws.” Keep small parts away from heavy sawdust and moisture so they remain usable.
What is the best first step for a cramped workshop?
Remove broken, duplicate, and unused items, then group what remains by task. Measure the available walls, corners, and machine footprints before buying storage. Build around your actual workflow, and ask a licensed professional about electrical, structural, or code-related work.
Conclusion
The most effective small-workshop storage system gives every tool a home without stealing the space where you build. Move storage upward, keep the floor clear, let mobile furniture share its footprint, and place your most-used tools where your hands naturally reach.
Start with one wall and one honest decluttering session. When the last clamp clicks onto its rack and the floor shows a clean path to the saw, your workshop will feel larger before it measures a single inch bigger.
Fall yard work Picks
leaf blowers
As an affiliate, we earn on qualifying purchases.