
TL;DR

Get business pricing on tools and workshop supplies
- Business-only prices and quantity discounts
- Tax-exempt purchasing
- Multiple users, one account, clear invoices
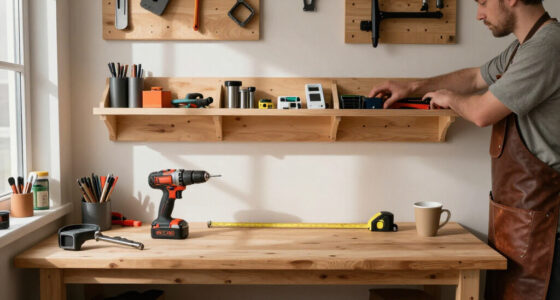
Customizing wall-mounted tool racks means matching each holder to the tool — cradles for hammers, edge-protecting slots for chisels, rails for clamps — and mounting into studs so weight and leverage don’t pull the system off the wall. The most flexible approach for a small shop is a permanent structural system (French cleats, slat wall, or metal pegboard) with removable, tool-specific modules, laid out so daily-use tools sit between waist and shoulder height with 15–25% of the wall left open for future additions.
I once spent a full Saturday building a beautiful pegboard wall for my garage shop. Two weeks later, my framing hammer had torn its cheap hook loose, two chisels had chipped each other’s edges in a crowded slot, and I was still opening drawers for the screwdrivers I used every single day. That wall saved space. It failed at everything else.
Here’s the lesson I learned the expensive way: a good wall-mounted tool rack should do more than save space. It should keep your daily tools visible, secure, easy to grab with one hand, and easy to put back without thinking. Generic hooks in a generic grid don’t do that. Customization does.
In this guide, I’ll walk you through matching holders to specific tools — hammers, chisels, clamps, saws, precision instruments — choosing the right mounting system for your wall and your weight loads, laying everything out around how you actually work, and building in the flexibility to handle the tools you haven’t bought yet.
Match the holder to the tool’s physics: support the heavy part (hammer head, clamp bar), free the part you grab, and require exactly one natural motion for rem…
A tool’s stress on the wall is weight times distance from it — deep hooks and shelves multiply leverage, so structural rails go into studs or masonry, never dr…
Put daily-use tools between waist and shoulder height, group by task or tool family, and leave 15–25% of the wall empty for future additions.
Build a permanent structural layer (French cleats, slat panels, metal pegboard) with removable screw-mounted modules on top — so adding storage for a new tool…
Line metal holders with cork or felt for precision tools, shield all cutting edges, skip foam lining (it traps moisture), and keep valuable steel away from con…
Customizing Wall-Mounted Tool Racks for Different Hand Tools
Generic hooks in a generic grid save space — and fail at everything else. A good rack keeps daily tools visible, secure, easy to grab with one hand, and easy to put back without thinking.
The core rule: support the tool’s heaviest part, free the part you grab, and mount into studs so weight and leverage never pull the system off the wall. Cradles for hammers, edge-protecting slots for chisels, rails for clamps — fit the holder to the tool’s physics.
Match the Holder to the Tool
One hook does not fit all — support the heavy part, free the grab zone, require exactly one motion.
Open cradles, angled pegs, or slots that support the head while the handle hangs free. Never hang a hammer by its handle.
Drilled shelves or slotted rails sized to handle diameter — fat impact drivers need 1.5″ of slot width; slim drivers fit in 0.75″.
Narrow hooks or open slots that grip the handle, never the jaws. Jaws stay calibrated and ready.
Graduated racks or labeled pegs sorted by size — grab the 10 mm without testing three others.
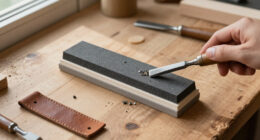
Individual slots that keep cutting edges from touching each other — or your forearm. Store by handle, shield the edge.
Support the handle and blade back. Never place pressure on the teeth.
Heavy horizontal rails or deep brackets mounted directly into studs — a clamp needs a rail, not a hook at all.
Straight, protected storage so nothing can bend them. A bent square is a wall decoration, not a tool.
Line metal holders with cork or felt, use shallow shelves with retaining lips — skip foam, it traps moisture.
The tool should come off with one natural motion but stay put when you bump the rack. If you wiggle it, reposition your grip, or steady the hook with your other hand — the fit is wrong.
Pegboard vs. French Cleats vs. Slatwall
The best system depends on your weight loads and how often you reconfigure.
| System | Strength | Flexibility | Best For | Watch Out For |
|---|---|---|---|---|
| Hardboard pegboard | Low–medium | ✓ High — movable hooks | Lightweight hand tools | Limited load; hooks can pull out |
| Metal pegboard | ~ Medium–high | ✓ High | Demanding shops, durability | Higher cost |
| Slatwall / slot panels | ~ Medium–high | ✓ High | Polished, movable accessories | Accessory cost adds up |
| French cleats | ✓ High | ✓ High — custom modules | Shelves, boxes, heavy holders | Requires building modules |
| Magnetic strips | Low–medium | ~ Medium | Lightweight steel tools | ✗ Not for heavy or delicate items |
| Custom plywood panels | ✓ High (if studded) | ✓ Unlimited | Tool-specific layouts | Permanent; needs planning |
The hybrid approach: French cleat rails across the studs, with pegboard panels and 3D-printed holders screwed onto cleat-mounted backboards. The structural layer never changes; the tool-specific layer changes constantly.
A $40 French cleat rail screwed into studs will out-hold a $200 panel floating on drywall anchors every time. Before drilling, locate studs and check for wiring, plumbing, or gas lines — electrical panel work and gas lines belong with a licensed professional.
Design the Layout Around How You Work
Follow workflow, not aesthetics — the wall should mirror your reach and your habits.
Woodworking zone, electrical zone, bike repair zone. Best if you switch between project types.
All pliers together, all wrenches together. Best for grab-and-go speed.
A prime real-estate zone and an overflow zone. Daily tools win the best spots.
Measuring tools at the bench, driving tools at the assembly table.
Spacing rule: leave clear space around every tool. Slim screwdrivers sit an inch apart; a rubber-grip dead-blow mallet needs four. If you must move two neighbors to reach one tool, the layout is too dense.
The Customization Process, Start to Finish
The sequence a weekend build should follow — before a single hook goes in.
Inventory
List every tool and decide which ones actually belong on the wall.
Sort
Group by task, size, weight, and frequency of use.
Measure
Wall, bench height, and each tool’s widest handle dimension.
Mark Hazards
Studs, plus wiring, pipes, door swings, and outlets.
Dry-Run
Lay the whole arrangement out on a table or the floor first.
Mount & Iterate
Install the structural layer into studs, add modules, leave room to grow.
Key Takeaways
Match the holder to the tool’s physics: support the heavy part (hammer head, clamp bar), free the part you grab, and require exactly one natural motion for removal and return.
Stress = weight × distance from the wall. Deep hooks and shelves multiply leverage, so structural rails go into studs or masonry — never drywall alone.
Zone the wall by use: daily tools between waist and shoulder, group by task or family, and leave 15–25% of the wall empty for future additions.
Layer the system: a permanent structural layer (French cleats, slat panels, metal pegboard) with removable screw-mounted modules on top — new tools never mean rebuilding the wall.
Protect finishes and edges: cork or felt lining for precision tools, guards on all cutting edges, no foam (it traps moisture), and keep valuable steel away from concrete floors.
Edge & Surface Protection Chain
How a raw cutting edge travels from hazard to protected storage.
Match the Holder to the Tool: One Hook Does Not Fit All
Customizing wall-mounted tool racks starts with a simple rule: the holder’s job is to support the tool’s heaviest part while leaving the part you grab completely free. A hammer hangs by its head, not its handle. A chisel stores by its handle with the cutting edge shielded. A clamp needs a horizontal rail, not a hook at all. When you get this backwards, tools fall, edges dull, and you end up storing things in drawers again.
Think of it like a tailored jacket versus one off the rack. The off-the-rack version covers you, but the tailored one lets you move. Here’s how the fit works for the common tool families:
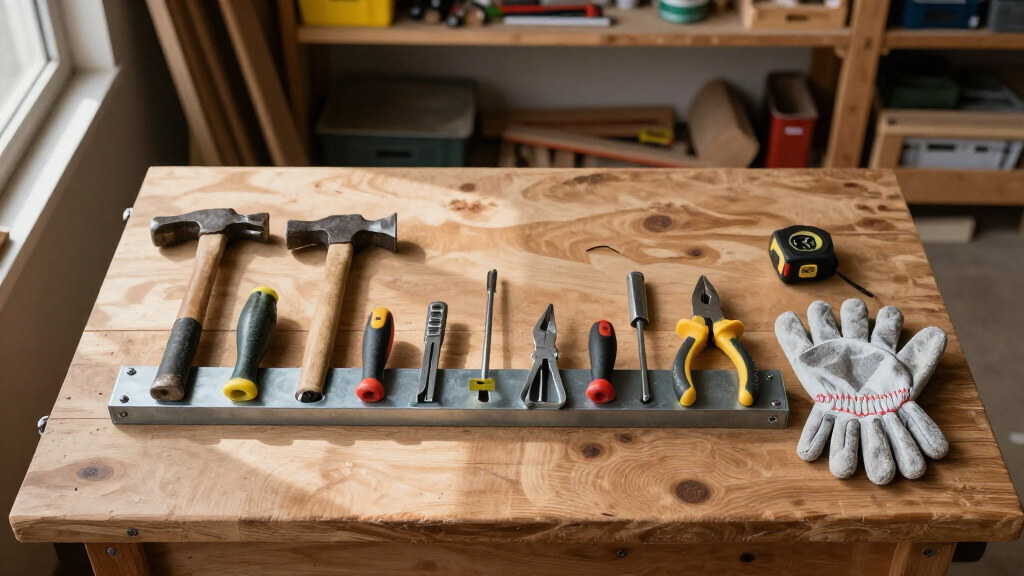
- Hammers and mallets: open cradles, angled pegs, or slots that support the head while the handle hangs free for a one-motion grab.
- Screwdrivers: drilled shelves or slotted rails spaced for handle diameter — my fat-handled impact drivers need a full inch and a half of slot width, while a slim 6-inch driver fits in three-quarters of an inch.
- Pliers and cutters: narrow hooks or open slots that grip the handle, never the jaws.
- Wrenches: graduated racks or labeled pegs sorted by size, so you grab the 10 mm without testing three others.
- Chisels and files: individual slots that keep edges from touching each other or your forearm.
- Hand saws: support the handle and blade back — never pressure on the teeth.
- Clamps: heavy horizontal rails or deep brackets mounted directly into studs.
- Squares and levels: straight, protected storage so nothing can bend them. A bent square is a wall decoration, not a tool.
The test for every holder is the same: the tool should come off with one natural motion but stay put when you bump the rack. If you have to wiggle it, reposition your grip, or steady the hook with your other hand, the fit is wrong.
One real-world example from my wall: my block plane used to live on a generic hook where the knurled adjustment knob rubbed against the neighboring ratchet wrench. A $3 scrap of 1/4-inch plywood made a dedicated cradle lined with cork — problem solved, finish protected, and the plane takes exactly one second to retrieve now.
As an affiliate, we earn on qualifying purchases.
Pegboard vs. French Cleats vs. Slatwall: Which System Fits Your Shop
The best mounting system for a wall-mounted tool rack depends on your weight loads and how often you reconfigure. Light hand tools on a budget? Pegboard works. Heavy custom holders and shelves? French cleats win. Here’s the honest comparison from running several of these in a two-car garage shop:
| System | Strength | Flexibility | Best For | Watch Out For |
|---|---|---|---|---|
| Hardboard pegboard | Low–medium | High (movable hooks) | Lightweight hand tools | Limited load; hooks can pull out |
| Metal pegboard | Medium–high | High | Demanding shops, durability | Higher cost |
| Slatwall / slot panels | Medium–high | High | Polished, movable accessories | Accessory cost adds up |
| French cleats | High | High (custom modules) | Shelves, boxes, heavy holders | Requires building modules |
| Magnetic strips | Low–medium | Medium | Lightweight steel tools | Not for heavy or delicate items |
| Custom plywood panels | High (if studded) | Unlimited | Tool-specific layouts | Permanent; needs planning |
My current setup is a hybrid: French cleat rails across the studs, with pegboard panels and 3D-printed holders screwed onto cleat-mounted backboards. The structural layer never changes; the tool-specific layer changes constantly. That’s the pattern I’d recommend to anyone with an evolving tool collection.
The wall construction matters as much as the panel. A $40 French cleat rail screwed into studs will out-hold a $200 panel system floating on drywall anchors every single time.
And a safety note: if your wall hides wiring, plumbing, or gas lines — common in finished garage walls — locate studs and check for hazards before drilling. When in doubt about what’s behind drywall, a stud finder with AC detection costs under $40 and earns its keep immediately. Anything involving electrical panel work or gas lines belongs with a licensed professional, not a weekend drill.
As an affiliate, we earn on qualifying purchases.
Design the Layout Around How You Actually Work
Tool rack layout should follow workflow, not aesthetics. The rule that matters most: tools you touch daily live between waist and shoulder height, heavy tools go lower, and occasional-use items go higher. My tape measure, pencil, combination square, and block plane sit within a forearm’s reach of my bench edge. The carpenter’s hatchet I use twice a year? Top shelf. That’s the whole system.
Group your wall one of four ways — or combine them:
- By task: woodworking zone, electrical zone, bike repair zone. Best if you switch between project types.
- By tool family: all pliers together, all wrenches together. Best for grab-and-go speed.
- By frequency: a prime real estate zone and an overflow zone.
- By station: measuring tools at the bench, driving tools at the assembly table.
Whatever grouping you pick, leave clear space around every tool. If you have to move two neighbors to reach the one you want, the layout is too dense. Slim screwdrivers can sit an inch apart; a rubber-grip dead-blow mallet might need four.
Here’s the customization process I use, start to finish:
- Inventory your tools and decide which ones actually belong on the wall.
- Sort by task, size, weight, and frequency of use.
- Measure the wall, bench height, and each tool’s widest handle dimension.
- Mark studs, plus any wiring, pipes, door swings, or outlets.
- Lay the whole arrangement out on a table or the floor first — dry-fit everything.
- Install the main panel or rails, anchored into studs.
- Mount the heaviest holders first while you have the best fastening options.
- Test removal and replacement with each tool before committing positions.
- Add labels, outlines, or shadow markings.
- Leave 15–25% of the wall capacity open for future tools.
That last step is the one everyone skips. I built my first wall at 100% capacity and had no room for the random-orbit sander I bought a month later. The tool lived on the bench for a year. Don’t repeat that.
As an affiliate, we earn on qualifying purchases.
Weight, Leverage, and the Fasteners That Keep Everything on the Wall
A rack fails not because of total weight but because of leverage — weight multiplied by distance from the wall. A 4 lb clamp hanging flush against the panel is a non-event. The same clamp on a 6-inch-deep hook applies roughly 24 inch-pounds of pull-out force per fastener zone, and that’s before you account for the shock of grabbing it. Deep shelves, long hooks, and protruding brackets are leverage amplifiers, and they’re what tear racks out of drywall.
The precautions are unglamorous but non-negotiable:
- Follow the manufacturer’s load ratings — and assume they’re optimistic for dynamic loads.
- Mount structural rails into studs whenever possible; use multiple attachment points spread across the panel.
- Don’t cluster heavy tools in one small area; distribute the load.
- Add retaining lips or clips wherever vibration or accidental bumps are likely — near a miter saw that shakes the wall, for instance.
- Inspect periodically for loose fasteners, bent hooks, or cracked panels, especially after the layout changes.
Never mount a heavy rack, shelf, or clamp rail to drywall alone with generic anchors. If it holds tools you’d hate to have land on your head, it goes into studs or masonry — no exceptions.
A cautionary anecdote: a friend hung six bar clamps — probably 25 lbs combined — on a single hook strip anchored into hollow wall with plastic sleeves. It held for three months, which is the dangerous part. It felt validated. Then one clamp removal flexed the anchor, the whole strip dropped, and a cast-iron clamp head cracked a chisel sitting on the bench below. The repair cost more than a stud finder and a box of structural screws.
Also keep ergonomics in the weight plan: nothing heavy above your head, no projecting hooks at face height near walkways, and handles graspable without reaching across a sharp edge. If kids use the shop, sharp and hazardous tools go behind locking cabinet doors or up high — not on open hooks.
As an affiliate, we earn on qualifying purchases.
Protect Sharp Edges and Precision Surfaces From Your Own Storage
Custom tool storage should protect tools as well as organize them. Chisels, carving tools, knives, and saws should never sit with exposed cutting edges at hand or eye level — one careless reach across the wall and you’ve either dulled a blade or opened your thumb. Individual slots, enclosed holders, or blade guards shield the edge while keeping the handle accessible for a clean grab.
Equally important: metal holders scratch. Any polished, precision, or finished tool — a bronze-infused block plane, a machinist’s square, a good try square — should sit in holders lined with cork, felt, leather, or rubber. A roll of adhesive-backed cork costs about $10 and has lined every metal slot on my wall. Avoid foam lining, though: it traps moisture against steel and can accelerate rust rather than prevent it.
Which brings up corrosion. In garages, sheds, and basements, ventilation matters. Clean and dry tools before they go back on the wall — a damp chisel shoved into a tight slot is a rust experiment. Keep valuable steel away from exterior walls where condensation forms, use rust-resistant hardware, seal exposed plywood edges in humid spaces, and consider corrosion-inhibiting liner material for enclosed holders.
Finally, decide what doesn’t belong on the wall at all. Open racks collect dust — fine for hammers and clamps, terrible for calipers, marking knives, and dial indicators. Hybrid storage is the honest answer: open racks for everyday tools, drawers or cabinets for delicate, valuable, or rarely used ones. My layout is roughly 80% open wall, 20% enclosed, and that ratio has held up for years.
Build In Adjustability: Design for the Tools You Haven’t Bought Yet
The best rack layouts are built to change, because tool collections always grow. A highly specific fixed holder with zero slack becomes obsolete the first time a tool gets upgraded or replaced. The fix is architectural: mount a permanent structural system — French cleat rails, slat panels, or a metal pegboard — and attach removable, tool-specific modules to it with screws, not glue.
Modern options make this easier than ever. A few worth knowing:
- 3D-printed holders: a $200 desktop printer turns out precise mounts for odd handles, battery tools, and proprietary accessories. Strength depends on material, wall thickness, and print orientation — a hook printed flat will delaminate under load, so print with layer lines running through the stress direction, and test heavy tools conservatively.
- Plywood modules: CNC-cut or hand-built holders on cleat backboards. Plywood is the most versatile rack material — strong, cheap, easy to machine, and perfect for shelves, slots, and graduated holes. Seal the edges in humid shops.
- Digital fabrication: laser-cut acrylic organizers and repeatable plywood patterns make professional-looking systems practical for small shops.
- Integrated stations: combine charging docks for battery tools, labeled parts bins, and task lighting into the same wall system instead of scattering them.
Visibility matters for adjustability too. Shadow boards — tool outlines painted or traced behind each item — make a missing wrench obvious in two seconds, which is why professional shops lean on them. The tradeoff: painted outlines lock your layout in place, so use tape, chalk, or movable labels if your wall changes often. In shared workshops, labels, outlines, or even a photo of the finished wall taped nearby make it intuitive for everyone to return tools to the same spot.
The mindset shift is simple: stop thinking of your tool wall as furniture and start thinking of it as a system with replaceable parts. When I switched to cleat-mounted modules, adding storage for a new tool went from a half-day project to a twenty-minute job.
The Mistakes That Ruin Good Tool Walls (Skip These, Save Weekends)
Most wall-mounted tool rack failures come from a short list of preventable mistakes. These are the ones I’ve either made myself or watched friends make — learn from them instead:
- Mounting heavy systems only to drywall. The number one failure mode. Studs or masonry, always, for anything with real weight.
- Buying hooks before measuring. Measure the widest part of every handle and head first. Uniform openings fit some tools poorly — graduated holes and adjustable clips handle mixed handle sizes far better.
- Packing tools too tightly. If neighbors must move first, the layout is wrong.
- Storing sharp edges uncovered at grab height.
- Heavy tools overhead. Gravity plus a dropping 3 lb mallet equals an ER visit.
- Ignoring door swings, outlets, lighting, and bench clearance. A perfect rack hidden behind an open door is a joke you’ll live with for years.
- Untested magnets. Test magnetic retention under real vibration before trusting it — shake the wall like a miter saw will.
- Adhesive mounts for heavy or dangerous tools. No. Adhesive strips are for lightweight, soft, harmless items only.
- Damp tools against cold exterior walls. That’s how collections rust.
If you avoid just the first three — stud mounting, measuring before buying, and spacing for real grabs — you’ll be ahead of 90% of the garage shops I’ve walked into. The rest is refinement.
Frequently Asked Questions
Is pegboard strong enough for hand tools?
Standard 1/4-inch hardboard pegboard handles lightweight and medium-weight hand tools fine when it’s spaced off the wall and securely mounted. Heavy clamps, large hammers, and loaded shelves need metal pegboard, reinforced panels, or direct stud attachment. If a hook flexes when you hang the tool, the panel isn’t the problem — the load path is.
How high should a wall-mounted tool rack be?
Frequently used tools belong between roughly waist and shoulder height. Heavy tools go lower so you’re never catching a falling mallet, and lightweight, rarely used items can go higher. Match the exact heights to the primary user and the workbench — the rack serves the person standing in front of it, not a theoretical average.
Are French cleats better than pegboard?
French cleats offer greater strength and easier customization for shelves and custom holders; pegboard makes small hooks faster to rearrange. Most serious home shops end up using both — cleat rails for the structural layer and modules, pegboard panels for light hooks. They solve different problems.
How do I store chisels and other sharp tools safely?
Use individual slots or enclosed holders that shield the cutting edge while leaving the handle accessible. Never let edges touch each other, and never store sharp tools where they can fall onto someone. Add cork or felt lining where metal meets a precision surface, and dry each tool before it goes back in the slot.
Can magnetic strips safely hold tools?
They can hold many steel tools, but safety depends on magnet strength, tool weight, contact area, and vibration. Test the grip by bumping the wall before trusting it, and never rely on a magnet alone for heavy tools or sharp tools hanging above a work surface. Ordinary magnets won’t damage basic steel hand tools, but keep them away from precision measuring equipment.
How can a rack accommodate new tools later?
Use movable hooks, cleat-mounted modules, slotted panels, and holders attached with screws rather than glue. Keep 15–25% of the wall open from day one and resist the urge to fill every gap immediately. The permanent structure stays; the tool-specific layer should be cheap and quick to swap.
What is the best material for a DIY tool rack?
Plywood is the most versatile choice — strong, affordable, easy to machine, and suited to shelves, slots, graduated holes, and French-cleat modules. Seal exposed edges in humid spaces. Metal is better where maximum strength and fire resistance matter, and 3D-printed plastic excels for odd, tool-specific shapes when print orientation and material are chosen for the load.
Conclusion
Here’s the crisp version: your tool wall isn’t storage, it’s a machine for returning tools to the right place without thinking. Design each holder around the tool’s shape, weight, and edge; anchor the structure into studs; lay it out around your actual workflow; and leave slack for what comes next. Do that, and the wall works for you every single time you reach for a chisel.
Start small this weekend. Pick your five most-used hand tools, build or adapt holders that fit each one properly, and mount them at grab height near where you use them. Then live with it for a month. You’ll know exactly what the rest of the wall needs — and what it doesn’t.
Fall yard work Picks
leaf blowers
As an affiliate, we earn on qualifying purchases.