
TL;DR

Get business pricing on tools and workshop supplies
- Business-only prices and quantity discounts
- Tax-exempt purchasing
- Multiple users, one account, clear invoices
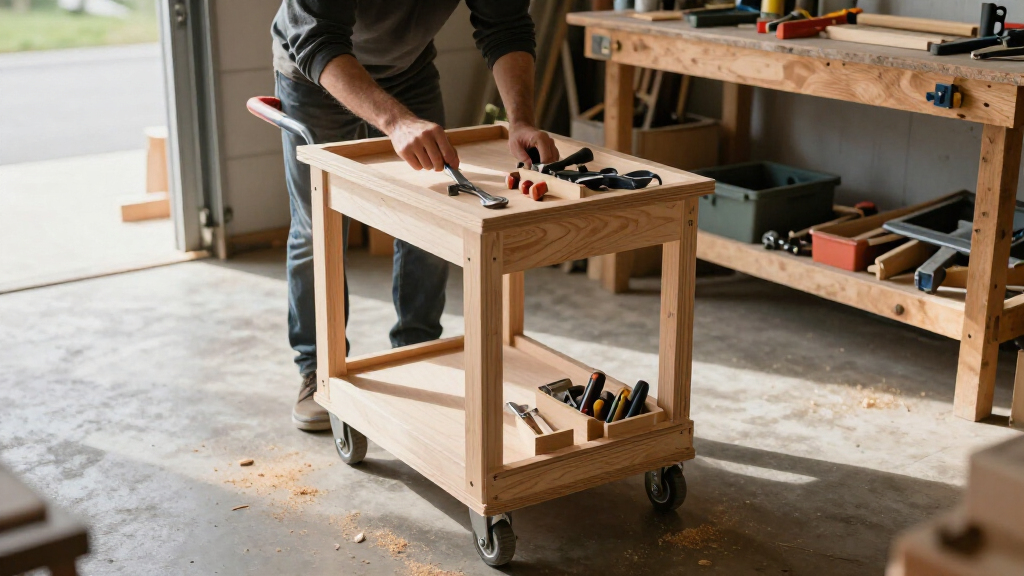
Build your custom tool cart around the hand tools you use every week: measure them, group them by task, and keep frequent-use items within easy reach. Use a balanced frame, place heavy tools low, and choose casters rated for the fully loaded cart with margin. Removable dividers and replaceable holders let you change the layout as your work changes.
The first time you roll a plane across the shop to find a screwdriver, the cart you need is already obvious. Your bench is crowded, the hand tools you reach for most are scattered, and the one chisel you want is buried beneath a tape measure. A custom tool cart can put that daily kit in one visible, mobile place.
The trick is to design around the work, not a pretty sketch or an arbitrary set of dimensions. Start with the tools you use, leave room for your hands to remove them, and decide whether the cart will live by one bench or travel across the garage. Those choices shape its height, footprint, storage, and wheels.
This guide walks you through planning, materials, stability, useful storage, and a practical build sequence. You’ll see where plywood makes sense, why heavy tools belong low, and how to keep the layout flexible when your next project calls for different tools. The goal: less rummaging, more making.
Measure the actual tools, cases, and hand clearance before you set the cart’s dimensions.
Group tools by job sequence and keep frequently used hand tools in the easiest-to-reach locations.
Build caster mounts and shelf supports into the frame, and put heavy tools on the lowest shelf.
Choose wheels for your loaded weight and floor; larger wheels cross thresholds better but raise the cart.
Use removable bins, dividers, and holders so you can change the layout when your projects change.
Building a Custom Tool Cart for Your Most-Used Hand Tools
Design the cart around the work, not a pretty sketch. Measure the tools you reach for every week, group them by task, keep heavy items low, and choose casters rated for the fully loaded cart — with margin.
Start with the tools you actually reach for
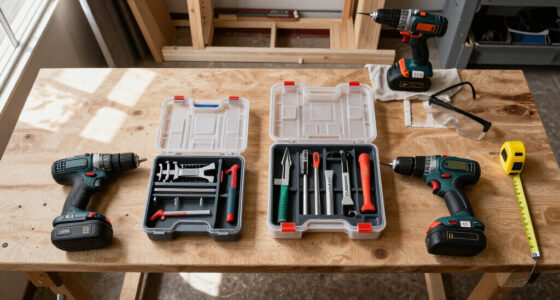
Storage designed from dimensions alone almost always fails: a slot sized to a blade will trap the handle, and a drawer sized to a closed case won’t close once you add finger clearance. Lay your tools on cardboard as if setting up for a familiar job — a block plane, chisels, marking knife, combination square, mallet, clamp, pencil — then measure the longest item and note whether it needs a sheath or flat resting place.
Measure the whole tool
Including handles and protective covers. Undersized storage is the most common cart-building mistake.
Allow removal clearance
Lift tools out without catching knuckles. Tight clearance means the tool never goes back where it belongs.
Separate sharp edges
Keep them away from loose hardware that could nick them — a nicked edge turns a five-second grab into a twenty-minute resharpening.
Group by task, not by name
Marking tools work well together; sharpening gear needs a contained tray for stones and oil — migrating oil attracts dust and swells wood.
Crossover items get easy spots
Tools split between two jobs go where you can grab them without moving the rest — a cart that supports transitions, not creates them.
Measure the parking space
A cart one inch too wide becomes permanent floor clutter — and once a cart fails to park, it stops being put away at all.
Choose a layout that saves the most steps
The cost of a tool isn’t just finding it — it’s the steps and interruptions between wanting it and using it. Two steps saved per tool, twenty times a day, compounds into real time and fewer broken concentrations. Think of the cart as a work sequence, not a filing system: square and marking knife, then chisel and mallet, then sandpaper.
| Storage choice | Works well for | Watch for |
|---|---|---|
| Shallow drawer | ✓ Layout tools, pencils, small parts | ~ Too little depth for handles or cases |
| Open shelf | ✓ Mallets, clamps, larger tools | ~ Tools can slide during travel |
| Fitted rack | ✓ Chisels, screwdrivers, frequently used tools | ~ Slots that grip too tightly or loosely |
| Clear top | ✓ Quick repairs and tool staging | ✗ Storage piled on top erases the work area |
Try the arrangement with cardboard boxes or scrap blocks first. Layout mistakes caught in cardboard cost a pencil line; the same mistakes after the build cost a drawer rebuild — and tend to go unfixed, which is how purpose-built carts slowly become shelves for junk.
Build a frame that stays square under load
A stable cart depends on its whole structure: material thickness, frame, joints, shelf supports, fasteners, and caster attachment all share the load. No single material makes a cart strong by itself. Relative merits of the main build materials:
Rate casters against the cart’s total loaded weight, then leave margin for uneven loading and the bumps that come with movement. Larger wheels handle thresholds and rough floors more easily — but raise the cart and affect stability and working height.
A practical path from cardboard to cart
Caster mounts and shelf supports belong in the frame from the start, not bolted on later. Removable bins, dividers, and replaceable holders let the layout change when your projects change.
Pick casters first
Choose wheels for floor, real loaded weight, and the route — doorways and thresholds included.
Build the frame
Integrate caster mounts and shelf supports; keep it square under load.
Shelves low & heavy
Wide, balanced base; heavy tools on the lowest shelf to keep the center of gravity down.
Fit flexible storage
Removable dividers, pegboard, magnetic strips, replaceable holders.
Test with a real task
Roll the mock-up to your bench and work through a job before final build.
From tools to a cart that works
Start with the tools you actually reach for
A cart for your most-used hand tools should begin with a measured list of the tools you reach for during a normal week. Group them by task, then design each storage spot around the tool’s full shape, including handles, cases, and the room your fingers need to lift it out. This matters because storage designed from dimensions alone almost always fails in practice: a slot sized to a blade will trap the handle, and a drawer sized to a closed case will not close once you add finger clearance. The inventory step is what separates a cart that speeds up your work from one that just relocates the clutter.
Lay your tools on the floor or a sheet of cardboard as though you were setting up for a familiar job. For a cabinet repair, you might gather a block plane, two chisels, a marking knife, a combination square, a mallet, a small clamp, and a pencil. Measure the longest item and note whether it needs a sheath or a flat resting place. A chisel slot that fits its blade but traps the handle is a frustrating holder, even if it looks tidy — and frustrated holders are the reason tools end up back on the bench instead of in the cart.
Group tools by how you use them, not just by their names, because task-based grouping mirrors how your hands actually move during work. Marking tools often work well together; sharpening gear may need a contained tray for stones and oil, since oil that migrates into a drawer will attract dust and swell wood; small fasteners and layout pencils can share a shallow drawer. If your frequently used hand tools are split between two jobs, place the crossover items where you can grab them without moving the rest — this is the difference between a cart that supports transitions and one that creates them.
- Measure the whole tool, including handles and protective covers — undersized storage is the most common cart-building mistake.
- Allow removal clearance so you can lift tools out without catching knuckles; tight clearance means the tool will not go back where it belongs.
- Separate sharp edges from loose metal hardware and tools that could knock them, because a nicked edge turns a five-second grab into a twenty-minute resharpening.
For a useful real-world example, imagine a small garage shop where the cart must tuck under a bench after use. Measure that opening before choosing a footprint; a cart that is only an inch too wide can become permanent floor clutter, and once a cart fails to park, it stops being put away at all. Mark the route to the work area too, including doorways and the slab’s raised threshold — the route determines wheel size and turning clearance just as much as the tools determine the storage.
Choose a layout that saves the most steps
A good tool-cart layout puts your daily tools in the easiest-to-reach spots, stores small items in contained drawers, and gives bulky tools open shelves or fitted racks. The reason this works is simple: the cost of a tool is not just finding it but the steps and interruptions between wanting it and using it. A layout that saves two steps per tool, twenty times a day, compounds into real time and, more importantly, fewer broken concentrations. Keep the cart’s top clear enough to act as a temporary repair surface, and use designated spaces so you can spot a missing tool quickly — a missing chisel is a safety issue in a shop with kids or pets, not just an inconvenience.
Think of the cart as a work sequence rather than a filing system. When fitting a drawer front, you may reach first for a square and marking knife, then a chisel and mallet, then sandpaper. Arranging tools in that order matters because each transition in a task is a chance to lose momentum; scattering them by size forces your hands to hunt at exactly the moment they should be moving. If you tend to set screws down while making an adjustment, a shallow tray or divided drawer can keep them from rolling into the wheel path — where they become both a lost part and a tripping hazard.
For example, a woodworker building a small cabinet can keep measuring and marking tools in the top drawer, chisels in a protected rack, and clamps or a mallet on an open lower shelf. The tradeoff between drawers and open shelves is worth understanding: drawers protect and contain but add weight, cost, and a failure point in the slides; open shelves are cheap and fast to access but let tools shift when the cart rolls. Most carts are best as a deliberate mix, weighted toward whichever failure bothers you more — lost tools or slow access.
| Storage choice | Works well for | Watch for |
|---|---|---|
| Shallow drawer | Layout tools, pencils, small parts | Too little depth for handles or cases |
| Open shelf | Mallets, clamps, larger tools | Tools can slide during travel |
| Fitted rack | Chisels, screwdrivers, frequently used tools | Slots that grip too tightly or loosely |
| Clear top | Quick repairs and tool staging | Storage piled on top can erase the work area |
Try the arrangement with cardboard boxes or scrap blocks before building drawers. Roll the mock-up to your bench and pretend to do a real task. This step is cheap insurance: layout mistakes caught in cardboard cost a pencil line, while the same mistakes caught after the build cost a drawer rebuild — and worse, they tend to go unfixed, which is how purpose-built carts slowly become shelves for junk.
Build a frame that stays square under load
A stable custom tool cart depends on its whole structure: material thickness, frame, joints, shelf supports, fasteners, and caster attachment all share the load. Plywood is accessible and easy to customize, solid lumber can form a stiff frame, and metal can suit heavier-duty use; none of those materials makes a cart strong by itself. This is the central tradeoff to understand: strength in a cart is a system property, not a material property. A thick plywood panel attached with a few screws into an unsupported edge is weaker than a thin panel captured in a proper frame, because load follows the joints, not the spec sheet.
For a compact home-shop cart, plywood sides and shelves can work well when supported by a sound frame and secured with appropriate fasteners. A solid-wood rail around the base gives you a substantial place to mount the casters, and this matters more than most builders expect: casters concentrate the entire loaded cart’s weight onto four small plates, and every shock from a threshold crossing travels through those connections into the frame. If your cart will carry a heavy bench vise or a dense stack of hand planes, add structure where the load enters the frame rather than relying on a thin panel or a few screws driven into an edge.
Say you build a cart from half-inch plywood and plan to load it with planes, clamps, and a small vise. Before assembly, locate the frame rails and caster plates so the wheel fasteners pass through or into supported material. The reason to plan this before assembly is practical: once the box is glued up, you cannot see or reach the interior to add blocking, and retrofitted mounts rely on hope rather than structure. Glue and mechanical fasteners can work together in a sound woodworking joint, but the joint design still matters; a screw cannot make a weak, splitting edge behave like a reinforced frame.
Keep the base wide enough for the cart’s height and expected load. Stability is fundamentally about the center of gravity staying inside the wheelbase: a tall, narrow cart with heavy tools on top can tip as you push over a threshold or pull a stuck drawer, because those moments shift weight toward one edge. Putting heavier tools and stock on the bottom shelf does two things at once — it lowers the center of gravity and it puts the densest weight closest to the structure best able to carry it. Secure tall or slender items in holders that prevent them from swaying, since a swaying plane leaning off the side acts like a lever working against you.
Structure follows the load: reinforce the places where the shelves, frame, and casters transfer weight, then keep the heaviest tools low.
Sand exposed corners and ease sharp edges before loading the cart. This is not cosmetic: a rounded edge feels better against your hip, is less likely to catch an apron or chip when you steer around a bench, and a chipped plywood edge will splinter tools and hands for years. Check that drawer slides, handles, and shelf edges do not interfere with the wheels or your grip — clearance problems discovered after the finish is applied are the most annoying kind to fix.
Pick casters for your floor and the cart’s real weight
Choose casters by the cart’s fully loaded weight and your shop floor, then leave a margin for uneven loading and the bumps that come with moving it. The margin is not padding for its own sake — it exists because a cart’s weight is never evenly split four ways. When you lean on the cart, cross a threshold, or roll one wheel into a crack, a single caster can momentarily carry half the load or more. A cart specced exactly to its average rating will feel fine in the aisle and fail at the worst moment. Locking casters help hold the cart in place while you work, while larger wheels generally cross thresholds and rough spots more easily; the tradeoff is that larger wheels also raise the cart, which changes working height and can affect stability on a narrow footprint.
Estimate the load before you shop for wheels. Add the cart’s own weight to the tools and supplies you plan to store; a cart that seems light when empty can become a dense, lopsided package once you add planes, a vise, and hardware. Check the caster manufacturer’s rating and follow its method for accounting for the number of wheels and load distribution. Don’t assume a rating printed on a package describes a safe capacity for every four-wheel arrangement — many ratings assume three wheels carrying the load, precisely because one wheel is often lifted or unloaded, and treating a four-way split as the design case is how carts get underbuilt.
Imagine a cart that weighs 45 pounds empty and carries 75 pounds of tools. Its working load is about 120 pounds before you account for uneven distribution, pushing, or a threshold impact. If one corner carries a vise and several planes, that caster sees more than an even quarter of the total — realistically closer to half. This is why a caster rated at 40 pounds per wheel is marginal on a 120-pound cart even though the arithmetic of 120 ÷ 4 says otherwise: the arithmetic describes the average case, and carts rarely live in the average case.
Floor conditions matter as much as ratings. Small hard wheels can roll smoothly on a clean, flat concrete slab, yet chatter over a doorway strip or catch in a crack — and every catch is a shock load transferred straight into your joints and hardware, slowly loosening everything you built. Larger wheels bridge those imperfections more readily, but the added height can make a narrow cart feel less planted and can push the work surface past a comfortable working height, especially for shorter woodworkers. Test a cardboard mock-up or measure how the proposed wheel height changes your top surface before committing; wheel diameter is one of the few dimensions in the build that you cannot easily change later without rebuilding the base.
- Estimate the loaded weight of the cart and its intended contents, then round up.
- Check the floor and route, including cracks, thresholds, and tight turns.
- Choose rated casters with margin and a locking arrangement that holds the cart in its working position.
- Mount wheels to supported material and keep the load balanced during use.
After the first week, lock the cart and give it a firm hand push before planing or chiseling at the top. If it creeps, rocks, or twists, check the locks, mounting bolts, floor contact, and load placement before carrying on. This test matters because a cart that moves under hand pressure will certainly move under the leverage of a plane stroke — and a shifting work surface is both a quality problem and a safety one.
Make storage easy to change as your work changes
Flexible storage lets you revise the cart without rebuilding it when a new project changes your tool mix. The deeper reason to build this way is that your tool collection is not static: hand tool users acquire, sharpen, retire, and repurpose tools constantly, and a cart with fixed, permanent storage is guaranteed to be out of date within a year or two. Removable bins, adjustable dividers, pegboard panels, magnetic strips, and replaceable holders all help, provided each feature suits the tools you actually own. A fitted tool slot is useful only when it holds securely and still lets you remove the tool without a struggle.
Start with a simple layout and make the holders replaceable. A strip of scrap wood with drilled holes can hold screwdrivers; a small rack with individual slots can protect chisels; a divider box can separate marking tools from small hardware. Fasten these parts so you can swap them later. The tradeoff between permanent and removable is worth naming: glued-in fitted storage looks better and holds tighter, but it commits you to today’s tool set; screwed-on inserts look slightly less refined and buy you the ability to adapt. If you add a new hand plane or change your sharpening setup, a screwed-on insert is an afternoon’s change, while a permanent maze of glue blocks is a teardown.
Consider the difference between storing a screwdriver and storing a sharp chisel, because it illustrates why one-size-fits-all storage fails. A magnetic strip can keep screwdrivers visible and easy to grab, but a chisel edge needs a holder or sheath that protects the cutting bevel — and the implication runs both ways: an unprotected edge gets damaged, and an exposed edge damages you when you reach past it. Likewise, a bin that contains loose screws should not share an open pocket with a delicate marking knife. Good modular storage keeps tools accessible while stopping metal, wood, and sharp edges from knocking together, because every collision between stored tools is a small, invisible cost paid later at the sharpening station.
For instance, you may build the cart for furniture repairs and later use it for fitting doors. The first setup might favor chisels, a block plane, and a marking gauge; the second may need a longer straightedge, shims, and a screw tray. Removable dividers let you shift the drawer layout in an afternoon, without drilling a new set of holes through the cart itself — which matters because repeated drilling weakens the drawer bottoms and eventually leaves them looking like pegboard.
- Use removable inserts for tool groups likely to change, and permanent fittings only for tools you have owned for years.
- Label or outline spaces when it helps you notice a missing tool at a glance — an outlined silhouette is a checklist that maintains itself.
- Protect blades and edges with sheaths or fitted holders, on both the tool’s side and yours.
- Keep changes reversible with screws, clips, or a mounting grid; reversibility is what makes experimentation cheap.
Leave a little open capacity. Filling every inch on day one makes the cart less adaptable and encourages awkward stacking, and awkward stacking is how careful storage systems decay into piles. A spare bin or blank panel gives you room to change direction without making clutter the default.
Finish the cart and test it with a real shop task
A finished tool cart should roll, lock, stay stable, and put the right tools within easy reach during actual work. Sand exposed edges, apply a finish suited to your shop, tighten the hardware, and test the loaded cart on its normal route before trusting it as a daily workstation. The point of testing with real work rather than a quick push around the shop is that real work exposes the failures that casual checks hide: a drawer that clears an empty cart may bind under load, and a layout that looks logical standing still may fight you when both hands are busy.
Before applying finish, check every edge for splinters and every fastener for a proud head that could snag a sleeve or scrape a tool handle. A simple durable coating can make plywood easier to wipe down when glue, oil, or pencil marks land on it — and this is a bigger deal than it sounds, because unfinished plywood absorbs glue and oil permanently, and a stained, sticky surface eventually repels you from using the top at all. Keep the top surface practical: a small lip helps contain loose pieces, but avoid building a tall rim that blocks clamps or turns the top into an inconvenient tray.
Now load the tools you measured and run a familiar job from start to finish. For a loose chair rung, you might need a square, marking knife, mallet, chisel, and glue brush. Roll the cart beside the repair, lock it, remove each tool, and return it to its holder. Pay attention to the friction points: whether the cart blocks your stance, the drawer bumps a wheel, or an open shelf lets tools slide when you steer. Each of these is a small annoyance alone, but together they decide whether the cart gets used daily or parked in a corner — and an unused cart is worse than no cart, because it occupies floor space while contributing nothing.
That test often reveals useful corrections. A drawer may need a shallow liner to stop small items shifting; a chisel rack may need wider spacing for your fingers; the cart top may need a small removable tray rather than a permanent lip. Make those adjustments before treating the layout as finished, and expect two or three rounds of small fixes — that iteration is normal, not a sign the build went wrong.
Check caster fasteners, drawer slides, and frame joints periodically, especially if your floor is uneven or you roll over thresholds. This matters because a moving cart is a vibrating machine: every threshold impact works fasteners loose a little at a time, and a wobble that starts as one loose bolt spreads load to neighboring joints until the whole frame feels tired. A quick inspection after the first few weeks can catch a loose bolt before it becomes a rebuild. Store the cart where it can park without blocking an exit or creating a trip hazard, and keep its handle clear enough to steer without pinching fingers.
Frequently Asked Questions
What dimensions should I use for a custom tool cart?
Measure your tools and the space where the cart will park and work. Choose a height that lets you reach the top and drawers comfortably, then check the footprint against doorways, bench legs, and the route across your shop.
What is the best material for a homemade tool cart?
There is no single best material for every build. Plywood is versatile and easy to customize, solid lumber can add a sturdy frame, and metal can suit heavier-duty carts; the finished strength depends on the structure, joints, supports, fasteners, and load.
How much weight can a homemade tool cart hold?
Capacity depends on the whole cart, including its frame, shelves, joints, caster mounts, and wheels. Estimate the loaded weight, account for uneven loading and movement, and check the caster and hardware ratings with an appropriate margin.
Should a tool cart have two or four locking casters?
Locking casters help keep a cart in place while you work, but the right arrangement depends on its size, floor, and how you steer it. Choose a setup that can lock securely in its working position, then test for rolling or rocking under hand pressure.
How do I stop tools from sliding off the cart?
Use fitted holders, drawer dividers, a non-slip liner, or a modest lip on open shelves. Secure tall tools so they cannot sway, and store heavy items low; a cart that stays balanced is easier to move and less likely to tip.
Can I add storage to the cart later?
Yes. Removable bins, adjustable dividers, and screwed-on tool holders make later changes straightforward. Leave a little empty capacity when you build so a new project’s tools do not force you to stack items in unsafe or awkward ways.
Conclusion
Build the cart around a real task: measure the tools, place them in the order you reach for them, and test the layout before cutting the final parts. Keep heavy tools low, support the casters properly, and leave room to adapt as your work changes.
When the cart rolls beside your bench and every tool has a sensible place, the shop feels a little less like a scavenger hunt. You can spend that saved time on the next clean cut.
Fall yard work Picks
leaf blowers
As an affiliate, we earn on qualifying purchases.