TL;DR
Maintaining and sharpening your woodworking tools comes down to three habits: clean after use, control rust with light oil and dry storage, and hone edges at consistent bevel angles (25° primary, 30° micro-bevel for chisels) on water stones or diamond plates. A $100 honing setup outperforms a drawer full of dull edges, and most sharpening — except carbide saw blades and jointer knives — is a home-shop job.
A dull chisel doesn’t just cut badly — it cuts dangerously. You lean into it, the edge skids off the wood instead of shearing it, and all that force goes somewhere you didn’t plan. Most workshop cuts I’ve seen (and a couple I’ve earned myself) trace back to an edge that should have been honed a week earlier.
The good news: keeping your woodworking tools sharp isn’t a mystic craft. It’s a handful of repeatable habits and maybe $100–150 in sharpening gear for a small garage shop. No water-cooled $700 system required, despite what the catalogs imply.
In this guide, you’ll learn how to sharpen chisels and plane blades, what to do about rust, how to maintain your woodworking tools between sessions, and where the budget/pro line actually sits. I run a two-car-garage shop with a 650 CFM dust collector and a bench that doubles as an assembly table — so everything here is sized for real shops, not fantasy ones.
Sharpen chisels and plane irons at a 25° primary bevel with a 30° micro-bevel — the micro-bevel makes touch-ups take under a minute on fine stones.
A $100–150 kit (coarse/fine diamond plate + 8000-grit water stone + strop + honing guide) covers everything a garage shop needs; skip the powered water-cooled…
Send carbide saw blades, jointer/planer knives, and router bits to a sharpening service ($15–30 per blade) — sharpening a good blade 3–4 times roughly triples…
Rust prevention beats rust removal: wipe tools with light oil, store edges off bare concrete and out of contact with other steel, and keep shop humidity under…
Follow a simple cadence — clean every session, oil weekly, deep-sharpen every six months — and maintain your woodworking tools in about 20 minutes of weekly at…
How to Maintain and Sharpen Your Woodworking Tools
A dull chisel doesn’t just cut badly — it cuts dangerously. Keeping tools sharp isn’t a mystic craft: it’s a handful of repeatable habits and roughly $100–150 in honing gear for a small garage shop. No $700 water-cooled system required, despite what the catalogs imply.
Why a Dull Blade Costs More Than a Sharp One
A dull edge tears wood fibers instead of severing them, so you sand more — burning through 220-grit paper and an extra half hour per project. It wrecks accuracy and wrists. And sharpness is a safety system: most workshop injuries cluster around loss of control, like a chisel skidding off the wood under too much pressure.
“Hold a board’s end grain up and take a light pare across it. A sharp edge leaves a glassy, translucent shaving. A dull one leaves a matte, fuzzy surface. Ten seconds, no guesswork.”
The End-Grain Sharpness TestKit Beats Replacement
A quality bench chisel runs $40–70. Replace it every time it dulls and you’ll outspend a full sharpening kit within two years. A maintained carbon-steel edge can be refreshed dozens of times before regrinding, per Wood Magazine’s long-term testing.
Sharpness Is Control
Woodworking injuries trace back to edges that skid and hands that slip toward blades demanding too much force. A truly sharp chisel parts pine end grain with thumb pressure alone. If you’re muscling it, the tool is telling you something.
Three Habits That Keep Tools Alive
Clean, dry, inspect. Do these consistently and rust, pitting, and mystery nicks mostly disappear from your life.
Strip Pitch & Resin
Pitch on a saw blade raises friction and heat, degrading the carbide’s temper over time. A ten-minute soak in mineral spirits plus a nylon-bristle scrub restores cutting feel. Do blades 2–3× a year — more when ripping construction pine.
Oil, Rack, Dehumidify
Wipe metal with light machine or camellia oil before storage (2 seconds per tool). Store edges in racks, on magnetic strips, or in canvas rolls — never loose in a drawer. Keep a hygrometer on the wall; sustained humidity above 60% means dehumidifier, not better oil.
Look Before You Cut
Check edges every session for nicks, corrosion, and loose handles. A 0.5 mm nick caught that day is a one-minute touch-up on an 8000-grit stone. Caught three months later, it’s a full regrind and twenty minutes you didn’t budget.
“My first set of chisels spent one August loose in a metal drawer. By September, every edge had orange rust freckles that cost an hour with abrasive pads and oil to remove.”
Field Lesson · Storage Failure ModeSharpening Chisels & Plane Blades in Four Steps
The whole routine takes under five minutes once practiced. Hold a consistent angle — 25° primary with a 30° micro-bevel is the bench-chisel standard — and use a honing guide ($15 side-clamp or $60 Eclipse-style roller) until freehand angles live in your wrists.
Flatten the Back
Rub the flat side on progressively finer stones (400–1000 grit) until scratch pattern is uniform to ~25 mm back. Do this once in the tool’s life.
Grind 25° Primary
Coarse diamond plate or 800-grit stone. Only regrind when chipped. Dip in water constantly if grinding — blue steel is dead steel.
Hone 30° Micro-Bevel
Bump the angle 5° in a honing guide; work 1000, then 4000–8000 grit. You repeat this step 95% of the time — under a minute.
Strop
A few pulls on leather charged with chromium-oxide compound removes the wire burr and polishes past what stones alone reach.
What to Sharpen Yourself — and What to Send Out
| Tool | Method | Home or Pro? | Typical Cost | Cadence |
|---|---|---|---|---|
| Bench chisels | Diamond plate + water stone + strop | ✓ Home | $100–150 kit, once | Touch up per session |
| Plane irons | 25°/30° bevel, honing guide | ✓ Home | Included in kit | Weekly / as needed |
| Carbide saw blades | Specialized grinding equipment | ✗ Pro service | $15–30 per blade | 2–3× per year |
| Jointer / planer knives | Precision grinding, matched set | ✗ Pro service | $15–30 per set | Every 6 months |
| Router bits | Diamond hone for touch-ups only | ~ Mostly pro | $10–20 per bit | When burnishing |
| Carving tools | Slip stones, strop | ✓ Home | Included in kit | Per session |
Sharpening a good carbide blade 3–4 times roughly triples its working life — often the difference between replacing a $90 blade annually or every third year.
The 20-Minute-Per-Week Rhythm
Every Session
Brush off sawdust, wipe pitch from blades, inspect edges and handles before the first cut. Two minutes, every time.
Weekly
Wipe all bare steel with light oil, check drawer humidity, strop the working edges. Roughly 20 minutes total.
Every 6 Months
Deep sharpening rotation: regrind any nicked primaries, service saw blades, re-flatten water stones, refresh silica packs.
The micro-bevel trick: a 30° micro-bevel over a 25° primary lets you touch up in under a minute, because you only polish 1–2 mm of steel.
$100–150 covers it: coarse/fine diamond plate, 8000-grit water stone, strop, and honing guide. Skip the powered water-cooled systems.
Send out carbide: saw blades, jointer/planer knives, and router bits go to a service at $15–30 per blade — 3–4 sharpenings roughly triple blade life.
Prevention beats removal: light oil, dry storage off concrete, no steel-on-steel contact, and humidity under 60%.
Cadence wins: clean every session, oil weekly, deep-sharpen every six months — about 20 minutes of weekly attention.
Why a Dull Blade Costs You More Than a Sharp One
A dull tool is more expensive than a sharp one, full stop. A dull edge tears wood fibers instead of severing them, so you sand more — burning through 220-grit paper and an extra half hour per project. It forces you to push harder, which wrecks your accuracy and your wrists. And a plane blade that’s lost its edge can chip or catch, turning a smoothing pass into a gouge you’ll chase across the whole board.
Sharpness is also a safety system. Woodworking injuries cluster around loss of control — a chisel skidding, a hand slipping toward a blade that needed too much pressure. A truly sharp chisel parts pine end grain with thumb pressure alone. If you’re muscling it, the tool is telling you something.
Here’s the test I use: hold a board’s end grain up and take a light pare across it with a chisel. A sharp edge leaves a glassy, translucent shaving. A dull one crumbles the fiber and leaves a matte, fuzzy surface. Ten seconds, no guesswork.
The economics favor maintenance, too. A quality bench chisel costs $40–70. Replace it every time it goes dull and you’ll spend more in two years than a full sharpening kit costs once. According to Wood Magazine’s long-term tool testing, a properly maintained carbon-steel edge can be refreshed dozens of times before it needs regrinding [1]. Sharpening isn’t a chore bolted onto woodworking — it is woodworking.
As an affiliate, we earn on qualifying purchases.
The Three Habits That Keep Tools Alive: Clean, Dry, Inspect
Tool maintenance is 90% three habits: clean off pitch and sawdust after use, keep metal dry and oiled, and inspect edges before you start work. Do those consistently and rust, pitting, and mystery nicks mostly disappear from your life.
Cleaning matters more than people think. Pine pitch and dried resin on a table saw blade raise friction and heat, which degrades the blade’s temper at the edge over time. A ten-minute soak in mineral spirits or a dedicated pitch remover, then a nylon-bristle scrub, restores a carbide blade’s cutting feel dramatically. I do my saw blades two or three times a year — more when I’m ripping construction pine, which is basically sap with grain. Concrete example: last spring I built a workbench from big-box SPF 2x lumber, and by the third rip my 40-tooth blade was leaving scorch marks on the cut edges. It wasn’t dull — it was glazed in pitch. One mineral-spirits soak and the blade cut like new again, no sharpening service needed.
Storage is where most garage shops fail. Bare concrete floors breathe moisture; a chisel rolled into a drawer against other steel will develop rust freckles within a week in a humid summer. I learned this the expensive way: my first set of chisels spent one August loose in a metal drawer, and by September every edge had orange freckles that cost me an hour with abrasive pads and oil to remove. Solutions are cheap:
- Wipe metal with a light machine oil or camellia oil before storage — a 2-second wipe per tool
- Store edge tools in a rack, on magnetic strips, or in a canvas roll — never loose in a drawer
- Toss silica gel packs or a rust-inhibiting vapor capsule in tool drawers and chests
- Keep a cheap hygrometer on the wall; sustained humidity above 60% means you need a dehumidifier, not better oil
Inspection is the third habit. Before each session, pull your edges and look — nicks, corrosion, loose handles, a chip in a plane iron’s corner. Catching a 0.5 mm nick when it happens means a one-minute touch-up on a 8000-grit stone. Catching it three months later means a full regrind on coarse diamond plates and twenty minutes you didn’t budget. A real scenario: I once tapped a chisel sideways to lever out a waste chunk (bad habit, don’t copy it) and put a tiny nick in the corner. Two minutes on the stone that evening and it was gone. A friend did the same thing, kept working with it for a season, and every paring cut left a score line down the board until the regrind.
diamond stone water stone honing set
As an affiliate, we earn on qualifying purchases.
As an affiliate, we earn on qualifying purchases.
How to Sharpen Chisels and Plane Blades: A Step-by-Step Method
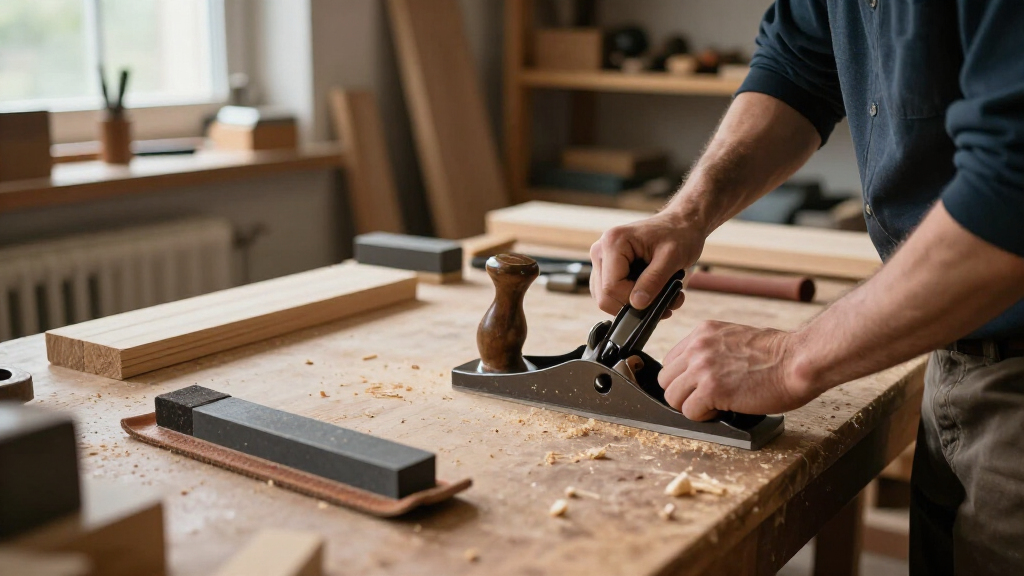
Sharpening a chisel or plane blade is a four-step process: flatten the back, grind the primary bevel, hone a micro-bevel, and strop. Hold a consistent angle — 25° primary bevel with a 30° micro-bevel is the standard for bench chisels — and the whole routine takes under five minutes once you’ve practiced it.
- Flatten the back. Rub the flat side of a new chisel on progressively finer stones (start 400–1000 grit) until you see a uniform scratch pattern from edge to about 25 mm back. Do this once in the tool’s life; it’s tedious but it’s the foundation of everything after.
- Grind the primary bevel to 25°. Use a coarse diamond plate, an 800-grit water stone, or a bench grinder with a light touch. You only regrind when the edge is chipped or after many honings — dip in water constantly if you use a grinder, because blue steel is dead steel; overheating destroys the temper.
- Hone a 30° micro-bevel. Bump the angle up 5° in a honing guide and work the edge on 1000, then 4000–8000 grit. This is the step you repeat 95% of the time, and because you’re only polishing 1–2 mm of steel, it takes under a minute.
- Strop. A few pulls on leather charged with chromium-oxide compound removes the wire burr and polishes the edge to a level stones alone struggle to reach.
Use a honing guide — the $15 side-clamp kind or a $60 Eclipse-style roller — until freehand angles live in your wrists. Freehand is faster for pros, but beginners who skip the guide almost always roll the angle steeper with every pass until the bevel is a blunt 40° wedge that cuts nothing.
Real example: my vintage Bailey No. 4 plane, bought rusted for $35 at a flea market, needed a full regrind and back flattening — about 40 minutes. Since then it gets a 90-second micro-bevel touch-up maybe every third project. That plane now leaves finished surfaces that skip most sanding. The math on sharpening time never lies.
rust prevention oil for woodworking tools
As an affiliate, we earn on qualifying purchases.
As an affiliate, we earn on qualifying purchases.
Water Stones vs. Diamond Plates vs. Sandpaper: Which Sharpener Fits Your Shop
For a home shop, the practical choice is between water stones, diamond plates, and honing on sandpaper (the Scary Sharp method). Diamond plates win on speed and zero maintenance; water stones win on final polish; sandpaper wins on upfront cost. Here’s the honest breakdown I give anyone setting up a first sharpening station.
| Method | Upfront Cost | Speed | Maintenance | Best For |
|---|---|---|---|---|
| Water stones (1000/8000 combo) | $70–130 | Fast cutting | Must flatten; soak (some) | Finest polish, cabinet work |
| Diamond plates (coarse/fine/x-fine) | $80–150 | Very fast | Rinse and store dry — that’s it | Flattening backs, hard steels, low fuss |
| Sandpaper + glass plate | $20–40 to start | Good | Paper wears out; recurring cost | Testing the waters, occasional sharpening |
My garage-shop setup: a double-sided diamond plate for coarse work and back flattening, plus an 8000-grit water stone just for final honing, plus a strop. Total around $120, and it handles chisels, plane irons, spokeshaves, and card scrapers. That combo covers everything a small shop needs without the water-cooled powered systems that cost more than a decent table saw blade set.
One honest caveat: water stones cut fast because they’re soft, which means they dish in the middle and need flattening — a few passes on your diamond plate or a sheet of 120-grit on float glass every few sessions. Skip that and you’ll hone a convex bevel without noticing. Diamond plates never dish, which is exactly why I keep one in the kit even though the water stone gives the finer final edge.
To make it concrete with two woodworkers I know: my friend Dan started with the Scary Sharp method — sandpaper on a float-glass plate — and it served him well for his first year of occasional projects, maybe $8 of paper at a time. But once he was honing after every session, the recurring paper costs passed the price of a diamond plate within a year, so he upgraded. Meanwhile another friend who does fine cabinet work went straight to water stones because the 8000-grit polish leaves the mirror surface his paring chisels need for clean dovetail tails. Different shops, different right answers — pick the one that matches how often you sharpen and what you build.
carbide saw blade sharpening service
As an affiliate, we earn on qualifying purchases.
As an affiliate, we earn on qualifying purchases.
What You Should Never Sharpen Yourself (and What to Send Out)
Not every blade belongs on your bench. Carbide-tipped table saw blades, jointer and planer knives, and router bits need specialized diamond grinding equipment that no home shop should own — send those to a sharpening service. Chisels, plane irons, hand saws, drill bits under 1/2 inch, and card scrapers are all home jobs.
A local saw sharpening service typically charges $15–30 per table saw blade and $1–2 per inch of planer knife. That sounds like an errand until you compare it to $90–150 for a quality replacement blade — you can sharpen a good carbide blade three or four times before its tooth geometry is spent, which triples or quadruples its working life. Concrete example from my own shop: my Forrest WWII-style blade cost $120. I’ve had it sharpened twice at $25 a trip, so I’m into it for $170 total — versus the $480 I’d have spent buying three new blades over the same years of work. That’s the whole business case in one receipt stack.
How do you know a blade needs the trip? Watch the cut, not the blade. Burn marks on ripped edges, a need to feed slower than usual, or tear-out in plywood that used to cut clean — those are dull signs. A real scenario: I was ripping birch plywood for cabinet sides and noticed the cut edges were scorching and I had to inch the board through. The blade looked fine to the eye, but the sharpening service fixed it for $20 and the saw went back to feeding at full speed with clean edges. A chipped tooth is a visual inspection item: unplug the saw (always — this is non-negotiable around any powered tool), slide the blade out, and check the tips under a bright lamp.
When to replace instead of sharpen? If a chisel’s edge has a crack, if its handle is split, or if repeated grinding has eaten the blade down past the tempered zone, retire it. Same for a saw blade missing multiple carbide tips — the re-tip cost exceeds a new blade. Example: a shop-mate kept sending out a 10-inch blade that had lost two carbide tips and kept chewing the re-tip money until a new $100 blade made more sense than a $70 repair on tired steel. Sharpening extends life; it doesn’t grant immortality.
A 10-Month Maintenance Schedule That Fits a Real Garage Shop
Most woodworkers fail at maintenance because they treat it as a big event instead of small, scheduled habits. Here’s the cadence I actually follow in a shop that runs evenings and weekends — scale it to however often you’re at the bench.
- Every session: wipe blades and cast iron tables dry, quick visual check of edges, strop or micro-bevel anything that’s lost its bite.
- Weekly: oil metal hand-tool surfaces, empty dust collector (my 650 CFM single-stage bag clogs and loses airflow fast when it’s past half full), vacuum tool drawers and the floor around the bench.
- Monthly: clean saw blade and drill bits with mineral spirits, check and lubricate moving parts on machinery (ways, trunnions, adjusting screws), test humidity level in the shop.
- Every 6 months: deep sharpening session — full honing of all chisels and plane irons, card scraper re-burring, send out any carbide blades that need it.
- Annually: inspect power tool cords and switches, check machinery belts, wax cast iron surfaces, and inventory what needs replacing before the busy fall project season.
That’s it. Twenty minutes a week, honestly. The woodworkers with pristine vintage tools aren’t obsessives — they’re just the ones who wipe the table saw down while the glue is drying instead of scrolling a phone. Small habits, compounded, are the entire secret.
And a note on power: any maintenance involving opening a tool’s housing, replacing cords, or working on motors is electrical work — unplug the tool, and if it goes beyond a simple swap, use a licensed professional. Code and your fingers both deserve that respect.
Frequently Asked Questions
How often should I sharpen my woodworking tools?
Hone chisels and plane irons whenever cutting performance drops — for most hobbyists that’s every few projects, or after heavy end-grain or exotic-wood work. The micro-bevel touch-up takes under a minute, so sharpening a little and often beats waiting for edges to go truly dull. A full regrind at 25° is only needed for chips or after many honings.
Do I need expensive sharpening equipment to get good results?
No. A double-sided diamond plate, an 8000-grit water stone, a leather strop, and a $15–60 honing guide total around $100–150 and produce edges as sharp as any powered system. Sandpaper on float glass (the Scary Sharp method) works for under $40 if you’re just starting. Spend the savings on wood.
Can I sharpen my table saw blade at home?
Not really — carbide-tipped blades need diamond grinding wheels and precise tooth geometry that home equipment can’t hold. Use a local sharpening service, typically $15–30 per blade. You can and should clean blades at home with mineral spirits, though; pitch buildup mimics dullness and cleaning alone often restores cut quality.
What’s the best way to prevent rust on hand tools in a garage shop?
Three layers: wipe metal with light machine or camellia oil before storage, keep edges in racks or rolls rather than loose in drawers, and control humidity — above 60% relative humidity, get a dehumidifier. Silica gel packs or vapor capsules in tool chests cover the gaps. Prevention takes seconds; removing pitting takes hours.
How do I know when a tool needs replacing instead of sharpening?
Replace when the steel is cracked, when the handle is split or loose beyond repair, or when repeated grinding has shortened a chisel past its tempered zone. For saw blades, missing carbide tips on multiple teeth means re-tipping costs more than a new blade. If sharpening no longer restores cutting performance despite good technique, the tool is telling you it’s done.
Is freehand sharpening better than using a honing guide?
For beginners and intermediates, a guide is strictly better — it guarantees a consistent angle, which is the entire game. Freehand is faster once the motion is trained into you, but most people who skip the guide early end up steepening their bevels gradually until the tool stops cutting well. Use the guide; go freehand later if you want to.
Conclusion
If you take one thing from this guide: sharpness is maintenance, not magic. Set your angles once with a honing guide, keep a strop on the bench, and give your edges ninety seconds when they ask for it. Everything else — the rust wipes, the drawer silica, the annual blade service — protects the time you’ve already invested in those edges.
There’s a moment every woodworker remembers: the first time a truly sharp plane glides through a board and rolls up a shaving you can read through. That moment isn’t a talent thing. It’s a Tuesday thing, if your tools are ready for it. Make yours ready.