TL;DR

Get business pricing on tools and workshop supplies
- Business-only prices and quantity discounts
- Tax-exempt purchasing
- Multiple users, one account, clear invoices
Build a workbench with integrated storage by choosing its jobs and dimensions, assembling a braced frame, adding a lower shelf and fitted drawer module, and fastening a durable top. The example below uses a 60-by-28-inch plywood top at a finished height of 36 inches, with checkpoints for square, drawer clearance, and stability.
A drawer that hits your vise can spoil an otherwise solid workbench before you make the first cut on it. You need a surface that stays put while you plane an edge, somewhere sensible to put your drill, and enough room underneath to tighten a clamp. Building those features together takes a little planning before the saw starts, especially when your workshop shares space with a car.
This guide walks you through a 60-by-28-inch bench with a laminated plywood top, a braced timber frame, a lower shelf, and an optional drawer module that turns the shelf into more useful storage. You get working dimensions, a cut list, and assembly checks you can use at each stage. You also get clear places to adjust the design for your height, tool cases, and available floor space.
Your first decisions should focus on the work you actually do. Repairing a lawn mower needs different clearances from cutting dovetails or assembling cabinet doors. Start with those everyday jobs, and you can build storage that fits without sacrificing the open space that makes a bench useful.
Mock up the 60-by-28-inch footprint and your preferred working height before cutting; include space for an open drawer and long boards.
For the stated 36-inch height and 1½-inch top, cut legs to 34½ inches, adjusting for actual plywood thickness and any added feet.
Square and brace the frame before installing storage; use the rear plywood panel to resist sideways racking.
Measure the completed cabinet opening and use the selected slide clearances to calculate drawer width.
Keep heavy tools low, preserve clamp access, and inspect rocking, racking, and drawer behavior before everyday use.
Step-by-Step Guide to Building a Workbench with Integrated Storage
Start with the work you do. Build a square, braced base, add storage around your tools and clamps, then fasten a flat, durable top. This practical plywood-and-timber design brings the whole sequence together.
Length × depth × height. Test the footprint and working height before cutting.
Leg length + laminated top thickness. This example has no feet or casters.
Before the rear panel
Measure actual thickness
One pair, if adding a drawer
Connections to plan
Make the bench fit the job.
Tape the footprint onto the floor. Mock up the height with a securely supported surface. Include an open drawer, long boards, and the route around a parked car.
Leave room to move
A common starting depth is 24–30 inches. Extra depth helps only if you can reach the back. Test the example’s 60 × 28-inch outline in your actual workspace.
Match your posture
Lower can help with hand-planing; higher can suit detailed assembly. Preserve knee space for seated work. Machine outfeed height must suit the machine.
Protect the working space
Measure tool cases and vise hardware before placing drawers. Keep access beneath the top for clamps, and leave space for awkward repair jobs.
Adjusting the height? Leg length = desired finished height − actual top thickness − installed height added by feet or casters. Measure the assembled top before cutting the legs.
Turn the dimensions into parts.
This cut list assumes actual 3½ × 3½-inch posts, 1½ × 3½-inch rails, and full ¾-inch plywood. Recalculate affected dimensions if your stock differs.
| Part | Material | Qty. | Finished size |
|---|---|---|---|
| Legs | 4 × 4 lumber | 4 | 34½ long |
| Front and rear rails | 2 × 4 lumber | 4 | 47 long |
| Side rails | 2 × 4 lumber | 4 | 15 long |
| Top layers | ¾-inch plywood | 2 | 60 × 28 |
| Lower shelf | ¾-inch plywood | 1 | 47 × 22 |
| Rear bracing panel | ¾-inch plywood | 1 | 54 × 30½ |
| Top attachment cleats | ¾ × 1½-inch lumber | 8 | 4 long |
Layout detail: Rails stand on edge between the legs, with outside faces flush. Upper rail tops align with leg tops. Lower rail bottom edges sit 4 inches above the floor.
The connector determines the joint.
Select framing connectors intended for this rail-to-leg arrangement. There are 16 rail ends; the connector instructions determine bracket quantities and specified screws or nails. Drywall screws are not a substitute, and screws into rail end grain do not establish an equivalent connection.
Also plan for wood glue, sheet-good screws, eight top cleats, finish, and—if building the drawer—one pair of 18-inch slides, mounting screws, and a pull. Have a saw and guide, drill/driver, clamps, square, tape measure, and countersink bit ready.
Build rigidity before adding storage.
Use a flat assembly surface and check the work at each stage. A thick top cannot compensate for a frame that racks sideways.
-
1
Cut and label
Choose straight, dry lumber. Confirm thicknesses, mark matching parts, and support sheet goods securely. Follow your cutting tool’s operating instructions.
Checkpoint: Matching rails and all four legs agree in length.
-
2
Assemble and square
Position the rails between the legs and install the selected connectors as instructed. Compare diagonals across each rectangular assembly and check corners with a square.
Checkpoint: Diagonals match and the base sits without rocking.
-
3
Brace, then fit storage
Secure the rear plywood panel from the 4-inch floor mark to the leg tops while holding the frame square. Fit and fasten the lower shelf; size the optional drawer module from the completed opening.
Checkpoint: The rear panel resists sideways racking before drawers go in.
-
4
Laminate and fasten the top
Glue the two plywood layers on a flat reference surface and allow the adhesive to cure as directed. Center the top over the completed base and secure it through the cleats, using screws that cannot pierce the work surface.
Checkpoint: With full-thickness stock, overhangs are 3 inches at the ends and about 2⅝ inches front and back.
The rear panel adds ¾ inch to the timber frame’s depth, making the completed base 22¾ inches deep. Account for that panel when centering the 28-inch top.
Fit the drawer around the workholding.
A drawer that hits a vise is a planning failure you can catch early. Keep the cabinet module optional until the frame, slide requirements, and tool clearances are measured.
= opening width
− total required side clearance
For slides specified this way, use the measured cabinet opening and the manufacturer’s combined left-and-right clearance. Other slide systems may require different drawer construction or calculations.
- 18-inch slides: Confirm cabinet depth and the required drawer length from the slide instructions.
- Square and parallel: Mount slides as instructed and test travel before loading the drawer.
- Custom module: Cabinet and drawer parts are additional to the base cut list; size them after assembly.
Keep heavy tools low. Use the lower shelf for bulky cases and reserve shallow drawers for frequently used small tools.
Preserve clamp access. Check the space below the top and around vise hardware, fasteners, and planned dog holes.
Avoid interference. Do not let a drawer, cabinet wall, or pull collide with workholding or block needed knee space.
Plan mobility separately. Casters change height and stability. Select them for the complete loaded bench and consider retractable casters or leveling feet.
Drawers and doors reduce dust accumulation; they do not make storage dustproof.
From intended jobs to a usable bench.
-
01
Jobs
Set reach, height, and clearances
-
02
Frame
Check square and rear bracing
-
03
Storage
Measure openings and slide fit
-
04
Workholding
Check top, vise, and clamp access
-
05
Use
Inspect stability and drawer travel
Before everyday use: Ease sharp edges, remove splinters, and allow the selected finish to cure. Check for rocking, racking, loose hardware, and binding drawers. Add intended tools gradually and recheck stability with drawers extended.
No universal load rating: These are worked dimensions, not a load-capacity calculation. Materials, joints, hardware, and construction quality determine the finished bench’s performance.
1. Choose Dimensions That Let You Work Comfortably
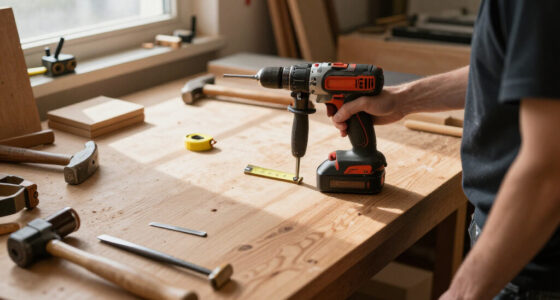
Your Step-by-Step Guide to Building a Workbench with Integrated Storage starts with choosing the bench’s main jobs and testing its footprint. Use 60 inches long, 28 inches deep, and 36 inches high as this example’s starting dimensions, then adjust them around your reach, working posture, tools, and available walking space.
Mark the outline on your garage floor with painter’s tape, then place your largest tool case inside it. Stand where you would normally work and pretend to pull out an 18-inch drawer. If that movement backs you into a parked car or shelving unit, shorten the bench or change the drawer location before buying materials.
Common starting footprints run from 48–72 inches long and 24–30 inches deep, but extra depth only helps when you can reach it. A bench against a wall can turn its back edge into a dusty parking lot for forgotten screws. Keep frequently used tools within comfortable reach and reserve deeper spaces for occasional-use items.
Test height with a securely supported temporary surface before cutting the legs. A lower surface can help you put your weight behind a hand plane; a higher one can save your back during detailed assembly. If you work seated, preserve knee space instead of filling every opening with drawers.
- Woodworking: reserve space for a vise, clamps, and long boards.
- Repairs: measure tool cases and awkward equipment before sizing shelves.
- Assembly: favor an accessible surface and removable organizers.
- Machine outfeed: set the height to suit the machine and check its operating clearances.
garage workbench with storage drawers
As an affiliate, we earn on qualifying purchases.
As an affiliate, we earn on qualifying purchases.
2. Turn Your Sketch into a Cut List That Fits
Your Step-by-Step Guide to Building a Workbench with Integrated Storage needs a dimensioned plan before you cut anything. This example uses a 54-by-22-inch timber frame, four legs, upper and lower rails, and a plywood back panel; the larger top provides useful overhang while the back panel resists sideways movement.
Use straight, dry construction lumber and measure every material thickness. The cut list assumes 4-by-4 stock measures 3½ inches square, 2-by-4 stock measures 1½ by 3½ inches, and plywood measures a full ¾ inch. If your plywood is thinner, recalculate leg length and cabinet parts instead of trusting the label.
| Part | Material | Quantity | Finished size |
|---|---|---|---|
| Legs | 4-by-4 lumber | 4 | 34½ inches long |
| Front and rear rails | 2-by-4 lumber | 4 | 47 inches long |
| Side rails | 2-by-4 lumber | 4 | 15 inches long |
| Top layers | ¾-inch plywood | 2 | 60 × 28 inches |
| Lower shelf | ¾-inch plywood | 1 | 47 × 22 inches |
| Rear bracing panel | ¾-inch plywood | 1 | 54 × 30½ inches |
| Top attachment cleats | ¾ × 1½-inch lumber | 8 | 4 inches long |
The front-view layout reads: 3½-inch leg → 47-inch clear opening → 3½-inch leg, totaling 54 inches. The side-view layout reads: 3½-inch leg → 15-inch clear opening → 3½-inch leg, totaling 22 inches. Rails stand on edge between the legs, with their outside faces flush with the legs’ outside faces.
Set upper rail tops flush with the leg tops and lower rail bottom edges 4 inches above the floor. The rear panel runs from that 4-inch mark to the leg tops and adds ¾ inch to the frame depth. Centering the top over the completed base leaves 3-inch end overhangs and approximately 2⅝ inches at the front and back.
Dimension note [1]: finished height equals leg length plus top thickness when the legs sit directly on the floor: 34½ + 1½ = 36 inches. The 47-inch rail length comes from 54 − 3½ − 3½. These are worked dimensions for this design, not a load-capacity calculation.
plywood workbench top 60×28 inches
As an affiliate, we earn on qualifying purchases.
As an affiliate, we earn on qualifying purchases.
3. Buy the Hardware Before You Start Cutting
Your Step-by-Step Guide to Building a Workbench with Integrated Storage becomes easier to follow when you select hardware before preparing the parts. Buy frame connectors, suitable screws, and drawer slides early, because their installation requirements determine joint details, drawer width, fastener placement, and the tools you need during assembly.
For this butt-jointed frame, use framing connectors intended for the lumber arrangement at the rail-to-leg joints. You have 16 rail ends to connect; the selected connector’s instructions determine how many brackets and which fasteners each end needs. Do not replace specified connector fasteners with drywall screws or assume screws driven into rail end grain provide the same connection.
- Frame hardware: compatible connectors and their specified screws or nails.
- Sheet-good assembly: wood glue and screws suited to the measured material thickness.
- Storage hardware: one pair of 18-inch drawer slides, mounting screws, and a pull if you build the module below.
- Surface supplies: sandpaper, a suitable finish, and optional replaceable hardboard.
- Working tools: saw and guide, drill/driver, clamps, square, tape measure, and countersink bit.
A budget frame can work well with carefully selected construction lumber; smoother cabinet-grade plywood makes storage easier to build and finish. A thick hardwood top may suit frequent hand-tool work, but it adds cost, weight, and movement details. For a garage assembly bench, spend first on straight stock and reliable joints.
Support sheet goods fully, clamp your guide, and use a sharp blade suited to plywood. Wear eye and hearing protection and capture dust at the tool; a vacuum connection suits many portable saws, while stationary machines may specify much greater airflow. Match dust collection CFM and hose requirements to the machine rather than choosing one airflow figure for the entire shop.
As an affiliate, we earn on qualifying purchases.
4. Build a Base That Stops the Sideways Shuffle
A rigid work surface starts with a square, braced base that resists racking—the sideways distortion that turns a rectangle into a leaning shape. Assemble the two end frames first, join them with the long rails, and attach the rear plywood panel while the base remains square and fully supported.
- Label and cut the lumber. Keep matching rails equal in length and cut leg ends square.
- Assemble two end frames. Join each pair of legs with upper and lower 15-inch rails.
- Connect the end frames. Fit the four 47-inch rails at the matching heights.
- Check the geometry. Compare diagonals across the top and rear rectangles, then check corners with a square.
- Attach the rear panel. Fasten it to both rear legs and the rear upper and lower rails.
- Fit the shelf. Set it on the lower front and rear rails, between the left and right legs.
Use a flat assembly surface, because a twisted setup can teach the entire frame bad habits. Aim to bring diagonal measurements within about ⅛ inch across this base, then confirm that all four legs touch your flat reference surface. Matching diagonals help establish square, but they do not alone prove the frame is free of twist.
Predrill plywood near its edges and use screws that penetrate the framing without emerging through exposed faces. For the rear panel, a practical layout places screws approximately 6 inches apart along supported edges, with holes kept clear of panel edges and connector hardware. The panel should sit against the framing without forcing the base out of square.
A thicker top cannot fix loose joints. If the base sways when you push sideways, correct the connections and bracing before adding storage.
For example, a hand plane can make an unbraced bench shuffle across the floor even when the top feels heavy. The back panel ties the rear rectangle together so those sideways forces meet resistance. Check rocking and racking separately: an uneven floor and a flexible frame need different fixes.
drawer slides for workshop storage
As an affiliate, we earn on qualifying purchases.
As an affiliate, we earn on qualifying purchases.
5. Fit a Drawer Without Losing Useful Clamp Space
Integrated storage works best when you build it around measured tools and leave access for clamps beneath the top. Start with the lower shelf, then add a removable 22-inch-wide cabinet module on one side; this keeps bulky cases accessible while giving small tools a drawer close to your working position.
For the example module, use ¾-inch plywood for two sides measuring 22 by 18 inches and a top and bottom measuring 20½ by 18 inches. Fit the top and bottom between the sides, then attach a ¼-inch back measuring 22 by 22 inches. The completed cabinet measures 22 inches wide, 22 inches high, and 18¼ inches deep.
Glue, predrill, and screw the carcass together, checking square before attaching its back. Sitting on this bench’s shelf, the cabinet leaves 4¼ inches below the worktop, assuming the stated material thicknesses. Fasten the module securely to the shelf and framing with accessible brackets; verify actual clamp clearance before committing to its position.
Install one shallow drawer near the cabinet’s top and leave the space below open for a sander or small case. If your chosen slides require ½ inch of clearance per side, the 20½-inch cabinet opening takes a 19½-inch-wide drawer. That clearance is an example: follow your slide manufacturer’s dimensions, including any drawer-length setback.
Drawer calculation [2]: opening width minus both slide clearances gives outside drawer width: 20½ − ½ − ½ = 19½ inches. For an 18-inch-long box made from ½-inch plywood, cut two sides at 18 by 4 inches and two front/back pieces at 18½ by 4 inches, fitting the latter between the sides. A 19½-by-18-inch applied plywood bottom completes the box; use it for light tools and build a stronger bottom arrangement for heavier contents.
Fit a separate inset front only after the drawer runs smoothly, allowing a small, even gap around it. Put chisels, pencils, and measuring tools in the shallow drawer and keep heavy equipment low. Drawers reduce settling dust, but closed storage is not dustproof.
6. Add a Flat Top and Workholding You Can Actually Use
Two laminated plywood layers provide a practical top for assembly and general repairs when you glue them on a flat reference surface. Fasten the completed top to the frame through internal cleats, then position clamps or a vise only after checking the paths of drawers, screws, and any planned dog holes.
Dry-stack the sheets first and check for rocking or visible gaps. Spread wood glue according to its instructions, align the layers, and clamp them against a flat support with cauls that distribute pressure. You can add screws from underneath, sized to pull the layers together without breaking through the upper face; mark their locations before drilling future workholding holes.
Mount the eight cleats along the inside faces of the upper rails, with their top edges flush. Attach each cleat securely to the rail, then screw upward into the plywood top through clearance holes in the cleats. Check every screw length against actual thickness: a sharp point peeking through the surface can scratch a finished cabinet door.
For a front vise, mock up its body and handle travel with a cardboard outline before drilling. Open the nearby drawer and swing the handle through its full arc. A dog hole also needs clear space underneath, so reserve a workholding corridor instead of drilling through the top directly over the cabinet.
Ease sharp edges, sand away splinters, and apply a thin, repairable finish suited to your work. Let it cure for the manufacturer’s stated period before setting projects on it. If you choose a solid-wood top instead, use attachments that permit seasonal movement across the grain.
7. Test the Finished Bench Before Giving It Heavy Work
Test stability, drawer travel, and joint tightness before loading the bench for everyday use. Begin with the empty bench, add your intended tools gradually, and check it again under ordinary working forces; a homemade bench has no universal weight rating, and a brief test does not establish a certified capacity.
Place the bench in its working position and press down at each corner to find rocking feet. Correct minor floor irregularities with securely retained shims or suitably installed leveling feet. Then push sideways at the top: movement in the joints calls for connection or bracing repairs, not another layer of plywood.
- Inspect connections. Check frame hardware, panel screws, cleats, and cabinet attachments.
- Load gradually. Put heavier tools low and watch for shelf deflection.
- Operate the drawer. Check smooth travel, fastener clearance, and stability with its intended contents.
- Try normal workholding. Clamp scrap wood and apply ordinary working pressure.
- Recheck after use. Look for loosened hardware, developing wobble, and rubbing drawer parts.
If you later add several drawers, remember that extended drawers shift weight forward. Open one at a time and address any tendency to tip before using the storage. A slide’s rating covers specified hardware conditions; it does not establish the strength of your drawer bottom or cabinet attachments.
For mobility, select hardware for the complete loaded bench and its mounting arrangement. Retractable casters let the bench rest on fixed feet during work, which can help when planing a stubborn board. Keep cords away from moving drawers and cutting paths; unplug tools before adjustments, and hire a licensed electrician for new fixed wiring or circuits, with permits where required.
Frequently Asked Questions
Can you build this workbench with basic tools?
You can build this design with a guided circular saw, drill/driver, clamps, and a square, provided you support the material securely. Accurate repeat cuts and careful measuring matter more than owning a table saw. Start with the shelf version if drawer fitting feels like too much for your first project.
Is a 1½-inch plywood top thick enough?
Two ¾-inch plywood layers make a practical general-purpose assembly surface on this supported frame. Suitability still depends on the load, support spacing, and workholding hardware. Check vise and holdfast requirements before assuming that thickness suits every woodworking task.
How much should you budget for materials?
Build your estimate from a local materials and hardware list, because plywood grades, lumber prices, and hardware choices vary. Include glue, connectors, specified fasteners, slides, finish, and any vise or mobility hardware. Price the shelf-only version first, then add the drawer module as a separate cost.
Can you add storage to an existing workbench?
You can add a removable shelf or cabinet module after checking the existing frame’s condition and available openings. Measure clamp access, vise movement, and knee space before building it. Repair loose joints or missing bracing before adding weight.
How do you keep a long lower shelf from sagging?
Reduce unsupported span with an intermediate support or add suitably attached reinforcement beneath the shelf. On this design, the front and rear rails support the shelf along its long edges, but concentrated heavy loads still deserve attention. Keep heavy cases near supports and inspect for deflection as you load the bench.
Conclusion
Build the bench around your working habits, then fit storage into the space those habits leave available. Before you cut, lay your drill case on the floor, clamp a board to your temporary height mock-up, and mark where the vise handle will travel. Those simple checks make the dimensions personal and useful, saving you from a drawer you cannot open or a top that leaves your shoulders aching.
Your most valuable result is a stable place to work where the next tool sits within easy reach. Keep the fasteners accessible, the storage adjustable, and the workholding space clear so the bench can change with your projects. Aim for the quiet satisfaction of a drawer sliding shut beneath a steady top while a clean shaving curls off the board above.
Fall yard work Picks
leaf blowers
As an affiliate, we earn on qualifying purchases.