
TL;DR

Get business pricing on tools and workshop supplies
- Business-only prices and quantity discounts
- Tax-exempt purchasing
- Multiple users, one account, clear invoices
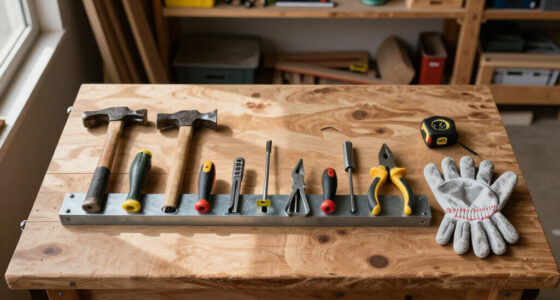
Magnetic tool holders let you grab and return tools one-handed in under two seconds, which industry studies credit with up to a 30% boost in workspace efficiency. They cost less than pegboard, hold surprisingly heavy tools when built on neodymium magnets, and mount to almost any surface in your shop.
I once spent eleven minutes looking for a 3/8-inch combination wrench. Eleven minutes. It was under a pile of cutoffs, behind the dust collector hose, exactly where wrenches go to disappear. That’s the day I screwed my first magnetic tool holder to the wall above my bench, and I’ve never organized a shop the same way since.
Here’s the honest pitch: a magnetic strip is the cheapest, fastest upgrade you can make to a cluttered garage shop. A 12-inch bar runs $10–20, mounts with two screws, and gives every chisel, wrench, and driver a home you can see from across the room. According to industry studies, this kind of visible, grab-and-go storage can boost workspace efficiency by up to 30% [1].
In this post, I’ll walk you through the real benefits — speed, safety, tool protection, cost — plus the recent upgrades worth paying for (neodymium magnets, modular strips), the mistakes that get tools dropped on concrete, and how to choose holders for your actual tools, not the ones in the catalog photo.
Mount magnetic bars with screws into studs or a cleat — never rely on adhesive for tools heavier than hex keys.
Choose neodymium-magnet holders for anything over about a pound, including hammers and cordless drills; ferrite bars are fine for drivers and chisels.
Wipe magnet faces monthly to remove metal shavings — swarf buildup sits between tool and magnet and reduces holding power.
Magnetic strips beat pegboard for cost per tool and dust resistance; keep pegboard for non-magnetic tools like brass hammers and aluminum planes.
Keep strong magnets several inches away from digital calipers and electronics to avoid scrambled readings.
Shop Organization · Field Guide
The Benefits of Using Magnetic Tool Holders in Your Shop
A magnetic strip is the cheapest, fastest upgrade you can make to a cluttered garage shop. Grab-and-return a tool one-handed in under two seconds — and stop losing eleven minutes hunting for a wrench that rolled behind the dust collector.
01 · Speed & Workflow
Why One-Handed Access Changes How You Work
Workflow in a small shop is a loop: cut, measure, adjust, cut again. Every time that loop breaks because a tool is buried, you lose momentum — and momentum is the difference between finishing a cabinet door tonight or next Saturday. The satisfying thunk-clack of steel snapping onto a magnet is audible confirmation the tool went home. Rule of thumb after fifteen years in a two-car garage: if you use it more than once per project, it belongs on a magnetic strip within arm’s reach.
Highest Traffic
Drivers & Bits
The tools you touch twenty times per project. A bar above the bench means no drawer pulls mid-assembly.
Joinery Work
Chisels & Marking Tools
Swapped constantly during layout and fitting — visible at a glance, always six inches from where your hand reaches.
Machine Setup
Wrenches & Hex Keys
Fence adjustments, blade height, dust fittings — keep them at the machine that needs them, not across the room.
02 · Real-World Capacity
How Much Weight Can a Magnetic Bar Hold?
Neodymium magnets — the strongest permanent magnets in common use — will comfortably hold a framing hammer, a full wrench set, or a cordless drill, provided you respect mounting and weight limits. The honest caveat: holding power drops fast as you add leverage, vibration, and swarf buildup.
Reality check: weight ratings describe pull force flat against the magnet face. Cantilevered tools, machine vibration, and swarf buildup can cut real-world holding power by half. Wipe the magnet face monthly — if you can see fuzzy shavings from three feet away, it’s overdue.
03 · Compatibility Matrix
What Hangs Where: Tool-by-Tool Verdict
| Tool | Weight | Budget Ferrite Bar | Neodymium Bar |
|---|---|---|---|
| 6-in-1 screwdriver | ~5 oz | ✓ Easily | ✓ Easily |
| Wood chisel (1/2 in.) | ~10 oz | ~ Yes, by the blade | ✓ Yes |
| Framing hammer (20 oz) | ~1.5 lb | ~ Marginally | ✓ Yes |
| Cordless drill | 2.5–3.5 lb | ✗ No | ✓ Yes, if rated |
| Pipe wrench (14 in.) | ~4 lb | ✗ No | ~ Check rating carefully |
04 · The Wall-Space Decision
Magnetic Strips vs. Pegboard
For a small garage shop, magnetic holders beat pegboard on cost per tool, repositioning speed, and dust resistance. Pegboard wins on non-magnetic tools and locking tools in place. Most organized shops use both — the split follows the tools.
Magnetic Bars
~$25 / pair of 24″ bars · zero consumables
- Lower cost per tool held — a dozen drivers and chisels, no hooks to buy or bend
- Reposition tools in two seconds when your collection changes
- Smooth face wipes clean in one pass — pegboard holes and hook pockets trap fine dust
- Ideal near the sanding station and dust-heavy zones
Pegboard
$30–50 / 2×4 ft panel + hooks that walk off
- Holds non-magnetic tools: brass hammers, aluminum planes, stainless anything
- Handles coated or painted shanks that don’t stick well
- Better for saws and edges you don’t want contacting steel
- Locks tools in place for high-vibration areas
05 · Installation Routine
Mount It So It Never Lets Go
One bar I trusted to double-sided tape peeled off drywall and dropped three chisels onto concrete — two edges chipped, one lesson learned. Screws into studs or a cleat, not adhesive, for anything heavier than hex keys. It takes ten extra minutes.
Find Studs
Mark studs; if the bar lands between them, screw a 1×3 cleat across two studs first.
Clean Surfaces
Wipe wall and bar backing — drywall dust between them lets the bar rock loose over time.
Screw All Holes
Drive screws through every mounting hole. Two end screws on a 24″ bar means mid-bar flex.
Test Load
Hang your heaviest tool, push-pull firmly, and check for any movement.
06 · Key Takeaways
Six Rules Worth Your Wall Space
Screws, not adhesive. Mount bars into studs or a cleat — never trust tape for tools heavier than hex keys.
Neodymium over a pound. Ferrite bars are fine for drivers and chisels; hammers and drills need neodymium.
Wipe monthly. Metal shavings sit between tool and magnet and quietly reduce holding power.
Use both systems. Magnetic beats pegboard on cost and dust; keep pegboard for brass, aluminum, and stainless.
Mind the electronics. Keep strong magnets several inches from digital calipers and sensitive gear.
Match storage to tools. Bars above the bench and lathe, pegboard by the assembly table — follow the tools.
Why One-Handed Tool Access Changes How You Actually Work
Magnetic tool holders allow for quick, one-handed access to tools, and that single trait is what drives nearly every other benefit. You’re mid-cut, the phone rings or the blade wanders, and you need to set down a screwdriver and grab a square. With a drawer, that’s two hands, a pull, a rummage, and a shove closed. With a magnetic bar, it’s a swipe and a click back on the wall.
The sound is part of it — that satisfying thunk-clack of steel snapping onto the magnet. It’s audible confirmation the tool went home. You never wonder whether you put the caliper back, because you can see it hanging there, six inches from where your hand reaches without looking.
Think about what that does to your rhythm at the bench. Workflow in a small shop is a loop: cut, measure, adjust, cut again. Every time that loop breaks because a tool is buried, you lose momentum — and momentum is the difference between finishing a cabinet door assembly tonight or next Saturday.
Ease of access matters most for the tools you touch twenty times a project:
- Drivers and bits — the highest-traffic tools in any shop
- Chisels and marking tools you swap constantly during joinery
- Wrenches and hex keys for machine adjustments (fence, blade height, dust fittings)
My rule after fifteen years in a two-car garage: if you use it more than once per project, it belongs on a magnetic strip within arm’s reach of the machine or bench where you use it. Everything else can live in a drawer.
As an affiliate, we earn on qualifying purchases.
How Much Weight Can a Magnetic Bar Actually Hold?
Magnetic holders built on neodymium magnets — the strongest permanent magnets in common use today [2] — will comfortably hold a 20-oz framing hammer, a full set of combination wrenches, or even a cordless drill, provided you respect the mounting and weight limits. The honest caveat: holding power drops fast as you add leverage. A bar rated at 15 lb of pull force holds that weight flat against the magnet, not hanging off the end of a long screwdriver acting like a lever.
Here’s a realistic capacity picture from my own wall:
| Tool | Typical Weight | Holds on Budget Ferrite Bar? | Holds on Neodymium Bar? |
|---|---|---|---|
| 6-in-1 screwdriver | ~5 oz | Easily | Easily |
| Wood chisel (1/2 in.) | ~10 oz | Yes, by the blade | Yes |
| 20-oz framing hammer | ~1.5 lb | Marginally | Yes |
| Cordless drill | 2.5–3.5 lb | No | Yes, if rated |
| Pipe wrench (14 in.) | ~4 lb | No | Check rating carefully |
Two failure modes show up repeatedly in shops. First, cheap adhesive mounting on drywall — fine for a strip of hex keys, a lawsuit waiting to happen for anything over a pound. Second, metal shavings. If you do any grinding or filing nearby, swarf builds up on the magnet face and the tool no longer sits flush. That gap kills holding force. Wipe the bar monthly; I hit mine with a rag when the shavings get fuzzy enough to see from three feet away.
Weight ratings on magnetic holders describe pull force against the magnet face. Cantilevered tools, vibration from nearby machines, and swarf buildup can cut real-world holding power by half.
As an affiliate, we earn on qualifying purchases.
Magnetic Strips vs. Pegboard: What a Small Shop Should Choose
For a small garage shop, magnetic holders beat pegboard on cost per tool, repositioning speed, and durability — pegboard wins on holding non-magnetic tools and locking tools in place. Neither is the whole answer; most organized shops I’ve been in use both.
Consider the math. A 2×4-foot pegboard panel plus hooks runs $30–50, and every tool needs its own hook that walks off or bends under load. A pair of 24-inch magnetic bars costs about $25 total and holds a dozen drivers and chisels with zero consumables. When your tool collection changes — and it will — you slide things around on a magnet in two seconds. On pegboard, you’re re-threading hooks through holes and hoping the layout still works.
Dust is the quiet factor nobody mentions. My dust collector pulls 650 CFM at the machine, but ambient fine dust still settles everywhere. Pegboard holes and hook pockets trap it; a smooth magnetic bar wipes clean with one pass of a shop rag. In a woodworking shop, that alone decides the argument for anything near the sanding station.
Where pegboard still earns its wall space:
- Non-magnetic tools — brass hammers, aluminum-body planes, anything stainless
- Tools with coated or painted shanks that don’t stick well
- Saws and anything with an edge you don’t want contacting steel
My own shop runs magnetic bars above the bench and lathe, pegboard by the assembly table. The split follows the tools, and that’s the point: match the storage to what actually hangs there.
As an affiliate, we earn on qualifying purchases.
Mount Magnetic Holders So They Never Let Go
Secure installation means hitting studs or solid backing with screws — not the included double-sided tape — for anything heavier than hex keys. That’s the single most important step, and it takes ten extra minutes.
Here’s my mounting routine, learned from one bar that peeled off drywall and dropped three chisels onto concrete (two edges chipped, one lesson learned):
- Locate the studs with a stud finder and mark them. If your mounting location lands between studs, screw a 1×3 cleat across two studs first, then mount the bar to that.
- Clean the wall and the bar’s backing — drywall dust between the bar and the surface lets it rock loose over time.
- Drive screws through the bar’s mounting holes into the stud or cleat. Use all the holes. A 24-inch bar with just two end screws will flex in the middle.
- Test-load it. Hang your heaviest intended tool, give the bar a firm push-pull, and check for movement.
- Wipe the magnet face before loading tools — swarf and grit under a chisel blade will scratch the blade every time you hang it.
For non-magnetic surfaces like the side of a wooden workbench or a plastic-faced cabinet, modern adhesive-backed mounting systems work well for lighter bars [1], but read the weight rating honestly. I use adhesive mounts only for hex-key sets and bit drivers — anything under half a pound.
Safety glasses on for the install and the test. A dropped chisel or wrench falls point-first or corner-first, and your feet are always in the landing zone.
As an affiliate, we earn on qualifying purchases.
The Safety and Tool-Protection Payoff Nobody Prices In
Properly mounted magnetic holders prevent tools from falling and getting damaged — or from waiting, blade-up, in a drawer to open your palm. Tool damage and hand injuries from cluttered storage are among the most common shop accidents, and the magnetic bar attacks both at once.
Chisels are the obvious example. In a drawer, a sharp chisel rubs against its neighbors, dulling the edge you spent twenty minutes honing. On a magnetic bar, it hangs in open air by its blade — nothing touches the bevel, nothing dulls it. One bar above my bench holds six chisels that have gone untouched by honing stone for months longer than when they lived in a tray, purely because nothing wears against them.
Then there’s the falling-tool scenario. A wrench balanced on a machine table vibrates off the moment the motor spins up. I’ve seen a combination square slide off a table saw and crack its rule on the concrete — an $80 mistake from a $0 storage decision. A magnetic strip bolted to the side of the saw cabinet catches that wrench exactly where the next person needs it.
The safety benefits stack up quietly:
- Edges protected from metal-on-metal contact in drawers
- Nothing blade-up waiting inside a drawer or on a bench
- Tools visible at a glance — you know instantly what’s missing and where it isn’t
- Nothing loose on vibrating machine surfaces
One honest warning: magnets and electronics don’t mix. Keep strips well away from where you set digital calipers, phones, and magnetized-sensitive items like mechanical watch movements if you repair them. A strong neodymium bar will scramble a cheap digital caliper’s readings from a couple of inches away. Ask me how I know.
What’s New: Stronger Magnets, Modular Systems, and Smart Tracking
The magnetic tool holder market has moved past the simple steel bar. Modern developments include neodymium-based holders with dramatically higher holding power, modular magnetic strips you can reconfigure as your tool collection grows, improved adhesives for non-metal surfaces, and — at the professional end — RFID-integrated holders for tool inventory tracking [1].
The modular systems are the ones I’d watch. Instead of buying one 24-inch bar and living with it, you snap together shorter magnetic segments like bench dogs. Need six more inches for new chisels? Add a segment. Tool collection shrank after you sold the lathe? Pull a segment and move it to the drill press. For a small shop that reorganizes every couple of years, that flexibility costs a little more up front — roughly 30–50% over fixed bars — but eliminates the buy-wrong-bar problem entirely.
The budget-versus-pro split is honest and simple:
- Budget tier ($10–20): ferrite-magnet bars, fine for drivers, chisels, hex keys, small wrenches. This covers 80% of a home shop’s needs.
- Mid tier ($20–40): neodymium bars with steel or aluminum housings — hammers, pliers, heavier tools, humid environments.
- Pro tier ($50+): modular systems, corrosion-resistant coatings for outdoor or high-moisture shops, and integrated tracking for commercial inventory.
If your shop is a detached garage with temperature swings, spend the extra on aluminum-housed, corrosion-resistant models. Bare steel bars will surface-rust in a humid climate, and rust on the magnet face means abrasive contact every time you hang a chisel. That’s the opposite of what you bought the bar for.
Frequently Asked Questions
Are magnetic tool holders safe for all types of tools?
Most hand tools with ferromagnetic (steel) construction work perfectly — screwdrivers, wrenches, chisels, pliers. Non-magnetic tools like brass hammers, aluminum planes, and stainless items won’t stick. Keep sensitive electronics away: digital calipers and magnetized-sensitive devices can be affected by strong neodymium magnets at close range. Edge tools like chisels are safe on magnets but wipe the bar first so swarf doesn’t scratch the blade.
Can magnetic tool holders actually hold heavy tools like hammers and drills?
Yes, if you buy the right magnet. Neodymium-based holders rated for 15 lb or more of pull force will hold a 20-oz hammer or a 2.5–3.5 lb cordless drill. Match the tool’s weight to the bar’s rating with margin to spare, and mount the bar with screws into solid backing. Weight ratings describe force flat against the magnet — long tools hanging off-center reduce effective capacity.
How do I install a magnetic tool holder securely?
Screw it into wall studs or into a wooden cleat spanning two studs. Use every mounting hole so the bar doesn’t flex in the middle. Adhesive mounting works only for light bars (hex keys, small drivers) on clean, dry, non-metal surfaces. Test-load with your heaviest tool before trusting the installation.
Do magnetic tool holders work in humid or outdoor shops?
They can, but choose corrosion-resistant models — aluminum housings or coated steel. Bare steel bars will surface-rust in a humid garage, and rust on the magnet face becomes an abrasive surface that scratches tools each time you hang them. Expect to pay 20–30% more for weather-resistant versions.
How do I keep magnetic holders working well over time?
Avoid dropping or striking the bar — physical shock can weaken magnets. Wipe the magnet face monthly to remove metal shavings and dust, which create gaps between tool and magnet and reduce holding power. Check the mounting screws once a year, especially if machines nearby vibrate the wall.
Conclusion
Buy two magnetic bars this week — one for above your bench, one for the side of your most-used machine. Total cost under $40, install time under thirty minutes, and the payoff starts the first time you reach for a chisel without breaking stride. That’s the best return-per-dollar of any shop organization upgrade I’ve made.
The best shop storage isn’t the fanciest system; it’s the one you actually use because it’s faster than dropping the tool wherever you’re standing. A magnet on the wall wins that contest every single time. So here’s the question worth asking at your own bench: where did you last see your 3/8-inch wrench?
Fall yard work Picks
leaf blowers
As an affiliate, we earn on qualifying purchases.