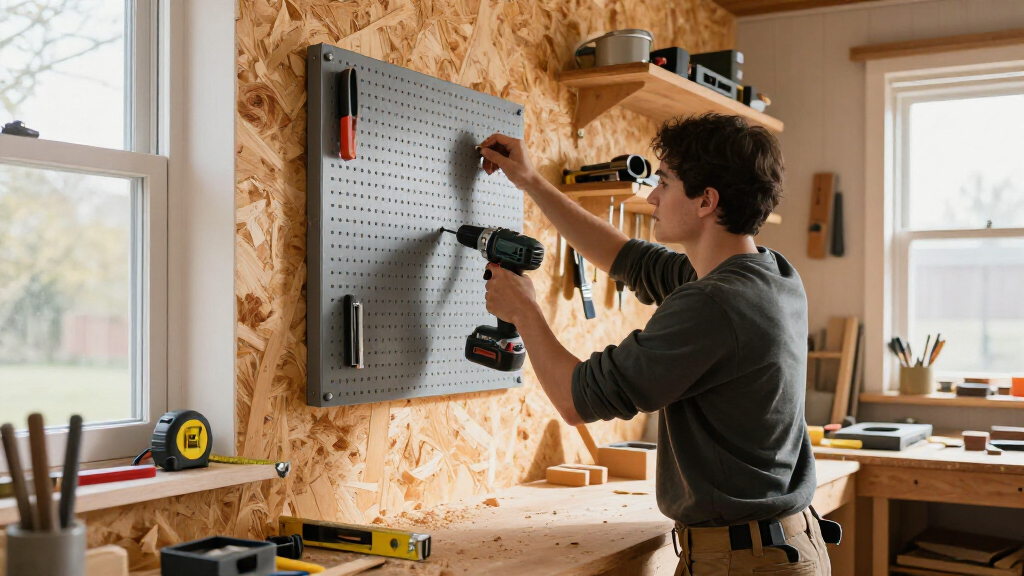

TL;DR

Get business pricing on tools and workshop supplies
- Business-only prices and quantity discounts
- Tax-exempt purchasing
- Multiple users, one account, clear invoices
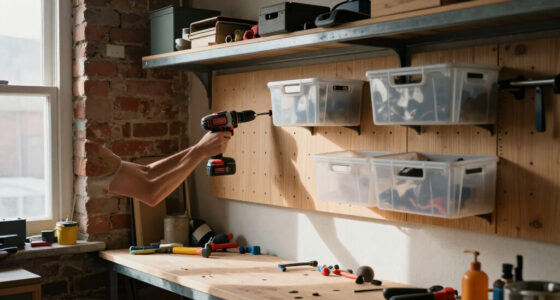
Choose pegboard for lighter hand tools, or compare slatwall and rail systems when you need shelves, bins, or room to rearrange. Before drilling, map the tools and mounting points, identify the wall material, and follow the system’s specified fasteners and load limits; the safe capacity depends on the entire installation. Store heavy tools low, load the system gradually, and inspect it periodically.
A wall full of tools can look tidy on Saturday and turn into a pile of hooks, fallen clamps, and wasted space by Monday. The difference usually starts before you drill: the storage has to suit your tools, the wall, and the weight you plan to hang.
This guide helps you choose a system, lay it out around the tools you actually use, and mount it with the right support for framed walls or masonry. You’ll also learn where to put heavy tools, how to leave room for a growing shop, and what to inspect after installation.
Think of a tool wall like a workbench: it only earns its space when you can reach what you need without wrestling with everything around it. A little measuring now can make the difference between a wall that hums along through a weekend project and one that rattles every time you grab a wrench.
Choose pegboard for lighter hand tools; compare slatwall, rails, and cabinets against your actual tools and accessory needs.
Check the capacity and installation conditions for the wall, fasteners, panel or rail, and each accessory as a complete system.
Locate and confirm studs or use anchors designed for the specific masonry; drywall anchors alone are generally unsuitable for heavy storage.
Mock up the layout before drilling, keep frequently used items comfortable to reach, and store heavy tools low.
Load gradually and inspect for loose fasteners, bent hooks, damaged panels, and signs of overload.
Workshop guide / choose • plan • mount
A Tool Wall That Works as Hard as You Do
Choose storage for the tools you own, the wall that will support it, and the weight you plan to hang. Measure first, mount to the right support, then load and inspect with care.
01 / Choose your setup
Start with the tools
Make a short inventory and group tools by use. Pick the system around their size, weight, reach, and the accessories you may add later.
Visible • lightweight
Pegboard
A straightforward choice for lighter hand tools and familiar layouts. Confirm panel support, hook fit, and the weight of each tool.
Modular • adaptable
Slatwall or rails
Useful for mixed hooks, bins, shelves, and changing storage needs. Check accessory compatibility and product specific mounting limits.
Enclosed • protected
Cabinet or panel
Helps cover tools and small parts from dust. Check door clearance, access, mounting support, and how quickly you need to reach items.
Make the everyday kit easy to reach
Keep frequently used items in a comfortable zone and leave room to lift each tool off its hook without hitting a shelf, outlet, or neighboring handle. Reserve secure, low positions for heavier pieces.
02 / Compare before buying
Match the system to the job
Product details matter more than category names. Compare the specific mounting method, compatible accessories, and stated capacity conditions.
| System | Works well for | Check before buying |
|---|---|---|
| Pegboard | Light hand tools and visible layouts | ✓ Panel support, hook fit, tool weight |
| Slatwall | Mixed hooks, bins, and shelves | ~ Accessory compatibility, mounting method |
| Rail system | Modular storage that may change | ~ Rail spacing, rated load, add-on fit |
| Cabinet / enclosed panel | Small parts or tools you want covered | ✓ Access, clearance, installation support |
03 / Wall + load
Find the support before the hardware
Check the wall material and the full chain of rated components before purchasing fasteners or putting tools on the system.
Framed wall
Locate and confirm studs
Use a stud finder, then confirm likely positions. Follow the system’s instructions for fastener type, spacing, and attachment points.
Masonry
Choose material-specific anchors
Use a drill bit and anchors designed for the particular masonry. One type of fastener may not suit every masonry surface.
Complete installation
Check every link in the chain
Review the wall, panel or rail, fasteners, hooks, brackets, and load distribution. The weakest part sets the practical limit.
Read the conditions behind the rating
A stated maximum load applies only under the manufacturer’s specified installation conditions. Drywall anchors alone are generally unsuitable for heavy storage. For uncertain walls or substantial planned loads, ask a qualified installer.
04 / Plan the layout
Make the wall fit your hands
Arrange tools on a bench or floor first, then sketch the layout or mark it with painter’s tape. Measure the available wall and account for handles, cords, outlets, wiring routes, shelves, and tool removal.
Put the tape, pencil, square, and drill in the easiest reach zone. Place occasional tools farther away and heavier items low, close to supported attachment points.
Example reach map / adjust to your space
05 / Installation sequence
Five careful steps
Follow the manufacturer’s instructions and any applicable local requirements. Use eye protection when drilling and check for hidden wires or pipes before making holes.
Plan
Measure wall space, map tools, and identify support points.
Prepare
Confirm stud locations or choose anchors for the masonry.
Mount level
Use specified fasteners, spacing, and enough attachment points.
Load gradually
Fit accessories, secure each tool, and keep heavy items low.
Inspect
Check for looseness, bending, damage, or wall changes.
Pick a system that fits the tools you reach for
For a small collection of light hand tools, pegboard is often the simplest place to start; for shelves, bins, or frequent rearranging, compare slatwall and rail systems. Cabinets and enclosed panels suit tools and small parts that benefit from dust protection. Your choice should follow the tools you own, the load they create, and how often your setup changes.
Pegboard makes a familiar wrench or square easy to spot, much like keeping ingredients on the counter while cooking. But a hook that works for a screwdriver may not hold a chunky cordless drill conveniently. Slatwall and rails accept a wider mix of hooks, bins, and brackets, though the accessories may fit only one product family. A cabinet hides clutter and shields contents, but it can make a frequently used tool slower to grab.
Picture a one-car garage shop with a drill, driver, hand saws, and a small set of chisels. A pegboard can keep the hand tools visible, while a shelf or dedicated holder gives the heavier power tools a proper resting place. If the owner later adds sanding discs and router bits, labeled bins on a compatible rail may beat a crowded row of hooks.
Before you shop, make a short inventory and group tools by use. Frequently used items deserve comfortable reach; heavy tools need secure support and a low position. Check capacity for the panel, each hook or bracket, and the specified fasteners, then verify that the accessories will fit the system you’re buying.
Compare storage styles before you commit to a wall
There’s no universally best tool wall: pegboard favors simple access for lighter tools, while slatwall and rails offer different accessory options, and cabinets keep items enclosed. To choose, compare the specific products’ accessory compatibility, mounting requirements, and rated capacities. A category name alone cannot tell you whether a given panel or hook will handle your setup.
| System | Works well for | Check before buying |
|---|---|---|
| Pegboard | Light hand tools and visible layouts | Panel support, hook fit, and tool weight |
| Slatwall | Mixed hooks, bins, and shelves | Accessory compatibility and mounting method |
| Rail system | Modular storage that may change over time | Rail spacing, rated load, and add-on fit |
| Cabinet or enclosed panel | Small parts or tools you want covered | Access, clearance, and installation support |
For example, a woodworker who keeps changing a sanding station might value a rail system’s rearrangeable bins. Someone with a stable row of screwdrivers and pliers may find pegboard easier to lay out. Either can disappoint if the wall is weak or the hooks don’t match the tools.
Use a small garage shop as your test case: if you can’t comfortably open a cabinet door beside the car, enclosed storage may be awkward there. If a panel has to span several studs, check the manufacturer’s mounting pattern before you assume it will work. Compare product-specific instructions, including any conditions attached to the load rating, and leave room for the tool to come off its hook without hitting a shelf or outlet.
Check the wall and load before you buy hardware
A tool wall’s capacity depends on the entire installation: the wall structure, panel or rail, fasteners, accessories, and load distribution all matter. A maximum-load number applies only under the conditions stated by the manufacturer. If a planned setup is substantial or the wall condition is uncertain, get advice from a qualified installer rather than guessing from the panel’s appearance.
On a framed wall, the studs provide dependable points for mounting many heavier systems. Drywall anchors alone are generally unsuitable for heavy storage, even if an empty panel feels firm when you tug it. Masonry needs fasteners designed for that specific material; a bit and anchor suitable for one kind of masonry may not suit another.
Imagine hanging a cast-iron plane, several clamps, and a row of chisels on a panel held only by ordinary drywall anchors. The load may seem modest at first, but reaching for tools tugs the accessories and panel repeatedly. A sound plan identifies where support comes from before the tools ever go on the wall.
Use a stud finder to locate framing, then confirm likely positions before fastening; stud spacing varies, and wall finishes can make readings less reliable. For masonry, choose the correct bit and anchors for the material. Check the panel, each accessory, and fastener specifications together, because the weakest part sets the practical limit. Keep heavy items low so a dropped tool has less distance to fall, and keep tools away from water exposure and heat sources.
A stated maximum load is not a blanket promise. It applies only when the product is installed as specified in the stated wall and fastening conditions.
Lay out tools so your hands find them naturally
A useful layout puts frequently used tools within comfortable reach, leaves space to remove them, and keeps the heavier pieces lower. Start by measuring the available wall and arranging the tools before you drill. That simple mock-up reveals collisions between handles, cords, shelves, outlets, and the neighboring workbench.
Spread the tools on the floor or bench in rough groups: measuring, cutting, fastening, sanding, and cleanup. Then mark a similar arrangement on paper or with painter’s tape on the wall. A tape measure and a bit of cardboard make a useful template for a drill’s footprint, including room for your hand to lift it off its holder.
For a common Saturday project, you might reach for a tape, pencil, square, and drill repeatedly, while a specialty plane comes out once a month. Put the everyday kit in the easiest zone and the occasional tool farther away. Store a cordless drill where its handle clears the shelf below, and place heavy clamps low enough that you aren’t lifting them over shoulder height.
Leave space for future changes rather than filling every hole on day one. Modular storage can grow, but only if the accessories remain compatible and the wall has room. Visible, reachable tools make work smoother; a bright outline or label can help a borrowed square find its way back. If the shop is cramped, mock up the layout while the car or machine is in its usual position, not after everything has been moved out.
Install the system in five careful steps
Install a tool wall by planning the layout, checking the wall, preparing the right fastening points, mounting the panel or rails level, and adding tools gradually. Keep the manufacturer’s instructions in hand because spacing, fastener type, and rated load vary by product. Eye protection matters when drilling, and you should check for hidden wires or pipes before making holes.
- Measure and mark. Mark the storage area and tool positions, leaving clearance for handles and removal. Note nearby outlets and likely wiring routes.
- Identify the wall. Use a stud finder on framed walls and confirm positions. For masonry, identify the material and select a suitable bit and anchors.
- Prepare the fastening points. Follow the system’s specified locations and fasteners. Don’t treat a drywall anchor as a substitute for support on a heavy installation.
- Mount the panel or rails level. Use a level, the specified spacing, and enough attachment points to distribute the load as directed.
- Fit accessories and load gradually. Start with lighter items, then add heavier tools near supported attachment points. Check that each hook, bracket, shelf, or bin sits securely.
For instance, if you’re mounting a rail above a workbench, check the level across its full length rather than trusting the first screw. A small tilt can make bins drift or a shelf look crooked. If you’re unsure about the wall or the intended load is substantial, ask a qualified installer to assess it before loading the system.
Use suitable eye protection, keep clear of dust and chips while drilling, and stop if you encounter an unexpected obstruction. Electrical, gas, structural, or roof work belongs with licensed professionals; switch off power before any work that may involve electrical wiring, and follow local code and permit requirements. The storage job should not become a shortcut through a wall you haven’t checked.
Load the wall so it stays handy and balanced
Once the system is mounted, put the heaviest items low and close to supported attachment points, then arrange frequently used tools where you can reach them comfortably. Don’t assume a strong-looking hook can carry any tool that fits on it. Check the accessory’s capacity and follow the product’s installation and loading guidance.
Try loading in stages: first a few light hand tools, then a drill holder or shelf, and finally heavier items such as clamps. Pause to check that the panel or rail remains secure and that accessories don’t shift. Think of a shelf like a small workbench: weight near its support is easier to manage than weight hanging far out at the edge.
A practical example: place a cordless drill and driver on dedicated holders near the bench, with batteries stored according to the tool maker’s guidance. Put loose screws, bits, and sanding accessories in labeled bins so they don’t spill from open hooks. Keep cords arranged so a swinging loop can’t snag a plane or knock a chisel onto the floor.
Store tools where water can’t reach them, especially in damp garages or sheds; corrosion-resistant materials and hardware can help in those environments. Avoid heat sources, and follow each tool maker’s storage recommendations. Use bins for small parts, stable holders for power tools, and open hooks for tools that are easy to lift off without disturbing their neighbors. A system can free up floor space and make tools easier to find, but only when each item has a secure, sensible home.
Keep the tool wall safe as your collection grows
Inspect the system periodically for loose fasteners, bent hooks, damaged panels, and changes in the wall. A wall that held a starter set may need a new layout when you add a heavier sander or a row of clamps. Reorganize before accessories crowd together or the system becomes overloaded.
Make a quick check part of your shop cleanup: run a hand over the visible fasteners, look for a rail pulling away, and make sure hooks haven’t opened or twisted. If a panel has started to bow or a bin keeps slipping, remove the affected load and revisit the installation instructions. Don’t solve a loose mounting point by hanging more weight elsewhere and hoping the wall balances itself.
For example, adding a compact router and a stack of accessories can change a light hand-tool wall into a mixed-load storage system. The new tools may fit physically but exceed the intended use of a hook or shelf. Check compatibility and ratings before adding accessories, particularly when they belong to a different product family.
Modular systems can be rearranged or expanded, yet attachment standards often vary by brand. Keep the manual or product information with your shop notes so you can confirm fastener requirements later. Periodic inspection is especially useful after moving storage, drilling nearby, or changing the wall’s tool load. A quiet, straight, secure panel is a far better signal than a capacity guess based on how sturdy it felt when empty.
Frequently Asked Questions
Which is better: pegboard, slatwall, or a rail system?
Pegboard often suits lighter hand tools and straightforward layouts. Slatwall and rails provide different options for shelves, bins, and hooks, but accessories may be product-specific. Compare the individual system’s mounting requirements and capacity before choosing.
Can I install a tool wall on drywall?
Light storage may work with suitable fasteners, but heavy storage should generally attach to wall studs or use anchors rated for the wall material and load. Don’t assume an ordinary drywall anchor can carry a loaded tool panel. Follow the system instructions and get qualified advice if the wall or load is uncertain.
How do I find wall studs before mounting?
A stud finder can help locate studs, but confirm positions before drilling because spacing varies and wall finishes can affect readings. Mark likely centers and check the planned attachment pattern against the mounting instructions. Also check for hidden wires or pipes before making holes.
How much weight can a wall-mounted tool system hold?
There is no single safe capacity for every installation. It depends on the wall, fasteners, panel or rail, accessories, installation conditions, and how the tools are distributed. Follow the specific product rating and its stated mounting conditions.
How high should I mount a tool wall?
Put frequently used tools within comfortable reach, leave clearance to remove them, and keep heavy tools lower. Mock up the tools and their handles before drilling; a drill that fits its holder may still collide with a shelf below. Check the layout from your usual working position.
Can I expand or rearrange the system later?
Many modular panels and rails allow rearranging or expansion, but hooks, bins, and brackets may use brand-specific standards. Check compatibility before buying add-ons and make sure the wall and mounting points can support the revised load. A new accessory still needs to suit its tool and its position.
Conclusion
Before you buy, list the tools, check the wall, and sketch a layout that leaves room to lift each tool free. Then mount to the system’s instructions, load gradually, and keep the heavy pieces low. The wall, fasteners, panel, and accessories work as one system, so judge capacity by the complete installation.
A good tool wall doesn’t just hold your gear; it puts the right wrench or square into your hand while the project is still moving. Build it for the shop you have, and leave a little space for the next tool.
Evergreen bestsellers Picks
bestsellers
As an affiliate, we earn on qualifying purchases.