
TL;DR

Get business pricing on tools and workshop supplies
- Business-only prices and quantity discounts
- Tax-exempt purchasing
- Multiple users, one account, clear invoices
The best organization system for a small workshop combines vertical storage, clear work zones, mobile or folding furniture, labeled supplies, and a strict clutter-reset habit. Keep frequently used tools near the main bench, heavy equipment low, sharp tools protected, and dust-producing machines connected to sensible extraction routes.
A two-car garage can feel smaller than a garden shed once a table saw, clamps, sheet goods, and three half-finished projects start competing for the floor. The fix is rarely another cabinet. Small workshops become far more efficient when each tool, material, and work surface has a defined job and a defined home.
This guide shows you how to reclaim floor space without turning your shop into a maze of bins. You will learn how to use walls, build practical zones, choose mobile furniture, place tools by frequency and weight, control dust, and create a reset routine that still works after a long Saturday at the bench.
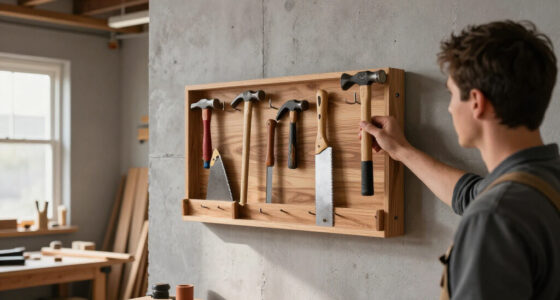
Use pegboards for light tools and French cleats or anchored rails for heavier shelves, cabinets, and equipment.
Build zones around your real workflow: measure, cut, assemble, sand, finish, and clean.
Choose rolling or folding furniture when the workshop must share space with a vehicle, laundry area, or household storage.
Store daily tools near the main bench, heavy items low, sharp tools protected, and small hardware in transparent labeled bins.
Treat dust collection, lighting, clear walkways, and a 10-minute end-of-project reset as part of the organization system.
Make every inch of your workshop work harder.
The best organization system combines vertical storage, clear work zones, mobile or folding furniture, labeled supplies, and a strict clutter-reset habit.
A storage system saves space only when it shortens the distance between a tool’s home and the task that uses it.
Every tool, material, and work surface needs a purpose and a home.
Use walls for visible access while preserving the floor for movement.
End each project by returning tools, clearing scraps, and reconnecting extraction.
Start with the walls, then give the room a logic.
Vertical storage and functional zones turn a crowded room into a calm control panel. The goal is not maximum capacity; it is minimum searching and carrying.
Pegboard
Keep tape measures, squares, pencils, screwdrivers, pliers, and marking knives visible and between waist and shoulder height.
French cleats
Use anchored rails for shelves, cabinets, clamp racks, and equipment that may need to move as your workflow changes.
Labeled bins
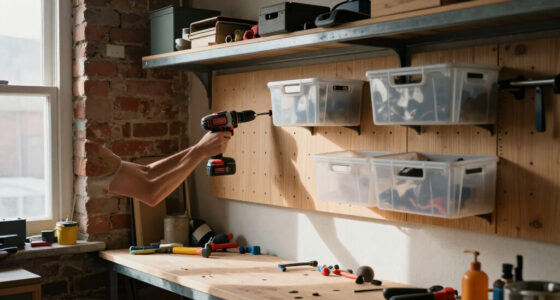
Transparent bins for screws, plugs, blades, sanding discs, and fittings stop duplicate purchases and reduce search time.
Anchor rails into suitable framing or masonry, check load ratings, and keep blades covered. A wall should feel useful—not dangerous.
Organize around the work your hands actually perform.
Use painter’s tape to test your layout for a week before installing permanent storage. Good organization follows your hands and feet, not a pretty floor plan.
Put the right tools in the right reach zone.
Frequency, weight, and risk should determine placement. A smaller rack near the action can outperform a larger cabinet across the room.
Shadow boards make missing tools obvious. Transparent drawers make missing hardware obvious. Visibility is a form of inventory control.
Choose surfaces that can leave when the car, laundry, or next project arrives.
Mobility creates flexibility, but stability still matters. Locking casters, rigid bases, rated wall brackets, and marked open positions keep flexible furniture safe.
| Storage choice | Best use | Main tradeoff |
|---|---|---|
| Rolling cart | Small tools, chargers, project hardware | Needs clear routes and locked casters |
| Mobile machine base | One machine serving several work areas | Can reduce stability if poorly sized |
| Fold-down bench | Shared garages and narrow rooms | Requires strong wall fixing and setup time |
| Fixed cabinet | Heavy storage and daily access | Consumes permanent floor space |
Make safety and reset part of organization—not an afterthought.
Dust collection, lighting, clear walkways, cord control, and waste disposal determine whether a system still works after a long session at the bench.
Route the dust
Place dust-producing machines near sensible extraction routes. Keep hoses short enough to use and out of the main walkway.
Contain the scraps
Keep a dedicated recycling or disposal container nearby. Apply “one project in, one project out” when unfinished work starts spreading.
Reset the room
Return tools, clear offcuts, recharge batteries, protect blades, and restore the main route before you leave.
A ten-minute reset protects every improvement you made.
Use this short sequence at the end of each project so organization becomes a habit instead of a rescue mission.
Top Organization Hacks for Small Workshop Spaces Start With Your Walls
Top Organization Hacks for Small Workshop Spaces begin with vertical storage because walls can hold tools without stealing the floor area you need to move, cut, and assemble. Use pegboard for light hand tools, French cleats for shelves and cabinets, magnetic strips for bits, and labeled bins for small parts. A clear wall often gives you more usable capacity than another floor cabinet.
Keep the tools you reach for every few minutes between waist and shoulder height. That is where tape measures, combination squares, pencils, screwdrivers, pliers, and marking knives belong. Heavy routers, cast-iron accessories, and boxes of fasteners should sit lower, where lifting them does not turn a quick task into a back strain.
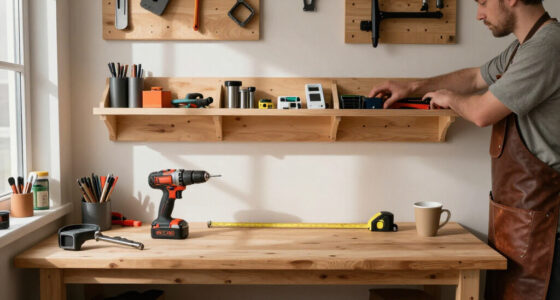
For example, a 30-inch-wide French-cleat panel beside your bench can carry a clamp rack, sanding shelves, and a small cabinet. You can rearrange the panel when your workflow changes, while a fixed cabinet may leave awkward gaps that collect dust and offcuts.
- Pegboard: best for lightweight, frequently used hand tools.
- French cleats: best for shelves, cabinets, and heavier equipment.
- Magnetic strips: useful for drill bits, hex keys, and steel rulers.
- Wall bins: useful for screws, plugs, blades, and sanding discs.
Do not hang a heavy tool from a weak panel or questionable fastener. Anchor rails into suitable framing or masonry, check the load rating, and keep blades covered. Your wall should feel like a calm control panel, not a sharp metal waterfall waiting to fall.
garage wall pegboard tool organizer
As an affiliate, we earn on qualifying purchases.
As an affiliate, we earn on qualifying purchases.
Top Organization Hacks for Small Workshop Spaces Use Zones to Cut Wasted Steps
Top Organization Hacks for Small Workshop Spaces use zones to reduce walking, searching, and awkward carrying. Divide the room by the work you perform: cutting and measuring, assembly, sanding and finishing, hand tools, power tools, hardware, and cleanup. A zone does not need a separate room; even a two-foot strip beside a bench can give a task a reliable address.
Place the most-used tools near the primary workbench, then arrange nearby storage in the order your hands use it. Measuring tools should sit close to the cutting area. Clamps and glue belong near assembly. Abrasives, a vacuum hose, and a small waste tub should sit near sanding. This simple sequence makes every tool easier to find and return.
Imagine building a pine shelf on a Wednesday evening. If the tape, square, pencil, saw, clamps, and screws all live within one or two steps of the bench, you keep your attention on the cut. If each item lives in a different corner, the project becomes a slow loop of opening drawers and stepping over cords.
- Mark the main workflow: measure, cut, assemble, sand, finish, clean.
- Place fixed machines: leave safe infeed and outfeed paths around them.
- Put support tools nearby: keep blades, bits, clamps, and consumables beside their task.
- Test the route: walk through a typical project before fastening storage permanently.
Use painter’s tape on the floor for a week before you install anything. If a taped zone makes you squeeze past the bench or blocks an exit, move it. Good organization follows your hands and feet, not a pretty floor plan.
As an affiliate, we earn on qualifying purchases.
Top Organization Hacks for Small Workshop Spaces Need Mobile and Folding Surfaces
Top Organization Hacks for Small Workshop Spaces often rely on furniture that changes position. A rolling tool cart, folding outfeed table, mobile base, or wall-mounted bench lets one surface serve several jobs. Locking casters give you flexibility during setup and stability during a cut, which matters when a workpiece meets a spinning blade.
Choose mobility based on the machine and the floor. A light cart may roll well under a cordless drill station, but a table saw needs a rigid base, large locking casters, and enough footprint to resist racking. Check that the machine stays level and that the casters cannot unlock from vibration.
In a garage that still holds a car, a fold-down bench can create a solid assembly surface on Saturday and disappear against the wall on Sunday. Add a pair of folding legs or a rated wall bracket, then mark its open position so you do not place it where a door, vehicle, or walkway needs to pass.
| Storage choice | Best use | Main tradeoff |
|---|---|---|
| Rolling cart | Small tools, chargers, and project hardware | Needs clear routes and locked casters |
| Mobile machine base | One machine serving several work areas | Can reduce stability if poorly sized |
| Fold-down bench | Shared garages and narrow rooms | Requires strong wall fixing and setup time |
| Fixed cabinet | Heavy storage and daily access | Consumes permanent floor space |
Make the surface do more than one job. A cabinet can store clamps below and act as an assembly table above. A rolling cart can hold a planer during use, then become a glue-up station after the machine rolls away.
clear labeled storage bins for tools
As an affiliate, we earn on qualifying purchases.
As an affiliate, we earn on qualifying purchases.
Top Organization Hacks for Small Workshop Spaces Keep Tools Easy to Reach
Top Organization Hacks for Small Workshop Spaces work best when storage reflects frequency, weight, and risk. Put daily tools closest to the bench, occasional tools in drawers or cabinets, heavy items below knee height, and sharp blades in protected cases. The best system is not the one that stores the most; it is the one that makes the right tool easy to grab and put away.
Use shadow boards for tools that should always return to the same place. Outline a block plane, flush-cut saw, or set of chisels so an empty silhouette catches your eye immediately. Transparent bins and labels do the same job for screws, nails, washers, electrical parts, adhesives, and paint supplies.
Take a real example: if you buy a box of 2-inch screws every month because the old box disappears, the problem is not memory. It is storage. One labeled drawer that says 2-inch coarse-thread screws can stop duplicate purchases and save several minutes on every small repair.
- Store cordless tools with batteries and chargers in one charging zone.
- Keep blades, router bits, and drill bits dry, covered, and grouped by size.
- Place clamps on a dedicated rack so they do not occupy the bench.
- Use a hybrid system: organize common project kits by task and large collections by type.
- Keep rarely used equipment high only when lifting it down remains safe.
Do not force every item into a shadow board. A tool used once a year may deserve a labeled cabinet, while a square used on every cut should stay visible and within one arm’s reach.
dust collection system for workshop
As an affiliate, we earn on qualifying purchases.
As an affiliate, we earn on qualifying purchases.
Top Organization Hacks for Small Workshop Spaces Include Dust and Airflow Planning
Top Organization Hacks for Small Workshop Spaces include dust planning because a clean shop is easier to use and safer to move through. Arrange dust-producing tools so hose runs stay short, smooth, and out of walkways. A compact extractor often performs better with a short 2-1/2-inch hose and fewer bends than with a long, tangled route across the room.
Match extraction to the machine rather than assuming one setup handles everything. A router table and random-orbit sander may work with a suitable shop vacuum, while a planer or table saw can demand a higher-volume collector. Check the manufacturer’s requirements, pay attention to airflow and filter condition, and avoid treating a small vacuum as a substitute for a properly sized collector.
Suppose your sander sits six feet from the extractor, but the hose crosses the main walkway. Move the extractor beside the sanding zone, mount the hose on a retractable hook, and keep a sweep nozzle nearby. The shop will sound quieter, the floor will feel less gritty, and cleanup will take less time.
Dust control is part of organization. If the hose, filter, and waste container have no defined home, they will eventually become obstacles instead of useful equipment.
Keep overhead air filtration clear of stored lumber, and provide ventilation appropriate to the finish or adhesive you use. Store flammable finishes away from ignition sources. For new electrical circuits, fixed wiring, or changes to a garage supply, switch off power before any permitted work and hire a licensed electrician; follow local code and permit rules.
Top Organization Hacks for Small Workshop Spaces Stop Clutter at the Source
Top Organization Hacks for Small Workshop Spaces last only when you control what enters the room and where waste goes. Use a one-project-in, one-project-out rule, keep a recycling or disposal container beside the bench, and remove scraps before they become a second lumber pile. A clear bench is not decoration; it is your next available work surface.
Create three quick decisions for every leftover item: keep, reuse soon, or remove. Keep only stock with a realistic use and a safe storage place. A narrow strip of walnut may be worth saving, but a damp, twisted offcut that blocks the floor belongs in the disposal bin.
Try a 10-minute reset at the end of each project. Return tools, empty the dust bin, coil cords, wipe the bench, and put unfinished work on one designated shelf. If you leave a half-built cabinet on the main bench, you have quietly removed the shop’s most useful surface.
- Reset the bench: remove tools, scraps, glue bottles, and loose hardware.
- Reset the floor: sweep dust, return carts, and clear every walking route.
- Reset the inventory: label new parts and note supplies that need replacing.
- Reset the next task: leave only the project materials you will use next.
Review the layout every few months or whenever you add equipment. If putting a tool away takes longer than grabbing it, redesign that storage spot. Clutter usually returns through friction.
Top Organization Hacks for Small Workshop Spaces Make Safety Visible
Top Organization Hacks for Small Workshop Spaces make hazards visible before they become accidents. Keep exits and walkways clear, provide bright overhead lighting, manage extension cords, protect exposed blades, and store heavy equipment low. A small room leaves less margin for a loose cord, unstable shelf, or badly placed machine.
Use strong task lighting over the bench and cutting area. Good light helps you read a ruler, see a pencil line, spot a splinter, and find a missing screw. A bright work surface can feel almost like a cool white blade edge against darker walls; that visual contrast reduces searching and improves control.
Position machines with enough room for the stock you actually handle. A table saw needs safe infeed and outfeed space, not just a footprint that fits on paper. If the machine blocks an exit, forces you to twist around stored lumber, or leaves no room for a dust hose, the layout is not ready.
- Keep sharp tools protected and store saw blades where they cannot snag clothing.
- Keep flammable finishes and solvents away from heat, sparks, and ignition sources.
- Use suitable PPE: eye protection, hearing protection, and respiratory protection where the task requires it.
- Inspect cords, plugs, hoses, and casters before use.
- Ask a licensed professional about electrical, gas, structural, or roof changes, and follow local permits and code requirements.
Organization should make the safe choice the easy choice. When the dust hose has a hook, the blade has a case, and the walkway has no storage assigned to it, you remove small decisions that otherwise pile up during a rushed project.
Frequently Asked Questions
How can I organize a workshop with almost no floor space?
Use wall-mounted storage, a narrow bench, fold-down surfaces, ceiling racks, and rolling cabinets. Keep the center open whenever possible, because clear floor space gives you room to handle long boards and move safely around machines.
Is a pegboard or French cleat system better?
Pegboard works well for lightweight tools such as pliers, screwdrivers, squares, and tape measures. French cleats handle shelves, cabinets, and heavier tool holders with more strength and easier rearrangement. Many small workshops use both.
Where should power tools and batteries go?
Keep frequently used cordless tools near the main bench, with chargers and batteries in the same area. Store larger tools on stable rolling bases or beneath the bench, and keep charging equipment away from dust buildup, moisture, and heat.
How should I store screws and small hardware?
Use divided drawers or transparent labeled bins, grouped by type and size. Keep common fasteners near the assembly zone, and mark partial boxes clearly so you do not buy another box while the first one is hiding behind a clamp rack.
How do I keep workshop clutter from returning?
Make storage easy to use, keep a disposal container beside the bench, and perform a 10-minute reset after each project. Remove scraps regularly and avoid using the workbench as temporary storage, because temporary piles tend to become permanent fixtures.
Conclusion
The most useful small-shop upgrade is a deliberate home for every tool, material, hose, and scrap. Start with one wall, one workflow zone, and one reset routine; then let your actual projects show you what needs to move.
When every tool has a defined place, your workshop stops feeling like a crowded storage room and starts working like a well-tuned hand plane: quiet, controlled, and ready to make something good.
Fall yard work Picks
leaf blowers
As an affiliate, we earn on qualifying purchases.