
TL;DR

Get tools and workshop supplies delivered free — and shop member deals
- Fast, free delivery on millions of items
- Access to Prime Big Deal Days deals on October 6–7
- Prime Video, Amazon Music and more included
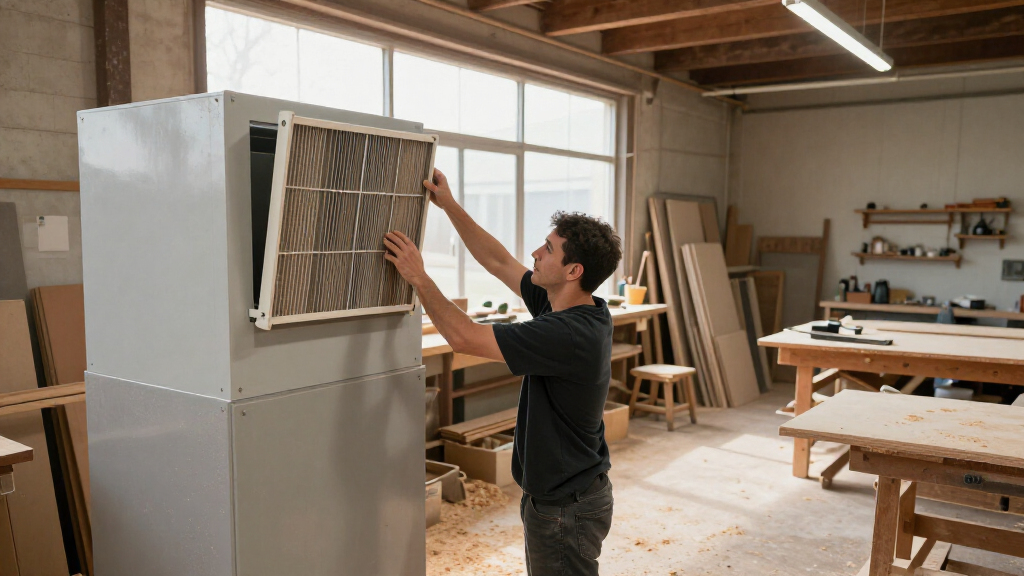
Shop filters and HEPA units protect you by capturing dust, but only if you match filtration to the hazard, watch airflow and pressure readings, and replace filters based on symptoms rather than a calendar. Good maintenance helps preserve airflow and filtration performance: inspect seals before every session, clean only where the manufacturer allows, log every change, and never assume a HEPA rating makes an undersized collector safe.
I learned the hard way that a dust collector can lie to you. My old single-stage collector still roared like a jet and filled its bag faithfully — while a flashlight beam across the shop showed the air hazy with fine dust the machine was never capturing in the first place. The canister filter inside was caked solid, and the airflow I thought I had was a fraction of the rated CFM.
That’s the trap with shop filtration. Coarse chips land in the bag whether your system works or not. It’s the invisible sub-micron dust — the stuff that reaches deep into your lungs — that depends entirely on clean filters, intact seals, and honest maintenance.
In this guide, you’ll get a shop-tested routine for inspecting, cleaning, and replacing filters and HEPA units: what to check before every session, how to read pressure gauges correctly, when cleaning helps versus when it destroys media, and how to replace a filter without dusting yourself or your shop. No product roundups — just the practices that keep a small garage shop breathing clean.
A HEPA filter cannot fix an undersized or leaky dust-collection system — capture at the source comes first, filtration second, ambient air scrubbing last.
Record a pressure baseline with a new filter; a falling reading often signals a leak or torn media, which is more dangerous than a rising one.
Clean filters only using the manufacturer’s approved method, outdoors, with a respirator — compressed air on HEPA media destroys it and releases captured dust.
Change filters based on symptoms (pressure drop, damage, poor cleaning recovery), not a calendar; your own log reveals your shop’s true replacement interval.
Bag loaded filters in place before removing them, verify seals and orientation on install, and run the flashlight test on the discharge before resuming work.
Best Practices for Maintaining and Replacing Shop Filters and HEPA Units
A dust collector can lie to you. Coarse chips land in the bag whether your system works or not — it’s the invisible sub-micron dust, the kind that reaches deep into your lungs, that depends entirely on clean filters, intact seals, and honest maintenance. This is the shop-tested routine for keeping a small garage shop breathing clean.
Fine dust passes straight through a system with caked filters and failed seals — even when the bag fills faithfully.
Record differential pressure with a fresh, seated filter. A falling reading is a warning, not a win.
One April, a below-baseline reading revealed a shifted gasket letting air skirt the media entirely.
A flashlight across the discharge in a dark shop: floating sparkle means dust is getting through.
Why a HEPA Filter Can’t Rescue a Neglected Dust Collector
Bolting a HEPA cartridge onto an undersized system gives you a very expensive filter doing a job the machine never finished. Think of your shop’s air handling as a bucket brigade — if the first person drops half the buckets, the last one drowns.
Capture at the Source
Proper hood, short duct run, and adequate CFM for the tool. The collector at the machine catches the big, heavy stuff first.
Fix this firstSeparate the Bulk
A chip separator or cyclone stage drops heavy chips before they ever reach the primary filter media.
Protects the mediaFilter the Remainder
Cartridge or bag filter rated for the dust you actually make — wood, metal, drywall, and silica each behave differently.
Match to hazardScrub the Room Air
An ambient HEPA unit running during work and 20–30 minutes after. Skipping straight here is the classic home-shop mistake.
Last line, not firstThe Pre-Session Check That Catches 90% of Filter Problems
Before you flip the switch on any tool, a quick walk-around catches most filter failures before they cost you airflow or lungs. A single loose hose clamp can bleed off more suction than a half-loaded filter.
Hoses & Connections
Look for cracks, kinked flex hose, and loose clamps on every run.
Collection Container
An overfull drum lets dust re-entrain and slam into the filter media.
Gauges & Alarms
Note the differential-pressure reading before work starts — your baseline for the day.
Seals & Latches
Eyeball the gasket. Dust trails on the clean side are leak signatures.
Filter Surface
Flashlight across the media: tears, dents, or a cake cleaning won’t budge = replacement time.
How to Read Pressure Gauges Without Fooling Yourself
Most woodworkers assume high reading = bad, low reading = good. Not true. Air taking the easy path around the filter instead of through it reads as a low pressure drop.
When the reading hits the manufacturer’s change-out value — often several times baseline — the filter is done, regardless of how it looks.
Reading It Honestly
- High reading = media is loading. Expected, predictable, manageable.
- Low or falling reading = leak, torn filter, bypassed gasket, or a gauge problem.
- Sudden pulse-clean demand during use means something changed — diagnose before swapping.
- A shop that smells like cutting with the doors closed is telling you dust is escaping.
- Blocked ducts, full containers, and failed cleaning systems all mimic a clogged filter — chasing symptoms wastes money.
Clean Only Where the Manufacturer Allows
Match filtration to the hazard, and never improvise a cleaning method. Compressed air on HEPA media destroys it and releases captured dust back into the air you breathe.
| Dust Type | Primary Risk | Pulse / Approved Clean | Compressed Air on Media | Disposal Handling |
|---|---|---|---|---|
| Wood dust | Respiratory sensitization, fine sub-micron fraction | ✓ If rated — per manual | ✗ Never on HEPA media | Bag in place, outdoor bin |
| Drywall / sanding dust | Fine loading, blinds media quickly | ~ Limited — check rating | ✗ Destroys media | Sealed containment |
| Metal grinding swarf | Abrasion, sparks, media damage | ✓ If designed | ✗ Releases dust | Per local requirements |
| Silica-bearing concrete | Requires purpose-built equipment + respiratory protection beyond shop filters | ✗ Wrong tool | ✗ Absolutely not | Hazard-specific protocol |
| Paint overspray | Tacky loading, non-recoverable media | ✗ Replace when loaded | ✗ Contaminates shop | Per product SDS |
When Cleaning Helps — and When It Destroys
Change filters based on symptoms: pressure drop, physical damage, or poor recovery after an approved cleaning. Your own log — not the calendar — reveals your shop’s true replacement interval.
Cleaning That Works
- Use only the manufacturer’s approved method — pulse-clean cycles, designated washes.
- Clean outdoors, wearing a respirator rated for the dust you collect.
- Confirm recovery: pressure should return near baseline after an approved clean.
- Log every cleaning with date, method, and before/after readings.
Mistakes That Cost You
- Compressed air on HEPA media — blows fibers apart and re-releases captured dust.
- Aggressive brushing or tapping to dislodge a cake that won’t budge.
- Handling filters by the media surface instead of the frame.
- Assuming a HEPA rating makes an undersized, leaky collector safe.
Replacing Filters Without Dusting Yourself or Your Shop
A loaded filter is a dense cake of everything your system captured. Replacing it is the riskiest moment in your routine — do it in the right order, every time.
Shut Down & Isolate
Power off and isolate equipment exactly as the manual directs. Let airborne dust settle before opening anything.
Gear Up
Wear appropriate respiratory protection and gloves. Loaded media releases its payload at the slightest bump.
Bag In Place
Seal the loaded filter in a bag before removing it from the housing. Never shake, drop, or carry it by the media.
Verify Seals & Orientation
Install the new filter in the correct orientation, gasket fully seated in its channel — the exact failure behind the April anomaly.
Confirm & Baseline
Check for leaks and normal airflow, then record a fresh pressure baseline to anchor your log.
Run the Flashlight Test
Beam a light across the discharge in a dark shop before resuming work. Clean air is invisible; contaminated air looks like a snow globe in slow motion.
Five Takeaways That Keep a Shop Breathing Clean
HEPA can’t fix neglect. Capture at the source comes first, filtration second, ambient air scrubbing last.
Record a baseline. A falling pressure reading signals a leak or torn media — more dangerous than a rising one.
Clean only as approved. Manufacturer’s method, outdoors, with a respirator — never compressed air on HEPA media.
Symptoms beat calendars. Your own log — inspections, readings, changes — reveals your shop’s true replacement interval.
Bag loaded filters in place before removal, verify seals and orientation on install, and run the flashlight test on the discharge before resuming work. If integrity testing of the assembled unit is required for your application, ask your supplier or a qualified service provider — a filter’s rating alone doesn’t prove the unit is leak-free.
Why a HEPA Filter Can’t Rescue a Neglected Dust Collector
Best practices for shop filtration start with one uncomfortable truth: a HEPA filter does not compensate for an undersized or poorly maintained dust-collection system. If your collector moves 400 CFM through a 4-inch duct with three elbows and a half-full drum, bolting a HEPA cartridge on the exhaust just gives you a very expensive filter doing a job the machine never finished. HEPA units protect lungs only when the rest of the system delivers the air to them.
Think of your shop’s air handling like a bucket brigade. The dust collector at the tool is the first person in line — it catches the big, heavy stuff at the source. An ambient HEPA air filtration unit hanging from the ceiling is the last person, mopping up whatever escaped. If the first person drops half the buckets, the last one drowns, no matter how good their hands are.
Here’s the practical hierarchy I use in my own two-car-garage shop:
- Capture at the source — proper hood, short duct run, adequate CFM for the tool.
- Separate the bulk — a chip separator or cyclone stage so the primary filter only sees fines.
- Filter the remainder — cartridge or bag filter rated for the dust you make.
- Scrub the room air — an ambient HEPA unit running during and 20–30 minutes after work.
Skipping straight to step four is the most common mistake I see in home shops, usually after someone reads about the health effects of fine wood dust. It’s like putting a better air freshener in a car with an oil leak. Fix capture first, then filtration pays off.
Match filtration to the hazard, too. Wood dust, drywall sanding dust, metal grinding swarf, and paint overspray each behave differently and carry different risks. A filter setup that’s fine for sawdust may be entirely wrong for silica-bearing concrete dust, which demands purpose-built equipment and respiratory protection beyond what any shop filter provides.
The 5-Minute Pre-Session Check That Catches 90% of Filter Problems
Before you flip the switch on any tool, a quick walk-around of your dust collection system catches most filter failures before they cost you airflow or lungs. Shop filters and HEPA units protect you by capturing dust — but a torn bag, a gap in a gasket, or a full collection drum silently defeats them all. Five minutes, every session. That’s the whole price.
My routine, in order:
- Hoses and connections — look for cracks, kinked flex hose, and loose clamps. A single loose hose clamp can bleed off more suction than a half-loaded filter.
- Collection container — check fill level. An overfull drum lets dust re-entrain and slam into the filter media.
- Gauges and alarms — note the differential-pressure reading before work starts. That’s your baseline for the day.
- Seals and latches — open the filter access door and eyeball the gasket. Look for dust trails on the clean side of the housing; dust trails are leak signatures.
- Filter surface — shine a flashlight across the media. Patches, tears, dents, or a visible cake that cleaning won’t budge mean it’s replacement time.
During use, keep half an ear on the machine. A collector that suddenly needs its pulse-clean cycle far more often than usual, or a shop that smells like cutting even with the doors closed, is telling you something changed. Chasing the symptom by swapping the filter without diagnosing the cause wastes money — blocked ducts, a full container, or a failed cleaning system all mimic a clogged filter.
The flashlight trick is the one I’d keep if I could only keep one. Beam it across the discharge side of your collector or the exhaust of your HEPA unit in a dark shop. Floating sparkle means dust is getting through. Clean air is invisible; contaminated air looks like a snow globe in slow motion.
How to Read Pressure Gauges Without Fooling Yourself
A differential-pressure gauge tells you when a filter is loading — if you read it honestly. Best practice is to record the reading with a brand-new, properly seated filter as your baseline, then track the rise over weeks of use. When the reading hits the change-out value the manufacturer specifies (often several times baseline, but check your manual), the filter is done regardless of how it looks.
Here’s where most home woodworkers get it wrong: they assume high reading = bad, low reading = good. Not true. A high reading means the media is loading — expected and manageable. A low or falling reading can mean a leak, a torn filter, a bypassed gasket, or a gauge problem. Air taking the easy path around the filter instead of through it reads as low pressure drop. Your gauge smiles while your lungs suffer.
A concrete example from my own log: my collector’s baseline with a fresh cartridge sits around 2 inches of water column. After a winter of weekend work, it had crept to about 5 — normal loading, fixed by an approved cleaning. But one April morning it read 1.2, lower than baseline. That made no sense until I opened the housing and found the gasket had shifted in its channel, letting air skirt the media entirely. The gauge looked ‘healthy’; the flashlight test showed a snow globe at the exhaust. Had I trusted the low reading, I’d have breathed that dust all spring.
Or take the sudden-spike case: a fellow club member couldn’t figure out why his pressure jumped overnight from 4 to 9 inches. The filter was fine — he’d been running green, moisture-heavy pine through his planer, and the damp dust had plastered the media into a paste. Same reading, completely different cause and fix.
| Reading vs. baseline | Likely cause | What to do |
|---|---|---|
| Steady, near baseline | Healthy filter | Keep logging |
| Gradually rising | Normal dust loading | Clean if allowed; plan replacement |
| Sudden spike | Wet material, overspray, or blockage | Inspect media and ducts |
| Falling or very low | Leak, torn media, bypass | Stop; inspect seals and filter immediately |
Interpret readings against your own baseline conditions, not a universal number. Humidity, material type, and even a new blade that makes finer dust all shift the curve. A cheap magnehelic-style gauge costs about the same as one cartridge filter and pays for itself the first time it tells you a filter has two more months in it — or that it failed yesterday.
If you don’t have a gauge, an ammeter on the collector tells a rough story too: a heavily loaded filter changes the motor’s working conditions. But gauges are direct, repeatable, and loggable. For a shop of any seriousness, add one.
When Cleaning a Filter Helps — and When It Destroys It
Can you clean a shop filter instead of replacing it? Only if the manufacturer says the filter is cleanable and tells you how. That single sentence saves more filters — and more lungs — than any other rule in dust collection. Some cartridge filters are built for pulse cleaning or gentle tapping; many bag filters tolerate careful shaking outdoors; most true HEPA media should never be touched with compressed air at all.
The physics is simple. HEPA and fine-filter media work by trapping particles inside the depth of the material and on a fragile dust cake that actually improves filtration. Blast that structure with 90 PSI from your compressor nozzle and you do two things at once: you tear micro-channels through the media, and you aerosolize the very dust you spent months capturing. It’s like pressure-washing a surgical mask and calling it disinfected.
- Pulse-clean systems: let them run as designed. Don’t improvise extra cycles or higher pressure.
- Cartridge filters: gentle tapping or a soft brush on the outside per the manual. Never direct high-pressure air into the pleats at close range.
- Bag filters: some are washable; most single-stage bags just get shaken out outdoors, downwind, with a respirator on.
- HEPA media: assume it is not cleanable unless the manufacturer explicitly says otherwise.
Cleaning buys you time, not immortality. Every cleaning cycle slightly fatigues the media, and eventually the filter’s structural life ends even if it looks clean. My own cartridge filter gets cleaned maybe three or four times across its life; by the fifth cleaning, suction recovery after cleaning drops noticeably, and that diminishing return is my cue to order a replacement.
Aggressive cleaning or improvised compressed-air blasting can damage media and release captured dust — the exact dust the filter existed to trap.
One more rule: never clean a filter indoors. Whatever you dislodge becomes airborne in the one room you’re trying to keep clean. Drag the filter outside, stand upwind, wear at minimum an N95 respirator (a P100 is better for this job), and let the breeze carry the dust away from you and the shop door.
Replacing Filters Without Dusting Yourself or Your Shop
Replacing a loaded filter is the highest-exposure moment in your entire dust-collection routine — the filter is a dense cake of everything you’ve cut, sanded, and routed for months, and one clumsy move puts it back in the air. The safe sequence is short: shut down, isolate, protect, contain, verify.
- Shut down and lock out the collector or HEPA unit. Let the air settle for 15–20 minutes so fine dust drops out of suspension.
- Gear up: P100 or N95 respirator, safety glasses, gloves. Treat the filter like the hazard it collected.
- Bag it before you move it. Slide a large contractor bag up and around the filter while it’s still seated, then release the clamps and pull it free inside the bag. Never shake, drop, or carry a loaded filter open through the shop.
- Inspect the housing. Check the gasket seat, latches, and mounting surfaces for wear, dust trails, and deformation. Clean the clean side of the housing — if it’s dusty, you had a leak, and the new filter will leak too if you don’t fix the cause.
- Install the new filter correctly: right orientation (arrows matter), even seating, gasket undamaged. Never handle any filter by its media surface — grab the frame or end caps.
- Verify before you work: run the unit, re-check pressure against your baseline, and do the flashlight test on the discharge. Normal airflow and no visible dust means you’re back in business.
Orientation deserves its own sentence because it’s the most common installation error: many cartridges and HEPA units are directional, and a backwards filter can seal incorrectly or collapse under airflow. If the housing looks wrong or the gasket won’t compress evenly, stop — forcing it warps the seal and creates a bypass you’ll never see.
Where your application genuinely requires verified HEPA performance — say, filtering anything beyond ordinary wood dust — ask your equipment supplier whether the complete unit needs an integrity test after installation. A filter’s rating on paper proves nothing about the assembled machine. The rating filters the air; the seals determine whether that air actually goes through the filter.
The Maintenance Log That Predicts Your Next Filter Change
Keeping a maintenance record is the least glamorous best practice in this article and the one that pays the longest dividends. Log every inspection, pressure reading, cleaning, filter change, and odd event — that choked-out cut on purpleheart, the day you sanded drywall by mistake. Within a few months you’ll have a site-specific replacement pattern that beats any calendar guess, because filter life depends on your dust, your hours, and your machines — nobody else’s.
My log is a grease-pencil note on the collector’s lid plus a note in my phone: date, pressure reading, hours since last change, what I cut. What emerged after a year surprised me. My cartridge filter lasts about nine months of weekend-shop use — but only three if I’m running lots of MDF and sanding, which produces exactly the fine, sub-micron dust that loads media fastest. Hardwood ripping barely moves the needle. Without the log, I’d have been replacing on superstition.
The log also catches systemic problems early. If pressure readings jump after a specific tool or operation every time, that points to a duct or capture problem, not a filter problem. If you’re replacing the same filter twice as fast as your baseline says you should, something upstream changed — a leaking seal, a failed pre-separator, a new-to-you blade making finer dust.
Recent gear makes this easier. Differential-pressure sensors, alarms, and even connected monitoring systems are trickling down to hobbyist pricing, and they genuinely help you spot changes earlier. Use them. But treat them as a supplement to physical inspection and the manufacturer’s guidance, never a replacement. A sensor tells you something changed; only your eyes and hands tell you why.
Records turn filter replacement from superstition into prediction — and prediction means you order the replacement before the old one fails, not after.
Buy one spare filter when you install a new one, too. Filters have a way of dying mid-project, on a Sunday, when the supplier is closed.
What to Do When Dust Appears Where It Shouldn’t
Dust downstream of a filter — on the clean side of the housing, at the exhaust, or settling on machines after a session — is a stop-work signal, not an annoyance. It means one of four things: a tear in the media, a filter that isn’t seated, a bypass leak around the gasket, or a fault elsewhere in the system like a cracked housing or disconnected duct. Continuing to run the system just recirculates captured dust through your shop air at the worst possible particle size.
Shut everything down and inspect in this order: the filter itself (shine light through the media looking for pinholes and tears), the gasket and its seat (look for dust trails — dust always draws a map of its escape route), the housing latches and access door, and finally the duct connections upstream. Nine times out of ten in my shop it’s been a gasket that didn’t sit evenly after the last filter change because I rushed the install.
Consider two scenarios I’ve personally debugged. In the first, a fine gray film kept appearing on my table saw every morning. It wasn’t the collector at all — a flex hose had worked loose behind the jointer just enough to vent Fine dust into the room at floor level, where the ambient HEPA unit couldn’t reach it. The ‘leak’ was upstream, not in the filter. In the second, dust appeared only at the exhaust during heavy planing sessions. That one was the filter: a pinhole in the pleated media, invisible until I shone a flashlight through the cartridge from inside in a dark shop and saw a tiny star of light. Same symptom, opposite end of the system, completely different fix. This is why the inspection runs upstream to downstream rather than starting at the most expensive part.
Disposal is the last link in the chain and depends on what you collected. Ordinary wood dust in most areas can go out with regular waste in a sealed bag, but you should verify your local rules. Filters contaminated with hazardous materials — engineered stone or concrete silica, certain metal dusts, finish-laden overspray — must be handled according to the relevant safety procedures, not tossed in the shop trash. When in doubt, treat the used filter as hazardous and check your municipality’s requirements.
The habit that prevents recurrence: after every filter change and after any leak investigation, run the flashlight test and re-baseline your pressure reading. Five minutes of verification beats a month of breathing somebody else’s retrofit project.
Frequently Asked Questions
How often should shop filters be replaced?
There’s no universal interval — dust type, workload, and filter design dominate service life. Follow the manual’s change-out criteria and use operating indicators: differential pressure versus your new-filter baseline, reduced suction at the tool, visible damage, and cleaning cycles that stop restoring airflow. In a weekend hobby shop, a cartridge filter commonly lasts somewhere between six months and two years; MDF and sanding heavy use can cut that by two-thirds.
Can I clean a shop filter instead of replacing it?
Only if the manufacturer explicitly rates the filter as cleanable and specifies the method. Cartridge filters often tolerate gentle tapping or a soft brush; some bags are washable. Compressed air blasted into pleats or HEPA media tears micro-channels and releases captured dust — you damage the filter and re-aerosolize the hazard at the same time. Always clean outdoors with a respirator on.
Does adding a HEPA filter make my dust collector safe for any material?
No. The collector’s CFM, ducting, filter arrangement, and the specific dust hazard all matter. Materials like silica-bearing stone dust or certain metal dusts require purpose-built equipment and respiratory protection beyond shop filtration. A HEPA stage improves fine-dust capture on an otherwise sound system — it doesn’t transform a marginal one, and it never substitutes for evaluating the actual hazard.
Why is there dust coming out of my dust collector’s exhaust?
Stop working and inspect. Downstream dust almost always means a tear in the filter media, an improperly seated filter, a bypass leak around the gasket, or a cracked housing. Look for dust trails — they mark the escape route — and check that the filter is seated evenly with its latches secure. Don’t resume operation until you find and fix the cause.
What should I check when installing a replacement filter?
Confirm the filter matches the unit’s specification, install it in the correct orientation (arrows on the frame matter), and never handle the media surface — grip the frame or end caps. Inspect the gasket and housing seat for damage, seat the filter evenly, secure all latches, then run the unit and verify normal airflow and your baseline pressure reading before going back to work.
How do I dispose of used shop filters?
It depends on what the filter collected and your local requirements. Sealed-bag disposal of wood-dust filters is acceptable in many areas, but filters contaminated with silica, hazardous metal dust, or finish overspray must follow the relevant safety procedures — don’t assume ordinary trash is fine. When in doubt, treat the used filter as hazardous waste and check your municipality’s rules.
Conclusion
If you take one thing from this guide: your filter’s rating means nothing without intact seals, honest airflow, and a written record. The best-maintained shop filtration isn’t the most expensive — it’s the one where someone noticed the pressure reading creep, replaced the gasket that was leaking, and bagged the old cartridge before carrying it through the door. Start today with five minutes and a flashlight beam across your collector’s exhaust in a dark shop. If the air is clean, write down your pressure reading and the date. If it sparkles — you’ve got a project this weekend, and your lungs will thank you for it.
Fall yard work Picks
leaf blowers
As an affiliate, we earn on qualifying purchases.