TL;DR

Get business pricing on tools and workshop supplies
- Business-only prices and quantity discounts
- Tax-exempt purchasing
- Multiple users, one account, clear invoices
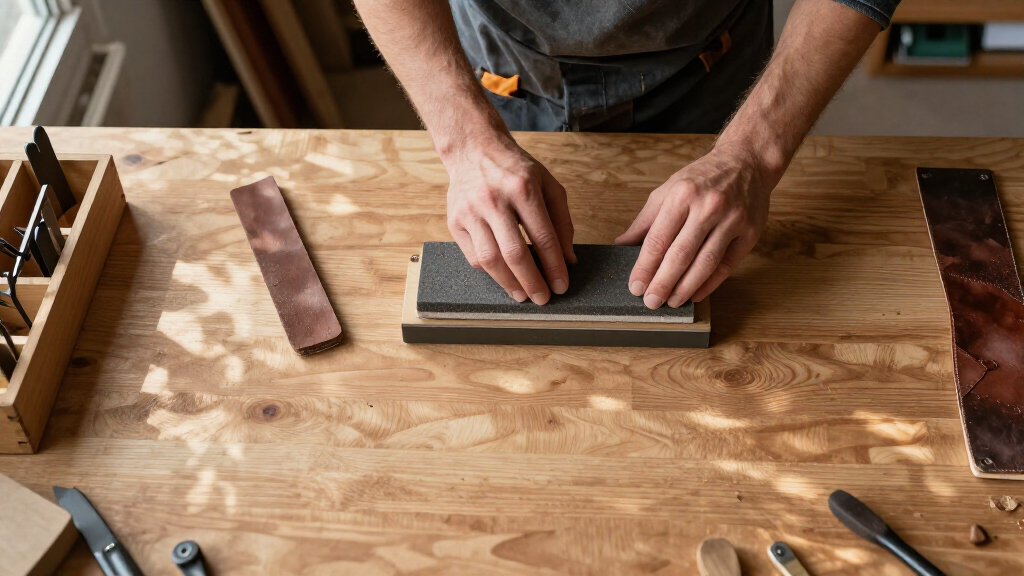
A dedicated sharpening station needs roughly 3×3 feet of bench space, good task lighting, water and dust containment, and a core kit of a 1000/6000 water stone, a honing guide, and a strop. The setup matters more than the gear: keep it near your bench, keep it clean, and you’ll actually sharpen instead of procrastinating.
A dull chisel doesn’t announce itself. It shows up as tearout on a maple drawer front, as a plane that skids instead of shaving, as a cut that requires force. By the time you notice, you’ve already paid the tax — and most woodworkers pay it weekly because sharpening means digging stones out of a drawer, soaking them, finding the guide, and clearing bench space. That friction is exactly why edges go neglected.
The fix isn’t better technique or fancier stones. It’s a dedicated sharpening station — a permanent, ready-to-use corner of your shop where everything lives, stays wet or flat or loaded, and waits for a 90-second touch-up. This guide walks you through location, the core kit, containment, safety, and maintenance, with real numbers for what a garage shop actually needs.
Allocate at least 3×3 feet within two steps of your main bench — proximity determines whether you sharpen or procrastinate.
A $100-150 kit (1000/6000 water stone or diamond plates, honing guide, strop, lapping plate) handles 90% of hand-tool sharpening; skip the grinder until you ac…
Contain the mess with a tray or stone pond and a 30-second wipe-down habit — slurry and swarf contaminate woodworking surfaces fast.
Flatten stones every 2-3 sessions using the pencil-grid trick; dished stones cause bad edges that get blamed on technique.
Add raking task light (800-1000 lumens) and a 10x loupe — seeing the burr is half of sharpening.
How to Set Up a Dedicated Sharpening Station in Your Workshop
A dull chisel doesn’t announce itself. It shows up as tearout, as a plane that skids, as cuts that require force. The fix isn’t better technique or fancier stones — it’s a permanent, ready-to-use corner of your shop where everything waits for a 90-second touch-up.
Pick the Spot That Makes You Actually Sharpen
Proximity beats everything. If you have to cross the shop, you won’t go — you’ll keep planing with a dying edge. The best location is within two steps of your main bench, under dedicated raking light, near water, and away from your dust collector’s discharge path.
Stay Within Two Steps
Allocate at least 3×3 feet within arm’s reach of your main bench. In a one-car garage, the station can live on a bench end, a rolling cart, or a wall-mounted fold-down shelf.
Raking Task Light
Overhead fluorescents hide burrs. An articulated LED at 18 inches, 800–1000 lumens, raking across the stone at a low angle reveals the burr as it forms. One $30 lamp fixed more than any upgrade.
Avoid Contamination Zones
Skip spots under finish storage or lumber racks. Water splashes, swarf sprays, and stone slurry will land on freshly planed boards leaning nearby.
Why 1000/6000 Covers 90% of Hand-Tool Work
Think of it like sanding: 1000 is your rough shaping pass, 6000 is your final polish. Going straight to 6000 on a dull tool is like sanding out a gouge with 220.
A 3×3 foot footprint with a dual-grit 1000/6000 water stone, honing guide, and strop covers 90% of hand-tool sharpening for a typical home shop — for around $100–150, versus $600+ for powered systems.
Sharpening Methods Compared
Everything beyond the core kit is speed or luxury, not capability. Buy the grinder when you actually chip an edge — not before.
| Method | Startup Cost | Speed | Skill Needed | Best For |
|---|---|---|---|---|
| Water stones | $60–120 | Fast | Low with a guide | Chisels, plane irons, knives |
| Diamond stones (plate) | $80–200 | Medium-fast | Low | Low maintenance, carbide-ish edges |
| Oil stones (Arkansas / Norton) | $50–100 | Slow | Low | Durability, no soaking |
| Slow-speed grinder (8″, 1750 RPM) | $150–400 | Very fast | High (burn risk) | Major repairs, regrinding bevels |
| Belt/grit system (Work Sharp style) | $200–450 | Fast | Medium | Hobbyists wanting repeatability |
What a $150 Setup Does That a $700 One Doesn’t Need To
Two years later, the $120 water stone kit and the $400 powered system both produced sharp chisels — one just spent $280 more getting there. Hand-sharpening a healthy edge takes 90 seconds either way.
Water Stones Win If…
- Cut faster and polish finer than any alternative
- Two minutes from dull chisel to sharp
- Cost: ~5 minutes of lapping every few sessions with a $30 plate
- You love a mirror polish on the final bevel
Diamond Plates Win If…
- Stay flat forever — zero flattening discipline needed
- Never need soaking; genuinely good and cheap now
- About four minutes of sharpening per tool
- The low-maintenance choice if you’ll neglect flattening
Build It in Six Steps: One Afternoon, Bare Bench to Working Station
The sequence works whether your station is a bench end, a rolling cart, or a dedicated cabinet.
Clear and Seal the Surface
Wipe on two coats of poly or spar varnish over a 3×3 foot zone. Water stones splash — bare MDF or ply will swell and fuzz within a month.
Add a Stone Pond or Tray
A $5 baking tray, a plywood tray lined with plastic, or a stone pond from any supplier. It catches water, swarf, and slurry before they hit your bench.
Mount the Lighting
Position a task lamp so light rakes across the stone at a low angle. Raking light reveals the burr and shows when the scratch pattern reaches the edge.
Set Up Water and Containment
A spray bottle of clean water (or small oil bottle), plus a dedicated rag — one for wiping, never shared with finish rags.
Create Fixed Homes
A small shelf or pegboard holds the honing guide, angle jig, strop, compound, and marker. Everything with a spot means setup time drops to zero.
Build the Maintenance Habit
A 30-second wipe-down after each session, and flatten stones every 2–3 sessions with the pencil-grid trick — dished stones cause bad edges that get blamed on technique.
Why the Setup Matters More Than the Gear
Friction is why edges go neglected. Remove the friction and the sharpening happens on its own.
Stones Stay Soaked
Permanent pond means zero prep before use
Guide Lives Here
Fixed homes drop setup time to zero
Light Always On
Seeing the burr is half of sharpening
90-Second Touch-Up
Mid-task, without clearing bench space
Clean Cuts
No more tearout tax on your work
Where to Put It: Picking the Spot That Makes You Actually Sharpen
The best location for a sharpening station in your workshop is within two steps of your main bench, under dedicated task lighting, near a water source, and away from your dust collector’s discharge path. Proximity beats everything else. If you have to cross the shop, you won’t go — you’ll keep planing with a dying edge.
When setting up a station, choose a well-lit area with consistent light. Overhead fluorescents cast shadows that hide wire edges and burrs, so add a task lamp — an articulated LED on a bench mount works, and 800-1000 lumens at 18 inches lets you actually see that burr form on the stone. I learned this the hard way: for a year I sharpened under a single garage bulb, chased angles I couldn’t see, and blamed my stones. One $30 lamp fixed more than any upgrade since.
Give it a footprint of at least 3×3 feet. That’s enough for a stone pond or tray, a honing guide, a strop, and elbow room for a 2-inch chisel to travel a full stroke. If your shop is a one-car garage, a dedicated station can live on the end of your bench, a rolling cart, or even a wall-mounted fold-down shelf — the important aspects to nail are lighting, water access, and the habit-forming permanence of the setup.
Avoid spots directly under finish storage or lumber racks. Water splashes and swarf spray, and you don’t want stone slurry landing on a freshly planed board leaning nearby.
water stone sharpening kit 1000/6000
As an affiliate, we earn on qualifying purchases.
As an affiliate, we earn on qualifying purchases.
The Core Kit: What a $150 Setup Does That a $700 One Doesn’t Need To
A complete sharpening kit for a hand-tool woodworker costs $100-150: one dual-grit 1000/6000 water stone (or a 1000 plus a 6000), a honing guide, a flattening plate, a strop with green compound, and a spray bottle. That’s it. Everything beyond that is speed or luxury, not capability.
Why those two grits specifically? The 1000 side does the heavy lifting — it shapes the bevel and removes the steel that dulling damaged. The 6000 side refines the scratch pattern into a polished edge that slices end grain cleanly. Think of it like sanding: 1000 is your rough shaping pass, 6000 is your final polish before finish. Skipping the coarse step and going straight to 6000 on a dull tool is like trying to sand out a gouge with 220 — you’ll be there all afternoon. Going coarser than 1000 (to 400 or 220) is only worth it when you’re regrinding a chipped edge, which is the grinder’s job anyway.
| Method | Startup Cost | Speed | Skill Needed | Best For |
|---|---|---|---|---|
| Water stones | $60-120 | Fast | Low with a guide | Chisels, plane irons, knives |
| Diamond stones (plate) | $80-200 | Medium-fast | Low | Low maintenance, carbide-ish edges |
| Oil stones (Arkansas/Norton) | $50-100 | Slow | Low | Durability, no soaking |
| Slow-speed grinder (8″, 1750 RPM) | $150-400 | Very fast | High (burn risk) | Major repairs, regrinding bevels |
| Belt/grit system (Work Sharp style) | $200-450 | Fast | Medium | Hobbyists wanting repeatability |
Here’s my honest budget-versus-pro take: diamond stones have gotten genuinely good and genuinely cheap in the last few years — a two-plate coarse/fine set around $80 stays flat forever and never needs soaking. Modern diamond stones in assorted grits are the low-maintenance choice if you know you’ll neglect flattening. Water stones cut faster and polish finer, but they dish, and you’ll need a $30 lapping plate and the discipline to use it. The real tradeoff is time versus tolerance: a water stone sharpens a dull chisel in maybe two minutes but demands five minutes of lapping every few sessions; a diamond plate takes four minutes of sharpening and zero maintenance. If you sharpen once a month, diamonds win. If you sharpen daily and love a mirror polish, water stones win.
Concrete example: my neighbor bought a $400 powered sharpening system the same week I bought my $120 water stone kit. Two years later, his chisels are sharp and so are mine — but he spent $280 more to get there, and his system can’t hold a 2-3/8 inch plane iron without an add-on fixture. Speed was the selling point, but hand-sharpening a healthy edge takes 90 seconds either way. Powered speed only matters when you’re removing a lot of metal, which most hobbyists rarely do.
What most hobbyists don’t need: an 8-inch slow-speed grinder on day one. It’s for repairing chips and regrinding primary bevels. If your chisels are intact, the stones will keep them sharp for years. Buy the grinder when you actually chip an edge — not before.
Skip the electric sharpeners with fixed angle guides if you own more than knives; their slots can’t handle a 2-3/8 inch plane iron. Adjustable-angle powered systems exist and work, but they solve a problem the $15 honing guide already solves.
dedicated sharpening station setup
As an affiliate, we earn on qualifying purchases.
As an affiliate, we earn on qualifying purchases.
Build It in Six Steps: From Bare Bench to Working Station
Setting up a sharpening station takes one afternoon. Here’s the sequence I’d follow, whether it’s a bench end, cart, or dedicated cabinet.
- Clear and seal the surface. Wipe on two coats of poly or spar varnish over a 3×3 foot zone. Water stones splash, and bare MDF or ply will swell and fuzz within a month.
- Add a stone pond or tray. A $5 baking tray, a shallow plywood tray lined with plastic, or a stone pond from any sharpening supplier. It catches water, swarf, and slurry so they don’t run onto your bench.
- Mount the lighting. Position a task lamp so light rakes across the stone at a low angle. Raking light reveals the burr and shows you when the scratch pattern reaches the edge.
- Set up water and containment. A spray bottle of clean water for water stones, or a small oil bottle if you run oil stones. A dedicated rag lives here too — one for wiping, never shared with finish rags.
- Create fixed homes for the small stuff. A small shelf or pegboard above the station holds the honing guide, angle jig, strop, compound, and marker. If everything has a spot, setup time drops to zero and you’ll touch up edges mid-task.
- Add a magnifier. A $15 loupe or 10x magnifier lets you confirm the burr and check the edge before you commit. It’s the single cheapest accuracy upgrade in sharpening.
One rule once it’s built: nothing else lives on the station. The moment it becomes overflow bench space, it stops being a sharpening station and becomes a shelf with stones buried under clamps.
As an affiliate, we earn on qualifying purchases.
Dust, Swarf, and Slurry: The Mess Nobody Plans For
Sharpening generates three waste streams — water-stone slurry, metal swarf, and fine stone dust — and all three contaminate woodworking if you let them travel. This matters more than it sounds: metal particles are harder than any wood you’ll ever cut, which means a single swarf chip pressed between a board and your bench becomes a permanent scratch in a panel you spent two hours surfacing. It’s the same reason machinists keep their inspection plates obsessively clean — hard particles plus pressure equals damage. And slurry dries into concrete-hard residue that wrecks a bench surface; once it’s cured, you’re scraping with a chisel and regretting.
Containment starts with the tray. Every stone sits in or over the pond; every wipe happens over the tray, not onto the floor. Slurry from water stones is just stone particles plus water plus tiny metal bits — safe to wipe into the trash when damp, and far easier to clean wet than dry. Think of dried slurry like dried joint compound: a five-second wipe when wet, a twenty-minute scrape when dry. My habit: 30 seconds with a paper towel at the end of every session, and the station stays presentable for years.
If you add any powered sharpening — a grinder, a belt sharpener, or sandpaper on a motorized wheel — dust collection becomes a real topic. A benchtop grinder throwing steel sparks and abrasive dust needs, at minimum, a shop vac with a HEPA bag (2.5 CFM of actual suction at the port won’t cut it; you want a vac rated for fine particulate) positioned at the spark path. For dedicated dust collection at a stationary grinding station, even a small 650 CFM ambient air filter mounted nearby helps capture the airborne fraction that settles on everything within six feet. The health angle matters too: grinding steel produces respirable particles small enough to lodge deep in your lungs, and unlike wood dust, your body can’t break down metal — a HEPA bag isn’t a nicety, it’s the difference between collecting the dust and redistributing it through the shop.
Also keep your sharpening supplies physically separate from your woodworking tools. A chisel rolled across a stone-dust-covered bench picks up abrasive particles that then scratch your work. A real-world scenario: you flatten a stone, wipe your hands on your jeans, then handle a freshly planed drawer front — those faint swirl marks in the finish aren’t mystery defects, they’re 1000-grit abrasive transferred by touch. Cross-contamination is the quiet villain here — a drawer or shelf that only holds sharpening gear solves it.
Wear safety glasses whenever you sharpen powered. A honing stone that shatters at speed — rare, but real — sends fragments exactly where your eyes are. For hand sharpening, glasses are optional; for grinding, they’re non-negotiable.
As an affiliate, we earn on qualifying purchases.
Keeping Stones Flat: The 5-Minute Habit That Doubles Their Life
Sharpening stones wear. Water stones dish fastest — a soft 1000-grit stone used weekly can develop a visible hollow in two months. Once dished, the stone can’t hold a consistent bevel, and people blame their technique. Here’s why: a hollowed stone only contacts the tool at the high spots, so the middle of your chisel’s bevel rounds over while the edges stay flat — you literally cannot produce a straight edge on a curved surface, no matter how good your form. The fix costs five minutes and a $30 diamond lapping plate.
The habit: every second or third session, before you sharpen, lap the stone under running water until the surface shows fresh abrasive uniformly. Pencil a grid on the stone face first — when the grid disappears evenly, the stone is flat. That pencil trick is the cheapest diagnostic in woodworking, and it works because it gives you a visual endpoint: if the grid lines vanish from the edges but linger in the center, you’ve found the hollow and you keep lapping until it’s gone. Without the grid you’re guessing; with it, flattening takes the guesswork out entirely.
Diamond stones barely wear but can load up with swarf; scrub them with an eraser block or a little Comet cleanser and they cut like new. Oil stones wear slowly and flatten on wet/dry sandpaper glued to glass — 120 grit, two minutes, done.
Water stone maintenance also means managing soaking. Modern fast-cutting formulations don’t always need a full soak — many just want a spray of water before use, which is why a spray bottle on the station beats a soaking tub that grows interesting biology in a garage that hits 90 degrees. Check your stone’s specs; soaking a binder that wasn’t designed for it can crack it. The tradeoff is convenience versus stone health: a permanently soaking tub means zero prep time but a stone that degrades faster and a tub of murky water that pets and kids find fascinating. A spray bottle means ten seconds of prep and a stone that lasts years longer.
The stone you flatten every week lasts years. The stone you flatten never turns every sharpening session into a fight against a hollow you can’t see.
Store stones dry, flat, and separated — stacking wet stones lets them bond slightly, and freezing a soaked stone in an unheated garage will split it. In cold climates, that matters: a waterlogged stone that freezes expands internally and cracks like a pothole in pavement, and it usually fails along a line that renders the stone unusable for bevel work.
Small Shop? Three Footprint Options Under 4 Square Feet
You can run a full sharpening station in even a cramped workshop — the constraint is layout, not equipment. Here are three configurations that work in real small shops.
- Bench end zone: Claim the last 30 inches of your workbench. Pond, stone, guide, lamp. Downside: shared surface means occasional clearing. Upside: zero extra floor space.
- Rolling cart: A 20×30 inch utility cart gives you a lower shelf for supplies and a top that’s always ready. Roll it next to the bench when sharpening, park it in a corner otherwise. This is what I’d do in a one-car garage.
- Wall-mounted fold-down: A hinged 24×36 shelf bracket-mounted to studs folds flat against the wall. Best for truly minimal shops, but you give up permanent stone storage — everything lives in a bin that comes out with the shelf.
Whatever you choose, protect the floor or wall behind it. Water splashes travel. A rubber mat under a cart, or a sheet of HDPE cutting board material behind a bench-end station, saves you from mineral spots on drywall and swollen OSB subfloor.
The test of a small-shop station is simple: can you go from dull chisel to shaving arm hair in under three minutes, including setup? If setup takes longer than sharpening, the station is failing at its one job.
Frequently Asked Questions
How much space do I need for a sharpening station?
Plan on a minimum of 3×3 feet of surface for a comfortable setup with stone pond, honing guide, strop, and stroking room for full-size plane irons. In tight shops, a 20×30 inch rolling cart or a wall-mounted fold-down shelf works fine — the layout matters more than raw square footage.
What sharpening stone should a beginner start with?
Most woodworkers start well with a dual-grit 1000/6000 water stone plus a $15 honing guide. The 1000 side shapes the bevel; the 6000 side polishes a working edge. If you know you’ll skip stone maintenance, a two-plate diamond set (~$80) cuts slightly slower but never needs flattening or soaking.
Are electric sharpeners worth the money?
They’re worth it if you sharpen daily or restore a lot of neglected tools — a slow-speed 8-inch grinder makes short work of chip repair. But for keeping healthy chisels and plane irons sharp, stones with a honing guide produce equal or better results for a quarter of the cost. Buy powered sharpening when a specific job demands it, not up front.
How often should I actually sharpen my tools?
Check the edge before each session — if a chisel won’t cleanly slice printer paper or a plane won’t take a full-width shaving, touch it up. With a dedicated station, that’s a 1-2 minute strop or a few passes on the 6000 stone. Full regrinds are rare: maybe once or twice a year per tool under normal hobby use.
Do I need dust collection at a sharpening station?
Hand sharpening needs no extraction — just a tray to contain slurry and swarf. Powered sharpening is different: a grinder or belt sharpener throws sparks, steel dust, and abrasive particles, so use safety glasses and a HEPA-rated shop vac at the point of dust generation. Anything airborne settles within about six feet, so keep the station away from finish work and lumber storage.
Conclusion
Build the station before you buy more tools. Sealed surface, pond, task light, one dual-grit stone, a guide, and a strop — one Saturday afternoon and about $150. The payoff isn’t sharper tools; it’s that sharpening stops being an event and becomes something you do for ninety seconds mid-cut without thinking.
The woodworkers with scary-sharp chisels aren’t the ones with the best gear. They’re the ones whose stones were already wet. Set up the station, keep it clear, and the edges take care of themselves.
Fall Picks
fall essentials
As an affiliate, we earn on qualifying purchases.