TL;DR
Listen free for 30 days with Audible
Thousands of audiobooks and originals — cancel anytime.
Start your free trialAs an affiliate, we earn on qualifying purchases.
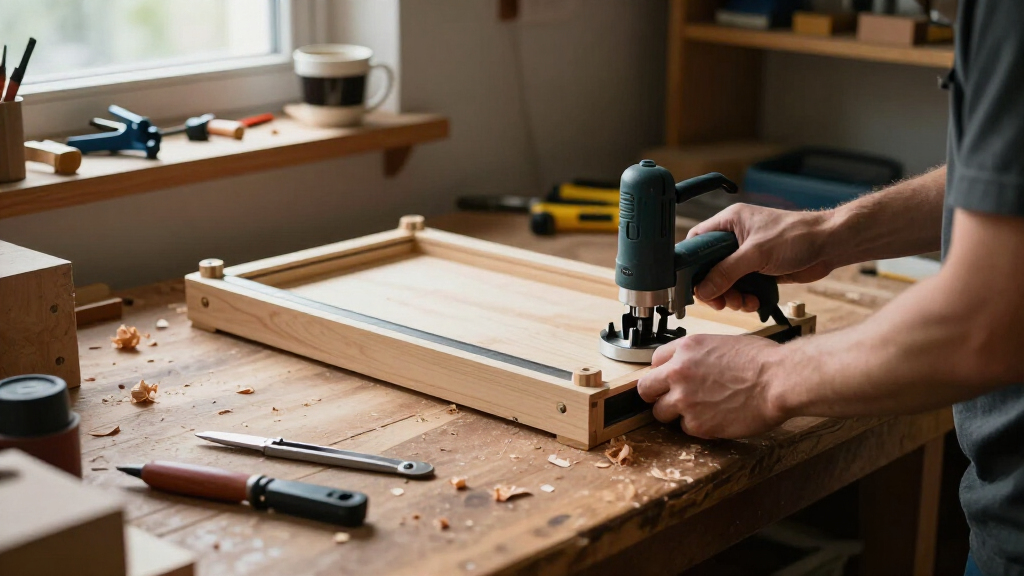
A router table turns a handheld router into a compact stationary machine, but the table needs more room than its footprint suggests. Plan around your longest stock, build for rigidity, level the mounting plate after adding the router’s weight, collect dust above and below the table, and place a properly rated stop switch within easy reach.
A friend once rolled a new router table into the only open corner of his garage, tightened a round-over bit, and fed in a six-foot board. Three feet later, the board struck a storage rack and twisted against the fence. The problem was not the router, the bit, or his technique. It was the missing material path.
That story captures the challenge of putting router tables in small workshops. The machine may occupy only a few square feet, yet every cut needs room for your hands, the stock, a dust hose, and a safe stance. You will get better results by treating the installation as a complete workstation rather than finding an empty patch of floor and dropping a table onto it.
This guide walks you through the choices that matter: installation style, table rigidity, plate compatibility, dust collection, electrical controls, feed direction, guarding, and final test cuts. You will also see where budget materials work well and where saving money creates a wobbly, dust-filled nuisance. The goal is simple: a router table that sets up quickly, cuts predictably, and disappears back into the rhythm of a crowded garage shop.
Lay out clearance for your longest likely board before choosing the router table’s location; the material path matters more than the tabletop footprint.
Check tabletop flatness and plate level again after mounting the router because motor weight can reveal sag that an unloaded check misses.
Collect dust at both the fence and lower enclosure while leaving controlled airflow for motor cooling.
Feed typical fence-guided work from right to left, use guards and work-holding aids, and physically disconnect power before touching the bit or collet.
Use a shallow test cut in scrap to check vibration, plate movement, fence flex, dust capture, heat, and switch access before attempting demanding work.
Guide to Installing Router Tables in Small Workshops
A router table may occupy only a few square feet, but every cut also needs room for stock, hands, hoses, and a stable stance. Plan the complete workstation—not merely the tabletop footprint.
Choose the runway before the table
Mark the proposed footprint with painter’s tape, then carry your longest common workpiece through the imaginary cut. Check doors, storage, vehicles, hoses, fence knobs, and your own stance.
Benchtop table
Easy to store and ideal for shared benches, provided it clamps firmly to a stable surface.
Best for pack-away shopsFloor-standing cabinet
Strong stability, useful storage, and enclosed dust capture at the cost of permanent floor space.
Best for dedicated cornersTable-saw wing
Uses an existing runway efficiently, but must not obstruct saw fences, hoses, or sheet handling.
Best for space efficiencyMobile or fold-away
Excellent for garages that return to parking duty, if casters, hinges, and braces lock rigidly.
Best for flexible layoutsRigidity beats accessories
Premium fences and digital gauges cannot correct a flexible top or a stand that racks under feed pressure. The table should feel like a boulder during a cut—not a shopping cart.
Five loaded checks
Top material profile
Match the entire mounting stack
Verify the router, plate or lift, insert rings, adjustment range, enclosure, and controls before cutting the tabletop. A lift improves convenience and repeatability; it does not improve the cut by itself.
| Compatibility check | Basic plate | Router lift | Failure prevented |
|---|---|---|---|
| Motor diameter and mounting pattern | ✓ Required | ✓ Critical | Motor that cannot be secured |
| Above-table height adjustment | ~ Model dependent | ✓ Standard benefit | Awkward under-table setup |
| Insert-ring and bit opening | ✓ Verify | ✓ Verify | Cutter that cannot clear the plate |
| Plunge-base integration | ~ Often awkward | ✗ Often incompatible | Unusable carriage or adjustment |
| Collet and speed-dial access | ✓ Confirm | ✓ Confirm | Controls trapped against cabinet walls |
| Horsepower and table-use approval | ✓ Required | ✓ Required | Overloaded or unsupported hardware |
Dry-fit the router, plate, rings, fence, dust fittings, and remote switch. Confirm that every adjustment remains reachable after the cabinet is closed.
Build accuracy in the right order
The plate opening must be snug without binding, and its supporting ledge must carry the loaded router without deflection. Never assume an unloaded plate will remain level.
Mark
Use the manufacturer’s template and verify its orientation twice.
Cut
Create a clean opening without weakening a narrow frame.
Support
Build a continuous ledge strong enough for the motor’s weight.
Load
Install the router before making the final leveling adjustments.
Verify
Cross the plate with a straightedge in several directions.
Control what the cutter creates
Router tables generate airborne dust, larger chips, heat, and reaction forces. Good installation manages all four without compromising motor cooling or access to an emergency stop.
Two-point dust capture
Capture debris near the bit and again below the table, while providing controlled make-up air through the enclosure.
Four non-negotiables
Safe control begins before the motor starts and continues until the bit has fully stopped.
Prove the workstation with scrap
A shallow test cut reveals installation problems while the consequences are still small. Stop immediately if the table moves, the plate shifts, or vibration changes unexpectedly.
One shallow pass
Use straight scrap with a modest cutter exposure. Listen, feel, inspect, and stop before moving to visible work or demanding profiles.
Test before productionSpend first on a clear material path, a rigid foundation, a flush loaded plate, effective dust capture, and reachable power control. Convenience upgrades only become valuable after those fundamentals are dependable.
Choose a Table Style That Gives Your Boards Room to Move
The Guide to Installing Router Tables in Small Workshops starts with the space around the machine, not the machine itself. Choose an installation style that leaves a straight, supported path for your longest likely workpiece while keeping the table clear of doors, shelves, vehicles, and nearby tools.
A router table is a handheld router mounted upside down beneath a flat surface. That arrangement turns a handheld router into a compact stationary machine, letting you guide the work instead of balancing the motor on the work. The tabletop looks small, but a six-foot rail still needs roughly six feet of clear travel as it crosses the cutter.
| Installation style | Where it works well | Main tradeoff |
|---|---|---|
| Benchtop table | Shared benches and shops that must pack away after each session | Needs firm clamps and separate stock support |
| Floor-standing cabinet | Dedicated corners with room for storage and enclosed dust capture | Consumes permanent floor space |
| Table-saw extension wing | Shops where one machine footprint must handle two jobs | Can interfere with saw fences, hoses, or sheet-goods handling |
| Mobile or fold-away table | Garages that return to parking duty | Casters, hinges, and braces must lock rigidly |
In a one-car garage, a table-saw wing often makes sense because the saw already owns the best runway. Yet that arrangement only works if the saw stays stable under the router’s weight and the router fence comes off without a wrestling match. If you need twenty minutes to convert the station, you will reach for another tool and leave the table unused.
Mark the proposed footprint with painter’s tape, then carry your longest common board through the imaginary cut. A seven-foot baseboard may need to pass through an open doorway, while a two-foot cabinet rail might fit across the room. Include space for your hips and feet; working sideways between a machine and a wall weakens control.
Plan for the stock, not the tabletop. A compact table in a blocked aisle is functionally larger and less useful than a mobile table with a clear runway.
Werkbericht recommends checking workpiece clearance, dust access, electrical access, and nearby machine conflicts before assembly [1]. That dry run costs ten minutes and can prevent weeks of shuffling machines every time you want to cut a groove.
As an affiliate, we earn on qualifying purchases.
Build Enough Rigidity to Keep Every Cut Consistent
The Guide to Installing Router Tables in Small Workshops puts rigidity ahead of accessories because a flexible stand changes the cut while you work. Your tabletop must stay flat, the base must resist side-to-side racking, and a mobile unit must become fully immobile when its wheels are locked.
Think of the table as the router’s foundation. A premium micro-adjust fence sitting on a springy MDF top is like a sharp chisel with a loose handle: the fancy part cannot correct the movement underneath it. If the top dips under motor weight, your carefully set bit height changes between the center and the edge.
Cast iron provides mass, stiffness, and a smooth surface, but it costs more and makes a mobile cabinet harder to move. Phenolic offers good stability at lower weight. Laminated MDF is the sensible budget choice when you support it well, seal exposed edges, and keep damp concrete-floor moisture away from it.
For example, place a straightedge across an unloaded MDF top, then repeat the check after mounting a heavy router. If a thin paper strip slides under the straightedge near the plate, the top or plate support has moved. Add bracing beneath the top or correct the leveling system before you shape a visible cabinet door.
- Push diagonally against the stand and check for racking or rocking.
- Lock every caster, then apply the same sideways pressure used during a firm feed.
- Check that folding legs and wall brackets have positive mechanical locks.
- Measure across the tabletop in several directions with a reliable straightedge.
- Recheck all fasteners after the first few cutting sessions.
Retractable casters or leveling feet usually feel more planted than small swivel casters whose brakes stop the wheels but leave the swivels loose. In a tiny garage, mobility has real value. During a cut, though, the station should feel like a boulder, not a shopping cart.
As an affiliate, we earn on qualifying purchases.
Match the Router, Plate, and Lift Before Cutting the Top
The Guide to Installing Router Tables in Small Workshops saves you from an expensive mismatch by checking the complete mounting stack before you cut. Confirm the motor diameter, hole pattern, plate dimensions, bit opening, adjustment range, collet access, cooling clearance, and manufacturer approval for table use.
A router lift is a mechanism that holds the motor and moves it vertically from above the tabletop. It buys convenience and repeatability, not better cutting by itself. A flat basic plate with an accessible fixed-base router can produce the same clean profile when you set it carefully.
The trap often appears after the shiny lift arrives. A woodworker removes the plunge base, then discovers that the motor body will not fit the lift carriage or that the speed dial faces a cabinet wall. Another common snag: the largest insert ring is smaller than the cutter the owner planned to use.
- Confirm the router motor diameter and approved mounting method.
- Compare the plate or lift outline with the supplied opening template.
- Check that the table and plate support the router’s weight and power class.
- Verify above-table height and collet access if those features matter to you.
- Leave room below for ventilation, dust hose routing, and motor removal.
- Check remote-switch and variable-speed compatibility, especially with cordless routers.
Compact routers suit chamfers, round-overs, shallow grooves, and other light work with smaller bits. A larger variable-speed motor handles demanding profiles with less strain, but it adds weight and needs a stronger plate. Large-diameter cutters also run at lower speeds set by the bit and router manufacturers; horsepower alone does not make them safe.
If you use a cordless motor, test whether the battery can be removed without taking apart the cabinet. Check what happens after power interruption and whether an external switch can actually control the tool. A battery trapped behind a drawer turns a clever compact build into a daily irritation.
Buy compatibility before convenience. A lift only saves time when the motor fits, the controls remain reachable, and the table opening supports the assembly without flexing.
As an affiliate, we earn on qualifying purchases.
Install the Plate Flush Enough That Stock Cannot Catch
A mounting plate should sit flush with the tabletop in every direction, with no raised corner that can catch a board and no low edge that lets narrow stock tip. Fit the opening closely, support the plate on a stiff ledge, and make final adjustments after mounting the router.
- Measure the room and material path. Confirm the table location, stock clearance, outlet position, and dust-hose route.
- Assemble and brace the base. Level it without twisting the tabletop supports.
- Cut the opening from the supplied template. Sneak up on the fit instead of leaving loose side play.
- Build a continuous support ledge. Leave enough material around the opening to carry the router without bending.
- Fit the plate or lift. Adjust each leveling screw in small increments.
- Mount the router. Repeat the straightedge check with the full motor weight installed.
- Rotate the bit by hand with power disconnected. Check the insert ring, fence, guard, and collet clearance.
A good fit does not mean hammer-tight. You need enough clearance to remove the plate without peeling the laminate, yet little enough movement that the assembly cannot shift sideways. Follow the plate manufacturer’s template and instructions because corner radii and support details differ [2].
Here is a real shop test: slide a narrow hardwood offcut slowly across every plate edge from four directions. If you hear a click or feel the leading edge stop, keep leveling. A straightedge and a 0.0015-inch feeler gauge can reveal tiny gaps, but the sliding-stock test tells you what the workpiece will actually feel.
Do not cut an oversized opening into a narrow bench frame just because the plate physically fits between two rails. The remaining strips may sag or split under a heavy router. Add crossmembers or choose a smaller plate before removing material you cannot put back.
After several test cuts, check the plate again. Vibration can settle hardware, and MDF supports can compress around poorly distributed screws. A quarter-turn at one leveling point can be the difference between a rail gliding like it is on glass and stopping sharply beside a spinning bit.
As an affiliate, we earn on qualifying purchases.
Set the Fence and Supports So the Workpiece Stays Under Control
Your fence should be straight, rigid, and easy to lock, while infeed and outfeed supports must share the tabletop height without steering the stock. For ordinary fence-guided routing, fence position relative to the cutter matters more than parallelism with the table edge or miter slot.
That last point surprises woodworkers coming from a table saw. A saw fence tracks parallel to the blade because the board passes between them. A router-table fence crosses the round cutter’s path, so you move the fence forward or backward to expose the required cutting arc.
Split fence faces let you close the gap around the bit, improving support near the cut. They can also handle light edge-jointing when the outfeed face receives a suitable shim. For example, a thin laminate shim behind the outfeed face can support a freshly trimmed edge, much like the outfeed table on a jointer.
For a typical fence-guided cut, feed the workpiece from right to left while standing at the front. That direction pushes the stock against the cutter’s rotation and helps you maintain pressure against the fence [1]. Feeding the opposite way creates a climb cut that can yank the board forward before your hands catch up.
- Use featherboards to maintain steady fence or table pressure without placing fingers near the bit.
- Guide narrow stock with push blocks rather than pinching it between fingertips.
- Support end-grain cuts with a coping sled or backer board to reduce tear-out.
- Use a starting pin and guarded jig for suitable bearing-guided freehand work.
- Never route a piece too small to control securely by hand or with a fixture.
Imagine routing a profile along an eight-foot shelf. A roller stand set a fraction too high lifts the board away from the tabletop as the trailing end reaches it. Set supports level or slightly low, then test the whole movement with the router off; the stock should glide without climbing, dipping, or knocking into a hose.
Take care when using a miter gauge and fence together. If the fence traps a crosscut piece against the cutter, the offcut has nowhere to escape. Pull the fence clear or use it only as a stop before the cutter so the workpiece enters the cut with open space beside it.
Capture Dust at Both Sources Without Cooking the Router
Effective router-table dust control uses two collection points: one at the fence for chips thrown above the table and one below for debris falling around the motor. The lower enclosure also needs controlled make-up air so extraction works without trapping motor heat inside a sealed box.
Routing produces two very different messes. Coarse curls rattle through the fence port like dry leaves, while pale flour-fine dust hangs in the light long after the cutter stops. Fence-only pickup may catch the obvious chips and still leave your lungs dealing with the dust you barely see.
A shop vacuum provides high suction through a small hose, which often suits compact fence ports. A larger dust collector moves more air, measured in cubic feet per minute or CFM, through wider ducting. Real performance at the tool falls as narrow fittings, long hoses, sharp bends, clogged filters, and leaks add resistance.
In one common garage setup, a short vacuum hose at the fence catches edge-profile chips well, but a deep dado showers the cabinet below. Adding a lower port and a deliberate air inlet opposite that port creates a sweeping airflow across the enclosure. The inlet should guide dust toward extraction, not pull it through the router’s cooling path.
- Keep hoses short and gently curved where the layout allows.
- Close unnecessary cabinet gaps while retaining planned cooling-air openings.
- Check the filter often; reduced suction can arrive gradually and go unnoticed.
- Use eye and hearing protection plus a suitable respirator when fine dust remains airborne.
- Follow the dust-system manufacturer’s instructions for conductive or grounded components.
Do not assume that dropping a loose wire into ordinary plastic hose creates a safe grounding system. Use components and methods approved by the equipment manufacturer and applicable local rules. Static control, electrical grounding, and fine-dust filtration solve different problems.
A clean floor does not prove clean air. Source capture, ambient filtration, careful cleanup, and respiratory protection work as layers rather than substitutes for one another.
Place the Switch Where One Fast Motion Stops the Cutter
A router-table switch belongs on the front of the station where you can hit it without bending, reaching beneath the table, or taking your attention off a problem. Use a properly rated control with a large stop paddle, accidental-start protection, and no-voltage restart protection where available.
The router’s own switch may remain on when an external control operates the machine. That makes the external device part of the safety system, so its voltage and current ratings must match the motor. A lightweight household switch or undersized extension cord has no place between a powerful router and the outlet.
Run the shutdown test before installing a bit. Stand in your normal feeding position, keep both hands where they would hold stock, and touch the stop paddle with a knee or free hand. If a drawer pull, dust hose, or cabinet corner blocks that motion, move the switch now.
The router and dust collector may overload one circuit when their running current and startup loads combine. Check both equipment labels, the circuit rating, and manufacturer instructions. Use a grounded outlet and an extension cord only when its gauge, length, condition, and rating suit the load.
Disconnect the plug or otherwise isolate power before changing bits, touching the collet, rotating the cutter by hand, clearing a jam, or working below the tabletop. A switch in the off position is not the same as physical isolation.
Electrical modifications must follow local codes and permit rules. Hire a licensed electrician for new circuits, outlets, hardwired controls, damaged wiring, or any work beyond plug-in equipment approved for the task. Turn power off at the correct breaker before authorized electrical work, verify the circuit is dead with suitable test equipment, and wear the PPE required for the job [2].
A small shop tempts you to daisy-chain cords because every outlet already serves a machine, charger, or heater. Resist that patchwork. A dedicated, correctly installed outlet near the workstation removes a trip hazard, reduces voltage drop, and keeps the emergency switch connected to a sound power path.
Make a Low-Risk First Cut That Exposes Installation Problems
Your first test should use scrap stock, a modest bit, and a shallow cut after a complete power-off clearance check. The goal is not to test the router’s muscle. You are listening for vibration, watching dust flow, and checking whether the fence, plate, supports, guards, and switch work together.
Start by installing a clean, undamaged router-table-rated bit in the correct collet. Insert the shank deeply enough for secure grip, then pull it back slightly so it does not bottom out before tightening. Match the speed to the router and bit manufacturers’ guidance, especially as cutter diameter increases.
With the router unplugged, rotate the cutter by hand through a full revolution. Check that it clears the insert ring, fence faces, guard, and dust hood. Expose only the cutter needed for the operation, and never start with the bit touching the workpiece.
A useful first trial is a 1/8-inch-deep groove in a straight, flat offcut wide enough to control comfortably. Feed from right to left with the guard and dust collection running. The sound should remain smooth rather than rising into a strained howl, and the stock should cross the plate without clicking or rocking.
- Stop and disconnect power after the first pass.
- Check the bit, collet, plate, fence, guard, and base fasteners.
- Look for dust piles that reveal weak extraction or blocked airflow.
- Check the motor compartment for unusual heat.
- Measure the cut at several points to expose plate movement or fence flex.
- Repeat with another shallow pass only after correcting any fault.
Suppose the groove measures correctly at both ends but grows deeper through the middle. That pattern points toward top sag, plate movement, or stock lifting rather than a bad height setting. The test cut acts like a fingerprint: it shows how the whole workstation behaves under real pressure.
Make multiple shallow passes for deep profiles instead of forcing the entire cut at once. This lowers the load on the bit and motor while giving you more control over tear-out. Digital height gauges can help you return to a setting, but a measured scrap cut remains the final proof.
Werkbericht’s installation sequence and safety guidance support the clearance, feed-direction, extraction, and post-test checks described here [1]. Equipment manuals and applicable electrical or workplace rules remain the controlling references for individual machines and installations [2].
Frequently Asked Questions
How much room does a router table need in a small workshop?
The tabletop may need only a few square feet, but the working space depends on your longest stock. A six-foot board needs a clear, supported path before and after the bit, plus enough room for your hands and stance.
Use doorways or open aisles when they provide a safe straight runway. Test the layout with an actual board before fixing the table in place.
Can I install a router table in a table-saw extension wing?
Yes, when the saw and extension structure support the router without flexing or becoming unstable. Check fence removal, dust routing, switch access, and interference with normal saw work before cutting the wing.
A shared footprint can save valuable floor space, but each machine should remain practical to use. Avoid a layout that requires dismantling half the workstation for every routing job.
Do I need a router lift?
No. A lift provides above-table adjustment and repeatability, but it does not replace a flat plate, rigid support, or careful test cuts. A standard plate and compatible fixed-base router can work very well.
Buy a lift only after checking motor diameter, opening dimensions, adjustment range, collet access, and table weight capacity. Compatibility matters more than added features.
Can a shop vacuum handle router-table dust?
A shop vacuum often works well with small fence ports because it produces strong suction through narrow hose. Performance depends on hose length, bends, leaks, filter condition, and the volume of chips produced.
Use fence and below-table pickup where possible. Fine airborne dust may still call for ambient filtration, careful cleaning, and a suitable respirator.
Which direction should I feed wood across a router table?
For a typical fence-guided operation, feed the workpiece from right to left while facing the table. This moves the stock against the cutter’s rotation and supports controlled pressure against the fence.
The reverse direction creates a climb cut that can pull the stock unexpectedly. Bearing-guided freehand work changes direction according to whether you follow an inside or outside edge, so confirm cutter rotation before starting.
Conclusion
Your best small-shop installation is the one that becomes rigid, clear, and ready in a minute or two. Before buying precision extras, spend your effort on the stock runway, stand bracing, plate fit, dual-point dust capture, guarded cutter, and a stop switch you can reach without searching.
Then unplug the router, rotate the bit by hand, and walk a scrap board through the full cut. If nothing catches, rocks, collides, or strains your stance, make one shallow pass and listen. A well-installed table gives you a steady hum, a clean ribbon of wood, and the quiet confidence that every part of the shop is working with you.
NFL season / tailgating Picks
team gear
As an affiliate, we earn on qualifying purchases.