TL;DR

Get tools and workshop supplies delivered free — and shop member deals
- Fast, free delivery on millions of items
- Access to Prime Big Deal Days deals on October 6–7
- Prime Video, Amazon Music and more included
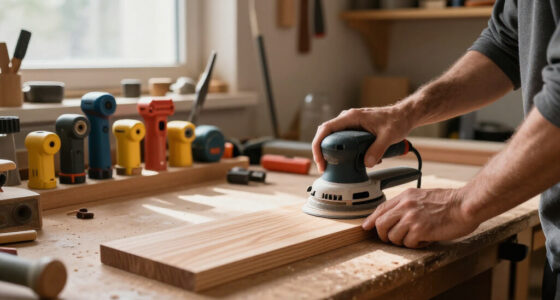
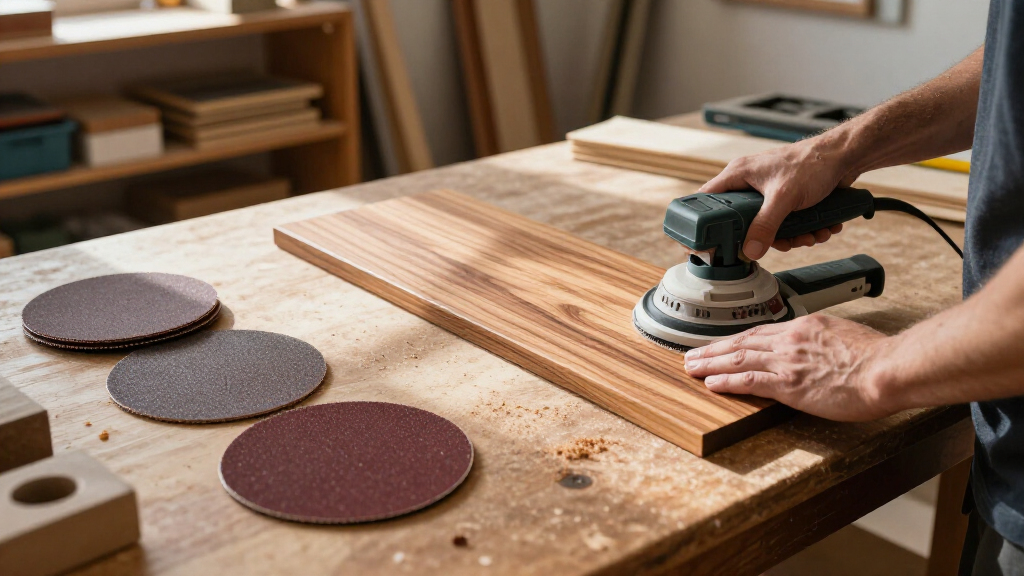
Choose sanding discs by matching grit to the surface, abrasive to the wood, and backing and hole pattern to your sander. A progression such as 80 → 120 → 180 works for many jobs, but pine, hardwoods, veneer, and different finishes call for adjustments; clean between grits, extract dust, and stop when the finish maker’s guidance says to.
A tabletop can feel glass-smooth under your palm and still turn into a map of pale swirls as soon as you wipe on stain. That’s the catch with sanding: the disc that removes wood fastest can also leave scratches your finish will highlight.
You’ll get better results by matching grit, abrasive material, and disc construction to the wood and the job. Pine behaves differently from oak; veneer gives you little room for correction; paint removal asks more of a disc than a final pass before clear coat.
This guide walks through practical grit choices, common abrasive types, dust extraction, and ways to catch scratches before they reach the finish. You’ll also see where a budget paper disc makes sense and when a more durable option earns its keep in a small shop.
Start with the coarsest grit the surface actually needs, then step through grits until earlier scratches disappear.
Treat pine gently because it can clog or scratch easily; expect dense oak and maple to benefit from durable abrasives and careful inspection.
Match disc diameter, attachment, and hole pattern to your sander so extraction can work as intended.
Clean the workpiece and sander between grits to keep stray coarse particles from cutting new scratches.
Use moderate pressure, effective extraction, and appropriate respiratory protection; replace discs when they stop cutting cleanly.
Start with the surface, then choose your grit
Choose your starting grit by judging how much material you need to remove: coarse grits level rough surfaces quickly, while finer grits erase the scratches they leave behind. For many projects, an 80 → 120 → 180 progression gives you a useful path from shaping to finish preparation, but the starting surface and finish decide where to begin and stop.
On rough lumber with mill marks, 80 grit may be a sensible start; on a flat tabletop that only needs light refinement, starting at 120 can save time and wood. Previously finished pieces need extra care: identify the old coating and remove it with a suitable method and abrasive. A disc made for wood may load or cut poorly against a gummy finish.
Skipping too many grits often leaves coarse scratches hiding beneath a smooth-looking surface. Imagine sanding a maple tabletop at 80 and jumping straight to 180: the finer disc may soften the feel while the deeper 80-grit lines remain. After finish goes on, those lines can stand out like pencil marks under a clear coat.
Instead of following a fixed recipe, inspect the surface after each step and follow the finish maker’s grit recommendations. Test on scrap when stain color matters: very fine sanding can burnish some woods and reduce absorption. The best stopping point is the one that leaves a consistent surface suited to your finish, not the largest number printed on a disc.
- Read the surface: note roughness, old coating, dents, and thin edges.
- Pick the coarsest grit you need: avoid aggressive stock removal on delicate faces.
- Step through grits: move up gradually and remove the previous scratches.
- Inspect and test: check in raking light and try the finish on an offcut.
As an affiliate, we earn on qualifying purchases.
Give pine and hardwoods the abrasives they need
Softwoods such as pine often need a lighter hand because they can clog or scratch easily, while dense hardwoods such as oak and maple may need a tougher abrasive for sustained cutting. No disc is best for every species: choose by how the wood cuts, how much material you’re removing, and whether a finish or glue residue is loading the surface.
Pine’s soft earlywood can wear away faster than its harder bands, leaving a rippled face if you lean on the sander. Resin can also build up on the disc. On a pine cabinet door, keep the tool moving, use dust extraction, and check the abrasive often; a loaded disc can rub warm resin into the grain instead of cutting cleanly.
Oak’s open grain and hard structure make a durable abrasive useful during heavier removal. Maple can be dense and show scratches under stain, so you may need to spend longer removing marks from the preceding grit rather than jumping ahead. That’s a good reason to try the full sequence on a cutoff before committing to the show face.
Veneer and thin finish layers call for a different kind of restraint. Use a light touch, keep the sander flat, and stay away from edges where the veneer is easiest to sand through. On a veneered cabinet panel, hand-sanding with the grain may give you more control than letting a machine hover over one spot. The wood species matters, but so does how much wood you can afford to remove.
- Pine: watch for loading and uneven wear; use modest pressure.
- Oak: choose durable discs for heavier leveling and clear scratches before finishing.
- Maple: inspect carefully under raking light, especially before staining.
- Veneer: use a light touch and avoid prolonged machine sanding in one area.
As an affiliate, we earn on qualifying purchases.
Pick an abrasive material that suits the job
Aluminum oxide is a versatile general-purpose abrasive for many woodshop tasks. Zirconia alumina and ceramic abrasives are durable options for heavier removal and harder woods, while silicon carbide is often used for fine sanding and wet sanding when the specific product allows it. These are useful starting points, not guarantees: grain design, coating, backing, and the job all affect how a disc performs.
For routine sanding on a pine shelf or a hardwood drawer front, aluminum oxide often gives you a practical balance of cost and cutting. For leveling a stubborn oak glue line, a more durable zirconia or ceramic disc may stay useful longer. A premium abrasive costs more per disc, but it can make sense when you’re removing material steadily; it’s wasted money if you’re using it for a light pass on a small, softwood part.
Silicon carbide is common in finer sanding and wet-sanding applications, but check the product’s stated use before introducing water. Not every paper, backing, or workpiece suits wet sanding. If you’re preparing a small sample for a finish, the product label and finish instructions matter more than a rule of thumb about abrasive chemistry.
Recent abrasive designs include engineered grains, anti-loading coatings for resinous woods, and mesh or multi-hole constructions aimed at dust extraction. A mesh disc may help keep the face clearer under compatible extraction, but no disc makes sanding dust-free. Choose the least expensive disc that cuts cleanly for the task, then move up a tier when frequent clogging, rapid wear, or production volume makes the added life worthwhile.
As an affiliate, we earn on qualifying purchases.
Match the disc backing and holes to your sander
A disc only works well when it fits the sander: match its diameter, attachment system, backing, and dust-extraction pattern. A disc with holes out of alignment can reduce extraction, letting dust pile up under the pad and around the work. Before buying a stack, check the machine’s manual or compare the disc directly with the pad.
Paper-backed discs handle many general sanding jobs and are common in small shops. Cloth-backed options can tolerate tougher use, though the right choice depends on the abrasive and machine. Hook-and-loop attachment makes grit changes convenient; adhesive-backed discs use a different system and cannot be swapped freely. A 5-inch disc also will not fit a 6-inch pad just because the holes look close.
Suppose your random-orbit sander has an eight-hole pad and you install a disc with only a few mismatched holes. The machine may still run, but dust capture can fall off, and the remaining dust can clog the abrasive faster. On a shop-built oak panel, that means more cleanup and a greater chance that stray particles will score the surface.
Mesh and multi-hole discs can support airflow when paired with compatible pads and extraction. They are not automatically superior: the layout must suit your tool, and the disc must stay flat and attached. In a compact garage shop, a well-fitted disc connected to a capable extractor is usually a more useful upgrade than buying an exotic abrasive and leaving its holes misaligned.
As an affiliate, we earn on qualifying purchases.
Use dust extraction and a light hand for cleaner sanding
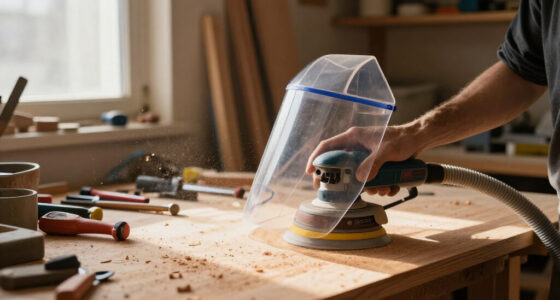
Effective dust extraction and moderate pressure help a disc cut cleanly, stay cooler, and leave fewer uneven marks. Fine wood dust can be hazardous, so use an extractor suited to your sander and appropriate respiratory protection, following the tool and workplace guidance. Extraction reduces airborne dust; it does not eliminate it.
Too much pressure can generate heat, clog the abrasive, or make the pad tilt and cut unevenly. Let the tool’s weight do most of the work and keep it moving in overlapping passes. If you’re sanding the broad face of a maple panel, pause now and then to feel for high spots and inspect the surface; pressing harder can create a shallow dip before you notice.
Dust control depends on the whole setup: sander ports, disc holes, hose, extractor, and filter all play a part. A small shop vacuum connected to a sander can help, but its performance varies by model and hose. If dust keeps escaping, check for a loose connection or clogged filter and consult the equipment maker’s guidance rather than assuming the disc is the only problem.
Keep the sanding area clean and wear eye protection as well as respiratory protection. If you’re sanding old paint or an unknown coating, don’t treat it like ordinary wood dust: identify the coating and follow appropriate handling guidance before you disturb it. A clean, well-controlled pass is easier on your lungs and gives you a better view of the surface you’re trying to finish.
Dust extraction helps, but it is not dust-free sanding. Use suitable respiratory protection and follow the guidance for your sander, extractor, and abrasive.
Catch swirls before stain or clear finish does
Random-orbit sanders reduce directional marks but can still leave swirls, especially if you move too fast, use a loaded disc, or leave coarse scratches behind. For final passes on visible surfaces, sand with the grain by hand when needed. A clean surface should look consistent in raking light, not merely feel smooth with your fingertips.
On an oak tabletop, inspect after each grit with light shining across the grain. Swirl marks may disappear under the sander’s pad and show up again when you wipe on finish. If they remain, return to the grit that can remove them, then work through the next steps so you don’t simply trade a visible swirl for a deeper scratch.
Cleaning between grits is one of the simplest ways to prevent new scratches. Remove dust from the workpiece and sander pad before changing discs; a stray coarse particle can cut a track that the finer disc will not erase quickly. This is particularly easy to miss when moving between grits on a small cabinet door: one grain trapped near the pad edge may drag across the whole face.
Sand with the grain for the last hand-sanding passes. Keep the surface and abrasive clean, replace a disc that stops cutting, and avoid pushing the sander into a corner where its pad can tilt. If staining is part of the project, test the whole sequence and stain on scrap from the same board. A few minutes there can save a full tabletop from a blotchy, scratch-revealing finish.
Know when to clean or replace a sanding disc
Clean or replace a disc when it stops cutting effectively, loads with dust or resin, wears at the edges, tears, or makes the workpiece noticeably hotter. A disc can look intact and still be spent. If you need to press harder to keep it cutting, stop and inspect it instead of trying to force more life out of it.
On a pine project, resin and softwood dust can pack into the abrasive and turn its surface dull. If the product maker permits disc cleaning, use the recommended method; otherwise replace it. On hardwood, worn abrasive may polish or burnish a surface instead of removing scratches, which can affect how stain takes.
Check the pad as well as the abrasive. A damaged hook-and-loop face or loose attachment can cause a disc to shift, tear, or cut unevenly. For example, if a disc’s edge starts to flap while you sand a maple drawer front, stop the machine and inspect the attachment before the loose edge scuffs the workpiece.
Count cost by useful cutting time, not just price per disc. A budget pack can be sensible for occasional light work, while longer-lasting abrasive may pay off when you’re regularly flattening hardwood or removing old finish. Keep a fresh disc ready for the final grits; using a worn disc to save a few cents can add much more time when you have to chase scratches later.
Frequently Asked Questions
What grit should I start with on rough lumber, a finished piece, or a tabletop?
Start rough lumber at a grit that removes its marks without taking off more wood than needed; 80 grit is a common starting point for rougher surfaces. A flat tabletop needing light refinement may start at 120 grit. For previously finished wood, identify the coating and choose a suitable removal method and abrasive rather than assuming a standard sequence will work.
What grit should I stop at before stain or clear finish?
Follow the finish maker’s instructions, since the right stopping grit varies with the product and wood. Many projects use a progression such as 80, 120, then 180, but very fine sanding can burnish some woods and reduce stain absorption. Test your finish on scrap from the same board.
Can I skip grits when sanding wood?
You can, but a large jump can leave scratches from the coarser disc that the next grit will not remove efficiently. For example, jumping from 80 straight to 180 may leave marks that become obvious under stain or clear coat. Inspect between steps and use a gradual progression when the surface shows scratches.
Why does my sanding disc clog so quickly?
Resinous wood, softwood dust, pressure, heat, and poor extraction can all load an abrasive. Pine can clog quickly, especially if you press hard or keep sanding with a disc that has stopped cutting. Reduce pressure, connect suitable dust extraction, keep the sander moving, and clean or replace the disc when needed.
Are mesh sanding discs better than paper discs?
Mesh discs can support airflow and dust extraction when the disc pattern and sander pad are compatible. Paper discs remain practical for many general tasks. Choose based on fit, extraction setup, abrasive performance, and cost; mesh does not make sanding dust-free.
How do I remove random-orbit sander swirls?
Check whether the marks come from a loaded disc, too much pressure, poor grit progression, or dust trapped under the pad. Return to a grit that can remove the scratches, then work forward while inspecting under raking light. Finish with a light hand-sanding pass with the grain where the surface is prominent.
Conclusion
Match the grit to the surface, the abrasive to the wood, and the disc to your sander. Then keep dust out of the cut, clean between grits, and check the work under raking light before the finish goes on.
That routine turns sanding from a race toward finer numbers into steady, visible progress. The reward is a tabletop that still looks clean when the finish catches the light.
Fall yard work Picks
leaf blowers
As an affiliate, we earn on qualifying purchases.