
TL;DR

Get tools and workshop supplies delivered free — and shop member deals
- Fast, free delivery on millions of items
- Access to Prime Big Deal Days deals on October 6–7
- Prime Video, Amazon Music and more included
For a smooth plywood finish, choose a panel with a face suited to your finish, sand lightly to about 180 grit when the surface needs it, and test your full process on an offcut. Seal the thirsty edges separately, control dust, and apply several thin coats that match the project and the finish maker’s instructions.
A sheet of plywood can look ready for finish under bright shop lights, then show every patch, swirl, and dust nib when a clear coat catches the afternoon sun. The face veneer may be only a thin skin over the core. A few extra seconds with a power sander can turn a small rough spot into a pale, hard-to-hide patch.
The good news: a smooth plywood finish rarely calls for elaborate equipment. You need a sound panel, gentle preparation, a finish that fits the job, and enough patience to let each coat dry as directed. The same careful approach works whether you’re building a painted garage cabinet or a clear-coated bookshelf for the living room.
This guide walks you through panel selection, sanding, repairs, edges, and coating, with practical checkpoints along the way. You’ll also see why a scrap piece from the same sheet can save you from an entire panel of blotchy color or a finish that never quite looks right.
Choose plywood by inspecting the visible face under angled light; grade labels and repair quality vary.
Sand only as much as needed, often finishing around 180 grit, and keep moving near thin veneer patches and edges.
Treat exposed edges separately with careful sanding, banding, filler, or extra sealing to suit the desired look.
Test the complete finish schedule on an offcut from the same sheet to check color, sheen, absorption, and adhesion.
Apply thin coats, follow label drying times, and control dust before each coat.
Workshop finish guide · Surface preparation
The Best Techniques for Finishing Plywood Surfaces Smoothly
A smooth result starts before the first coat: choose a face that suits the final look, sand only as needed, and test the complete process on an offcut. Give the edges, dust, and drying time their own attention.
01 · Start with the panel
Choose a face that fits the finish
Clear coats put the veneer in view; paint can conceal more variation. Inspect the sheet itself because grades and repair quality vary by product.
Inspect the visible face
Look for patches, open knots, splits, ripples, and sanding marks. Check both sides and decide how the sheet will be cut and positioned.
Choose for a uniform base
Paint-grade plywood can be a practical choice when grain continuity matters less. Compatible primer helps even out the surface and absorption.
Use angled light
Let light skim across the panel to reveal shallow repairs and surface irregularities. Plan cuts so noticeable flaws land in less visible places.
A repaired spot may become more conspicuous if you sand through the thin face. Aim for an even surface, not aggressive sanding to erase every mark.
02 · Prepare with control
A light touch makes a smoother surface
Use gentle pressure, keep the sander flat and moving, and check the surface under raking light. Stop when it feels even.
If the face already feels even, skip the coarser step. The starting point depends on the panel and finish.
Keep moving
Use a sanding block or a random-orbit sander held flat. Avoid lingering over edges, patches, or one rough spot.
Follow the grain
Sand with the grain where practical. Remove dust between grits and before applying any finish.
Repair selectively
Fill defects with a product suited to paint or clear finish. Test filler color on scrap when the grain will show.
03 · A reliable sequence
Repair, edge, sand, then clear the dust
Keeping the tasks in order helps prevent missed corners and accidental over-sanding while you switch between repairs and surface prep.
Inspect
Mark patches, dents, knots, and visible flaws.
Repair
Fill only what needs filling; test clear-finish repairs.
Prepare edges
Sand carefully, add banding, or use suitable filler.
Sand the face
Use light passes, finishing near 180 grit as needed.
Remove dust
Vacuum, then follow the finish maker’s dust-removal advice.
Exposed layers can absorb finish unevenly. Choose cleanly sanded layers for a visible effect, or use edge banding or filler for a more uniform painted look.
04 · Choose by use
Match the finish to the room and the work
Balance appearance, protection, application, and drying time. Always check preparation, ventilation, compatibility, and recoat instructions on the product label.
| Finish | Appearance | Useful for | Consider |
|---|---|---|---|
| Paint + primer | Hides variation | Utility shelves, cabinets | Choose a compatible primer for an even base. |
| Water-based clear | Often stays clearer | Pale wood, light interiors | Can raise grain; light sanding after the first dry coat may help. |
| Oil-based varnish / polyurethane | Warmer tone | Surfaces needing a durable film | Longer drying and recoating times are common. |
| Oil finish | Emphasizes the wood | Projects where appearance is a priority | May protect less than a built-up film finish. |
| Lacquer / shellac | Can be very smooth | Suitable, well-planned setups | Check ventilation, application, and compatibility needs. |
05 · Build a consistent coat
Thin layers. Clean surface. Patient timing.
Stir as directed; shaking can add bubbles to some products. Apply with a suitable brush, roller, pad, or sprayer, keep a wet edge, and avoid overworking finish as it starts to set. Follow label drying times before sanding or recoating.
Traceability · One sheet to finished surface
Test the full process on an offcut
A cutoff from the same sheet shows how the face, repairs, and exposed layers respond before the finished panel is committed.
Check veneer appearance and patches under angled light.
Try the sanding grit and repair method you plan to use.
Compare color, sheen, absorption, and adhesion on face and edge.
Control dust and follow the label’s temperature and humidity range.
Choose a face that’s ready for the finish you want
For finishing plywood, start with a face grade and condition that suit the final look: clear finishes need an attractive veneer, while paint can hide more variation. Check both sides for patches, open knots, splits, and sanding marks before you buy. A smooth finish starts with a panel that won’t demand aggressive sanding to disguise flaws.
Grading labels vary across countries and plywood types, so don’t rely on a letter or product name alone. Stand the sheet where light skims across its surface; that shallow angle makes ripples and repairs easier to spot. If you’re building a bookcase with exposed sides, inspect the face you’ll actually show and plan how you’ll orient it after cutting.
A veneer repair can be perfectly sound and still look like a small island under clear finish. Paint-grade plywood is often a sensible budget choice for a workshop cabinet, where a good primer and paint matter more than uninterrupted grain. By contrast, a dining-table apron or open bookshelf may justify a better face veneer because the grain sits close to eye level.
Think about the panel’s surface carefully before you load it into the truck. Mark any defects and account for them in your cut plan; a knot that lands inside a shelf support can disappear, while the same knot centered on a cabinet door may draw the eye every time you walk past.
As an affiliate, we earn on qualifying purchases.
Sand gently so the thin veneer stays intact
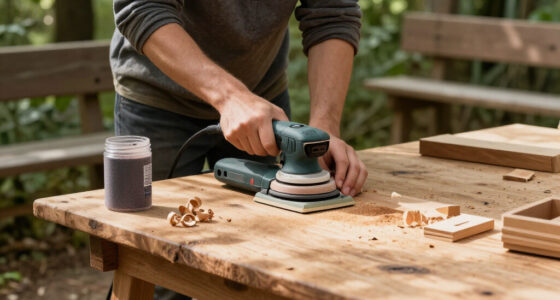
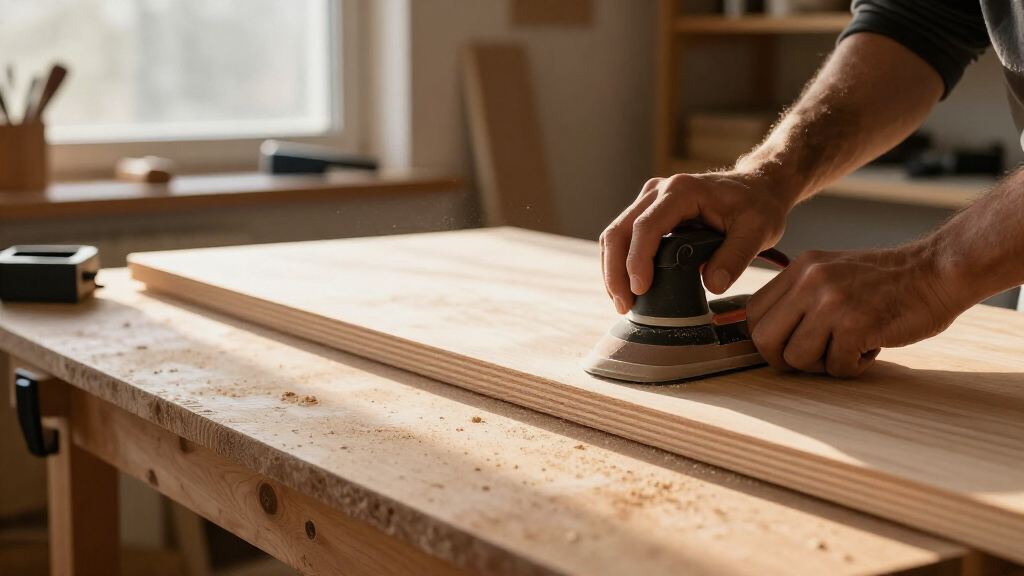
The best way to sand plywood is to remove only what the face needs: use light pressure, keep the sander flat and moving, and stop when the surface feels even. Plywood’s thin face veneer can be damaged quickly, especially around edges, repairs, and raised grain. A smooth face doesn’t need to be sanded down like a thick solid-wood board.
For minor roughness, start around 120 or 150 grit, then move to 180 grit. If the face already feels even, you may be able to skip the coarser step. Use a sanding block or a random-orbit sander with fine paper; hand sanding gives you better control near a patch or at the edge of a cabinet door.
Picture sanding a ¾-inch plywood shelf with a repaired veneer spot near one corner. If you pause a spinning sander there to erase the patch, the s thin face can vanish before you notice. Keep the tool moving and make a light pass across the whole surface; check the spot often under raking light instead of chasing it with pressure.
Follow the grain where practical, remove dust between grits, and resist the temptation to jump to very fine paper before the surface is even. The goal is a uniform surface, not an invisible repair at any cost. Once sanding exposes the core layers, the repair can stand out more than the original mark.
As an affiliate, we earn on qualifying purchases.
Use this simple order for repairs, edges, and dust
To prepare plywood, inspect the panel, repair defects, smooth the edges, sand the face lightly, and remove dust before applying finish. Doing these jobs in a steady order makes it less likely you’ll miss a corner or grind through a patch while switching between tasks. For a painted cabinet door, each step also gives primer a cleaner, more consistent surface to grip.
- Inspect and mark patches, dents, open knots, and spots that will remain visible.
- Fill only what needs filling with a product compatible with paint or clear finish; test its color on scrap if the grain will show.
- Prepare the edges with careful sanding, edge banding, or filler, depending on the look you want.
- Sand the face lightly, usually starting around 120 or 150 grit if needed and finishing near 180.
- Vacuum and remove fine dust using the method recommended for your chosen finish.
For a painted shop cabinet, filler can level nail holes and rough patches before primer. For clear-coated furniture, an oddly colored filler spot may be more distracting than a tiny dent, so test it on a cutoff first. The veneer can be thin enough that a repair becomes more visible after sanding, which is why the test matters.
Plywood edges show alternating layers and often drink in more finish than the face. You can make that layered look a feature on a modern shelf, or use edge banding or suitable filler when you want a solid, painted appearance. A quick finish test on an offcut shows how the face and edge will differ before the full piece is coated.
As an affiliate, we earn on qualifying purchases.
Match the finish to the room and the way you’ll use it
Choose a plywood finish by balancing appearance, protection, application, and drying time. Paint and primer hide variation; water-based clear finish tends to preserve a lighter look; oil-based varnish or polyurethane usually warms the color and builds a protective film. The right choice depends on what the surface must withstand and how much time you can give the work.
For a painted utility shelf, a compatible primer helps create an even base, especially where the face and exposed edges absorb differently. A water-based clear coat may suit a pale birch bookcase if you want its light color to stay closer to natural. For a bench that sees more scuffs, an appropriate film finish can offer more surface protection than a simple oil finish.
Each option has tradeoffs. Water-based finishes dry relatively quickly and often stay clearer, but can raise the grain; oil-based coatings take longer between coats and add a warmer cast. Oil finishes can bring out the wood’s appearance, though they may give you less surface protection than a built-up varnish system. Lacquer and shellac can produce smooth results, but their application and ventilation needs may make them a poor fit for a small garage shop.
Read the product label for preparation, ventilation, temperature, humidity, drying, and recoat instructions. Product formulations vary, and a finish that works well on a decorative cabinet may not offer the moisture or abrasion resistance you need for a workbench. Test the full schedule, including any stain or primer, on an offcut from the same sheet.
As an affiliate, we earn on qualifying purchases.
Apply thin coats and let each one settle
Several thin coats usually give you a smoother film than one heavy coat, because the finish can level without pooling or trapping as much air. Apply with a brush, roller, pad, or sprayer suited to the product, and keep a wet edge so the coating blends across the panel. If the finish starts to set, repeated brushing can leave ridges and marks.
Stir the product as directed; shaking can add bubbles to some finishes. On a wide plywood tabletop, work from one side toward the other in a steady rhythm, watching for runs along the far edge. A wet coat can look glossy and perfect while hiding a small sag, so check it from a low angle before you leave it to dry.
Follow the specified drying time before sanding or recoating. A surface can feel dry to a fingertip yet still be too soft for the next step. When the instructions call for sanding between coats, use fine paper or a sanding pad with a light touch, then remove dust before adding the next coat. Avoid cutting through the film into the face veneer.
For a smooth cabinet door, it helps to coat the face and edges deliberately rather than leave the edge as an afterthought. Keep your passes even, use the applicator to catch drips promptly, and let each coat dry on a clean, level support. Patience here pays off in a surface that feels satiny under your hand instead of pebbled or tacky.
Keep dust and uneven color from spoiling the last coat
Dust control and a test finish prevent two of the most common disappointments: gritty nibs in the coating and blotchy color across the face. Vacuum the panel and nearby surfaces, then use a lint-free cloth or the finish maker’s recommended method to pick up remaining dust. Work within the temperature and humidity range on the label, since conditions can affect drying and how well the finish levels.
In a small garage shop, fine dust may linger in the air after you sand even when the bench looks clean. Vacuum the floor and nearby shelves, then give airborne dust time to settle before opening the finish. If a dust collector is part of your sanding setup, check that its airflow and hose connections are adequate for the tool; a clean work surface matters, but a clean coat also depends on what’s floating above it.
Blotchy results often begin with differences in veneer, patches, or core construction. A stain that looks even on one corner of a sheet may turn much darker over a repair or exposed edge. Take an offcut from the actual panel and apply the whole sequence—sanding, stain or primer, and topcoat—so you can see the color and sheen together.
If the finish beads up or refuses to bond, look for contamination such as wax, oil, or an incompatible old coating. Follow the maker’s preparation and compatibility guidance rather than adding more coats over a bad surface. Newer water-based and lower-odor formulations may be convenient indoors, but check the product’s technical sheet for intended use, cure time, and resistance before relying on a marketing claim.
Frequently Asked Questions
What grit should I use to sand plywood?
For a typical smooth face, start around 120 or 150 grit only if the surface needs it, then finish near 180 grit. Use light pressure and stop when the face feels even, since sanding through thin veneer can expose the core.
Can I use a power sander on plywood?
Yes. Keep a random-orbit sander flat, use fine paper, and keep it moving so it doesn’t dwell on one patch or edge. Hand sanding gives you more control around repairs and narrow areas.
How can I stop plywood from looking blotchy?
Choose a suitable face, prepare it evenly, and test the full finish schedule on an offcut from the same sheet. Veneer patches and edges can absorb or reflect finish differently; primer or a suitable finish system may help even out a painted surface.
How do I make plywood edges smooth?
Sand the edges carefully, then choose edge banding, filler, or a compatible sealer based on whether you want a solid painted look or visible layers. Test a clear finish on an offcut because the exposed layers often absorb more than the face.
Do I need primer before painting plywood?
Primer generally helps paint adhere and creates a more even base, especially where edges, patches, and the face absorb differently. Fill visible defects and seal edges as needed, then follow the primer and paint labels for drying and recoating.
How many coats of finish should I apply?
Follow the product label and the protection your project needs. Film finishes commonly use several thin coats, while oils and other systems follow different schedules; a thicker coat is not automatically a smoother or more durable one.
Conclusion
For a smooth plywood surface, spend your effort where it counts: choose a suitable face, sand gently, prepare the edges, and test the complete finish on an offcut. Then apply thin coats under the conditions on the label and give them time to dry.
That scrap piece is your preview window. Use it to catch a blotchy edge or a color shift before the finished panel catches the light.
Fall yard work Picks
leaf blowers
As an affiliate, we earn on qualifying purchases.