
TL;DR
Get ready for Prime Big Deal Days — try Prime free
Exclusive member deals on October 6–7, plus fast free delivery. Cancel anytime.
Start your free trialAs an affiliate, we earn on qualifying purchases.
Installing a router table with a dust collection hood means matching a stable, flat table to your router, mounting a hood that encloses the bit and fence area, and connecting it to a 2.5-to-4-inch hose with airtight seals. A well-fitted hood captures up to 90% of routing dust, which matters because fine wood dust is the part that damages your lungs.
The first time you plow a 3/4-inch roundover bit through oak on an open router table, you learn something fast: routing makes more fine dust per second than almost any other operation in the shop. It hangs in the air, coats your safety glasses, and settles into every corner of the garage. A good dust collection hood fixes most of that.
I run a two-car-garage shop with a wall-mounted dust collector and a 4-inch main line, and I’ll tell you honestly: the router table was the last machine I ducted and the one I should have ducted first. A well-fitted hood captures up to 90% of routing dust — including the fine particles that actually reach your lungs, not just the chips you can see.
In this guide, you’ll get the full picture: choosing a table that’s actually stable, mounting your router correctly, installing and sealing the hood, sizing hose and CFM for a small shop, and the safety habits that keep your fingers and lungs intact. No product roundups — just what works.
Choose a router table that’s sturdy and large enough for your stock — verify flatness within about 0.010 inch and confirm it fits your router model before buyi…
Mount the router to a flush insert plate and square the bit to the fence and miter slot before installing the hood; alignment is what makes collection effectiv…
A fence-mounted hood with foam-sealed gaps captures up to 90% of routing dust; pair it with a below-table box because chips exit downward too.
Use a 2.5-to-4-inch hose with airtight clamped joints; a HEPA dust extractor on 2.5-inch hose is the small-shop sweet spot for fine dust.
Run the router and collector on separate circuits or a sequenced switch box, and unplug the router before every bit change — no exceptions.
Installing a Router Table with a Dust Collection Hood
Routing makes more fine dust per second than almost any other shop operation. A properly fitted hood, a stable table, and airtight 2.5-to-4-inch ducting capture the dust you can’t see — the part that reaches your lungs. This guide covers table selection, mounting, hood sealing, hose sizing, and the safety habits that keep you whole.
Pick a Router Table That’s Actually Stiff Enough
Verify Within 0.010″
Put a straightedge across the surface under shop lighting and look for light gaps. A flexing table means a wobbling cut line — sag near the insert ruins raised-panel work.
Milled Aluminum or Phenolic
Not thin plastic — the plate carries your router. Most plates accept multiple drilling patterns, but verify your trim router or 2.25-HP plunge base actually fits before buying.
Closed Cabinet Wins
A closed cabinet base gives a built-in chamber for below-table extraction. A four-legged open stand fights your dust collection the whole way. Aim for 24 × 32″ of surface.
Mount, Square, Then Hood — In That Order
Unplug & Remove Base
Actually unplug it. This is the step people skip — and the reason router injuries happen during setup.
Mount Router to Plate
Drill the insert plate for your router’s pattern, attach with machine screws, drop plate into the recess.
Level & Square
Lock leveling screws so the plate sits flush — not proud. Square the bit to fence and miter slot; spin by hand to check runout.
Install & Seal Hood
Shroud over the bit, behind the fence. Close every gap with closed-cell foam tape — seal is everything.
Connect & Test
Clamp the 2.5–4″ hose airtight, add a below-table box, and run a test cut before real stock.
Match Hose Size and CFM to Your Shop
| Setup | Airflow (approx.) | Best For | Weakness | Fine-Dust Rating |
|---|---|---|---|---|
| Shop vacuum, 1.25–1.5″ hose | 100–150 CFM | Trim router work, occasional cuts | Fine dust passes the filter; small bag fills fast | ✗ Poor |
| Dust extractor, 1–2.5″ hose | 130–250 CFM, HEPA-rated | Garage shops focused on fine dust | Price; lower chip volume capacity | ✓ Sweet spot |
| Single-stage collector, 4″ line | 350+ CFM | Ducted shops with multiple machines | Needs ducting; filter upgrades for HEPA-level capture | ~ Good with HEPA |
Where the Hood Goes — and Why It Must Seal
Fence-Mounted Hood
A clear plastic box spanning the fence opening, with a brush strip or rubber flap on the outfeed side that closes around the workpiece.
Best for edge-profiling · 80% of dust originates hereAbove-Table Hood
Clamps to an arm and hovers over the bit. Captures well for freehand and pin routing where no fence constrains the airstream.
Best for freehand & pin routingEstimated fine-dust capture rates · routing throws chips down as well as back — pair the fence hood with a below-table box
Safety Habits That Keep Fingers and Lungs Intact
Separate Circuits
Run the router and collector on separate circuits, or use a sequenced switch box so the collector always starts first and shuts down last.
Unplug Before Bit Changes
No exceptions. Every bit change starts with pulling the plug — a switched-off router can still be bumped on.
PPE & Maintenance
Safety glasses, hearing protection, and a rated dust mask. Clean the hood and system regularly to prevent blockages and maintain CFM.
Pick a Router Table That’s Actually Stiff Enough for the Job
A router table is only as good as its flatness and stiffness. Before you think about hoods and hoses, confirm your table is sturdy and large enough for your projects — a 16-inch-deep benchtop unit flexes under a raised-panel cut, and a flexing table means a wobbling cut line. For most garage shops, a table surface around 24 by 32 inches handles door panels and wide stock without eating your whole wall.
Check three things before money changes hands. First, flatness within about 0.010 inch across the surface — put a straightedge across it under shop lighting and look for light gaps. Second, a milled aluminum or phenolic insert plate, not thin plastic, because that plate carries your router. Third, compatibility with your router model: most plates accept multiple drilling patterns, but verify your trim router or 2.25-HP plunge base actually fits.
My first table was a homemade MDF box with laminate top. It worked, mostly, but it sagged near the insert after two humid summers. The cabinet-style table that replaced it has an adjustable fence, a miter slot, and enough mass that a 1/2-inch spiral bit in hard maple doesn’t shake it. Mass is a feature, not a spec-sheet afterthought.
One of the important aspects of choosing the table is thinking ahead to dust collection: a closed cabinet base gives you a built-in chamber for below-table extraction, which we’ll get to. A four-legged open stand fights you the whole way.
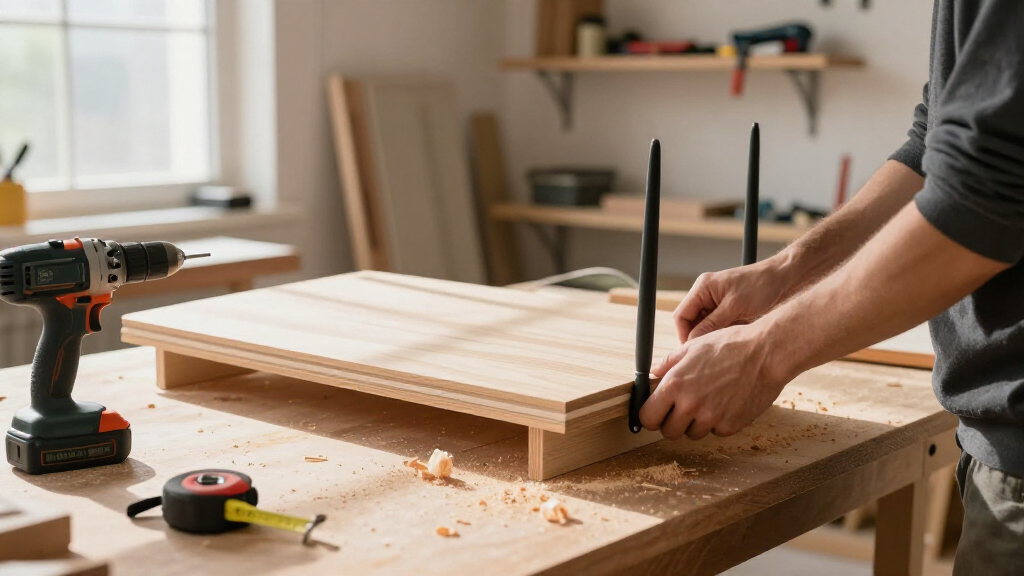
router table with dust collection hood
As an affiliate, we earn on qualifying purchases.
As an affiliate, we earn on qualifying purchases.
Mount the Router and Square Everything Before the Hood Goes On
Mounting comes before hood installation because alignment is what makes dust collection effective — a hood can’t capture chips flying off a misaligned fence. Mounting means fastening your router to the insert plate, dropping that plate into the table, and squaring the bit to both the fence and the miter slot. Do it in that order and the rest of the install gets easy.
- Unplug the router and remove its base. Yes, actually unplug it. This is the step people skip and the reason router injuries happen during setup.
- Mark and drill the insert plate for your router’s mounting holes, or use a pre-drilled plate matched to your model.
- Attach the router to the plate with the machine’s included screws, then drop the plate into the table’s recess and lock the leveling set screws so the plate sits flush, not proud. A proud plate snags workpieces.
- Install a bit, set the fence parallel to the miter slot with a combination square, and confirm the bit sits 90 degrees to the table with a small square held against the cutting edge.
- Spin the bit by hand to check for runout — visible wobble means a bent collet or dirty arbor.
Placement matters too. Set the table where you’ve got overhead lighting and room to feed long stock, ideally within reach of your dust collection main. Mine lives against the wall opposite the lumber rack, so an 8-foot door stile has a clear path in and out. Moving a router table after it’s ducted is nobody’s idea of a Saturday.
2.5 inch dust collection hose for router table
As an affiliate, we earn on qualifying purchases.
As an affiliate, we earn on qualifying purchases.
Where the Hood Goes and Why It Has to Seal Tight
A dust collection hood works by enclosing the cutting zone so the airstream has nowhere to pull from except around the bit — where the dust is. On a router table, that means a shroud directly over the router bit, behind the fence, with a port sized for your hose. If air can sneak in through gaps, your CFM drops and dust escapes. Seal is everything.
Most fence-mounted hoods are a clear plastic box that spans the fence opening, with a brush strip or rubber flap on the outfeed side that closes around the workpiece. Above-table hoods clamp to an arm and hover over the bit. The fence style captures better on edge-profiling; the overhead style wins for freehand and pin routing. If you can only buy one, get the fence-mounted hood — it’s where 80% of your dust originates.
Retrofitting an existing table is completely doable. When I built my second fence from Baltic birch, I glued a 4-inch port into the fence body and added a shop-made box behind it. Total cost was about $15 of ply and a blast gate. Commercial hoods run $40 to $150, and honestly, at the low end they’re often just vacuum-formed plastic with mediocre gaskets — plan to add foam weatherstrip.
To seal the hood to the table: close every gap with closed-cell foam tape, keep the fence’s dust port centered on the bit opening, and add a below-table box or bag around the router itself. Routing throws chips down as well as back, and the fine dust rises from below the table if you leave that chamber open.
HEPA dust extractor for small shop
As an affiliate, we earn on qualifying purchases.
As an affiliate, we earn on qualifying purchases.
Match Your Hose Size and CFM to What a Router Actually Needs
The right hose diameter for a router table hood is 2.5 to 4 inches. That range balances two competing realities: bigger pipe moves more air, but a hood opening only pulls effectively if the duct velocity stays high enough to keep chips airborne — roughly 3,500 to 4,000 feet per minute. A 4-inch hose on a 350-CFM collector does that comfortably; a shop vac on 1.5-inch hose does it with high velocity but low volume.
Here’s the honest tier breakdown from someone who’s owned all three setups:
| Setup | Airflow (approx.) | Best for | Weakness |
|---|---|---|---|
| Shop vacuum, 1.25–1.5 in. hose | 100–150 CFM | Trim router work, occasional cuts | Fine dust passes the filter; small bag fills fast |
| Dust extractor, 1–2.5 in. hose | 130–250 CFM, HEPA-rated | Garage shops focused on fine dust | Price; lower chip volume capacity |
| Single-stage collector, 4 in. hose | 350–650 CFM | Full dust hoods, cabinet machines | Noisy; needs a fine filter or venting strategy |
For a small shop, a HEPA dust extractor on a 2.5-inch hose is the sweet spot for a router table specifically — you’re after the invisible sub-micron dust, and extractors filter to M-class or better standards. Whatever you run, seal every joint with hose clamps and a wrap of duct tape. Air leaks at the joints steal CFM before it ever reaches the hood.
Add a blast gate at the table so the line closes when the router’s not in use, and consider a cyclone separator between the hood and the vacuum if you do volume work — it keeps the filter from clogging with chips and stretches filter life dramatically.
As an affiliate, we earn on qualifying purchases.
Wire It Safely — Power, Grounding, and the Circuit You Actually Have
Electrical safety around a router table comes down to three things: don’t overload the circuit, ground everything metal, and keep the dust collection wiring as tidy as the machine wiring. A 2.25-HP router pulls 12 to 13 amps at full load; a shop vacuum adds another 10. Together, that’s at the edge of a standard 15-amp household circuit, and tripping a breaker mid-cut with a spinning bit in the wood is genuinely dangerous.
The clean solution is running the router and collector on separate circuits, or using a switch box that starts the vacuum before the router — many aftermarket router table switches do exactly this with a timed delay. If you’re adding a new circuit or moving your panel, that’s licensed-electrician territory. I’m comfortable wiring a switch box from a kit; I’m not comfortable pulling new romex through a garage wall, and you shouldn’t be either unless that’s your trade.
Grounding matters more than people think. Dust moving through plastic hose builds static charge, and while the fire risk from a residential dust system is lower than forum lore suggests, a grounded system prevents static shocks that make you flinch near a spinning bit. Use grounded cords, keep them off the floor where chips collect, and route the dust hose so it can’t snag your arm during a feed.
Unplug the router before every bit change, every fence adjustment underneath, and every hood tweak. The few seconds you save are never worth a hospital visit.
The Maintenance Routine That Keeps 90% Capture Actually Happening
A dust hood that’s clogged captures nothing. The maintenance routine that keeps your system at full performance takes about ten minutes a month, and it’s the difference between a system that captures 90% of routing dust and one quietly dropping to 50% while you blame the hood.
- Weekly: Empty the collector bag or vacuum drum before it’s two-thirds full. Airflow falls off a cliff past that point.
- Weekly: Pull the hood and brush out the fence box — chips pack into corners where airflow is weakest.
- Monthly: Check the filter. On a single-stage collector, tap or wash the cartridge per the manufacturer’s spec; on a extractor, watch the filter-load indicator if it has one.
- Monthly: Inspect hose clamps and foam seals. Vibration loosens clamps; UV makes foam tape brittle. Both cost under $10 to fix.
- Quarterly: Blow out the router itself with compressed air — fine dust infiltrates the housing and kills bearings.
My routine marker is simple: if I can see a visible dust cloud above the table during a cut, something in the chain has failed. Last winter that cloud appeared, and it took ten minutes to find a cracked foam gasket where the hood met the fence. New weatherstrip, full capture restored. Regular maintenance extends the system’s life and keeps efficiency where it belongs — it’s the cheapest upgrade you’ll ever make.
What’s New: Modular Hoods, Clear Shields, and Sensor-Driven Collection
Router table dust collection has gotten genuinely better in the last few years, in three specific ways worth knowing before you buy or build. None of it is mandatory for a garage shop, but it changes the value math on mid-tier equipment.
- Modular and adjustable hoods let you resize the enclosure around different bit diameters and heights, so a raised-panel bit and a 1/4-inch roundover both get a tight capture zone instead of one compromised setting.
- Improved sealing and airflow designs in modern hoods capture more fine dust — internal baffles direct the airstream across the bit rather than just past it.
- Cyclonic separators integrated into benchtop systems keep chips out of the filter, which means sustained airflow through long sessions.
- Sensor-driven collection is emerging: units that detect tool current and switch the extractor on and off automatically, plus some smart systems that monitor dust levels. Convenience, mostly — but convenience you’ll actually use beats a manual switch you forget.
- Safety interlocks and transparent shields now come on better fences, preventing accidental contact with the bit while letting you see the cut.
The honest take from a budget-conscious shop: auto-start and a clear shield are worth real money; app-connected dust sensors are not, at least not yet. Spend the difference on a HEPA filter, which does more for your lungs than any smart feature on the market.
Frequently Asked Questions
How do I choose the right dust collection hood for my router table?
Match the hood to where your dust actually goes: a fence-mounted hood for edge profiling and panel raising, an overhead hood for freehand work. Look for a port that fits your hose diameter (2.5 to 4 inches), adjustable or modular enclosure walls for different bit sizes, and replaceable brush or flap seals on the workpiece side. Budget $40–150 for a commercial unit, and plan to add closed-cell foam tape — stock gaskets are rarely airtight.
What size dust hose should I use for a router table?
Use a 2.5-inch hose with a dust extractor or a 4-inch hose with a single-stage collector. Both maintain the roughly 3,500–4,000 FPM duct velocity needed to keep chips moving. A shop vac’s 1.5-inch hose works for light trim routing but lacks the volume for raised-panel cuts, and its filter passes the finest, most harmful dust unless it’s HEPA-rated.
Can I retrofit my existing router table with a dust collection hood?
Yes, and it’s often the better value. A shop-built fence box from 3/4-inch plywood with a 4-inch port glued in, plus foam weatherstrip sealing, performs close to commercial hoods for about $15 in materials. Also add a below-table enclosure or bag around the router — routing throws a large share of chips downward, and that dust migrates up through any open base.
How do I ensure a tight seal between the hood and the router table?
Apply closed-cell foam tape to every mating surface — hood-to-fence, fence-to-table, and around the insert plate. Clamp hose connections with proper hose clamps, not just friction fit, and wrap joints with duct tape if you want belt-and-suspenders. Test by holding a strip of tissue near each seam while the collector runs; movement means air is leaking in and stealing capture efficiency.
What safety precautions should I follow when installing and using a router table with dust collection?
Always unplug the router before bit changes or any under-table work. Wear safety glasses, hearing protection, and at minimum an N95 dust mask even with collection running. Don’t run the router and a shop vacuum on the same 15-amp circuit — use separate circuits or a sequenced switch box. Keep cords and dust hose routed away from your feed path, and for any new circuits or panel work, hire a licensed electrician rather than improvising.
How often should I clean or replace filters in my dust collection system?
Check filters monthly and clean them per the manufacturer’s method — tapping or washing cartridges on collectors, replacing bags and HEPA filters on extractors when the load indicator trips or airflow visibly drops. Empty collection bags before they’re two-thirds full. A good rule of thumb: if you can see a dust cloud over the table during a cut, something in the maintenance chain has already failed.
Conclusion
Do this in order: stable table, flush-mounted router, squared fence, sealed hood, right-size hose, safe wiring. Each step makes the next one work better, and the payoff is a router table you can use for two hours without tasting MDF at dinner. A well-installed hood capturing 90% of the dust isn’t a luxury spec — it’s the difference between a hobby you keep for thirty years and one that keeps a pulmonologist busy.
Start this weekend with the seal. Foam tape, a hose clamp, and ten minutes under the fence will do more for your air quality than any upgrade you can buy. Your lungs never see the chips — they only see what you failed to capture.
NFL season / tailgating Picks
team gear
As an affiliate, we earn on qualifying purchases.