
TL;DR

Get tools and workshop supplies delivered free — and shop member deals
- Fast, free delivery on millions of items
- Access to Prime Big Deal Days deals on October 6–7
- Prime Video, Amazon Music and more included
Choose a marine finish by checking the substrate, whether the surface sits above or below the waterline, its sun and water exposure, and the upkeep you can manage. Varnish shows wood grain, paint creates an opaque protective film, and oil is easier to renew but usually builds less film protection. A marine finish is only as durable as the preparation beneath it and the maintenance that follows.
A glossy handrail can look shipshape on launch day and start peeling at the end grain before summer is over. That gap between a fresh finish and a durable one usually comes down to the whole coating system: the surface underneath, the exposure above it, the way you apply it, and how often you inspect it.
This guide helps you choose a finish for marine projects by matching the coating to wood, fiberglass, steel, aluminum, or an existing finish. You’ll see when varnish, paint, or oil makes sense, why below-waterline work has different rules, and how careful preparation can prevent a weekend repair from turning into a full strip-down.
Think of the finish as a rain jacket. A high-quality jacket still leaks if the seams are open; a marine coating can’t rescue damp wood, a failing primer, or water trapped around a fastener. We’ll cover the key points for a blog article on choosing, applying, and maintaining a practical finish for a boat or other marine-grade project.
Check the substrate, existing coating, and product compatibility before choosing a topcoat.
Use finishes rated for their actual exposure; below-waterline coatings need continuous-immersion ratings and compatible antifouling systems.
Choose varnish for visible grain, paint for an opaque film, or oil when easy renewal matters and less film protection is acceptable.
Clean, dry, and prepare the surface as directed, then follow application conditions and full cure times.
Rinse away salt and inspect edges, joints, fasteners, and standing-water areas before small failures spread.
FIELD GUIDE · COATINGS & CARE
Choosing the Best Finish for Marine-Grade Projects
Match the coating to the material, waterline, exposure, and upkeep you can manage. A durable finish starts with the surface beneath it and continues with regular care.
01 / START WITH THE SURFACE
Match the finish to the material
“Marine-grade” does not mean one product suits every job. Identify the substrate and existing coating, then check the technical data for preparation, primer, and compatibility guidance.
Keep grain or cover it?
Check moisture and end grain. Choose a clear system when the grain should show; use an opaque finish when a uniform surface matters more.
Test the existing layer
Confirm suitability over paint or gelcoat. Remove failed edges, prepare as directed, and try a hidden test patch to check for lifting or poor adhesion.
Use the specified primer
Metal needs compatible cleaning and surface preparation. Follow the coating maker’s primer and topcoat recommendations for that substrate.
02 / RESPECT THE WATERLINE
Above and below are different jobs
Sun, spray, and repeated wetting call for weather and UV protection. Continuous submersion brings different demands and requires products rated for immersion.
Weather, salt & sunlight
Decks, cabin trim, and brightwork face UV, salt spray, abrasion, and changing conditions. Clear exterior varnish may suit a handrail, but inspect exposed edges and horizontal surfaces regularly.
Continuous immersion
Choose a coating specifically rated for submerged use and compatible with the antifouling system. Check manufacturer guidance and current local rules, especially for antifouling products.
03 / CHOOSE YOUR TRADE-OFF
Appearance, film protection, upkeep
Varnish shows the wood, paint hides the grain beneath an opaque film, and oil is easier to renew but generally builds less long-term film protection.
Varnish
Brings out wood color and figure. UV wear can expose timber beneath; inspect for cracks and recoating needs before moisture reaches the wood.
Paint
Creates a consistent protective film and conceals uneven color. The grain disappears, and a repair may leave a visible patch.
Oil
Often simple to refresh. It usually offers less film protection and may need more frequent renewal; match it to the actual exposure.
04 / DECISION TABLE
Choose for the job you have
| Need | Varnish | Paint | Oil |
|---|---|---|---|
| Show wood grain | ✓ Strong fit | ~ Grain hidden | ✓ Visible |
| Opaque, uniform look | ~ Clear finish | ✓ Strong fit | ~ Natural look |
| Easy renewal | ~ Inspect & recoat | ~ Surface prep | ✓ Often simpler |
| Film protection | ✓ Builds a film | ✓ Builds a film | ~ Generally less |
| Underwater use | ~ Only if immersion-rated | ~ Only if immersion-rated | ~ Verify product rating |
The table compares general characteristics. A product’s stated substrate, exposure, and immersion ratings decide where it can be used.
05 / APPLY & MAINTAIN
Build durability into the routine
A high-quality coating cannot rescue damp wood, a failing primer, or water trapped around a fastener. Preparation and maintenance are part of the finish system.
Clean & dry
Remove salt, dirt, and contamination. Make sure the surface is dry as directed before coating.
Repair & prepare
Remove failed layers, sand, and address damaged areas. Use the specified primer or sealer.
Apply by the data
Follow temperature, humidity, ventilation, film thickness, recoat windows, and full cure times.
Rinse & inspect
Wash away salt. Check edges, joints, fasteners, and standing-water areas for early failure.
THE WHOLE COATING SYSTEM
Trace the path from substrate to service life
Small failures often start where water collects or a coating edge is exposed. Follow the chain, then keep checking it through the season.
+ old coating
+ waterline
+ primer
+ cure
+ inspect
Compare technical data sheets and independent testing where available. Waterborne and lower-solvent products, along with formulations marketed for improved UV or abrasion resistance, vary in performance by product and application.
Match the finish to the surface before you buy
Choosing the best finish for marine-grade projects starts with identifying the substrate and the coating already on it. Wood, fiberglass, steel, and aluminum each need compatible preparation and, often, a specific primer. The word “marine” on a tin does not mean the contents will bond to every surface or suit every job.
Start by asking what the part is made of and what finish it carries now. A mahogany hatch may need a clear system that preserves its grain; an aluminum rail needs a coating made for metal, with the right primer. If you’re working over an old layer, confirm that it’s sound and compatible before adding anything. A small test patch in a hidden spot can show whether the new coating wrinkles, lifts, or refuses to adhere.
Imagine a fiberglass locker lid with intact paint on most of its surface, but a chipped edge around the latch. Painting straight over it may seal the visible face while the loose edge keeps lifting. Clean, sand, and repair the failed area according to the coating maker’s instructions, then use the specified primer and topcoat where needed.
A coating system may include cleaner, primer, sealer, and topcoat. Products from one maker can simplify compatibility checks, but mixing brands can work when the technical data confirms it. Read the technical data sheet for the named substrate, surface preparation, and existing-coating guidance; that document carries more useful detail than a broad “marine grade” claim.
- Wood: Check moisture and end grain, and decide whether the grain should remain visible.
- Fiberglass: Confirm the coating is intended for the surface and its existing paint or gelcoat.
- Steel or aluminum: Use a compatible primer and follow the specified cleaning and surface-preparation steps.
- Old coatings: Apply over them only when they’re sound and the new system allows it.
For example, if a boat’s wooden tiller already has a peeling clear coat, the first decision isn’t “varnish or oil?” It’s whether the remaining coating can stay, or whether you need to remove failed layers to give the new finish a stable foundation.
As an affiliate, we earn on qualifying purchases.
Keep topside coatings above the waterline
Choosing the best finish for marine-grade projects also means matching the coating to its position on the boat. Decks, cabin trim, and brightwork above the waterline need weather and UV protection; underwater surfaces need coatings specifically rated for continuous immersion. A finish meant for topsides is not automatically suitable below the waterline.
This distinction matters because a coating that repeatedly gets wet and dries has different demands from one that remains submerged. A clear exterior varnish may protect a handrail in sun and spray, yet soften, lose adhesion, or fail when continuously immersed. Once water gets beneath the film, it can spread the failure beyond the original wet spot. Underwater coatings also need to work with the rest of the vessel’s system, including any antifouling layer; an incompatible layer can compromise adhesion or the intended performance. Check immersion ratings and compatibility in the manufacturer’s instructions before you coat.
Suppose you’re refinishing a small boat’s transom and the project crosses the waterline. The top section faces sun, rain, and salt deposits; the lower section may sit underwater for long periods. Treat those areas as separate jobs: identify the waterline, choose products rated for each zone, and follow the stated overlap and recoat directions. The transition matters too, since poorly planned overlaps can leave a weak seam exposed to splash and changing water levels.
Below the waterline, local rules can affect which antifouling paints you may use. Active ingredients and product availability vary by location, so check current local requirements as well as the latest manufacturer guidance. A product allowed in one region may not be permitted or suitable where you keep the boat.
Use an immersion-rated coating below the waterline. “Marine” or “exterior” on the label alone does not confirm that a product can handle continuous submersion.
For practical planning, mark the waterline before stripping or buying supplies. That simple step helps you estimate where each coating belongs, plan a compatible transition, and avoid applying a handsome topside finish to the wrong part of the hull—and having to remove it later.
As an affiliate, we earn on qualifying purchases.
Choose varnish, paint, or oil for the upkeep you’ll do
Varnish, paint, and oil trade visible grain, film protection, and ease of renewal in different ways. Varnish keeps wood’s color and figure on display but calls for inspection and recoating. Paint hides the grain beneath an opaque film, while oil is simple to refresh but generally offers less long-term film protection.
Think of clear varnish as a window over the wood: you get the warm bands of teak or the red-brown glow of mahogany, but sun damage can work through the clear layer and expose the timber beneath. That visibility is part of the appeal, yet it also means wear can be easy to see and a neglected crack can let moisture reach the wood. Paint is more like a shield with the view covered; it gives a uniform surface and can conceal uneven color, though repairs may leave a visible patch and the grain disappears. Oil sinks into the wood and is often easier to renew, but because it does not build the same protective film, it may need more frequent refreshing and is not a substitute for a coating rated for a demanding exposure.
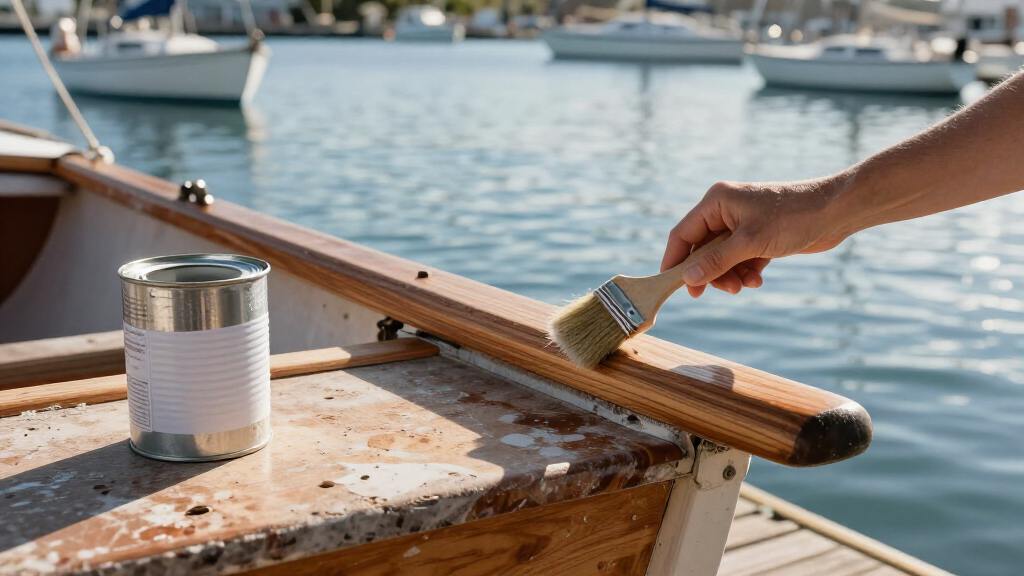
Picture a brightwork handrail in a sunny harbor. Varnish may be the right choice if you enjoy its gloss and can inspect it regularly, especially at edges and horizontal surfaces where water and sunlight take their toll. If that rail belongs to a working boat that sees hard use and has to be repaired quickly, an opaque coating may fit your routine better: you give up the grain in exchange for a less appearance-sensitive surface. The owner’s maintenance habits are part of the finish choice.
| Finish | What you gain | What you trade | Good fit |
|---|---|---|---|
| Varnish | Visible grain and a clear film | Needs frequent inspection and upkeep in sun | Brightwork you can maintain |
| Paint | Opaque, uniform protective layer | Hides the wood grain | Surfaces where appearance can be solid color |
| Oil | Simple renewal and a natural look | Usually less film build and long-term film protection | Wood where easy refresh matters more than a thick film |
Before choosing, ask how the surface gets used and how a repair will look. A cabin trim piece sheltered from direct sun has different demands from a horizontal hatch that holds rainwater, and a coating that looks beautiful but goes months without inspection may be a poor practical fit. No one finish wins every job; the right answer balances appearance, protection, and the maintenance you’ll actually perform.
As an affiliate, we earn on qualifying purchases.
Prepare the surface so the new coating has a chance
Careful preparation keeps moisture and weak layers from undermining a marine finish. Clean the surface, let it dry, sand as directed, remove failed coating, and apply the compatible primer or sealer. A finish can only be as durable as the preparation beneath it and the maintenance that follows.
Coating is a little like laying a new shop floor: if dust, oil, or a loose patch remains underneath, the handsome surface above won’t stay handsome for long. On wood, trapped moisture can lead to peeling, blistering, or rot. On any material, a dirty or unsound surface can interfere with adhesion.
For instance, say you’re refinishing a dinghy seat after a wet spring. If the timber still feels damp or water sits in the screw recesses, sanding and coating that afternoon can trap moisture. Let it dry first, clear out the failing coating, and give fasteners, joints, end grain, and edges close attention—those small spots often give water a way in.
Follow the product’s instructions for film thickness, coat count, recoat windows, temperature, humidity, ventilation, and cure time. Thin, even coats are usually more reliable than trying to build a thick layer in one pass. “Dry to touch” does not mean fully cured, so don’t launch the boat or put a coated part into heavy use until the stated cure time has passed.
- Identify the substrate and old finish; check compatibility.
- Clean and dry the surface, joints, and places where water collects.
- Remove or repair loose, cracked, or failed coating; sand as directed.
- Apply the specified primer, sealer, and topcoat in the stated conditions.
- Wait for the full cure before water exposure or heavy use.
That sequence may feel slower than opening the tin and brushing, but it is often what separates a finish that holds through a season from one that blisters around the first damp joint.
below waterline antifouling coating
As an affiliate, we earn on qualifying purchases.
As an affiliate, we earn on qualifying purchases.
Make the application fit your shop and the weather
A marine finish performs best when you apply it within the conditions and film thickness its maker specifies. Temperature, humidity, airflow, and the time between coats all affect adhesion, leveling, and cure. Check the technical sheet before you set up, especially when working in a garage or an exposed driveway.
A warm, still afternoon can help a coating level, but direct sun may make it skin over too quickly. A cool, damp evening can slow curing or leave dew on the surface. Wind can blow dust into wet varnish and carry solvent fumes toward people or ignition sources. If the weather sits outside the product’s stated range, wait for a better window rather than guessing.
Consider a small garage shop with a hatch on sawhorses. Sweep and vacuum before coating, use the ventilation required by the product, and keep pets and ignition sources away where solvent vapors may collect. Wear the protective equipment named in the safety data sheet; sanding dust and some coating ingredients can harm your health. Don’t assume a waterborne label means you can skip ventilation or PPE.
Waterborne coatings and lower-solvent formulations have become more widely available, alongside products marketed for added UV resistance, abrasion resistance, or faster curing. Those claims don’t make every formulation interchangeable. Compare the stated substrate and exposure ratings, application requirements, and independent test information when available.
Record the conditions and product used if you maintain several parts. A note such as “two coats on the cabin trim, applied at 18°C, recoat after four hours” can help you diagnose a later failure or repeat a successful job. It also keeps a quick garage repair from becoming an exercise in guessing which half-empty tin went on last.
Inspect early and catch small failures before they spread
Regular washing and inspection help you catch marine coating problems while repairs are still local. No finish stays maintenance-free in salt, sun, spray, and temperature swings. Check the maker’s maintenance guidance, then look often at exposed edges, fasteners, joints, and horizontal surfaces where water can collect.
Salt deposits can hold moisture against a surface and contribute to corrosion or coating deterioration. Rinse them away with fresh water as part of routine care. A thin crack around a screw may seem minor, but water can creep beneath a coating and lift a larger patch. Spotting that seam early can save you from stripping the whole rail later.
Imagine inspecting a varnished companionway hatch after a few months in a sunny berth. The flat center still shines, but the edges look dull and the coating has a hairline crack near a hinge. The center isn’t the whole story: those worn edges may need attention before the next wet stretch exposes bare wood.
Use a simple routine: rinse away salt, let surfaces dry, and scan for dull patches, cracks, worn corners, corrosion, or bubbling. Follow the coating manufacturer’s instructions for cleaning and recoating. If the finish fails repeatedly in the same spot, find the water source or adhesion problem instead of brushing on another coat over the symptom.
Coat longevity varies with the material, exposure, preparation, application, and upkeep, so a fixed calendar is a poor substitute for inspection. A sheltered cabin interior may need less attention than a sun-exposed rail, while a working deck may wear from abrasion and standing water. Think of maintenance as an early-warning system: the first small change tells you where the finish needs help.
Handle old coatings and sanding waste with care
Before you sand or remove old marine paint, identify the coating where possible and plan how to control dust and waste. Some products, including antifouling coatings, can carry environmental or health risks. Follow the safety data sheet, use suitable protective equipment and ventilation, and comply with local rules for sanding dust, paint chips, and disposal.
That advice applies to a modest garage job as much as a marina refit. If you’re stripping an old keel or scraping paint from a trailerable boat in the driveway, loose chips can travel into soil or drains. Contain debris, keep it out of household trash unless local rules allow that route, and check the requirements for your area before you begin.
Use the product label and safety data sheet to choose protective measures; don’t rely on a dust mask of unknown rating or an open garage door alone. Keep other people away from dust and fumes, and follow local disposal instructions for leftover coatings, solvent-soaked materials, and removed paint. If you can’t identify the old layer, take extra care and seek guidance from a qualified local waste or coating professional.
Disposal rules and antifouling restrictions change by location. A coating that was standard on an older boat may face different requirements today. Checking current local rules before the first scrape can prevent a small maintenance job from creating a larger environmental problem.
Control the dust before you make it. A tidy work area, suitable PPE, and proper waste handling protect you and keep paint chips from spreading beyond the project.
For a boat owner, responsible cleanup is part of the finish job. The coating protects the vessel; careful handling protects the place where you work on it.
Frequently Asked Questions
What finish lasts longest in saltwater and strong sun?
No single finish lasts longest on every marine surface. Service life depends on the substrate, exposure, preparation, application, and upkeep. Choose a system rated for that particular surface and inspect high-exposure areas regularly.
Should I use varnish, paint, or oil on boat wood?
Choose varnish to show the grain, paint for an opaque protective layer, and oil for easier renewal. Varnish needs regular inspection and recoating, while oil generally provides less long-term film protection. A sunny handrail and a sheltered cabin trim may call for different choices.
Can I apply a new finish over an existing coating?
Only apply over an old coating when it is sound and the new product is compatible. Clean and prepare it according to the technical instructions, and test a hidden area if compatibility is uncertain. Peeling or cracked layers usually need repair or removal first.
Can a topside finish be used below the waterline?
Use it below the waterline only if it is rated for continuous immersion and compatible with the rest of the coating system. A topside varnish or paint is not automatically suitable underwater. Check antifouling compatibility and local rules as well.
How many coats should I apply?
Follow the product’s technical instructions for coat count and film thickness. The number depends on the coating, substrate, desired build, and whether a primer or sealer is required. More coats in one session do not replace the correct recoat windows.
How can I prevent peeling, blistering, or bubbles?
Start with a clean, dry, properly prepared surface and use compatible products in the stated conditions. Respect recoat intervals and cure times, and investigate moisture if the same spot fails again. Trapped water or a weak old layer can defeat a fresh topcoat.
Are water-based marine finishes durable enough?
Some waterborne coatings suit particular marine uses, but performance varies by formulation. Check the stated substrate and exposure ratings, application limits, and test information where available. Don’t judge durability from the water-based label alone.
Conclusion
Choose the coating system for the surface, exposure, and maintenance you can realistically manage. Confirm the substrate and immersion rating, prepare the surface properly, and follow the product’s application and cure instructions. Then wash away salt and inspect the places where water and wear gather first.
Clear grain, solid color, easy renewal: each has its place on a boat. The best finish is the one that still protects the wood or metal after the launch-day shine fades and the salt starts to dry.
Halloween Picks
halloween
As an affiliate, we earn on qualifying purchases.