
TL;DR

Get business pricing on tools and workshop supplies
- Business-only prices and quantity discounts
- Tax-exempt purchasing
- Multiple users, one account, clear invoices
A complete guide to sanding and abrasives starts with one rule: use the finest grit that removes the defect, then let each following grit erase the scratches left before it. Match the abrasive mineral, backing, coating, tool speed, and stopping grit to your material, while using effective dust extraction, PPE, and light pressure.
Sandpaper is a cutting tool, and every grain is a tiny blade. When you push an 80-grit disc across oak, thousands of sharp particles scoop out narrow furrows, leaving a pale cloud in the air and a scratch pattern that the next grit must remove. Treat sanding like vague polishing and you can spend an hour making a surface look worse.
This guide shows you how to choose the right starting grit, build an efficient sequence, match abrasive minerals and backings to the job, and use hand blocks, random-orbit sanders, and belt sanders without carving unwanted valleys. You will also learn why sanding finer is not always better and how dust extraction affects both your lungs and the quality of the cut.
The advice fits a real home shop: perhaps one random-orbit sander, a shop vacuum, and a drawer full of partly used discs. You do not need a production machine or a wall of premium abrasives. You need clean paper, controlled pressure, good inspection light, and a clear idea of what the next coating requires.
Start with the finest grit that removes the deepest defect efficiently; an unnecessarily coarse starting grit creates extra scratches and extra work.
Use a measured progression such as 80, 120, 150, and 180, vacuuming and inspecting between steps so each grit removes the previous scratch pattern.
Choose the whole abrasive system, not just a grit number: mineral, open- or closed-coat coverage, backing, bond, and grading standard all affect the cut.
Keep random-orbit sanders flat and use light pressure; pressing harder adds heat, slows orbit action, and can leave swirls or uneven hollows.
Capture dust at the tool, wear material-appropriate PPE, and verify unknown coatings before sanding them.
A Complete Guide to Sanding and Abrasives
Sandpaper is a cutting tool, and every grain is a tiny blade. Better surfaces come from choosing the least aggressive effective grit, erasing each previous scratch pattern, and matching the mineral, backing, coating, tool, and stopping point to the job.
Choose the cut, not merely the number
Lower numbers mean larger particles and deeper scratches. Higher numbers mean smaller particles and shallower scratches. FEPA P-grit, CAMI, JIS, and micron systems are not perfectly interchangeable—especially at fine grades.
Heavy leveling, rust removal, aggressive shaping, and badly damaged surfaces.
Remove milling marks, planer ripples, moderate defects, and old surface residue.
Common stopping range before many stains, paints, and clear wood finishes.
Remove cured dust nibs and prepare delicate surfaces without deep cutting.
Fine finish leveling, polishing preparation, and automotive clear-coat work.
Wet defect correction, haze removal, and preparation for high-gloss polishing.
A practical wood sequence
Mineral, backing, and grain spacing work together
A printed grit number describes only part of the abrasive. Heat resistance, grain fracture, flexibility, dust escape, bond strength, and backing consistency all change the real-world cut.
Aluminum oxide
Durable and economical for wood, paint, metal, and composites. A dependable general-purpose shop choice.
Silicon carbide
Excels on finishes, glass, plastics, stone, and wet-sanding applications.
Zirconia alumina
Tough, self-sharpening grain suited to heavy stock removal and metal grinding.
Ceramic alumina
Fast cutting under demanding heat and pressure in metalwork and production sanding.
Garnet
Produces a clean hand-sanded cut on wood, although the grains wear relatively quickly.
Diamond + CBN
Specialized choices for very hard materials, precision grinding, and sharpening.
Open coat
More space between grains creates escape lanes for dust. Best for wood, paint, resinous stock, and other loading-prone materials.
Closed coat
Dense grain coverage cuts quickly and leaves an even scratch pattern. Best where clogging is less likely and removal speed matters.
The surface decides what supports the grain
Backing controls durability, flexibility, conformity, and scratch consistency. Choose it for the shape of the work and the force of the tool.
| Backing | Flat work | Contours | Heavy force | Dust control | Best use |
|---|---|---|---|---|---|
| Paper | ✓ Strong fit | ~ Limited | ✗ Tears | ~ Perforated | Sheets, discs, general woodwork |
| Cloth | ✓ Good | ✓ Flexible | ✓ Durable | ~ Moderate | Belts, contours, metalwork |
| Film | ✓ Uniform | ~ Moderate | ~ Moderate | ✓ Good | Fine, consistent scratch patterns |
| Foam | ~ Soft | ✓ Excellent | ✗ Light duty | ~ Varies | Profiles, moldings, softened edges |
| Mesh | ✓ Good | ~ Moderate | ✗ Light duty | ✓ Excellent | Low-loading, high-extraction sanding |
| Fiber | ~ Rigid | ✗ Poor | ✓ Excellent | ✗ Limited | Heavy-duty grinding discs |
✓ Recommended ~ Situational ✗ Generally unsuitable
Inspect, cut, clean, and verify
Controlled technique beats brute force. Keep the sander flat, overlap passes, use light pressure, and confirm that the old scratch pattern is gone before moving finer.
Inspect
Find defects, coatings, glue, rust, and high spots.
Test
Try the least aggressive useful starting grit.
Mark
Add a loose pencil crosshatch to expose low areas.
Sand
Use steady, overlapping passes with a flat tool.
Vacuum
Remove loose grains before they create rogue scratches.
Verify
Use raking light, then advance only when marks are gone.
Pressure is not productivity
Pressing harder can slow random-orbit action, generate heat, load the abrasive, and create swirls or shallow hollows. Let fresh grains and tool speed do the cutting.
Dust is part of the cut
Capture it at the tool. Extraction keeps grains exposed, reduces loading, improves visibility, and limits airborne dust.
Protect yourself. Wear material-appropriate eye, hearing, and respiratory protection. Identify unknown coatings before disturbing them.
Check the rating. Never run an abrasive disc above its stated maximum RPM.
Finer is not automatically better
The correct stopping grit is set by the next operation. Excessively polishing wood can reduce stain absorption, while an unfinished coarse scratch can become dramatically darker under a coating.
Follow the finish maker
Many wood finishes need a controlled scratch structure for even color and reliable adhesion.
Level without cutting through
Use fine paper and a light touch to remove dust nibs only after the coating has cured sufficiently.
Refine before compound
Progress through fine grades until the scratch pattern is uniform and shallow enough to polish efficiently.
Removal-to-refinement spectrum
Choose the Right Grit Without Creating Extra Work
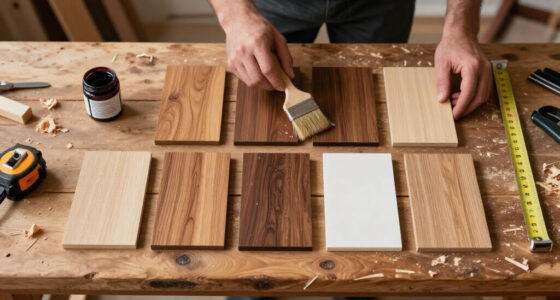
A complete guide to sanding and abrasives begins with understanding grit size: lower numbers use larger particles that cut deeper, while higher numbers use smaller particles that leave shallower scratches. Start with the finest grit that removes the actual defect at a useful pace, then move upward in measured steps.
| Grit range | Typical job | Home-shop example |
|---|---|---|
| 24–60 | Heavy stripping, shaping, rust removal | Flattening a badly cupped construction-lumber bench top |
| 80–120 | Milling-mark removal and general smoothing | Cleaning planer ripples from a maple shelf |
| 150–180 | Preparation for many stains and clear finishes | Preparing an oak cabinet door for wiping stain |
| 220–320 | Light sanding between finish coats | Removing dust nibs from cured polyurethane |
| 400–800 | Fine finish leveling and polishing preparation | Flattening orange peel in an automotive clear coat |
| 1,000+ | Wet defect correction and gloss refinement | Removing fine haze before compound polishing |
Suppose a walnut tabletop has shallow planer marks but no deep tear-out. Starting at 40 grit creates trenches you must chase through several later steps; fresh 100-grit paper may remove the marks just as quickly with far less risk. Coarse paper acts like a hungry jack plane: useful when you need it, expensive when you do not.
Printed numbers also need context. According to the Federation of European Producers of Abrasives, FEPA identifies coated-abrasive grades with a P designation [1]. A P800 sheet and an 800-grit sheet from another grading system may not produce the same scratch depth, so stay within one product system during fine finishing when possible.
Every grit has one job: remove the scratches or defects that came before it. If those marks remain, moving to finer paper only makes them shinier.
random orbit sander with dust collection
As an affiliate, we earn on qualifying purchases.
As an affiliate, we earn on qualifying purchases.
Build a Grit Sequence That Erases Every Scratch
A complete guide to sanding and abrasives uses a simple progression: inspect, cut, clean, and verify before moving finer. A sequence such as 80, 120, 150, and 180 works because each grade can remove the preceding scratch pattern without demanding endless passes or excessive pressure.
- Inspect the surface. Find dents, glue smears, torn grain, rust, old coating, and high spots under a low-angle light.
- Choose the least aggressive starting grit. Test it on a small area and check whether it removes the deepest defect efficiently.
- Sand with even, overlapping passes. Keep the tool flat and move at a steady pace rather than scrubbing one stubborn spot.
- Vacuum before inspecting. Loose coarse grains can hitch a ride under fine paper and draw a single ugly corkscrew across the work.
- Mark the surface with pencil. A loose crosshatch shows where the next grit has cut and where low areas remain untouched.
- Stop at the finish maker’s recommended grit. The coating needs a suitable surface, not the highest number in your drawer.
On a cherry drawer front, draw faint pencil loops after 120 grit. Sand with 150 until the loops disappear, then inspect the wood under a lamp held almost parallel to the surface. The raking light throws each leftover scratch into sharp relief, like late-afternoon sun finding footprints in sand.
Large jumps cause the most frustrating failures. If you leap from 80 directly to 220, the board may feel smooth because the sharp fibers are gone, yet broad 80-grit grooves can appear as dark lines when stain hits them. That delayed reveal is why cleaning and inspection matter more than speed.
A common rule is to increase the grit number by roughly 50 percent per step, though the abrasive system and material change the math. The sequence is a staircase, not an elevator. Skip too many steps, and the scratch pattern waits upstairs for the finish to expose it.
As an affiliate, we earn on qualifying purchases.
Match the Abrasive Grain and Backing to the Job
A complete guide to sanding and abrasives must go beyond the number printed on the sheet. Results come from matching the abrasive mineral, grain spacing, backing, and bond to the material, because two 120-grit products can cut at different speeds, resist heat differently, and leave visibly different surfaces.
Aluminum oxide is the dependable shop choice for wood, paint, many metals, and composites. Its grains fracture during use and expose fresh edges, so it balances price and life well. For a pine bookcase or painted cabinet, a quality open-coat aluminum-oxide disc usually earns its space in the drawer.
Silicon carbide is sharper and more friable, making it useful on glass, plastic, stone, finishes, and wet-sanding work. Zirconia alumina handles aggressive metal removal, while ceramic alumina tolerates the heat and pressure of demanding grinding. Garnet cuts wood cleanly by hand but wears faster; diamond and cubic boron nitride serve very hard materials and precision sharpening.
- Paper backing: economical and useful for flat sheets and discs, but easier to tear on sharp profiles.
- Cloth backing: strong and flexible for belts, contours, and metalworking.
- Film backing: exceptionally uniform, giving fine finishes a consistent scratch pattern.
- Foam backing: follows curves, moldings, softened edges, and automotive panels.
- Mesh backing: pulls dust through most of its surface and resists loading.
- Fiber backing: supports heavy grinding discs where strength matters.
Coating density matters too. Closed-coat abrasive packs grains tightly for fast, even cutting, while open-coat paper leaves escape lanes for sawdust and sticky finish. Sand resinous pine with closed-coat paper and it can grow little amber lumps within minutes; open coat gives that debris somewhere to go.
dust extraction vacuum for woodworking
As an affiliate, we earn on qualifying purchases.
As an affiliate, we earn on qualifying purchases.
Pick the Sander That Removes Material Without Damage
The right sanding tool balances removal speed with control. Use a random-orbit sander for broad general work, a block for flat hand sanding, a detail or finishing sander for corners, and a belt sander only when fast stock removal matters more than delicacy.
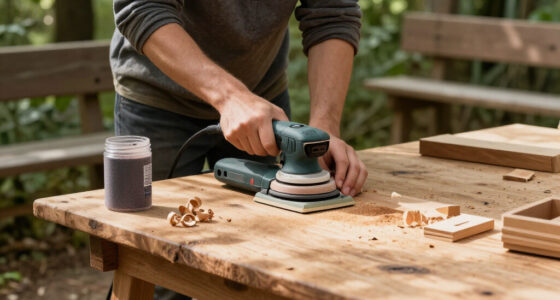
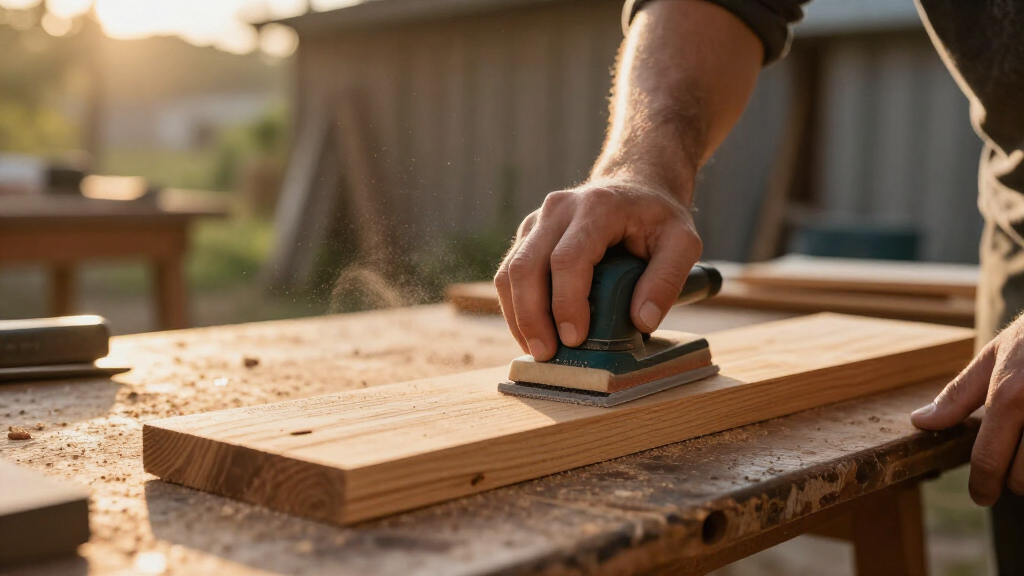
A random-orbit sander is the useful center of a small garage shop. A 125 mm or 150 mm model can smooth cabinet parts, prepare paint, and refine a tabletop, yet it can still leave pigtail swirls if you tilt it, push hard, use clogged paper, or race across the work. Place the pad flat before starting when the manual directs it, then keep the machine moving in overlapping lanes.
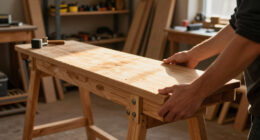
A belt sander is a different animal. Its abrasive belt charges forward like a tracked machine, cutting high spots quickly but happily digging a trench at an edge. When leveling a rough workbench, mark the top with pencil, sand diagonally with a coarse belt, and stop often to check the marks; do not hover over a low knot while the surrounding wood disappears.
Hand sanding still wins around profiles, edges, corners, and finish coats. Wrap paper around a firm cork or rubber block on flat wood so your fingertips do not create shallow hollows. On a veneered panel, hand-sand the last few passes with the grain and lighten your pressure near the edges, where a thin face veneer can vanish with frightening speed.
For metal, an angle grinder removes material aggressively when fitted with the correct wheel. Match every disc to the tool’s spindle, guard, material, and maximum rated RPM; never mount a low-speed accessory on a faster machine. Disconnect power or remove the battery before changing accessories, wear eye and hearing protection, and follow the tool and abrasive instructions.
As an affiliate, we earn on qualifying purchases.
Get Better Results on Wood, Metal, Paint, and Plastic
Material changes the sanding rules, even when the grit number stays the same. Wood rewards grain-aware finishing, metal demands heat and contamination control, coatings need measured leveling, and plastic needs low pressure and speed so friction does not soften or smear the surface.
On solid wood, finish your hand sanding with the grain. Many furniture parts are ready for stain around 150–180 grit, though the species and finish instructions decide the stopping point. Sanding hard maple to an extremely fine grit can burnish it and reduce stain uptake, while thirsty end grain may benefit from one finer step to keep it from turning nearly black.
Metal should be clean and free of oil before sanding. Heat can blue steel, warp a thin automotive panel, or damage coating beside the repair. Keep stainless-steel abrasives and tools separate from those used on carbon steel; embedded iron particles can later bloom into orange rust freckles on an otherwise clean stainless surface.
Between coats of clear finish, you are not trying to remove the previous layer. You are knocking down dust nibs and creating a uniform surface for the next coat, often with 220–320 grit or a compatible fine pad after the finish has cured. Imagine a varnished tabletop that feels like tiny grains of sugar under your palm: two light passes and a thorough vacuum beat hard scrubbing.
Drywall needs fine abrasive, feather-light pressure, and strong extraction. Once you scuff through the white face paper or expose joint-tape edges, the repair grows. Plastic and resin need similar restraint because heat can make the abrasive drag and leave gummy curls; composite dust may also demand source capture and suitable respiratory protection.
Automotive finishing often mixes dry shaping with very fine wet defect removal. A coarse scratch buried below primer can return after paint as a straight gray ghost, so each refinement step must fully remove the last pattern. The surface keeps a record of every shortcut.
Know When Wet Sanding Beats Dry Sanding
Dry sanding is best when you need clear visual feedback, easy cleanup through extraction, or a moisture-free surface. Wet sanding is better for very fine defect removal because an approved liquid carries residue away, limits loading, and helps the abrasive leave a more refined scratch.
| Method | Best uses | Main limitation |
|---|---|---|
| Dry sanding | Raw wood, drywall, general paint preparation, rapid shaping | Creates airborne dust and may load on soft coatings |
| Wet sanding | Automotive clear coat, polished metal, solid surface, cured paint | Needs compatible material, abrasive, lubricant, and equipment |
Wet sanding does not mean drenching a surface. When correcting a cured clear coat, you might soak suitable paper as directed, mist the panel, and use a soft block with light strokes. The water turns milky as it carries away residue; wipe the area often so you can see when the orange-peel texture has become uniformly dull.
Raw wood usually belongs on the dry side. Water can raise fibers, swell joints, move veneer, or add moisture just before finishing. If you intentionally raise the grain before a water-based coating, dampen the wood in a controlled way, let it dry fully, then knock down the lifted fibers with the specified fine grit.
Electricity and water are a dangerous combination. Never wet-sand with a powered tool unless the manufacturer explicitly approves the complete setup for wet operation. Disconnect power during accessory changes, use suitable PPE, and hire a licensed professional for electrical changes to shop circuits.
The choice is not a contest between old and new methods. A cabinet door may go from 120 to 180 grit dry under extraction, while a cured high-gloss panel may move through 1,000, 1,500, and 2,000 grit wet before polishing. Match the method to the surface waiting at the finish line.
Stop Swirls, Clogging, and Sand-Through Before They Spread
Most sanding defects come from pressure, contamination, heat, or an oversized grit jump. Fix the cause before changing paper: clean the surface, inspect the pad, reduce pressure, verify the sequence, and test on a small area. Otherwise, fresh abrasive simply repeats the same damage faster.
Swirl marks often begin with one hard speck trapped below a random-orbit disc. The speck circles the work like a compass needle, drawing curly pigtails that stay invisible until stain darkens them. Vacuum between grits, use clean discs, keep the pad flat, and let the machine reach or leave the work as its instructions specify.
Clogging tells you that debris has nowhere to go. Soft paint, resinous wood, moisture, heat, or an uncured coating can pack the grain until the disc feels smooth and shiny. Switch to an open-coat, mesh, stearated, or wet-rated abrasive when compatible, and wait for coatings to cure rather than forcing the job.
Uneven stain can come from glue residue, skipped grits, burnished patches, or inconsistent treatment of face and end grain. On a glued oak frame, a nearly invisible thumbprint of squeeze-out can become a pale halo under brown stain. A low-angle inspection light and a light wipe with an approved compatible liquid can reveal trouble before finishing, but follow the finish maker’s preparation directions.
Sand-through happens fastest at edges, where pressure concentrates on a narrow strip. Veneer, primer, color coats, and clear coats offer little margin there, so protect edges with lighter pressure and finer paper. When cutting slows or you must lean harder, replace the abrasive; a glazed disc may polish and heat the surface instead of cutting it cleanly.
Modern mesh discs and multi-hole pads improve airflow across more of the surface, while film-backed products deliver a more uniform fine scratch. Those upgrades can extend abrasive life, but they cannot rescue poor technique. Dust extraction and a flat pad remain the quiet foremen of the job.
Control Sanding Dust Before It Reaches Your Lungs
Sanding dust requires control at the tool, suitable PPE, and deliberate cleanup. Connect the sander to effective extraction, wear a correctly selected and fitted respirator, protect your eyes and hearing, and identify unknown coatings before disturbing them. A clean-looking shop can still hold fine airborne particles.
In a one-car garage, a sander’s dust bag may catch the coarse flour-like debris while the finest particles drift through a sunbeam and settle on shelves overnight. A well-sealed hose connected to a suitable extractor captures dust closer to the cut, keeps the abrasive cooler, and reduces the loose grit that can scar your finish. Compare systems by real airflow under load, filtration, hose losses, and tool-port fit rather than a large CFM number alone.
According to the U.S. Occupational Safety and Health Administration, respirable crystalline silica exposure can cause serious disease, and construction tasks involving silica require specified controls [2]. Concrete, stone, plaster products, and engineered stone deserve material-specific precautions; hardwood, treated lumber, composites, metals, and old coatings carry their own hazards. An ordinary household vacuum may leak hazardous fine dust back into the room.
- Verify old paint before sanding because it may contain lead or other hazardous substances.
- Capture dust at the source with a compatible shroud, hose, extractor, and filter.
- Wear fitted protection chosen for the material and exposure, plus eye and hearing protection.
- Keep ignition sources away from combustible metal dust and follow material-specific disposal rules.
- Handle oily debris carefully because contaminated abrasive and rags can create a fire risk.
Do not improvise removal methods for lead paint, silica-rich materials, or potentially combustible dust. Follow product safety data, local rules, and applicable permit requirements, and bring in a licensed or certified professional when hazardous-material controls exceed your equipment or training. The best finish is not worth trading for damaged lungs.
Frequently Asked Questions
What grit should you start with?
Start with the finest grit that removes the defect efficiently. Fresh 100 or 120 grit may handle normal planer marks, while 40 or 60 grit belongs on heavy coating removal, major leveling, or deep damage. Test a small area before committing to the whole surface.
Can you skip grits when sanding wood?
You can make small grit jumps, but large jumps often leave deep scratches below a surface that feels smooth. Moving from 80 to 120 to 150 or 180 is usually more reliable than jumping from 80 to 220. Each sheet should remove the pattern left by the one before it.
What grit should you use before staining wood?
Many furniture projects stop around 150–180 grit before stain, but species and product instructions control the choice. Sanding too finely can burnish dense wood and reduce stain absorption. Test the complete sanding and finishing schedule on an offcut from the same board.
Why does a random-orbit sander leave circular marks?
Pigtail swirls usually come from trapped grit, clogged paper, excessive pressure, a damaged pad, poor extraction, or moving too quickly. Vacuum the work, install a clean disc, keep the pad flat, and slow your travel. Inspect under a low-angle light before applying stain.
How do you know when sandpaper is worn out?
Replace abrasive when cutting speed drops, loading will not clear, the grain looks glazed, or you feel tempted to push harder. A worn disc often makes heat and burnishes the surface rather than cutting it. Fresh paper is cheaper than repairing a scorched edge or blotchy finish.
Is wet sanding better than dry sanding?
Neither method wins every job. Wet sanding limits loading and supports very fine correction on compatible cured finishes, while dry sanding works well on raw wood and with effective extraction. Never mix liquid with powered equipment unless the complete setup is approved for wet use.
Do you need a dust extractor for a random-orbit sander?
For regular power sanding, a suitable dust extractor is strongly recommended. It improves visibility, abrasive life, scratch consistency, and exposure control, though hazardous materials may still require a fitted respirator and added containment. Match the extractor, filter, hose, and cleanup method to the dust involved.
Conclusion
Your best sanding upgrade is not a more powerful machine. It is a disciplined habit: start no coarser than needed, clean between grits, inspect under raking light, and stop at the grit your finish calls for. That routine saves abrasive, protects thin edges, and leaves a predictable surface.
Before your next finish coat, switch off the sander and sweep a bright lamp across the work. If the surface shows one even scratch pattern and no shiny glue, swirls, or deep lines, you are ready. Let the abrasive cut, and let the light tell you when the job is done.
Fall yard work Picks
leaf blowers
As an affiliate, we earn on qualifying purchases.