
TL;DR

Get business pricing on tools and workshop supplies
- Business-only prices and quantity discounts
- Tax-exempt purchasing
- Multiple users, one account, clear invoices
Essential hardware for building and finishing falls into fasteners, assembly tools, drywall components, door and window hardware, and cabinet hardware. Choose galvanized or stainless steel fasteners for outdoor work, match drawer slides and hinges to actual load ratings, and buy to recognized standards like ASTM or ISO rather than by price. Most home shops need a small set of quality hardware, not a warehouse of it.
The most expensive mistake in my shop was never a ruined board. It was a $4 hinge. A cabinet door I’d spent two weekends on sagged within three months because I grabbed cheap stamped hinges instead of spending eight more dollars on full-mortise ball-bearing hinges. The wood was fine. The hardware gave up.
That’s the thing about essential hardware for building and finishing: it’s the smallest, cheapest part of any project, and it decides how long everything else survives. A flawless finish on a drawer running on bargain slides is a drawer that will annoy you every single morning.
This guide walks through the hardware that actually earns its place in a home shop — fasteners, assembly tools, drywall and finishing components, door and window hardware, and cabinet fittings. I’ll flag where the budget tier works fine and where it will betray you, because after twenty years in a two-car garage, I’ve bought both.
Use hot-dipped galvanized or 305/316 stainless fasteners for any exterior or pressure-treated project; zinc-plated screws will rust through in a single wet sea…
Match drawer slides to real load ratings — 100-lb side-mount ball-bearing slides for workhorse drawers, undermount soft-close for kitchens and bathrooms.
Use coarse-thread drywall screws in wood framing, fine-thread in metal studs, and always use paper-faced metal corner bead on outside corners.
Buy certified hardware: ANSI/BHMA grades for locks, ASTM/ISO ratings for structural fasteners. Certification is your fastest quality check in the aisle.
Run the 5-step selection process — load, environment, material compatibility, tooling, standards — before purchasing; it takes ten minutes and prevents years o…
Essential Hardware for Building & Finishing
Fasteners, assembly tools, drywall components, door and window hardware, cabinet fittings. Hardware is the smallest, cheapest part of any project — and it decides how long everything else survives. Match hardware to load ratings and buy to recognized standards, not by price.
“The most expensive mistake in my shop was never a ruined board. It was a $4 hinge.”
Cheap hinges vs. full-mortise ball-bearing: +8 dollars, years of serviceStep by step
How to Choose Hardware: A 5-Step Process
The right hardware choice follows a short, repeatable process. Run it before purchasing — it takes ten minutes and prevents years of annoyance.
Load
What weight and force must the hardware carry? Match slides and hinges to real load ratings.
Environment
Interior, exterior, wet, or salt air? This decides galvanized vs. 305 vs. 316 stainless.
Material
What is it biting into? Coarse thread for softwood, fine thread for hardwood and metal studs.
Tooling
Torx drive always; a clutched driver prevents twisted-off heads in soft brass and steel alike.
Standards
Buy certified: ANSI/BHMA for locks, ASTM/ISO for structural fasteners. Certification is your fastest quality check.
Category 01 · Fasteners
Fasteners That Won’t Let You Down
A fastener is a spring under tension. Shear it sideways with the wrong thread, or let corrosion eat its cross-section, and it becomes the weak link that decides when the whole assembly lets go. Modern treated lumber uses copper preservatives — copper plus wet steel is a battery, and the steel screw is the sacrificial anode.
Construction Screws
#8 and #9, 1¼”–3″. Torx drive, always — Phillips cams out under real torque; Torx grips on six full faces. For framing, jigs, and shop furniture.
Finish Nails
15-gauge holds heavy crown molding straight but leaves a bigger hole; 16-gauge holes vanish under one pass of filler. Pick per the trim.
Pocket-Hole Screws
Coarse thread for softwood, fine for hardwood. Coarse in oak splits the board — a lesson learned from an audibly cracking walnut bench seat.
Fine-Thread Drywall Screws
Hardened, brittle, and cheap for a reason: drywall loads are pure shear. They snap under lateral load and have no business in woodwork.
Toggle & Wedge Anchors
A 3/16″ toggle holds four times what a plastic sleeve does — it spreads load across the whole back face instead of a half-inch gypsum cone. Wedge anchors for concrete.
Zinc-Plated Outdoors
Zinc-plated screws rust streaks down a cedar planter in one wet season. Deck screws from five-year-old treated posts: orange lace. Structural failure, hidden from view.
Category 02 · Assembly Tools
The Tools That Install Hardware Right
You don’t need a tool wall — you need six or seven tools that hold tolerances. A clutched 18V drill/driver is the whole argument for tool control in one screw: dial in the breaking point, and the tool respects it. Eight doors, no-clutch drill: five snapped hinge screws. Same job, clutched driver: zero.
| Tool | Budget Tier | Pro Tier | Verdict |
|---|---|---|---|
| Drill/Driver | $60–100 brushed | $180+ brushless | ✓ Brushless worth it if you use it weekly |
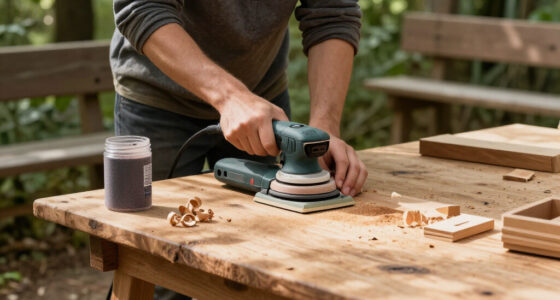
| Random Orbit Sander | $50, 5″ fixed speed | $130 variable speed | ~ Budget fine; spend on discs instead |
| Clamps | Bar clamps, $15–25 | Parallel jaws, $50+ | ~ Buy parallel jaws as you can afford them |
| Driver Bits | $10 assorted | $25 shock-resistant Torx | ✓ Always buy the good bits |
| Fine-Thread Screws in Wood | Common shortcut | Correct thread per material | ✗ Brittle — snaps under lateral load |
| Layout: Story Stick & Combo Square | Under $30 total | — | ✓ Non-negotiable; a hinge 1/32″ off swings itself shut forever |
The Clamp Lesson
Cheap clamps are springs when you need walls. A 24″ cherry tabletop glued up with four bargain bar clamps bowed 1/32″ at center — and left a hairline crack running a foot along the panel. Four 24″ bar clamps plus two parallel-jaw clamps cover most garage-shop panels up to about 18″ wide.
Categories 03–05 · Finishing Components
Drywall, Doors & Windows, Cabinets
Board & Corner Hardware
Coarse-thread screws in wood framing, fine-thread in metal studs. Always paper-faced metal corner bead on outside corners for straight, crack-resistant edges.
Security & Efficiency
Hinges, handles, locks, latches, weatherstripping. Buy locks to ANSI/BHMA grades — the certified grade is the only claim you can verify from the aisle.
Slides & Hinges
100-lb side-mount ball-bearing slides for workhorse drawers; undermount soft-close for kitchens and baths. Full-mortise ball-bearing hinges — never cheap stamped.
By the numbers
Load Ratings That Matter
Match hardware to actual load ratings — not the picture on the box.
Certified vs. No-Name
ASTM/ISO-rated fasteners cost a small premium for anything structural. No-name bin screws vary wildly in hardness — heads twist off a third of the way in, leaving a steel nub to file flat. A certification doesn’t guarantee a great screw; it guarantees the manufacturer tested a batch to a published standard.
Traceability
From Load Rating to Finished Project
Fasteners That Won’t Let You Down: Screws, Nails, and Anchors
Fasteners are the backbone of every build, and choosing them comes down to three questions: what load are they carrying, what environment are they living in, and what material are they biting into? Get those right and almost any decent brand works. Get them wrong and the best screw in the world still fails. The reason is simple physics: a fastener is a spring under tension. Shear a screw sideways with the wrong thread pattern for the material, or let corrosion eat its cross-section, and it stops being a spring — it becomes the weak link that decides when the whole assembly lets go.
For exterior work or pressure-treated lumber, use hot-dipped galvanized or stainless steel fasteners — 305 stainless for most outdoor projects, 316 if you’re near salt water. Zinc-plated screws will rust streaks down a cedar planter in one wet season. Inside, standard zinc or yellow-zinc screws are fine. Why the distinction matters: modern treated lumber uses copper-based preservatives, and copper plus wet steel is a battery. The steel screw becomes the sacrificial anode and literally dissolves — I’ve pulled deck screws out of five-year-old treated posts reduced to orange lace. That’s not a cosmetic failure; it’s a structural one, and it happens exactly where you can’t see it.
Here’s the fastener lineup I keep stocked at all times:
- Construction screws (#8 and #9, 1¼” to 3″) — structural framing, jigs, shop furniture. Torx drive, always. Phillips strips under real torque because its wings cam out; Torx pads the driver on six full faces and keeps torquing.
- Fine-thread drywall screws — drywall only. They snap under lateral load and have no business in woodwork. They’re hardened brittle and cheap for a reason: drywall loads are pure shear-perpendicular, a load case wood never gives you.
- Finish nails (15- or 16-gauge) — trim, casing, anything where the hole gets filled. The tradeoff: 15-gauge leaves a bigger hole but holds heavy crown molding straight; 16-gauge holes vanish under one pass of filler.
- Pocket-hole screws — coarse thread for softwood, fine thread for hardwood. Using coarse in oak splits the board; I learned that on a walnut bench seat that cracked audibly as I drove the last screw.
- Anchors — toggle bolts for hollow walls, wedge anchors for concrete. Plastic sleeve anchors hold maybe 20 lbs in drywall; a 3/16″ toggle holds four times that, because the toggle spreads the load across the whole back face of the panel instead of a half-inch cone of gypsum.
ASTM and ISO-rated fasteners are worth the small premium for anything structural. The no-name bin screws at the big box store vary wildly in hardness — I’ve had heads twist off a third of the way in, leaving a steel nub you get to file flat. A certification doesn’t guarantee a great screw; it guarantees the manufacturer actually tested a batch to a published standard, which is the only claim you can verify from the aisle.
As an affiliate, we earn on qualifying purchases.
The Tools That Install Hardware Right: Drills, Drivers, and Clamps
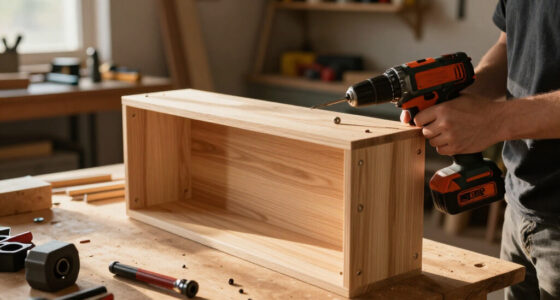
You don’t need a tool wall — you need six or seven tools that hold tolerances. A drill/driver handles 90% of fastener work, and a quality 18V model with a clutch saves more hardware than any other tool I own. Concrete example: driving a #6 brass screw into a vintage hinge. Brass is soft as butter — one extra second of full torque and the head twists off clean, leaving a threaded brass plug stuck in the door you now have to dig out with an extractor. Set the clutch to a low number and the driver ratchets off before that happens. That’s the whole argument for a clutch in one screw.
Think of the clutch like a torque wrench for screws: you dial in the breaking point, and the tool respects it. My neighbor hung eight interior doors with a no-clutch drill and snapped hinge screws on five of them; I hung the same doors with a clutched driver and snapped none. Same screws, same wood, same hinges — the only difference was the tool stopping at the right moment.
The honest tier breakdown for a small shop:
| Tool | Budget tier | Pro tier | Verdict |
|---|---|---|---|
| Drill/driver | $60–100 brushed | $180+ brushless | Brushless worth it if you use it weekly |
| Random orbit sander | $50, 5″ | $130 variable speed | Budget fine; spend on discs instead |
| Clamps | Bar clamps, $15–25 | Parallel jaws, $50+ | Buy parallel jaws as you can afford them |
| Driver bits | $10 assorted | $25 shock-resistant Torx | Always buy the good bits |
Clamps are the hardware people forget. You can never have too many, and cheap clamps that flex under glue-up pressure will bow a panel joint open right in the middle. A real scenario: I glued up a 24″-wide cherry tabletop with four bargain bar clamps, and the middle bars bowed just enough — maybe 1/32″ — to let the joint open at dead center. When I broke the clamps off the next morning, I had a hairline crack running a foot along the panel. The wood wasn’t the problem; the clamps were springs when I needed them to be walls. Four 24″ bar clamps and two parallel-jaw clamps — whose jaws stay dead parallel under load by design — will cover most garage-shop panels up to about 18″ wide.
A story stick, a combination square, and a tape you trust matter as much as anything with a motor. Hardware installation is layout work — a hinge set 1/32″ off center shows up as a door that swings itself shut forever. Example: on a recent cabinet job, I marked two hinge cup locations freehand on four doors and used a story stick on the other four. The freehand doors each sat a slightly different distance from the top; the story-stick doors matched perfectly. A story stick is just a length of scrap with the layout marks transferred once — but it turns four unique measurements into four identical ones, which is the entire game when hardware has to line up.
As an affiliate, we earn on qualifying purchases.
Drywall and Finishing Hardware: What Makes Walls Actually Smooth
Smooth walls come from three things working together: coarse-thread drywall screws, paper or fiberglass joint tape, and corner beads that stay straight. The screws hold the board to the studs at roughly 12″ on center on walls; everything layered on top is refinement. Think of drywall as a system where each layer’s only job is to compensate for the imperfection of the layer beneath — compound fills the screw dimple, tape spans the joint, bead guards the edge. Skip quality at any layer and the flaw telegraphs through the paint months later.
Use coarse-thread drywall screws for wood framing and fine-thread for metal studs — the threads are engineered for each. Coarse threads bite deep into soft wood fibers like a woodscrew; fine threads grip thin sheet metal the way a machine screw does, and coarse threads in a metal stud will chew the opening oversize and spin uselessly. Set the screw just below the paper surface without tearing it: you want a slight dimple the first coat of compound can fill. A drywall screw gun with depth-setting nosecone does this automatically; a regular driver with a drywall bit gets you 90% there.
For corners, metal or vinyl corner bead protects the most abused edge in any house. Paper-faced metal bead is the sweet spot for DIY — it embeds in the tape coat and resists the dings that crack bare vinyl. Why this matters: a cracked corner bead can’t be spot-repaired invisibly, because the crack sits exactly where light rakes across it. Outside corners take bead; inside corners take folded paper tape and patience.
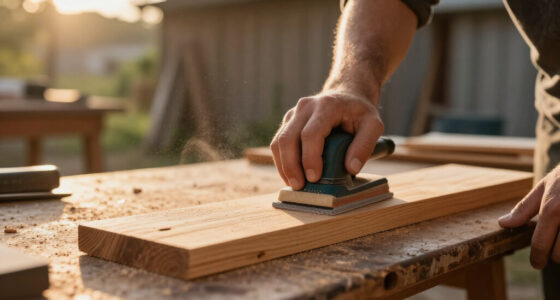
Three coats is the standard rhythm: tape coat, fill coat, skim coat, each sanded with 150-grit on a pole sander. And take the dust seriously — drywall dust is fine enough to hang in the air for hours. A box fan in a window with a furnace filter taped to the back is a crude but real improvement; a shop vac with a fine-dust filter and 100+ CFM of actual capture at the source is better. Wear a respirator, not a dust mask. The tradeoff is honest: dust control gear adds $50 and ten minutes of setup per session, and it’s the difference between wiping down a room and wiping down your lungs.
soft-close undermount drawer slides
As an affiliate, we earn on qualifying purchases.
As an affiliate, we earn on qualifying purchases.
Hinges and Slides: Where Doors and Drawers Live or Die
Door and cabinet hardware is where usability is decided. A $600 cabinet with $3 hinges feels cheap every time you open it. A $200 cabinet with good slides feels like furniture. The reason is that hardware is the interface — it’s the part of the project your hands touch daily, and every cycle exercises the same wear points until they either hold or degrade.
For cabinet doors, 35mm concealed (European) hinges are the standard for face-frame and frameless work. They’re adjustable in three directions — a quarter turn on the cam moves the door laterally, vertically, and in/out — which forgives a lot of imperfect layout. That adjustability is the hidden value: cabinet cases are rarely perfectly square, and a fixed hinge turns a 1/16″ case error into a permanent uneven reveal, while a concealed hinge turns it into a half-turn of a screwdriver. Full-overlay, half-overlay, and inset configurations all use the same body with different arm geometry, so buy to match your door style.
For drawers, match the slide to the load, not the price tag. Load ratings aren’t marketing fluff — a 100-lb rating accounts for the dynamic shock of a drawer slammed shut with cast iron inside:
- Side-mount ball-bearing slides, 100-lb rating — the workhorse. About $6–10 a pair. The ball bearings matter because nylon rollers wear into an oval under repeated load and start indexing — that sticky, notchy feel mid-travel.
- Undermount soft-close slides — cleaner look, better feel, $15–25 a pair. Worth it in kitchens, where a slam-closed drawer three inches from your shin is a daily event.
- Center-mount wooden slides — period-correct for reproductions, frustrating for everything else. They demand waxing and perfect box fit; the tradeoff is authenticity versus every other quality.
On interior doors, use ball-bearing hinges in high-traffic spots. A solid-core door can weigh 60–80 lbs; plain knuckle hinges will squeak and wear oval-shaped within a few years under that load. The implication of that oval wear: the door sags a quarter inch, starts dragging on the jamb, and the fix isn’t a new hinge — it’s re-mortising the jamb. Three hinges per door up to about 80 lbs, and pay attention to hinge handedness if you’re replacing rather than routing new.
The one spec people skip: screw quality on hinges. Hinge screws carry the entire shear load of the door, and the tiny soft screws included in some budget packs will pull out of soft pine jambs — the screw isn’t failing, the wood around it is, because a soft screw compresses instead of clamping. Brass or hardened steel, #7 or #8, at minimum.
As an affiliate, we earn on qualifying purchases.
Finishing Touches: Weatherstripping, Smart Hardware, and Green Choices
Finishing hardware is the layer that seals the deal — literally, in the case of weatherstripping. Door sweeps, kerf-in foam, and V-strip weatherstripping close the gaps that leak heated air all winter; a well-sealed exterior door can cut drafts measurably and pays for itself in a season. The classic test: close the door on a dollar bill and try to pull it out. If it slides freely anywhere along the jamb, that’s a gap your heating budget is pouring through. A $12 kerf-in foam strip at that gap is cheaper than one month of the heat it wastes.
Recent years have added genuinely useful options, along with common traps:
- Smart locks and hardware — convenient, but check that the deadbolt meets the same ANSI grade rating as a mechanical one before trusting it for security. The electronics can be flawless while the bolt behind them is Grade 3 residential-grade steel; a smart lock is only as secure as its dumbest component.
- Eco-friendly materials — recycled-content steel fasteners and long-life hardware reduce replacement cycles. Hardware designed to last 50 years is greener than hardware designed to be replaced. The math is blunt: three $4 hinges replaced every few years cost more in money, trips, and embedded energy than one $12 hinge that outlives the cabinet.
- Corrosion-resistant coatings — modern ceramic and polymer coatings outperform old zinc plate, useful for deck and fence hardware. The tradeoff: they cost roughly twice as much per piece, so save them for exposed connections where replacement means dismantling the structure.
Look for ANSI/BHMA grading on locks (Grade 1 is commercial, Grade 2 is heavy residential, Grade 3 is basic residential) and ASTM/ISO markings on structural fasteners. Certification is the fastest quality check you have when you can’t test a product in the aisle — a Grade 1 lock has survived hundreds of thousands of cycle and strike tests; Grade 3 may have passed far fewer.
A caution that matters: if any finishing or hardware project touches electrical work — smart switches, outlet relocation, anything wired — shut the breaker off and verify with a tester, and bring in a licensed electrician for anything beyond a like-for-like swap. Codes and permits exist for exactly the projects that seem simple. The stakes aren’t theoretical: a smart switch wired backward can work fine for months and then fail in a way that leaves the fixture energized with the wall switch off.
How to Choose Hardware for Your Next Project: A 5-Step Process
The right hardware choice follows a short, repeatable process. Run through these five steps before you buy anything and you’ll rarely pick wrong.
- Define the load. How much weight will this fastener, hinge, or slide actually carry — static and dynamic? A drawer full of hand tools is a 40-lb load on every opening cycle.
- Define the environment. Interior dry, interior humid (bathrooms!), exterior, or ground contact. Each step outward demands better corrosion resistance.
- Check material compatibility. Stainless against pressure-treated lumber, brass in marine settings, and never mix metals that invite galvanic corrosion — copper and steel in a wet location will eat each other.
- Match your tools and skill. Concealed hinges need a 35mm Forstner bit. Undermount slides need precise drawer-box sizing. If you don’t own the tool, budget for it.
- Verify standards and code. ANSI/BHMA for locks, ASTM/ISO for structural fasteners, and your local building code for anything structural, electrical, or plumbing-related.
Last year I built a bathroom vanity and ran this list in about ten minutes. It flagged that the humid environment ruled out my usual budget slides, so I spent $40 more on stainless-runner undermounts. Two years of daily use, zero sag, zero corrosion. That’s the whole game: a few minutes of matching specs saves years of living with the wrong choice.
Frequently Asked Questions
What are the best fasteners for outdoor use?
Hot-dipped galvanized or stainless steel fasteners are the standard recommendation for outdoor applications. Use 305 stainless for general exterior work and 316 stainless near salt water or in pool environments. Standard zinc-plated screws corrode quickly outdoors and can fail at the connection within a season or two of wet weather.
How do I choose the right hardware for my project?
Work through four factors: the load the hardware will carry, the environment it will live in, compatibility with surrounding materials, and your local building codes. For example, a bathroom drawer needs corrosion-resistant slides, while a deck frame needs galvanized or stainless structural screws rated for treated lumber. When in doubt, buy to ASTM or ISO certified specs.
Are cheap cabinet hinges and drawer slides worth buying?
For light-duty, occasional-use cabinets, budget hardware can be acceptable. For kitchens, bathrooms, or anything used daily, no — cheap slides lose their action and stamped hinges sag within a couple of years. Mid-tier ball-bearing slides ($6–10 a pair) and adjustable 35mm concealed hinges hit the value sweet spot for most home shops.
Do I need special screws for pressure-treated lumber?
Yes. Modern pressure-treated lumber uses copper-based preservatives that react corrosively with plain steel fasteners. Use hot-dipped galvanized or stainless steel screws specifically rated for treated lumber; standard zinc plating is not sufficient and will corrode at the connection point.
Are there eco-friendly or sustainable hardware options?
Yes. Many manufacturers now offer fasteners made from recycled-content steel, hardware with advanced corrosion-resistant coatings that extend service life, and modular systems designed for disassembly and reuse. The greenest hardware choice is often simply the longest-lasting one — a hinge that lasts 50 years beats three replacements.
Conclusion
Hardware is the cheapest line item on your materials list and the last line of defense for everything you build. Spend the extra dollar on the fastener, hinge, or slide that matches the load and the environment, and buy to recognized standards instead of by price. Your projects will outlast your enthusiasm for them — in the best way.
Before your next build, pull one thing off the shelf — a hinge, a screw, a slide — and ask whether you’d trust it under load for ten years. If the answer is no, you’ve found your next upgrade.
Fall yard work Picks
leaf blowers
As an affiliate, we earn on qualifying purchases.