TL;DR
Furniture hardware — fasteners, hinges, drawer slides, brackets, and connectors — determines whether a piece lasts decades or wobbles apart in a year. Buy corrosion-appropriate materials (stainless or zinc-coated for outdoor work), match hardware type to load and use, and install with pre-drilled pilot holes and a self-centering jig for accurate results.
The drawer that glides like silk and the one that squeaks and jams after six months usually differ by about $8 in hardware. I’ve built both. The squeaky one was a workbench build where I cheaped out on roller slides; the silk one used soft-close ball-bearing slides I bought on sale. Same wood, same joinery, completely different piece of furniture.
Hardware is the unglamorous half of woodworking. We obsess over grain patterns and finish sheen, then bolt the whole thing together with whatever screws were in the coffee can. That’s backwards. Every hinge, slide, and fastener is a moving part or a load path — and moving parts and load paths are where furniture fails.
This guide gives you an overview of the essential hardware for furniture and projects: what each type does, which materials to choose, what’s worth the money in a small garage shop, and how to install it so it holds up. No product roundups — just the spec-level knowledge you need before you hit the checkout button.
Spend your hardware budget where hands touch daily: ball-bearing or soft-close drawer slides deliver the biggest feel upgrade per dollar in any furniture build.
Match hardware material to environment — zinc-plated steel for indoor work, 304 stainless (or 316 near saltwater) and brass for outdoor and humid locations.
Pre-drill every screw: a 7/64" pilot for #8 screws in hardwood prevents snapped screws and split stock; a $12 self-centering Vix bit fixes hinge-hole accuracy…
For furniture that gets moved, use threaded inserts and cross dowels instead of cam locks, which strip out after a few reassemblies.
Keep a $120–180 standing stock of common screws, slides, hinges, and inserts so a missing fastener never stalls a weekend build.
Essential Hardware for Furniture & Projects
Hardware is the unglamorous half of woodworking. Every hinge, slide, and fastener is a moving part or a load path — and that’s exactly where furniture fails. This guide covers what each hardware type does, which materials to choose, what’s worth the money in a small garage shop, and how to install it so it holds up for decades.
The 7 Types of Hardware Every Build Actually Needs
Master these seven categories and you can build nearly everything that shows up in a furniture catalog. Budget follows usage frequency — hardware you touch daily deserves the most spend.
Fasteners
Screws, bolts, nuts — joinery reinforcement and assembly where glue alone won’t hold: anything under load or that gets disassembled.
Hinges
Doors and lids. Choose by door weight, overlay style (full, half, inset), and opening angle — not by price tag.
Drawer Slides
The single biggest feel-quality upgrade in any cabinet build. Put money here before fancy pulls or exotic hinges.
Brackets & Supports
Hidden structural support for shelves and counters — the silent backbone of case goods.
Knock-Down Connectors
Cam locks and fittings for flat-pack assembly — but threaded inserts and cross dowels survive reassembly far better.
Feet, Glides & Levelers
Protect floors and compensate for the garage slab that slopes a quarter inch across four feet.
Pulls & Knobs
The jewelry. Cheap ones make a $500 build look like a $150 one — this is where hands meet the piece daily.
Steel, Brass, or Stainless? Pick by Where the Piece Lives
Material choice comes down to one variable: moisture exposure. Corrosion is the number one hardware killer — a zinc-plated cedar garden bench was weeping orange rust streaks within two summers. Stainless bolts would have cost $6 more.
| Material | Cost Tier | Best For | Avoid When |
|---|---|---|---|
| Zinc-plated steel | Budget | Indoor furniture, shop projects | Outdoor, humid rooms, coastal air |
| Stainless steel (304/316) | Pro | Outdoor furniture, marine/coastal, bathrooms | Rarely wrong; cost is the only knock |
| Solid brass | Premium | Restoration work, classic aesthetics, salt exposure | High-load structural joints (softer metal) |
| Aluminum | Mid | Lightweight frames, modern looks | Threads strip easily; avoid load-bearing bolts |
| Plastic / polymer | Budget | Glides, bumpers, dry-use knock-down fittings | Any structural or heat-exposed role |
The Best Money You’ll Spend on a Build
Ball-bearing slides with soft-close cost 3–5× more than roller slides per pair but last 2–3× longer and transform how the entire piece feels. The drawer that glides like silk and the one that squeaks after six months differ by about $8 in hardware.
Spec details that matter Match slide length to drawer box depth within ~½” — a 20″ slide in a 22″ box wastes capacity and creates a slam point. A slide mounted 1/16″ out of parallel will bind for the life of the drawer: use a scrap positioning jig and pre-drill every screw. Twenty minutes of care decides twenty years of function.
Hardware That Never Loosens: The 5-Step Process
Durable installation comes down to pilot holes, precise layout, and the right screws. A 7/64″ pilot for #8 screws in hardwood prevents snapped screws and split stock — and a $12 self-centering Vix bit fixes hinge-hole accuracy forever.
Layout & Mark
Set hinge cups and slide lines with a story stick or jig — never raw measurements per piece.
Clamp a Jig
Use a scrap block cut to the exact cabinet setback to position slides in parallel.
Pre-Drill Pilots
7/64″ pilot for #8 screws in hardwood; self-centering Vix bit for hinge cups.
Drive the Right Screws
Match screw gauge to load; square or Torx drives resist cam-out better than Phillips.
Test & Adjust
Cycle doors and drawers, adjust euro-hinge cams, then final-torque. Done for decades.
Five Rules Before You Hit Checkout
Spend where hands touch daily. Ball-bearing or soft-close drawer slides deliver the biggest feel upgrade per dollar in any furniture build.
Match material to environment. Zinc-plated steel indoors; 304 stainless (or 316 near saltwater) and brass for outdoor and humid locations.
Pre-drill every screw. A 7/64″ pilot for #8 screws in hardwood prevents snapped screws and split stock; a $12 Vix bit fixes hinge accuracy.
Plan for reassembly. For furniture that moves, use threaded inserts and cross dowels — cam locks strip out after a few reassemblies.
Keep standing stock. A $120–180 shelf of common screws, slides, hinges, and inserts means a missing fastener never stalls a weekend build.
Same wood, same joinery, completely different piece of furniture. The drawer that glides and the one that squeaks differ by about $8 in hardware.
The 7 Types of Hardware Every Furniture Build Actually Needs
Most furniture projects come down to seven hardware categories: fasteners (screws, bolts, nuts), hinges, drawer slides, brackets and corner supports, knock-down connectors like cam locks, feet and levelers, and pulls and knobs. Master these and you can build 90% of what shows up in a furniture catalog.
Here’s a scenario from my own shop. Last winter I built a pantry cabinet for our kitchen — plywood case, face frame, four drawers, two doors. The wood cost about $140. The hardware — hinges, soft-close slides, levelers, pulls, and a box of #8 screws — ran another $95. Nearly 40% of the materials budget was hardware, and every dollar of it shows up in daily use. The doors still close with that satisfying hydraulic thunk.
Each type solves a specific problem:
- Fasteners — joinery reinforcement and assembly where glue alone won’t hold (typically anything under load or that gets disassembled)
- Hinges — doors and lids; choose by door weight, overlay style, and opening angle
- Drawer slides — the single biggest feel-quality upgrade in any cabinet build
- Brackets — hidden structural support for shelves and counters
- Cam locks and knock-down fittings — flat-pack assembly and future disassembly
- Feet, glides, and levelers — protect floors and compensate for the garage slab that slopes a quarter inch across four feet
- Pulls and knobs — the jewelry; cheap ones make a $500 build look like a $150 one
Notice what’s missing: exotic stuff. You don’t need smart locks or motorized hinges for a bookshelf. Along with common sense, budget follows usage frequency — hardware you touch daily deserves the most spend.
soft-close ball-bearing drawer slides
As an affiliate, we earn on qualifying purchases.
As an affiliate, we earn on qualifying purchases.
Steel, Brass, or Stainless? Picking Hardware Material by Where the Piece Lives
Hardware material choice comes down to one variable: moisture exposure. Indoor furniture in a climate-controlled room can use plain zinc-plated steel for everything. Outdoor or humid environments — bathroom vanities, porch furniture, greenhouse shelving — demand stainless steel (304 grade minimum) or brass, because corrosion is the number one hardware killer.
I learned this the expensive way with a cedar garden bench. Built it beautiful, bolted it together with zinc-plated carriage bolts from the big-box bin. Two summers later, the bolt heads were weeping orange rust streaks down the cedar — which also contains natural tannic acids that react with non-galvanized steel. Stainless bolts would have cost $6 more. Six dollars.
Here’s the practical decision table I keep taped inside my hardware cabinet:
| Material | Cost Tier | Best For | Avoid When |
|---|---|---|---|
| Zinc-plated steel | Budget | Indoor furniture, shop projects | Outdoor, humid rooms, coastal air |
| Stainless steel (304/316) | Pro | Outdoor furniture, marine/coastal, bathrooms | Rarely wrong; cost is the only knock |
| Solid brass | Premium | Restoration work, classic aesthetics, salt exposure | High-load structural joints (softer metal) |
| Aluminum | Mid | Lightweight frames, modern looks | Threads strip easily; avoid load-bearing bolts |
| Plastic/polymer | Budget | Glides, bumpers, dry-use knock-down fittings | Any structural or heat-exposed role |
One nuance the table can’t capture: coastal environments within a few miles of saltwater will eat zinc plating in a single year. If that’s you, 316 stainless is worth the premium over 304. And recent advances in PVD and e-coat plating have improved mid-tier corrosion resistance — good options if you want black hardware outdoors without stainless prices.
As an affiliate, we earn on qualifying purchases.
Why Drawer Slides Are the Best Money You’ll Spend on a Build
Drawer slides are the highest-value hardware upgrade in furniture building. Ball-bearing slides with soft-close mechanisms cost roughly 3–5 times more than basic roller slides per pair, but they last 2–3 times longer and transform how the entire piece feels. If a project’s budget forces a choice, put money here before fancy pulls or exotic hinges.
The three tiers you’ll encounter:
- Roller slides ($3–6/pair) — epoxy-coated steel, side-mount. Fine for shop cabinets and light-duty storage. They rattle, they sag under 35+ lb loads, and they slam.
- Ball-bearing slides ($8–15/pair) — the workhorse. Smooth, rated 75–100 lb, full-extension available. This is where a home-shop builder should live for most projects.
- Soft-close undermount ($15–35/pair) — concealed, quiet, premium feel. Worth it for kitchen and bathroom work; overkill for the paint storage cabinet.
Spec details that matter more than most people realize: slide length must match drawer box depth within about a half inch (a 20″ slide in a 22″ box wastes capacity and creates a slam point), and weight rating assumes even load distribution. A drawer full of hand tools exceeds a 75 lb rating faster than you’d think — my tool drawer weighed in at 91 lb on the bathroom scale.
Installation accuracy is everything with slides. They’re unforgiving of misalignment; a slide mounted 1/16″ out of parallel with its partner will bind for the life of the drawer. Use a scrap block cut to the exact cabinet setback as a positioning jig, and drill pilots before every screw. It’s twenty minutes of care that decides the next twenty years of drawer function.
zinc-coated fasteners for woodworking
As an affiliate, we earn on qualifying purchases.
As an affiliate, we earn on qualifying purchases.
Hinges Demystified: Choosing by Door Type, Not by Price Tag
Hinge selection starts with one question: full overlay, half overlay, or inset door? That answer, plus door weight, determines your hinge. European-style concealed cup hinges handle most modern cabinet doors, while butt hinges suit traditional face-frame furniture and piano hinges run the length of lids and drop-front desks.
For concealed hinges, the numbers matter. A typical kitchen-cabinet door needs two hinges; doors over 48 inches tall or heavier than about 15 lb need three. Soft-close versions add $3–5 per hinge and prevent the single most annoying sound in a household: the cabinet door slammed at 6 a.m.
My rule after building a dozen cabinets: buy adjustable concealed hinges with clip-on plates. The clip-on feature lets you remove a door in five seconds for finishing or cleaning, and the cam adjustment screws let you fine-tune gaps to a consistent 1/8″ reveal across every door. Butt hinges, by contrast, depend on mortising precision — a 3/16″ mortise chiseled slightly deep means a door that sags forever.
One warning from experience: hinge screws included in most retail packs are soft, cheap pot-metal. Swap them for #6 flathead steel screws, 5/8″ length, and pre-drill with a 7/64″ bit in hardwood. The factory screws will strip their heads in white oak every single time, and then you’re extracting a broken screw from a hinge cup with an extractor bit and a vocabulary you didn’t plan to use.
As an affiliate, we earn on qualifying purchases.
Install Hardware That Never Loosens: The 5-Step Process
Durable hardware installation comes down to pilot holes, precise layout, and the right screws. Follow this sequence and your hardware will outlast the wood around it. Skip steps and you’ll be re-tightening pulls every month like I did on my first dresser build.
- Lay out with a story stick or jig, never a tape measure alone. Transfer hinge and pull positions from a single reference edge. A shop-made drilling jig from 1/2″ plywood guarantees identical hole spacing on every door.
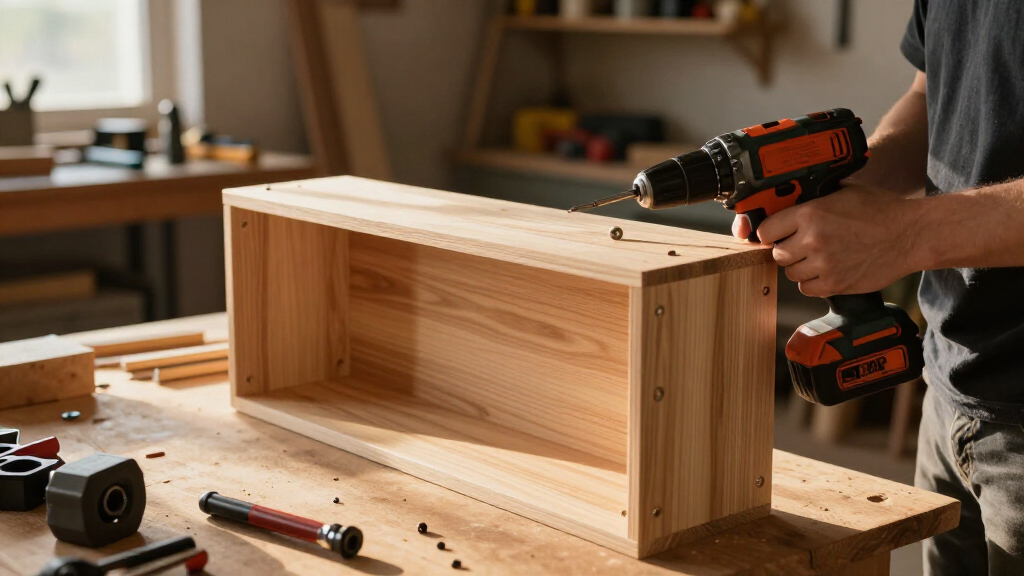
- Pre-drill every pilot hole. In hardwood, drill the pilot at about 70% of the screw’s shank diameter (a 7/64″ bit for a #8 screw) and countersink. In softwood or ply, 50–60% is enough. No pilot in oak equals a snapped screw, guaranteed.
- Use a self-centering bit for hinge cups and existing holes. The spring-loaded Vix bit centers perfectly in slotted hinge holes every time — a $12 tool that eliminates the most common installation error.
- Drive screws to snug, not gorilla-tight. A #8 hinge screw seated fully plus a quarter turn is done. Overtorque cambers the hinge plate and throws the door alignment off.
- Test, adjust, then final-tighten. Hang doors, check reveals with a 1/8″ spacer, adjust the concealed hinge cams, and only then do the final snug pass on all screws.
Clamp everything you drill into. A door that shifts 1/16″ mid-drill because it wasn’t clamped ruins the pull placement on a finished panel — and there’s no filler that hides a misplaced 1/4″ hole in walnut. Wear your safety glasses, keep loose sleeves away from the drill press, and if any of your project involves mounting to house wiring or walls with unknown utilities, that’s the point to stop and bring in a licensed professional.
Knock-Down Fittings and Smart Hardware: What’s Actually Worth Adopting
Knock-down (KD) hardware — cam locks, threaded inserts, cross dowels, and tool-less connectors — lets you build furniture that disassembles for moving. If you’ve ever tried to carry a fully assembled armoire up a staircase with a 90-degree turn, you already understand the appeal.
The KD tier list from a small-shop perspective:
- Threaded inserts — the best option. Brass or steel inserts epoxy-threaded into plywood accept machine bolts repeatedly without stripping. My workbench legs bolt on with 5/16″ inserts; I’ve torn it down twice for moves with zero degradation.
- Cross dowels (barrel nuts) — strong, hidden, and cheap. Great for bed frames and trestle tables. Requires accurate perpendicular drilling.
- Cam locks — the flat-pack standard. Fast and cheap, but the particleboard around the cam peels out after three or four reassemblies. Acceptable for occasional disassembly only.
On the newer side, smart hardware — electronic locks, touch-latch mechanisms, and soft-close actuators — has genuinely matured. Touch-latch push-open hardware, for example, lets you build handleless modern cabinets cleanly, and it’s now affordable at $8–12 per unit instead of the $30 it cost a decade ago. Electronic locking systems make sense for medicine cabinets or gun storage; they make no sense on a hallway coat cabinet. Sustainability trends have also brought recycled-metal hardware and longer-life coatings to market — worth considering, though longevity itself is the greenest feature any hardware can offer.
Building a Hardware Stockpile: What a Small Shop Should Keep on Hand
A small garage shop doesn’t need a hardware store aisle — it needs a curated stock of about ten items that cover 95% of projects. Keeping these on hand means you finish builds on Saturday night instead of stalling because you’re one screw short.
My standing inventory, refined over years of exactly those stalls:
- #8 flathead wood screws, 1″ to 2-1/2″, in yellow zinc and stainless — covers joinery, hinges, and general assembly
- #6 screws, 5/8″ — the hinge-and-pull replacement screw
- Ball-bearing slides, 14″, 16″, 18″, 20″ — buy a few pairs whenever they go on sale
- Concealed hinges, soft-close, clip-on, plus a couple of plates
- Threaded inserts, 1/4-20 and 5/16-18, with matching bolts
- Corner braces and flat L-brackets, 2″ and 3″
- Adhesive rubber bumpers and felt pads — the cheapest quality-of-life upgrade in the shop
- Bed rail bolts and cross dowels — because someone always needs a bed frame built
Total investment to stock all of this: roughly $120–180 at budget-to-mid tier. That’s less than one sheet of nice hardwood plywood, and it eliminates the most common project delay in home woodworking. Store screws in labeled bins by size and material — mixing zinc and stainless in one bin means you’ll grab the wrong one for the outdoor bench and repeat my rust-streak mistake.
Budget where nobody touches, spend where everybody touches. Slides and hinges get daily use; brackets hide forever. That’s the whole hardware budgeting philosophy in two sentences.
Frequently Asked Questions
What hardware do I need for building furniture at home?
Core essentials: #8 wood screws in multiple lengths, concealed hinges for cabinet doors, ball-bearing drawer slides, corner brackets for reinforcement, threaded inserts for anything that disassembles, and felt pads or rubber bumpers for finished pieces. A full starter stock runs $120–180. Add project-specific items — bed bolts, casters, pulls — as designs demand them.
What are the best hardware materials for outdoor furniture?
Stainless steel is the default answer — grade 304 for general outdoor use, grade 316 within a few miles of saltwater. Solid brass also performs well outdoors and suits traditional designs, though it’s softer and shouldn’t carry major structural loads. Avoid plain zinc-plated hardware outdoors; it rusts within one to two years exposed to weather.
Are soft-close drawer slides worth the extra cost?
For furniture used daily — kitchen cabinets, bathroom vanities, dressers — yes. Soft-close ball-bearing slides cost 3–5 times more than roller slides but last two to three times longer and eliminate slamming. For shop cabinets, garage storage, or rarely opened drawers, standard ball-bearing slides are the better value.
Why do my screws keep breaking or splitting the wood?
Almost always missing pilot holes. Drill a pilot at roughly 70% of the screw’s shank diameter in hardwood (7/64″ for a #8 screw) and 50–60% in softwood or plywood, plus a countersink for flatheads. Also replace the soft factory screws included with hinges and slides — they strip and snap far more easily than standard steel screws.
Can I upgrade hardware on existing furniture easily?
Usually yes, with caveats. Pulls and knobs swap in minutes if hole spacing matches (96mm is the common standard for pulls). Hinges swap if the existing door style matches the new hinge type — converting visible hinges to concealed ones typically requires reworking the door and frame. Replacing worn cam-lock fittings with threaded inserts is a strong upgrade that revives flat-pack furniture permanently.
Conclusion
Here’s the whole thing in one line: hardware is where furniture earns its lifespan. The wood is the body; the hardware is the joints, the movement, the daily interaction. A modest plywood cabinet with ball-bearing slides and adjustable soft-close hinges will feel better and last longer than a gorgeous hardwood piece hung on bargain hinges and stripped-out screws.
Before your next build, write the hardware list the same hour you write the cut list — sizes, ratings, materials, quantities. Then hold a drawer slide from your stash, run it full extension, and listen to the near-silence of good hardware. That sound is what your project’s future owners will judge it by, whether they know it or not.