TL;DR

Get business pricing on tools and workshop supplies
- Business-only prices and quantity discounts
- Tax-exempt purchasing
- Multiple users, one account, clear invoices
Good workshop lighting combines even ambient light of roughly 300–500 lux with targeted task lighting of 500–1,000+ lux at benches, using neutral-to-daylight LEDs (4,000–5,000 K) with CRI 80+ (90+ for finishing work). Multiple fixtures beat one bright lamp because they kill the shadows that cause miscuts and hide hazards. Flicker matters too: low-flicker drivers prevent the stroboscopic effect that makes spinning blades appear stationary.
I once watched a friend nearly lose a fingertip because of a shadow. Not a kickback, not a dull blade — a shadow. His single garage-door-opener light cast his own body across the miter saw’s cut line, and he didn’t see the offcut bind until it was too late. He got lucky. Nine stitches.
That’s the uncomfortable truth about workshop lighting: lighting for safety is the cheapest insurance you’ll ever buy, and most of us treat it as an afterthought. We’ll argue for hours about blade choices and dust collection CFM, then work under a single 60-watt bulb that was there when we moved in.
This guide walks you through what actually matters — lumens versus lux, color temperature, CRI, flicker, fixture placement, and the budget-versus-pro-tier decisions a real garage shop faces. No product roundups. Just the numbers and the layout logic so you can see your layout lines, your wire colors, and the spinning edge of a blade clearly.
Measure lux at the workpiece, not lumens at the box: target 300–500 lux for general shop areas, 500–1,000 lux at benches, and 1,000+ lux for finishing and deta…
Multiple fixtures in a grid beat one bright lamp — a single light source turns your own body into a shadow over every cut line and layout mark.
Use 4,000–5,000 K neutral-to-daylight LEDs; choose CRI 80+ for general work and CRI 90+ for staining, finishing, wiring, and color-critical tasks.
Low-flicker drivers are a safety requirement near rotating machinery — flicker can make a spinning blade appear stationary. Never run a single light source at…
Match fixtures to the environment (sealed, impact-resistant near machines), clean dust off lenses monthly, and keep a battery backup light within reach for pow…
Choosing the Best Lighting for Safety and Precision in Your Workshop
Even ambient light plus targeted task lighting, neutral-to-daylight LEDs, and low-flicker drivers — the numbers and layout logic that let you see layout lines, wire colors, and the spinning edge of a blade clearly.
Lumens vs. Lux: The Numbers That Matter
Lumens tell you how much light a fixture puts out; lux tells you how much light actually reaches your workbench — and lux is the number that counts. Think dust collection: CFM at the tool clears chips, not rated horsepower.
| Work Area | Target Illuminance | Real-World Example |
|---|---|---|
| General shop floor, walkways, storage | 300–500 lux | Finding a clamp, sweeping, moving lumber |
| Workbenches, assembly, machine zones | 500–1,000 lux | Marking layout lines, reading a tape, chucking a bit |
| Fine detail: finishing, electronics, inspection | 1,000+ lux | Sanding to 220, checking a finish for skips, soldering |
Paint walls and ceiling white or light gray — flat, not gloss. A light ceiling bounces fixture output back down and raises effective lux without a single new lamp.
Why One Bright Lamp Fails You
A single light source turns your body into a permanent shadow-caster over every cut line and layout mark. Multiple fixtures in a grid mean that when one path is blocked, two others fill the gap.
Map work zones
Sketch bench, tablesaw, miter station, assembly table, finishing corner on paper.
Grid the fixtures
Four to six ceiling fixtures so each zone gets light from at least two directions.
Check body shadows
Stand at each machine in working position — if your torso blocks the cut line, move or add a fixture.
Add task lighting
Adjustable LED arms throwing light from the side or front at benches and inspection spots.
Re-measure & tune
Measure lux at each workpiece and adjust spacing until every zone hits target.
Multi-fixture lighting should feel like an overcast day: no hard shadows anywhere, because light arrives from every direction at once.
Kelvin and CRI: Truthful Color at the Bench
Color temperature sets the mood; CRI determines whether what you see is true. One woodworker applied “walnut” stain under a CRI ~70 LED — in daylight, it was plum. Three coats of stripping later, a CRI believer was born.
| CRI Rating | Good Enough For | Falls Short For |
|---|---|---|
| Below 80 | Storage areas, walkways | ✗ Anything color-sensitive; distorts stains and finishes |
| 80–90 | General woodworking, machining, assembly | ~ Final color checks, fine finishing |
| 90+ | Painting, staining, wiring, electronics, automotive | ✓ The tier for color-critical work |
High-CRI LEDs used to be a pro-tier premium — they’ve dropped into hobbyist price ranges. High CRI also makes white-vs-gray wires, overheated brass, and lumber-grade markings easier and safer to read.
The Safety Factors Most Shops Skip
Brightness is only half the story. Flicker, glare, fixture environment, and emergency backup are where workshop lighting quietly becomes a safety system.
Stroboscopic Illusion
A tablesaw blade spinning at ~3,450 RPM can appear stationary or slow under flickering LED light. Low-flicker drivers are a safety requirement near saws, lathes, grinders, and drills — never run a single light source at machines.
Reflections Hide Hazards
Glare off polished cast iron and glossy finishes makes pupils fight reflections and obscures hazards. Choose diffused fixtures, frosted lenses, or shields; position lights so they never bounce directly into your eyes.
Match Fixtures to the Room
Sealed dust-resistant fixtures in dusty zones, moisture-resistant where condensation lives, impact-resistant covers near machinery. Keep a battery backup light within reach for power failures.
Relative efficiency · lower heat matters most in small shops, paint areas & enclosed spaces
The Numbers, Distilled
Measure lux at the workpiece, not lumens at the box. Target 300–500 lux general, 500–1,000 at benches, 1,000+ for finishing. A phone lux-meter app gets you within 10–15% — plenty for tuning a home shop.
Multiple fixtures in a grid beat one bright lamp. A single source turns your own body into a shadow over every cut line and layout mark.
Use 4,000–5,000 K neutral-to-daylight LEDs. CRI 80+ for general work, CRI 90+ for staining, finishing, wiring, and color-critical tasks.
Low-flicker drivers are a safety requirement near rotating machinery — flicker can make a spinning blade appear stationary.
Match fixtures to the environment. Sealed and impact-resistant near machines, dust lenses cleaned monthly, and a battery backup light within reach.
Lumens vs. Lux: The Numbers That Actually Tell You If Your Shop Is Bright Enough
Lumens tell you how much light a fixture puts out; lux tells you how much light actually reaches your workbench — and lux is the number that matters. You can buy a 5,000-lumen shop light and still get terrible illumination at the surface if your ceilings are high, your walls are dark, or the beam angle is narrow.
Think of it like dust collection: CFM at the tool is what clears chips, not the motor’s rated horsepower. Same logic. Illuminance at the workpiece is the deliverable.
Here are the widely accepted targets for workshop work:
| Work Area | Target Illuminance | Real-World Example |
|---|---|---|
| General shop floor, walkways, storage | 300–500 lux | Finding a clamp, sweeping, moving lumber |
| Workbenches, assembly, machine zones | 500–1,000 lux | Marking layout lines, reading a tape, chucking a bit |
| Fine detail: finishing, electronics, inspection | 1,000+ lux | Sanding to 220, checking a finish for skips, soldering |
More is not automatically better, though. Crank a small room to 2,000 lux with bare-bulb fixtures and you’ll trade shadows for glare and eye strain — your pupils constantly fighting reflections off polished cast iron and glossy finish. Diffused, even light beats raw output every time.
A cheap lux meter app on your phone gets you within 10–15% of a dedicated meter, which is plenty for tuning a home shop. Measure at bench height, lights on, in the spots where you actually work. If your marking area reads 180 lux, now you know why you keep misreading 32nds.
One more free upgrade: paint your walls and ceiling white or light gray. Flat, not gloss. A light-colored ceiling bounces fixture output back down onto your work and can meaningfully raise your effective lux without buying a single new lamp.
As an affiliate, we earn on qualifying purchases.
Why One Bright Lamp Fails You — and How to Kill Shadows for Good
The single most common lighting mistake in home shops is relying on one central fixture, and it fails because a single light source turns your body into a permanent shadow-caster over everything you do. Every time you lean over a cut, you darken the exact spot you need to see. That’s how people mark on the wrong side of the line and how fingers get closer to blades than anyone intends.
Good workshop lighting comes from multiple fixtures at different angles, so when one light’s path is blocked, two others fill the gap. In a typical two-car garage shop, that means four to six ceiling fixtures arranged in a grid — not one heroic lamp in the middle.
Here’s the layout process I use:
- Map your work zones on paper: bench, tablesaw, miter station, assembly table, finishing corner.
- Place overhead fixtures in a grid so each zone gets light from at least two directions — ideally from in front of where you stand, not behind you.
- Check for body shadows by standing at each machine in working position and looking down at the cut line. If your torso blocks the light, move or add a fixture.
- Add task lighting at benches and inspection spots — an adjustable LED arm that throws light from the side or front.
- Re-measure lux at each workpiece location and adjust fixture spacing until every zone hits its target.
Linkable linear LED fixtures have made this genuinely affordable. You can chain four 4-foot units off one circuit, run them along a bench or machine row, and get uniform light exactly where lumber meets blade — the spots where traditional ceiling placement leaves dark pockets.
Analogy time: single-source lighting is like a single flashlight in a dark basement — you see one circle and everything around it is guesswork. Multi-fixture lighting is like an overcast day: no hard shadows anywhere, because light arrives from every direction at once. That’s the feel you want.
As an affiliate, we earn on qualifying purchases.
Kelvin and CRI: Picking Light That Shows Finish Color and Wire Colors Honestly
Color temperature (measured in kelvins) controls how warm or cool light looks, and 4,000–5,000 K neutral-to-cool white is the sweet spot for most workshops — bright enough for contrast and detail without the harsh, clinical blue of a 6,500 K bulb. Color temperature sets the mood; CRI determines whether what you see is true.
CRI — Color Rendering Index — measures how accurately a light source shows real colors, on a scale to 100. This is the spec most woodworkers skip, and it’s the one that bites hardest. I once applied a “walnut” stain under a CRI ~70 bargain-shop LED and discovered, in daylight, that it was actually plum. Three coats of stripping later, I became a CRI believer.
| CRI Rating | Good Enough For | Falls Short For |
|---|---|---|
| Below 80 | Storage areas, walkways | Anything color-sensitive; distorts stains and finishes |
| 80–90 | General woodworking, machining, assembly | Final color checks, fine finishing |
| 90+ | Painting, staining, wiring, electronics, automotive | — this is the tier for color-critical work |
High CRI matters beyond finishes, too. Distinguishing a white wire from a pale gray one, spotting the red tint in overheated brass, reading colored markings on lumber grades — all easier and safer at CRI 90+. And the good news: high-CRI LEDs used to be a pro-tier premium, but they’ve dropped into hobbyist price ranges in the last few years.
For temperature tiers: 3,000–4,000 K feels comfortable for break areas and general ambient light; 5,000–6,500 K daylight-balanced light excels for inspection, painting, and finishing because it mimics the conditions your work will eventually be judged under. Just don’t mix wildly different temperatures in one visual field — your eyes work hardest reconciling a warm ceiling and a cool task lamp, which works against reducing eye strain.
As an affiliate, we earn on qualifying purchases.
Flicker Near Spinning Blades: The Safety Spec Nobody Talks About
Flicker — rapid, often invisible pulsing in a light’s output — is a genuine safety hazard around rotating machinery, because it can create a stroboscopic effect that makes a spinning blade, chuck, or lathe spindle appear stationary or slow. That illusion can convince your brain the blade has stopped when it hasn’t. If you’ve ever seen a wheel look like it’s turning backward under old fluorescent light, you’ve watched this happen.
The mechanism is simple: cheap LED drivers pulse their output at a frequency that can beat against the rotation rate of your tool. A tablesaw arbor spinning at ~3,450 RPM under a flickering light can visually alias into apparent stillness. This isn’t comfort-tier nitpicking — it’s the same category of risk as a disabled blade guard.
What to do about it:
- Buy fixtures with low-flicker drivers and look for flicker percentage or flicker index in specs — quality manufacturers publish them; the cheapest fixtures don’t.
- Never rely on a single light source around machinery. Two fixtures with different flicker characteristics effectively cancel the illusion.
- Avoid dimmers not designed for your LEDs — mismatched dimming is a leading cause of flicker in retrofitted shops.
- Test before committing: point your phone’s slow-motion camera at the fixture. Visible banding on screen usually means visible-spectrum flicker.
Invisible flicker has a second cost even away from machines: headaches and eye fatigue after long sessions. If you finish a three-hour session with tight temples and tired eyes, your fixtures are suspects along with your prescription. According to lighting-industry research, flicker at certain frequencies is a documented contributor to headaches and visual discomfort — another reason the $12 no-name shop light is a false economy.
Old fluorescent fixtures bring their own issues: ballast hum, cold-weather stutter, disposal rules for the mercury tubes, and flicker that worsens as ballasts age. Retrofitting LED tubes into old fixtures can work, but ballast compatibility is finicky — bypass-wiring the ballast is cleaner, and that’s licensed-electrician territory if you’re not fully comfortable with circuit work.
impact-resistant workshop LED fixtures
As an affiliate, we earn on qualifying purchases.
As an affiliate, we earn on qualifying purchases.
Task Lighting That Actually Survives Shop Life
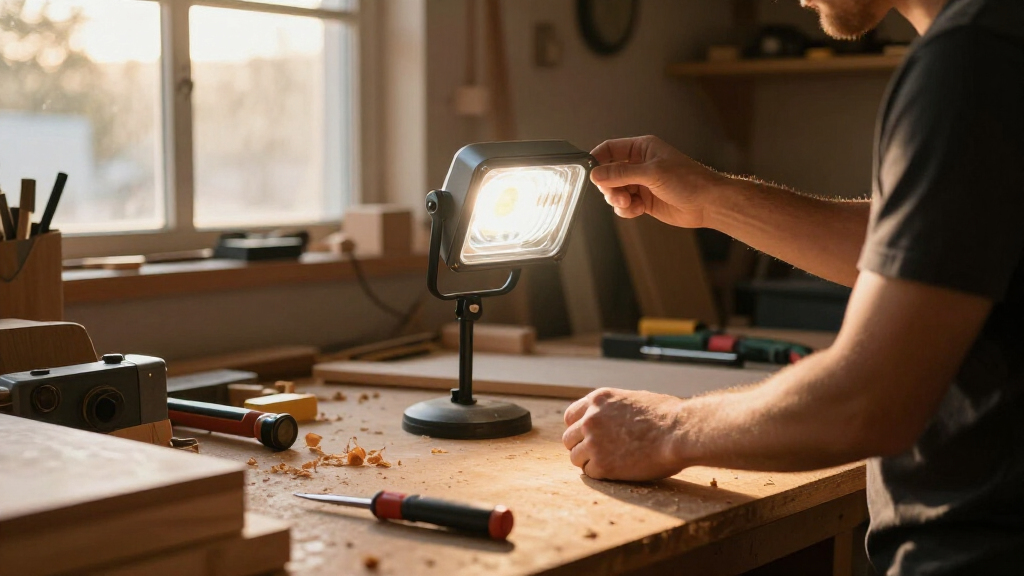
Task lighting is the movable, directional light that puts targeted task illumination exactly where fine work happens — bench edges, lathe ways, inspection corners — and it should be your second purchase after ceiling fixtures, not an afterthought. An adjustable arm lamp at the bench does what no ceiling grid can: light the workpiece from the front, at close range, from an angle you control.
What separates a shop-worthy task light from a desk lamp that dies in a month:
- Adjustable arm or head you can aim one-handed with gloves on
- Stable base or solid mounting — magnetic mounts are gold on machine tables
- Shatter-resistant lens, because a dropped offcut will eventually find it
- Controls reachable safely, without reaching across a blade or bit
- Real heat management, since cooked LEDs fade and shift color years early
For electronics and small mechanical work, a magnifying lamp at CRI 90+ is worth every penny — try soldering 22-gauge joints under a CRI 75 bulb and you’ll understand. For finishing, add light from multiple angles so you catch skips and sags before the coat tacks over.
Rechargeable work lights have earned their place too. Modern units with USB-C charging, magnetic bases, and stepped brightness are perfect for inside-cabinet work, under-vehicle jobs, and maintenance crawling. But treat them as supplements — they should never be your primary light in a high-risk zone, because a battery that dies mid-cut is its own hazard.
One balance rule: don’t blast a 1,500-lux task lamp into an otherwise dim room. Extreme contrast between task and surround forces constant pupil adjustment — fatigue and reduced awareness of what’s moving around you. Keep ambient and task levels within a sane ratio; the transition should feel gentle.
Dust, Wiring, and the Fixtures That Belong in a Woodshop (Not a Bedroom)
A woodworking shop is a hostile environment for light fixtures — fine sawdust infiltrates everything, damp concrete floors add moisture risk, and flying offcuts punish anything fragile — so fixture selection and installation need to match the environment, not just the brightness chart. A bedroom-grade fixture in a dust-heavy shop slowly buries its lens in sanding residue and quietly loses half its output.
And that output loss is sneaky. Dust on lenses and diffusers can cut useful light output dramatically over months — so cleaning fixtures belongs on your regular maintenance list, right beside emptying the dust collector. I check mine monthly and wipe lenses with a dry microfiber during blade-change sessions.
Environmental matching checklist:
- Sealed or dust-resistant fixtures over machines and sanding stations
- Moisture-rated fixtures near garage doors and damp floors
- Impact-resistant covers anywhere within offcut-launch range
- Proper grounding, correct wiring, and strain-relieved cable routing — no extension cords zip-strapped to trusses as permanent infrastructure
- Voltage and switching compatibility with your shop’s circuits
Straight talk on the electrical side: adding fixtures means adding circuit load, and running new circuits or modifying panel wiring in a garage is work for a licensed electrician and may require a permit depending on your jurisdiction. Don’t trivialize that. If you’re DIY-ing fixture swaps on existing circuits, kill the breaker, verify dead with a tester, and wear eye protection — the boring safety steps are the ones that matter.
Two final planning points. First, emergency and backup lighting: a power failure mid-cut is exactly when you need to see. Battery-backed fixtures or a charged rechargeable work light within reach lets you shut down and exit safely. Second, if you use motion sensors or smart controls to save energy, make sure they have manual overrides — a light that times out while you’re mid-rip on the tablesaw is a design flaw with teeth. Sensors belong in storage and circulation zones, not cutting zones.
Frequently Asked Questions
How many lumens do I need for a workshop?
Lumens alone can’t answer it — it depends on room size, ceiling height, and wall color. Plan by lux instead: roughly 300–500 lux for general areas and 500–1,000+ lux at benches and machines. As a rough starting point for a typical two-car garage with white ceilings, four to six 4,000–5,000-lumen LED shop lights in a grid usually lands in range. Verify with a lux meter app at bench height.
Why do my spinning tools look like they’re moving slowly or backward under LED lights?
That’s the stroboscopic effect: light flicker interacting with a rotating object. A spinning blade can appear stationary or slow, which is dangerous near machinery. Fix it with low-flicker LED fixtures, proper dimmer compatibility, and never relying on a single light source around rotating tools.
Is daylight (6,500 K) lighting best for a workshop?
Not necessarily. 4,000–5,000 K neutral-to-cool white offers great contrast without feeling harsh and suits most shop tasks. Reserve 5,000–6,500 K daylight-balanced light for inspection, painting, and finishing, where it reveals true colors and surface defects. Avoid mixing very different color temperatures in one work zone.
How can I reduce shadows at my workbench?
Use several fixtures from different directions, combine overhead grid lighting with an adjustable task lamp, and position lights slightly in front or to the side of your working position — never directly behind you. Light-colored flat (not glossy) walls and ceilings also help by bouncing fill light into shadowed areas.
Are LED shop lights safe around sawdust?
Only if they’re built for it. Choose sealed or dust-resistant fixtures with protected lenses, mount them securely away from impact zones, and keep wiring and grounding to code. Clean dust off lenses regularly — buildup can cut light output substantially over time. For new circuits or panel work, hire a licensed electrician and check local permit requirements.
Should task lighting be brighter than ceiling lighting?
It can be — detailed work often needs 1,000+ lux at the workpiece — but the contrast shouldn’t be extreme. A very bright task lamp in an otherwise dark room increases eye strain and shrinks your awareness of surrounding hazards. Keep ambient lighting reasonably strong so the transition to task light feels gentle.
Conclusion
If you take one thing from this guide: stop lighting your shop with a single fixture. Even ambient light from a grid of four to six ceiling fixtures, layered with targeted high-CRI task lighting at the bench, is the combination that prevents both the obvious accident and the slow, subtle cost of eye strain. Budget-tier LED shop lights will get you 85% of the way there — spend your premium dollars on low-flicker drivers and CRI 90+ lamps over your finishing bench, not on fancy smart features.
Here’s my challenge: tonight, walk into your shop at your usual working hour, stand at your tablesaw in cutting position, and look down at the cut line. If you can’t read a pencil mark as easily as you could in daylight, your lighting is quietly working against you. Fix that before you buy your next blade. It’s cheaper — and unlike the blade, it protects everything you do in that room.
Fall Picks
fall essentials
As an affiliate, we earn on qualifying purchases.