
TL;DR

Get business pricing on tools and workshop supplies
- Business-only prices and quantity discounts
- Tax-exempt purchasing
- Multiple users, one account, clear invoices
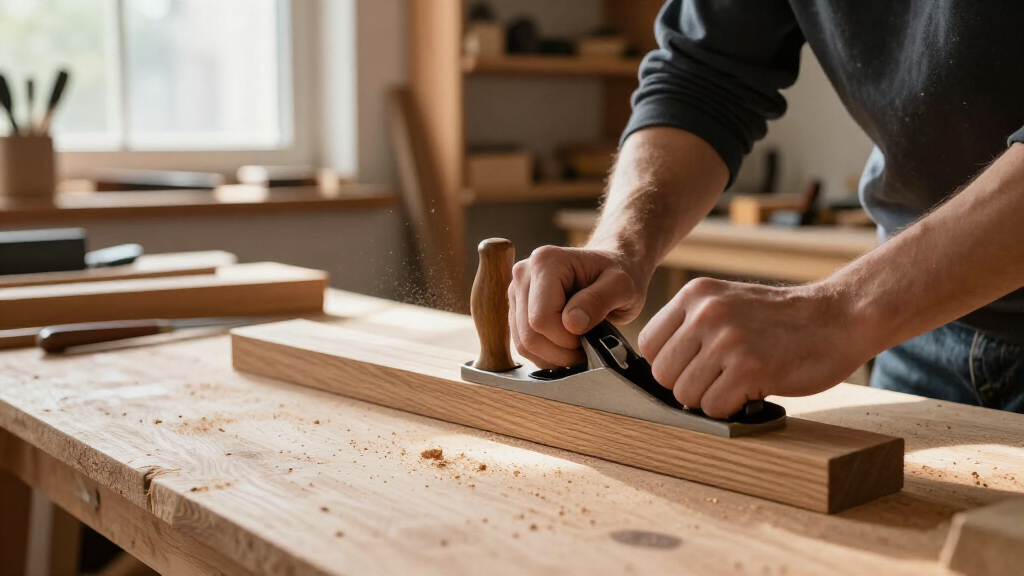
For most beginners, a No. 5 jack plane is the best first hand plane because it can flatten modest boards, straighten edges, remove milling marks, and leave a respectable surface. Add a low-angle block plane for end grain and small fitting jobs, then buy a No. 4 smoother when final surface quality becomes your priority.
Your first hand plane can produce a glassy, finish-ready surface or leave you wrestling with chatter, torn grain, and a blade that refuses to cut. The difference rarely comes down to an impressive logo. It comes from choosing the right plane size, preparing the iron correctly, and learning what a clean shaving feels like under your hands.
You do not need a row of cast-iron tools lined up like locomotives. In a small garage shop, one dependable bench plane and a basic sharpening setup handle far more work than a bargain bundle of rough castings. You will learn which plane earns that first spot, what each common size actually does, and where budget tools demand extra labor.
You will also see how sole flatness, blade steel, mouth width, cap-iron fit, and bevel geometry affect the cut. Those details sound technical until you push a sharp plane across maple and hear a soft hiss instead of a clattering scrape. By the end, you will know how to buy carefully, set up the tool, diagnose ugly shavings, and keep your fingers and freshly honed edge out of trouble.
Buy a No. 5 jack plane first if you want one tool for flattening, straightening edges, removing machine marks, and light smoothing.
Choose a No. 4 first only when your lumber already arrives flat and your main goal is a finish-ready surface.
Use a low-angle block plane for end grain, chamfers, and small fitting work, not for flattening full-size boards.
Prepare a roughly 25° primary bevel and a keen edge near 30° as a practical starting point for many bevel-down bench-plane irons.
Inspect vintage planes for cracks, missing parts, damaged adjusters, severe edge pitting, and sole distortion before treating the asking price as a bargain.
Best Hand Planes for Beginners
Your first plane should teach control while handling real work. For most beginners, the No. 5 jack plane offers the best balance: long enough to correct modest surface errors, compact enough for everyday use, and adaptable through blade shape and adjustment.
Start broad. Add precision when the work demands it.
The right buying order follows the woodworking process: establish geometry first, handle small fitting work second, then specialize in final surface quality.
No. 5 jack plane
The strongest single-tool choice for stock preparation and general bench work.
- Flatten modest boards
- Straighten edges
- Remove milling marks
- Deliver respectable smoothing
Low-angle block plane
A nimble companion for small, precise tasks that benefit from one-handed control.
- Trim end grain
- Cut chamfers
- Fit drawers and doors
- Level proud plugs
No. 4 smoother
The specialist to reach for once the board is flat and finish-ready surfaces matter most.
- Take fine final passes
- Remove minor surface marks
- Work comfortably on small parts
- Refine figured timber
Long soles correct shape. Short soles refine texture.
A longer plane bridges hollows and cuts high spots. A shorter plane follows the existing surface more closely, making it responsive but less reliable for correcting broad errors.
| Plane type | Best work | Beginner advantage | Main limitation | First-buy fit |
|---|---|---|---|---|
| No. 5 jack | Flattening, edges, milling marks, general smoothing | Broadest range from one tool | Heavier and less nimble than a smoother | A Excellent |
| No. 4 smoother | Final passes on already-flat parts | Compact, responsive, easy to handle | Short sole follows broad errors | B Conditional |
| Low-angle block | End grain, chamfers, fitting, small parts | Comfortable one-handed control | Too short for flattening boards | C Companion |
| No. 7 or No. 8 jointer | Long edges and large panels | Long sole supports straighter surfaces | Cost, weight, and specialization | D Later |
| Low-angle jack | End grain, general work, difficult grain | Cutting angle changes with blade bevel | Extra blades and premium bodies cost more | B Versatile |
| Japanese kanna | Fine surfaces using a pull stroke | Light body and excellent edge potential | Different setup and blade-fitting skills | C Alternative |
Fit grades reflect usefulness as a beginner’s first plane, not ultimate performance.
Set up the tool before judging the tool.
Chatter, torn grain, and stubborn cutting often come from preparation rather than the logo on the casting. Work through the same sequence every time.
Flatten the back
Polish the working area behind the edge.
Establish bevel
Shape a consistent primary bevel.
Hone the edge
Create a keen, burr-free cutting line.
Fit cap iron
Close gaps that can trap shavings.
Secure the bed
Give the iron firm, stable support.
Set projection
Advance evenly and correct lateral skew.
Take a test cut
Adjust by the shaving and surface.
Use roughly a 25-degree primary bevel and hone near 30 degrees for many bevel-down bench-plane irons.
A2 steel often benefits from a slightly steeper honing angle. Bevel-up planes use the blade bevel as part of the effective cutting angle.
Blade shape decides how the No. 5 behaves.
Changing camber alters cutting width, effort, speed, and surface character. Two prepared irons can eventually be more practical than repeatedly reshaping one edge.
Inspect function before finish.
Cosmetic machining matters less than solid blade support, dependable adjustment, and an iron that can be sharpened cleanly.
Rigid body and sound casting
Reject cracks and serious damage. Cast iron or ductile iron should feel stable under pressure.
Reasonably flat sole
Look for reliable contact near the toe, mouth, and heel rather than microscopic perfection.
Firm blade support
The frog or bed should support the cutting iron securely without rocking or obvious gaps.
Close cap-iron fit
The cap iron should mate cleanly with the blade so shavings cannot wedge underneath it.
Predictable adjustment
Limited backlash makes fine depth and lateral changes easier to understand and repeat.
Serviceable vintage parts
Check for missing pieces, damaged adjusters, severe edge pitting, and sole distortion.
Diagnose the cut in a logical chain.
When the surface turns ugly, begin at the edge and work outward. Small setup faults often multiply into noisy, frustrating cuts.
Sharp edge
A dull or damaged edge raises effort and tears fibers instead of slicing them.
Stable bedding
Firm support reduces vibration, chatter, and inconsistent shaving thickness.
Fine projection
Retract the iron, then advance gradually until a balanced shaving appears.
Soft, steady hiss
A continuous shaving and quiet cut signal that edge, support, and adjustment are working together.
Learn one good plane deeply before buying five more.
Choose a No. 5 if you need to establish flatness, straighten edges, and handle general bench work. Choose a No. 4 first only when your timber already arrives flat and your priority is the final surface. Keep a block plane in its proper supporting role: precise, useful, and far too short to replace a bench plane.
Start With the One Plane That Can Handle Four Jobs
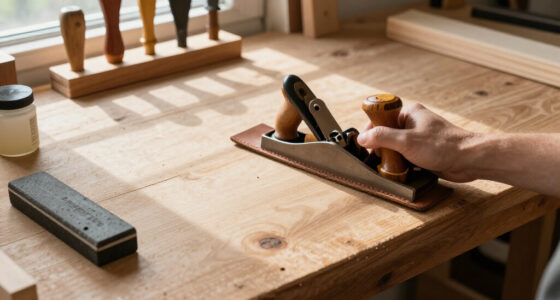
Best Hand Planes for Beginners starts with the No. 5 jack plane because its length, weight, and blade width cover the widest range of everyday work. It can flatten modest boards, straighten edges, remove milling marks, and smooth reasonably well when you sharpen and adjust it for the job.
That versatility comes from compromise rather than perfection. The No. 5 is long enough to bridge many shallow hollows but short enough to respond when you deliberately work a high spot. It will not straighten a long edge as automatically as a No. 7, and it will not feel as nimble as a No. 4 during final smoothing. For a beginner, however, those limitations are useful: one plane exposes the relationship between sole length, blade shape, shaving thickness, and surface condition before specialized tools hide part of that lesson.
- Buy first: No. 5 jack plane. Use it for stock preparation, edge work, and general bench duties.
- Add next: low-angle block plane. Use it for end grain, chamfers, proud plugs, and small fitting jobs.
- Add later: No. 4 smoothing plane. Use it when your boards are already flat and you want a cleaner final surface.
Imagine building a pine bookcase from rough boards in a one-car garage. A No. 5 can knock down a high corner, clean the scalloped ridges left by a thickness planer, and straighten an edge before glue-up. Set it for a lighter shaving, and the same tool can clean the shelf faces before you reach for sandpaper. The practical implication is that your first purchase supports the whole project instead of solving only its final five minutes.
Blade shape changes the personality of the plane. A moderately cambered edge takes thick, narrow shavings without leaving sharp tracks, much like a snowplow rolling material away from the center. A light camber supports general flattening, while a nearly straight edge works better for edge jointing and finer passes.
Camber introduces a tradeoff between speed and precision. A pronounced curve concentrates the cut near the middle of the blade, so the plane removes material quickly and remains easier to push, but it leaves a shallow scalloped surface. A straighter edge cuts across more of the blade width and produces flatter-looking passes, yet it demands finer adjustment because projecting one corner even slightly can score a track. Beginners who regularly switch between rough and fine work may eventually prefer two irons for the No. 5 rather than repeatedly grinding one edge from curved to straight.
The No. 4 remains an appealing alternative if you mostly work with prepared lumber. It is shorter and easier to handle, especially for small hands, but it follows hollows and bumps more readily. That makes it lively on a tabletop that is already flat and less dependable when the tabletop still has a broad twist. Choosing it first therefore assumes that machines, a lumber supplier, or another plane has already established the geometry.
A block plane complements a bench plane; it does not replace one. Its short sole rides over long hills and valleys instead of showing you where the board is truly flat.
As an affiliate, we earn on qualifying purchases.
Match the Plane to the Surface You Want to Produce
Best Hand Planes for Beginners become easier to choose when you match sole length and blade geometry to the work. Longer planes bridge low spots and cut high spots, while shorter planes follow the existing surface. The table below shows what that difference means at a real workbench.
| Plane type | Best work | Beginner advantage | Main limitation |
|---|---|---|---|
| No. 5 jack plane | Flattening, edge straightening, milling-mark removal, general smoothing | Broadest range from one tool | Heavier and less nimble than a smoother |
| No. 4 smoothing plane | Final passes on already-flat furniture parts | Compact, responsive, and easier to handle | Short sole follows broad surface errors |
| Low-angle block plane | End grain, chamfers, drawer fitting, small parts | Comfortable one-handed control | Too short for flattening boards |
| No. 7 or No. 8 jointer | Long edges and large panels | Long sole produces straighter surfaces | Cost, weight, and specialization |
| Low-angle jack plane | End grain, general planing, difficult grain | Cutting angle changes with blade bevel | Extra blades and premium bodies can be costly |
| Japanese kanna | Fine surfaces using a pull stroke | Light body and excellent edge potential | Wooden-body tuning and blade fitting require different skills |
A long plane acts like a long sanding block on drywall: it touches the humps before it reaches the hollows. Run a No. 7 along a six-foot table edge and the sole helps create a straight reference. Run a block plane along the same edge, and its compact sole can trace every dip without correcting the overall line.
This does not mean that longer is always better. A long sole can bridge a localized hollow so completely that the blade never reaches it, which is desirable during flattening but inconvenient when you need to clean a small recessed area. Extra length also adds weight and friction. The useful question is not which plane produces the flattest surface in theory, but whether the surface needs its overall geometry corrected or only its local texture refined.
Bevel orientation also changes your setup choices. Traditional bench planes usually hold the iron bevel down, so the frog or bed establishes most of the cutting angle. Low-angle block and jack planes usually work bevel up, making the honing angle part of the final cutting geometry.
On a bevel-up plane, the bed angle and honed bevel combine to determine the effective cutting angle. A lower angle can reduce cutting resistance across end grain because the edge meets severed fibers less abruptly. A steeper bevel strengthens the edge and can help control difficult face grain, but it also increases pushing effort. The replaceable blade therefore becomes part of the plane’s geometry rather than merely a spare cutting edge.
A bevel-up jack can carry separate blades for low-angle end-grain work, ordinary face planing, and stubborn reversing grain. That flexibility is useful, but it does not make bevel-up construction automatically better. A well-tuned bevel-down No. 5 remains a capable, economical first plane for a garage shop. Its cap iron provides another way to control how fibers bend and break, while its common pattern makes replacement parts and secondhand examples easier to find.
Japanese kanna introduce a different set of tradeoffs rather than a shortcut to finer results. Pulling can suit some bodies and benches, and a laminated iron can take an excellent edge, but the wooden dai must support the blade selectively and may move with humidity. Choose that system because you want to learn its fitting and working methods, not because a pull stroke automatically corrects poor sharpening or surface preparation.
As an affiliate, we earn on qualifying purchases.
Spend Money on Stable Parts, Not Shiny Machining
When judging the Best Hand Planes for Beginners, prioritize a rigid body, firm blade support, and predictable adjustment over mirror-polished sides. A plane needs a reasonably flat working sole, secure handles, a sound mouth, and an iron that advances without excessive slack. Cosmetic perfection does not produce the shaving.
These features matter because a hand plane is a system for holding an edge at a stable depth. If the body twists, the blade rocks, or the adjuster changes position under load, each pass begins with a different cutting geometry. The beginner then compensates unconsciously with extra pressure or a deeper blade setting, making it difficult to tell whether the problem lies in technique, sharpening, or hardware.
Set the plane on a known-flat surface and use a reliable straightedge across the sole at the toe, mouth, and heel. You are looking for meaningful rocking, daylight around the mouth area, or a twisted casting. You are not chasing laboratory-flat metal across every square millimetre; blade bedding and sharpness have a larger effect on everyday results.
Contact near the mouth deserves particular attention because that area supports the wood immediately before the blade severs it. A low spot there can reduce fiber support during a fine cut, while a tiny hollow elsewhere may have no visible effect. The acceptable tolerance therefore depends on the job: coarse preparation forgives more variation than smoothing a wide, reflective tabletop.
Check the adjustment wheel and lateral lever before buying. A little backlash is normal, but several turns of dead movement make fine adjustments frustrating. The frog or blade bed should hold the iron without grit beneath it, and the cap iron should meet the blade so closely that a thin shaving cannot wedge underneath.
Backlash is not merely an annoyance. When the mechanism changes direction, slack can make the wheel move without moving the blade, encouraging you to overshoot the desired projection. A consistent habit helps: make the final adjustment while advancing the blade, so the mechanism remains loaded in the same direction. Firm bedding matters for the same reason; it converts the pressure of the cut into a stable shaving instead of vibration.
Blade steel affects your sharpening routine. O1 carbon steel sharpens quickly and takes a very fine edge, though you will hone it more often. A2 steel holds an edge longer but usually needs more effort and responds well to a slightly steeper honing angle. Powder-metallurgy steels extend edge life again, while raising the purchase price and sharpening time.
The best steel depends on the whole sharpening system, not edge life alone. A wear-resistant blade paired with slow oilstones can make routine maintenance feel punitive, while the same blade may suit efficient diamond plates. O1 rewards frequent touch-ups and fast repairs but may interrupt work more often in abrasive timber. The tradeoff is between shorter, more frequent sharpening sessions and longer intervals followed by slower abrasion.
For most beginners, easy sharpening beats heroic edge retention. If you nick an O1 blade while planing a reclaimed oak shelf, you can repair it on a coarse abrasive and return to work quickly. A wear-resistant premium iron may keep cutting longer, yet removing that same nick can feel like grinding a kitchen knife on polished glass.
Parts support matters too. A modest plane with available replacement irons, cap irons, screws, and handles is a safer purchase than an obscure tool with a beautiful casting and no compatible hardware. Check availability before handing over your money, especially when an online listing shows only one carefully chosen camera angle. Compatibility also preserves future choices: a common pattern lets you replace one failed component instead of discarding an otherwise sound tool.
As an affiliate, we earn on qualifying purchases.
Set Up Your Plane in Seven Repeatable Steps
A new or restored plane needs seven basic setup steps: prepare the blade back, establish the bevel, fit the cap iron, secure the frog or bed, set the mouth, center the edge, and advance it slowly. According to Werkbericht [2], setup quality matters more than the badge cast into the body.
The order matters because each step establishes a reference for the next. A polished bevel cannot produce a reliable edge against an uneven blade back, and precise lateral adjustment cannot compensate for a cap iron that traps shavings. Treat setup as a chain: the first weak contact surface usually reappears later as extra force, clogging, chatter, or an uneven shaving.
- Prepare the blade back. Flatten and polish the area directly behind the cutting edge. You do not need to polish the entire back like chrome. This narrow polished band forms one face of the cutting edge; scratches or a rounded corner there prevent the two faces from meeting cleanly.
- Grind the primary bevel. About 25° is a common starting point for a bevel-down bench-plane iron. The lower primary angle leaves clearance behind the edge and gives later honing a small area to abrade.
- Hone the cutting edge. A honing angle near 30° gives many traditional irons a durable, keen edge. Remove the burr completely. A lower angle may feel keen but weaken sooner, while a higher angle adds durability at the cost of more metal to hone and potentially greater cutting resistance.
- Fit the cap iron. Its leading edge must contact the blade without a visible gap that can trap shavings. Set it farther back for coarse work and closer for fine work in difficult grain; moving it very close improves fiber control but demands more precise fitting and adjustment.
- Secure the frog or blade bed. Clean away grit, seat the assembly firmly, and set the mouth for the planned cut. A wide mouth clears thick shavings, while a fine mouth supports fibers but clogs more easily if the cut is too heavy.
- Center the blade. Sight along the sole and use the lateral lever until the edge projects evenly. With a cambered iron, judge the useful cutting portion rather than trying to make both curved corners appear equally exposed.
- Advance with tiny movements. Retract the blade, then creep forward until a test board produces an even shaving. Approaching the setting from the retracted side keeps adjuster backlash predictable and reduces the chance of burying the edge in the wood.
A coarse abrasive, a medium stone, and a fine finishing stone form a workable sharpening system. The coarse stage repairs damage and establishes geometry, the medium stage removes the deep scratches efficiently, and the fine stage refines the edge. Skipping directly from a damaged bevel to a polishing stone wastes time because a fine abrasive removes metal too slowly to correct the underlying shape.
Add a honing guide if freehand angles wander. The guide works like a fence on a table saw: it removes one variable, letting you focus on pressure, scratch pattern, and a complete burr. Its tradeoff is setup time and dependence on consistent blade projection, but repeatability is usually more valuable than speed while you are learning what a fully sharpened edge looks and feels like.
Suppose your plane skates across cherry without cutting. Advancing the blade aggressively may produce a sudden bite and a torn trench. Retract it, mark the bevel with a felt-tip marker, and take a few honing strokes; uneven remaining ink quickly shows whether the stone is reaching the actual edge. If ink remains at the cutting edge, the blade is not yet sharp regardless of how polished the rest of the bevel appears.
Resist aggressive sole flattening until a straightedge reveals a real fault. Hours of sanding can round the toe, widen the mouth area unevenly, or remove metal that never affected the cut. Measure first, correct only the working problem, and spend most of your effort on the edge. A slightly imperfect sole paired with a sharp, stable blade commonly outperforms a gleaming sole paired with a rounded edge.
As an affiliate, we earn on qualifying purchases.
Read the Shaving Before You Blame the Tool
What does a healthy shaving tell you? An even, continuous ribbon shows that the edge is sharp, centered, and taking a controlled cut. A torn, tapered, jammed, or intermittent shaving points toward a specific setup problem, so inspect what curls from the mouth before blaming the plane body.
The shaving is useful because it records what happened across the full blade width. One thick edge and one thin edge usually indicate lateral misalignment or uneven pressure. A shaving that begins cleanly and then breaks near reversing grain points toward fiber direction or insufficient support. Dust, isolated crumbs, and increased effort suggest that the edge has dulled or is barely reaching the wood.
For fast stock removal, use a wider mouth, deeper cut, and cambered blade. You should hear a firm slicing sound and see sturdy curls rather than dusty crumbs. When flattening a cupped pine board, work diagonally across the high edges, check with winding sticks, and reduce the cut as the surface comes into line.
That changing cut is important. A coarse setting saves time while the errors are large, but it becomes risky as you approach the desired surface because each pass can remove more than the remaining correction. Reducing blade projection in stages trades speed for control and leaves shallower scallops for the next operation to erase.
For difficult grain, sharpen the blade, close the mouth enough to support the fibers, and take a shallow cut. Set a well-fitted cap iron close to the edge on a bevel-down plane. If a walnut board tears around a knot, approach from the opposite direction or skew the plane instead of driving straight through the rising fibers.
Each remedy changes the way fibers fail. A sharp edge requires less bending before separation, a tight mouth limits how far fibers can lift, and a close cap iron redirects the shaving before a split can travel ahead of the blade. Skewing lowers the apparent attack and introduces a slicing action, though excessive skew reduces the effective sole length in the direction of travel and can make it easier to follow local hollows.
Chatter often feels like a washboard pulsing through the tote. Check for a dull or loose blade, too much projection, poor frog contact, weak workholding, or a cap iron that does not seat properly. A thin cut cannot rescue a blade that rocks every time it meets dense latewood.
Diagnose chatter by changing one variable at a time. Tightening every screw, closing the mouth, resharpening, and altering the cut simultaneously may stop the vibration, but it teaches you nothing about the cause. First secure the work and blade assembly, then test a lighter cut; if the pulsing remains, inspect the edge and bedding surfaces.
If no shaving appears, check the simple faults first. The blade may be installed backward, retracted too far, or shifted to one side. On a short, slightly hollow board, the toe and heel may also touch while the blade floats above the center, making a sound without reaching the wood. Testing on a known-flat scrap separates a setup problem from the geometry of the workpiece.
Do not chase translucent shavings during every operation. A thick curl that removes a high spot quickly is correct during coarse preparation. The whisper-thin ribbon belongs near the end, when your fingertips can feel tiny ridges and the surface begins to reflect light in one clean sweep. Shaving thickness is therefore evidence of an appropriate setting only when judged against the operation you are performing.
Choose New, Vintage, or Premium Without Buying Twice
Your best value depends on whether you want to spend money, setup time, or restoration effort. A sound vintage plane can offer excellent performance at a modest price, a modern budget plane may need correction, and a premium plane buys more consistent machining. None arrives exempt from final honing and adjustment.
Think in terms of total cost rather than purchase price. Restoration includes abrasives, replacement parts, rust removal, research, and hours that could have gone into a project. Premium pricing buys a narrower range of likely defects and easier diagnosis, not woodworking skill. A beginner with more time than cash may welcome restoration, while someone with one free evening each week may reasonably pay to begin with a predictable tool.
Older Stanley, Record, and similar bench planes can be smart buys. Inspect the casting around the mouth and sides for cracks, test every adjuster, and look for missing screws or mismatched parts. Surface rust is manageable; deep pitting near the cutting edge, a badly distorted sole, or a welded casting can turn an apparent bargain into a parts hunt.
Condition matters more than age or collector reputation. Rust on the sole may clean away with little consequence, but pitting on the back of the iron can intersect the cutting edge and leave tiny gaps that behave like serrations. A repaired tote affects comfort; a crack through a load-bearing casting affects stability. Distinguishing cosmetic defects from functional ones prevents both needless rejection and expensive optimism.
For example, a dusty No. 5 with intact handles, working adjusters, and light rust may need only cleaning, lubrication, and sharpening. A cheaper plane missing its cap iron and lever-cap screw can cost more once you source compatible replacements. Online photographs often hide cracks beneath the frog, so ask for clear images of the bare casting.
Modern premium planes usually provide thicker irons, tighter machining, better adjusters, and steadier quality control. You pay more up front, but you spend less time separating tool faults from beginner technique. That can be worthwhile if shop hours are scarce and you want to make furniture rather than rebuild tools.
A thick iron is not automatically sharper, and tight machining does not eliminate the need to learn adjustment. Those features mainly improve stability and predictability: the blade is less prone to vibration, adjuster movements are easier to repeat, and parts tend to meet as intended. The implication is faster feedback. When the surface tears, you can investigate grain direction and edge condition with greater confidence that a hidden casting fault is not undermining the test.
Budget planes occupy the uncertain middle. Some respond beautifully to deburring, blade work, and careful bedding; others carry warped castings or sloppy hardware that never becomes pleasant. If the seller offers an easy return policy, check the plane immediately and reject structural faults instead of treating every defect as a rite of passage.
The budget category makes the most sense when you can inspect before buying or return after a controlled test. Spending an hour sharpening a removable iron is a recoverable investment; spending a weekend correcting a twisted body may still leave an unreliable reference surface. Decide in advance which faults you are willing to tune and which trigger a return, so the low price does not keep moving that boundary.
Buy one plane whose problems you can identify. Five cheap planes create five blades to sharpen, five mechanisms to diagnose, and five places for poor tolerances to hide.
Build Skill With a Simple Board-and-Shaving Practice
The fastest practice routine uses a straight-grained board, secure workholding, and controlled adjustments. Mark the face with pencil lines, plane across and along the grain, then watch which marks disappear. You will learn more from twenty deliberate minutes than from randomly pushing the tool until your shoulders ache.
Straight grain removes one major source of uncertainty. If the shaving fails, you can focus on sharpness, blade projection, pressure, and adjustment instead of wondering whether reversing fibers caused the result. Once those variables feel predictable, figured or knotty timber becomes a useful challenge rather than a confusing starting point.
Clamp a 600 mm length of pine or poplar so it cannot creep. Check the grain on the edge, retract the blade, and advance it until you catch the lightest shaving. Make three overlapping passes, then stop and feel the surface with your fingertips; they detect ridges that overhead shop lights often hide.
Pay attention to pressure during each pass. Favor the front knob as the toe enters the board, balance pressure through the middle, and favor the tote as the heel leaves. This keeps you from tipping the plane and rounding both ends. Overlapping passes also matter because the blade may carry a slight camber; overlap blends its shallow channels into a more uniform surface.
Next, draw diagonal pencil lines over the face and place a thin shim under one corner to simulate twist. Use the No. 5 diagonally across the high areas, checking frequently with winding sticks. This exercise teaches that flattening is closer to leveling a wobbly table than mowing a lawn: you remove selected high spots rather than shaving everything equally.
The pencil is a map, not proof of flatness. Uniformly erased lines show where the blade has touched, but a short plane can touch every area while following a broad hollow. Winding sticks reveal twist, a straightedge reveals lengthwise or crosswise hollows, and the pencil shows the pattern of your passes. Using all three prevents one convenient signal from becoming a false conclusion.
Change only one setting during each short practice round. Try a little more blade projection, a narrower mouth, or a different planing direction, then compare the sound, effort, shaving, and surface. That isolation turns adjustment into cause and effect. If several variables change together, even a better result will not tell you which choice produced it.
Good technique also protects you. Wear eye protection during grinding, keep the workpiece firmly held, and move your free hand away from the blade path. When handling the iron, grip the sides rather than the cutting edge, and keep the bench clear enough that a freshly honed blade cannot disappear beneath shavings.
A hand plane produces curly chips instead of the airborne powder thrown by a sander, so your dust collector’s CFM matters less during planing. Fine dust still remains from earlier machine work and sanding. Use suitable respiratory protection, collect loose shavings, and avoid blowing dust across the shop with compressed air.
After work, retract the blade, brush away chips, and wipe moisture or wet sharpening residue from bare steel. Apply a light corrosion inhibitor if your garage turns damp overnight. A plane left on cold concrete can show orange fingerprints by morning, while a dry shelf and a thirty-second wipe keep the sole clean. These habits protect more than appearance: corrosion near the blade back or bedding surfaces can undermine the precise contact you created during setup.
Frequently Asked Questions
Which hand plane should a beginner buy first?
A No. 5 jack plane is the most versatile first purchase for general furniture work. Its longer sole helps flatten modest boards and straighten edges, while careful sharpening and a light cut let it perform acceptable smoothing. Choose a No. 4 smoother first only if you mostly work with prepared lumber that is already flat.
Do I need a block plane if I already own a No. 5?
A block plane is useful but optional. It fits comfortably in one hand for trimming end grain, easing sharp edges, fitting a drawer, or flushing a small plug. Its short sole cannot establish flatness across a wide board, so treat it as a compact companion rather than a smaller replacement for your bench plane.
Can an inexpensive hand plane work well?
Yes, an inexpensive plane can work well when the casting is sound, the blade beds firmly, and the adjusters function. Expect to deburr rough edges, sharpen the iron, fit the cap iron, and check the sole. Return a plane with cracks, severe twist, or unusable hardware; patient tuning cannot repair every manufacturing fault.
Should a beginner buy a new or vintage plane?
Buy new when you value predictable condition and easy returns. Buy vintage when you can inspect the casting, identify missing parts, and accept cleaning or repair work. A lightly rusted No. 5 with complete hardware can be excellent value, while an incomplete bargain can consume your tool budget and shop time.
Why does my hand plane tear the grain?
Tear-out usually points to a dull edge, deep cut, wrong planing direction, or weak fiber support. Sharpen the blade, reduce its projection, and try approaching from the opposite direction. On reversing grain, a fine mouth, tight cap-iron fit, skewed stroke, and very shallow shaving can leave a much cleaner surface.
Does a hand-plane sole need to be perfectly flat?
No. The sole should be reasonably flat at the toe, mouth, and heel, without rocking or meaningful twist. Tiny cosmetic variations rarely stop a plane from cutting well. Check with a dependable straightedge before sanding, because unnecessary flattening can remove useful metal and create new errors around the mouth.
How often should I sharpen the blade?
Hone the blade when pushing effort rises, the surface loses its sheen, or the shaving starts breaking and tearing. Frequent light honing takes less time than waiting until the edge becomes badly rounded. Keep the honing angle repeatable, remove the burr, and protect the fresh cutting edge during reassembly.
Conclusion
Your first plane should teach you what a sharp, controlled cut feels like. For most beginners, that means buying a sound No. 5, adding a simple honing guide and three abrasive stages, then learning to create an even shaving before shopping for another numbered size. Skill at the edge pays back on every future plane you own.
Start with a straight-grained practice board this weekend. Mark it with pencil, take the lightest cut you can manage, and listen for that soft, steady hiss. When a pale ribbon rises from the mouth and lands in a warm curl on your bench, you will know exactly why a well-tuned hand plane still earns its space in a modern shop.
Fall yard work Picks
leaf blowers
As an affiliate, we earn on qualifying purchases.