TL;DR

Get business pricing on tools and workshop supplies
- Business-only prices and quantity discounts
- Tax-exempt purchasing
- Multiple users, one account, clear invoices
Parallel-jaw clamps are the best all-around bar clamps for glue-ups where keeping parts square matters — cabinets, doors, and tabletops. Pipe clamps deliver the most clamping capacity per dollar for big panels, and F-style or lightweight aluminum bar clamps handle smaller assemblies. Even pressure every 6–12 inches, alternating clamps above and below the panel, matters more than brute clamping force.
The joint failed, and it wasn’t the glue’s fault. That’s the hard truth behind most botched glue-ups: a board slipped out of square, the panel cupped under uneven pressure, or you simply ran out of clamps halfway through and panicked while the glue’s open time bled away. Clamps don’t just squeeze things — they hold your project in the exact shape you intended until the adhesive cures.
This guide breaks down which bar clamps actually earn their spot in a small shop, how the main types compare, and what a practical starter collection looks like. I’ve done enough garage-shop glue-ups to know the difference between what the catalog promises and what a 40-inch walnut tabletop demands at 9 PM on a Tuesday.
You’ll learn the specs worth checking — jaw parallelism, throat depth, bar stiffness — plus the technique details nobody puts on the box, like why alternating clamps above and below a panel keeps it flat. No product roundup fluff. Just what works.
Match the clamp to the glue-up: parallel-jaw for cabinets, doors, and panels where squareness matters; pipe clamps for maximum capacity per dollar; F-style and…
Space panel clamps every 6–12 inches and alternate them above and below the work to balance bowing forces — even pressure beats maximum pressure every time.
Buy clamps several inches longer than the finished assembly so you have room for pads, cauls, and positioning.
Keep steel and iron bars off wet glue and tannin-rich woods like oak — iron staining soaks deep and often won’t sand out. Use waxed paper or elevate the work.
A joint that needs extraordinary pressure is a preparation problem, not a clamp problem. Dry-fit everything and fix the joinery before the glue comes out.
Best Bar Clamps for Glue-Ups
The joint failed, and it wasn’t the glue’s fault. Boards slip out of square, panels cup under uneven pressure, or you run out of clamps while the open time bleeds away. This guide breaks down which bar clamps actually earn their spot in a small shop — parallel-jaw for square-critical work, pipe clamps for capacity per dollar, and F-style for everything in between.
Which Clamp Type Wins Your Glue-Up?
No single clamp does everything well. Parallel-jaw clamps dominate cabinet, door, and panel work where alignment matters; pipe clamps win on capacity per dollar; F-style and aluminum clamps cover small furniture and boxes. The pattern: a tradeoff between control and capacity.
| Clamp Type | Best For | Advantages | Drawbacks |
|---|---|---|---|
| Parallel-jaw | Cabinets, doors, tabletops | ✓ Deep reach, broad jaws, strong pressure, keeps work square | ✗ Expensive, heavy |
| Pipe clamp | Large panels, long assemblies | ✓ Cheap, powerful, capacity scales with pipe length | ✗ Heavy; pipe flexes and can stain wet wood |
| F-style bar | General furniture, small glue-ups | ✓ Versatile, affordable, many sizes | ✗ Small jaws; cheap bars flex |
| Aluminum bar | Boxes, drawers, frames | ✓ Lightweight, easy to position | ✗ Less rigid, less force |
| Sash clamp | Doors, workbenches | ✓ High force, long capacity | ✗ Bulky, slow to reposition |
| One-handed | Positioning, holding | ✓ Fast, often reversible as spreader | ✗ Limited force and precision |
Control vs. Capacity per Dollar
Parallel-jaw clamps give you the most control over alignment but the least capacity per dollar. Pipe clamps flip that ratio entirely. F-style and aluminum sit in the middle on both.
Why Parallel-Jaw Clamps Are the Gold Standard for Panels
Their large, flat jaws stay perpendicular to the bar, distributing force across a wide area instead of pinching a single contact line. A conventional F-style clamp with small jaws addresses none of the three failure modes — it just presses harder on a spot.
Boards slide laterally
Out of position under point pressure, with nothing controlling alignment between clamps.
Edges ride out of plane
The wider the panel, the more the drift compounds — the middle of each board is uncontrolled.
Panel bows under load
The sum of clamping force distorts the assembly if pressure isn’t balanced above and below.
Parallel jaws fix all three
Broad pads bridge joints, perpendicular pressure pushes straight in, no pivot around a pinch point.
A joint that needs extraordinary pressure is a preparation problem, not a clamp problem. Dry-fit everything and fix the joinery before the glue comes out.
Respected Lines & a Practical Starter Collection
The hybrid approach: pair four to six premium parallel-jaw clamps with cheaper pipe and F-style clamps. The expensive clamps earn their cost on the few glue-ups where alignment is hardest; the cheap ones absorb all the routine work.
Bessey K Body REVO & Jorgensen Cabinet Master
Premium parallel-jaw clamps with broad jaws, strong force, and reliable alignment — the workhorses for wide panels and square-critical assemblies.
Pony Pipe Clamp Fixtures
Cost-effective capacity for long panels, workbenches, and large furniture. Capacity scales with whatever pipe length you thread in.
Bessey Tradesman F-Style & Dubuque Aluminum
Reliable F-style clamps for furniture and shop work; lightweight aluminum bars favored for boxes, drawers, frames, and light panels.
What Actually Matters on the Box
Alignment & Reach
Parallel jaws spread force and keep parts square — but the label doesn’t guarantee alignment under max torque. Throat depth determines how far pressure reaches from the edge.
Resist the Bow
A stiff bar resists bowing under load. A bowed bar bows your work no matter how good the jaws are — and overtightening is the usual culprit.
Less Is More
Excess pressure bows work and crushes fibers. And keep steel bars off wet glue and tannin-rich woods like oak — iron staining often won’t sand out. Use waxed paper.
Which Clamp Type Wins Your Glue-Up? A Straight Comparison
The best bar clamps for glue-ups depend on the project: parallel-jaw clamps dominate cabinet, door, and panel work where alignment matters; pipe clamps win on capacity per dollar for long assemblies; and F-style or aluminum bar clamps cover small furniture and boxes. No single clamp does everything well, which is why most shops end up with a mix.
Here’s how the main types stack up against each other:
| Clamp type | Best for | Advantages | Drawbacks |
|---|---|---|---|
| Parallel-jaw | Cabinets, doors, tabletops | Deep reach, broad jaws, strong pressure, keeps work square | Expensive, heavy |
| Pipe clamp | Large panels, long assemblies | Cheap, powerful, capacity changes with pipe length | Heavy; pipe can flex and stain wet wood |
| F-style bar | General furniture, small glue-ups | Versatile, affordable, many sizes | Small jaws; cheap bars flex |
| Aluminum bar | Boxes, drawers, frames | Lightweight, easy to position | Less rigid, less force |
| Sash clamp | Doors, workbenches | High force, long capacity | Bulky, slow to reposition |
| One-handed | Positioning, holding | Fast, often reversible as spreader | Limited force and precision |
The pattern hiding in that table is a tradeoff between control and capacity. Parallel-jaw clamps give you the most control over alignment but the least capacity per dollar; pipe clamps flip that ratio entirely; F-style and aluminum clamps sit in the middle on both. What this means practically: the expensive mistake isn’t buying the wrong brand, it’s buying a clamp type that fights your actual work. A woodworker who builds mostly small boxes doesn’t need parallel-jaw muscle any more than a tabletop builder needs a wall of 6-inch F-clamps. The clamp’s rigidity, jaw area, and reach have to match the size of the parts being joined — when they don’t, you compensate with cauls, blocks, and time, or you accept a panel that needs flattening after the glue cures.
Widely respected lines include the Bessey K Body REVO and Jorgensen Cabinet Master in the parallel-jaw tier, Pony pipe clamp fixtures for budget capacity, and Bessey Tradesman F-style clamps for general work. Specs and availability shift between production runs, so verify current details before buying.
The trend worth knowing: many woodworkers now pair four to six premium parallel-jaw clamps with cheaper pipe and F-style clamps instead of buying one type for every task. That hybrid approach works because the expensive clamps only earn their cost on the few glue-ups where alignment is hardest, while the cheap clamps absorb all the routine work. That’s the approach I’d recommend for a garage shop, and the rest of this article explains why.
best parallel-jaw bar clamps for woodworking
As an affiliate, we earn on qualifying purchases.
As an affiliate, we earn on qualifying purchases.
Why Parallel-Jaw Clamps Are the Gold Standard for Panels
Parallel-jaw clamps earn their reputation because their large, flat jaws stay perpendicular to the bar, distributing force across a wide area instead of pinching a single contact line. To understand why that matters, think about what actually goes wrong in a panel glue-up: boards slide laterally out of position, edges ride up out of plane with each other, and the assembly bows under the sum of all that clamping force. A conventional F-style clamp with small jaws addresses none of these — it just presses harder on a spot. A parallel-jaw clamp attacks all three: the wide pad spans multiple joints and holds adjacent boards flush, the perpendicular jaw keeps the pressure pushing straight into the panel instead of angling it out of square, and the broad contact area means the board can’t pivot around a single pinch point.
Picture a six-board cherry tabletop, 40 inches wide. With F-style clamps, each small jaw presses a concentrated spot, and the boards between clamp points drift out of plane — the wider the panel, the more the drift compounds, because there’s simply nothing controlling the middle of each board. With parallel-jaw clamps like the Bessey K Body REVO or Jorgensen Cabinet Master, the broad pads bridge the joints and hold adjacent boards flush across a much wider footprint. JET’s parallel clamps offer similar jaw area plus convenient setup features, at the cost of noticeable weight — which matters more than it sounds when you’re lifting eight of them onto a wet panel.
Two honest caveats, because the marketing oversells this category. First, the “parallel-jaw” label doesn’t guarantee perfect alignment under maximum torque — bar stiffness and manufacturing quality still matter, and a bowed bar bows your work no matter how good the jaws are. Overtightening is the usual culprit: the jaw stays perpendicular to a bar that’s no longer straight. Second, at $60–100+ per clamp for quality examples, a full set stings. The implication: parallel-jaw clamps are worth it precisely to the degree that your work involves wide panels and square-critical assemblies. If your projects are small or forgiving, that money buys a lot of capability elsewhere.
One feature people overlook until they’ve used it: many parallel-jaw clamps stand upright on their own. You set the clamp on the bench, lay your boards across the bars, arrange and flatten them dry, then glue. This changes the workflow fundamentally — instead of fighting gravity and wet glue simultaneously, you’re doing layout on a flat rack that happens to be your clamping system. For big panel assemblies, this transforms the process from a juggling act into something almost calm.
Parallel jaws distribute force evenly and reduce the tendency of parts to shift out of square — but they’re a positioning tool, not a joinery repair tool. They preserve good prep; they can’t substitute for it.
heavy-duty pipe clamps for large panels
As an affiliate, we earn on qualifying purchases.
As an affiliate, we earn on qualifying purchases.
Pipe Clamps: The Most Clamping Inch Per Dollar
Pipe clamps offer the best capacity for the money of any glue-up clamp: buy a few fixtures at a modest price, thread them onto black pipe in whatever length the project demands, and swap pipes as needed. A 48-inch panel, a 6-foot workbench slab, a dining table — same fixtures, different pipe. The reason this matters economically is that in every other clamp style, capacity is baked into the purchase: doubling your clamping width means buying a second, longer clamp. With pipe clamps, doubling your capacity costs you one length of pipe — often $15–25 — while the fixtures you already own do the same job. That’s why shops that build big tend to accumulate pipe clamps even when they own premium gear.
Pony pipe clamps are the classic cost-effective choice here. The real trick is buying 3/4-inch black pipe in a couple of lengths and having the hardware store thread the ends. Half-inch pipe works but flexes more under heavy load, and here’s the mechanism behind that failure: when a bar flexes, the clamping force at the ends drops and concentrates unevenly across the panel — which is exactly the condition that cups a glue-up. The 3/4-inch stuff costs a little more and weighs a lot more — your arms will tell you — but it holds its line, and a straight bar means the pressure you apply is the pressure the panel receives.
Now the warning every woodworker learns the hard way. Steel or iron pipe in contact with wet glue and tannin-rich wood — especially oak — produces dark iron stains that soak deep into the fibers and often won’t sand out. The chemistry is simple: moisture activates a reaction between iron and tannins in the wood, and the resulting discoloration travels with the water into open pores — which is why it penetrates beyond the surface and why sanding rarely chases it all down. I’ve seen a beautiful white oak panel ruined by one careless clamp placement. Keep the workpiece elevated off the bar, or lay waxed paper between bar and wood.
Where keeping parts perfectly square is critical, parallel clamps are still easier to position — the tradeoff you’re accepting with pipe clamps is that you become the alignment system. The round pipe offers no reference surface to square against, so you’re relying on measuring diagonals and checking with a square as you tighten. Pipe clamps produce excellent joints — they just demand more attention from you. For occasional extra-long work, two pipe clamps and a threaded connector beat improvising some clamp-to-clamp contraption that slips under load, because a joint that slips mid-cure is worse than no clamp at all.
F-style woodworking clamps for small projects
As an affiliate, we earn on qualifying purchases.
As an affiliate, we earn on qualifying purchases.
The Specs That Actually Change Your Results
Four specs separate a clamp that helps from a clamp that fights you: jaw parallelism, capacity, throat depth, and bar stiffness. Everything else is ergonomics and polish — nice, but secondary to whether the clamp holds your work flat and square. What ties these four together is that each one determines how faithfully the pressure you apply at the handle arrives at the joint. A weakness in any of them distorts or redirects force somewhere you didn’t intend.
- Capacity: Buy clamps several inches longer than your finished assembly. You need room for pads, cauls, and positioning. A 24-inch clamp on a 24-inch panel has zero adjustment margin — and worse, the fixed jaw sits exactly where you may need a caul or an edge block.
- Throat depth: This determines how far pressure reaches in from the edge. Deep throats (3+ inches) matter for wide rails, cabinet parts, and assemblies where the joint sits away from the edge. The implication: a shallow-throat clamp on a wide carcase presses the edge but leaves the interior joint line unsupported, which is how gaps open up in the middle of a case side.
- Bar stiffness: A bar that bows under load reduces effective pressure and encourages panels to cup, because the bar absorbs force by bending instead of transmitting it. Thick, well-made bars cost more and earn it — this is the spec most often sacrificed on cheap clamps, and it’s the one you can’t work around with technique.
- Jaw size and pads: Large jaws spread force and prevent dents by distributing the same pressure over more area. Even with removable pads, keep scrap blocks, cork, or leather handy for finished surfaces and softwoods — soft fibers crush under concentrated load long before the joint closes.
A practical starter selection covers real project sizes: 12–18-inch clamps for boxes and small furniture, 24-inch for cabinets and chairs, 31–36-inch for doors and moderate panels, and 40–50-inch for tabletops. If you can only buy two lengths first, get 24-inch and 31–36-inch — they overlap just enough to cover a wide range of furniture work while you learn which sizes your projects actually demand.
Ergonomics sound like a luxury until you’re mid-glue-up with a ticking clock. Handle size, screw smoothness, and release-lever location become very important when you’re assembling a complicated project inside the glue’s open time — a gritty screw doesn’t just feel bad, it slows every adjustment, and slow adjustments are how open time runs out. Cheap clamps with gritty screws will teach you this lesson exactly once.
As an affiliate, we earn on qualifying purchases.
More Clamps Beat More Pressure — Every Time
The single biggest glue-up myth is that tighter equals stronger. It doesn’t — and understanding why requires knowing what the glue actually needs. Modern wood glue bonds by penetrating the wood fibers and curing into a thin, continuous film; that film achieves full strength at surprisingly low pressure, provided the surfaces are in intimate contact. Pressure’s real job is simply to close the gap so contact happens everywhere. Beyond that point, additional force is actively destructive: it bows boards, crushes soft fibers, and squeezes adhesive out of the joint, leaving a glue-starved line that’s weaker than if you’d clamped gently. Extreme force adds nothing except problems.
A joint that needs extraordinary pressure is almost always a preparation problem. If you’re reefing on the handle hard enough to leave marks, stop and check the fit — something is warped, mis-machined, or misaligned, and the force you’re applying is bending the assembly to hide it. The moment the clamp comes off, the internal stress you trapped in the joint becomes a permanent fight between the wood and the glue line. Your thickness planer and jointer do the precision work; the clamps just hold it still.
Here’s the process I use for every panel glue-up, learned through enough failures to be confident about it:
- Dry-fit everything. Full rehearsal, all clamps in position. This catches missing clamps, awkward sequences, and boards that need cauls — before glue is everywhere. The rehearsal also tells you whether your clamp count is genuinely sufficient or whether you’re about to improvise under time pressure.
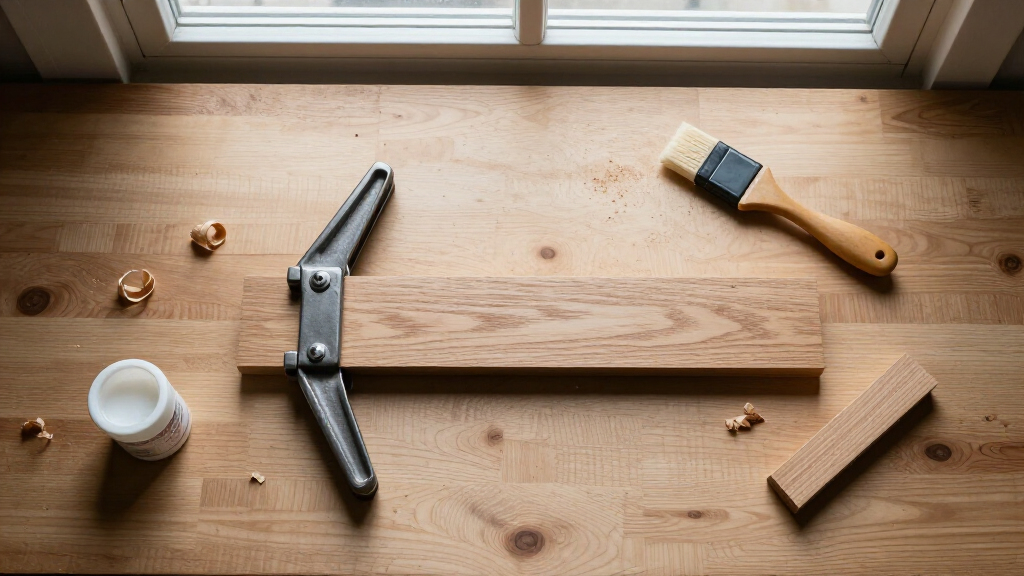
- Stage your tools. Mallet, square, cauls taped with packing tape, damp rags, glue brush — all within reach. Open time is not the moment to hunt for anything.
- Space clamps every 6–12 inches, adjusting for board thickness and stiffness. Thinner stock needs closer spacing because it deflects more between clamp points — pressure distribution, not clamp count alone, is what the spacing rule is really about.
- Alternate clamps above and below the panel to balance the forces that cause bowing. Every clamp pressing from one side nudges the panel toward a bow; alternating sides cancels those nudges instead of stacking them. Keep screws close to the workpiece centerline so force enters the panel rather than levering it.
- Tighten gradually and evenly, just until the joint closes and shows a consistent, modest squeeze-out bead. Work from the center outward so pressure and glue are distributed toward the ends rather than trapped in the middle.
- Lay cauls across the panel where board faces must stay flush, covered in tape or wax so they don’t glue themselves to your project. Cauls are the answer to the limitation no clamp solves: bar clamps press edges, but only cauls control faces.
Two timing notes. Clamp time and cure time are different — clamps can come off when the glue has grabbed enough to hold the assembly, but full structural strength comes later, and temperature, humidity, species, and adhesive type all shift the schedule. Follow the glue manufacturer’s instructions, not your impatience; stressing an early joint can create a hidden weak line that fails months later. And don’t read squeeze-out as a pressure gauge: a visible bead confirms glue reached the joint, but heavy squeeze-out usually means too much glue, too much pressure, or both. A starved joint can’t be diagnosed from squeeze-out alone — which is one more reason even, moderate clamping beats cranking everything down.
What a Small Shop Should Actually Buy First
Beginners consistently over-buy cheap clamps and under-buy good ones, and the reason is understandable: ten inexpensive clamps feel like more capability than four good ones. But capability isn’t clamps — it’s controlled pressure. A drawer full of $10 clamps that flex and slip will cost you more in ruined projects than four quality clamps cost in dollars, because each failed glue-up consumes lumber, glue, hours, and the confidence to attempt the next one. Buy gradually, based on real projects, and let your actual work drive the collection — this also teaches you what you genuinely reach for, which no buying guide can.
The best value play for a new shop: quality F-style clamps (Bessey Tradesman-tier), a few at a time. They’re affordable, easy to store, and useful far beyond glue-ups — holding jigs, cauls, and workpieces at every stage of a build. That versatility is the point: an F-style clamp earns its cost across dozens of non-glue-up tasks, while a parallel-jaw clamp mostly waits for panels. Pair them with two or more pipe clamp fixtures and pipes bought to match your first big project. That combination handles furniture-scale work for a fraction of a full parallel-jaw set, and it defers the expensive purchase until you know your work justifies it.
Add parallel-jaw clamps when cabinet and tabletop work justifies them — a set of four in your most common length is the sweet spot, since that’s roughly what a modest panel demands at 6–12-inch spacing. Buying four at once in one length, rather than a mixed pair here and there, means your premium clamps can actually complete a glue-up together. The mature mixed collection looks like this:
- Four to six parallel-jaw clamps in your workhorse lengths — the square-critical core
- Several F-style clamps for general duty and everything between glue-ups
- Two-plus pipe fixtures with interchangeable pipes, covering any length the project throws at you
- A few one-handed clamps strictly for positioning and holding
- Cauls, pads, and clamping blocks — cheap, and they do as much for alignment as any premium clamp, because they solve the problems clamps alone can’t reach
Mixing brands is fine; shops do it constantly. The only annoyance is mismatched jaw heights making panel setup less convenient — spacer blocks solve it, and a bin of uniform offcuts costs nothing. For small work like boxes, drawers, and frames, lightweight aluminum bar clamps (Dubuque-style) are a fine choice for assemblies where high pressure is unnecessary — their lower rigidity is a non-issue when the joints are small and the forces modest. And keep the clamp pads clean: dried glue eventually wrecks pads and sliding mechanisms, so scrape it off before it builds. Your clamps will outlast several projects if you treat them like tools instead of consumables — which is the quiet argument for buying quality in the first place.
Frequently Asked Questions
How many clamps do I need for a tabletop?
It depends on the tabletop’s length, thickness, and board stiffness. A typical approach places clamps roughly every 6–12 inches, alternated above and below the panel to balance bowing forces. Thinner boards or difficult stock need closer spacing and more clamps. For a 5-foot tabletop, that usually means six to ten clamps, plus cauls across the panel to keep board faces flush.
Are parallel-jaw clamps worth the price?
Usually yes if you frequently build cabinets, doors, or tabletops — the broad jaws and controlled alignment make assemblies noticeably easier and squarer. Occasional woodworkers get better value from a mix of F-style and pipe clamps. Remember that premium clamps improve alignment, speed, and durability; joint strength still depends on surface prep, fit, and curing, not clamp price.
Can clamps be too tight?
Yes. Excess pressure bows boards, distorts frames, crushes soft fibers, and squeezes adhesive out of the joint. Apply only enough pressure to close the joint and produce a modest, even squeeze-out bead. If a joint needs heavy force to close, that’s a machining or fit problem to fix — not something the clamp should solve.
Why do my steel clamp bars stain the wood?
Steel or iron contacting wet glue and tannin-rich woods — especially oak — produces dark iron stains that penetrate the fibers. Prevent it with pads, waxed paper, or plastic barriers between the bar and the work, or by elevating the workpiece off the bar. Stains caught early can sometimes be sanded or treated; deep ones often can’t be removed cleanly.
Can quick-grip one-handed clamps handle real glue-ups?
They’re fine for light assemblies, positioning, and small projects — and many reverse into spreaders, which is handy. But most lack the force, jaw depth, and bar stiffness needed for large panels or demanding furniture joints. Keep them for holding and initial positioning, and reach for parallel-jaw, pipe, or F-style clamps for the actual glue-up pressure.
Should I wipe glue squeeze-out right away?
It depends on the adhesive, wood, and finishing plan. Wet wiping can drive diluted glue into the pores and cause blotchy finish later; many woodworkers wait until the squeeze-out turns rubbery and peels or scrapes off cleanly. Fully hardened glue may require scraping and risks damaging the surface. Test your approach on scrap before committing a visible panel.
Conclusion
If you take one thing from this: clamps don’t create strong joints — they preserve well-prepared ones. Spend your money on enough clamps to distribute pressure evenly across the work, in the types that match what you actually build, and spend your effort on joint prep and dry-fitting. A $40 pipe clamp used with good technique outperforms a $100 parallel-jaw clamp used to bully a bad joint closed.
Start with a few quality F-style clamps and pipe fixtures, add parallel-jaw clamps as the work demands them, and always dry-fit with everything staged before the glue bottle opens. Glue-up is the moment your project either becomes furniture or firewood — give it the clamps and the patience it deserves.
Fall Picks
fall essentials
As an affiliate, we earn on qualifying purchases.