
TL;DR

Get business pricing on tools and workshop supplies
- Business-only prices and quantity discounts
- Tax-exempt purchasing
- Multiple users, one account, clear invoices
Router bits are cutting tools mounted in a router to shape edges, cut joinery, and groove materials, and the best bit depends on what you’re cutting: carbide for abrasive sheet goods like MDF and plywood, sharp HSS for light work, downcut or compression spirals for clean veneered faces, and purpose-built geometry for plastics and aluminum. Match the shank to your collet, respect the maker’s rated RPM, and take multiple light passes instead of one deep one. A few sharp, correct bits will outperform a giant set of dull ones every time.
The first time I routed a groove through a sheet of melamine with a cheap straight bit, the edge came out looking like something a beaver had visited. Chipped, ragged, ruined. The bit wasn’t defective — it was simply the wrong tool for that material, and no amount of careful feeding was going to save it.
Here’s the thing most beginners learn the hard way: router bits are cutting tools mounted in a router to shape edges, cut grooves, and form joinery, and every material you feed them punishes the wrong geometry differently. Solid wood forgives. Melamine does not. Aluminum will tell you immediately and loudly.
In this guide, you’ll learn how to match bits to wood, plywood, plastics, and nonferrous metals — what steel to buy, what shank to run, what RPM to respect, and where the budget tier ends and the pro tier starts. I’ll keep it honest about what a small garage shop actually needs, because you don’t need forty bits. You need six right ones.
Match the bit to the material first: carbide for abrasive plywood and MDF, downcut or compression spirals for veneered faces, purpose-built geometry for plasti…
Choose 1/2-inch shank bits whenever your router supports them — the stiffer shank reduces chatter and deflection on any cutter over about 1/2 inch in diameter.
Respect the manufacturer’s rated RPM for each bit diameter; large cutters like raised-panel bits may be limited to roughly 12,000 RPM while small spirals can r…
Cut deep profiles in multiple passes of 1/8 to 1/4 inch, and feed steadily — feeding too slowly burns wood just as surely as a dull bit does.
Buy six to ten sharp, correct bits instead of a 100-piece set; a $30 quality spiral beats a drawer of $4 mystery steel on every cut.
How to Select the Best Router Bits for Different Materials
Start with the material, then match the cutter geometry, edge material, shank, and cutting plan. The right bit leaves a cleaner edge, holds its sharpness longer, and makes the cut easier to control.
“The bit wasn’t defective. It was simply the wrong tool for that material.”
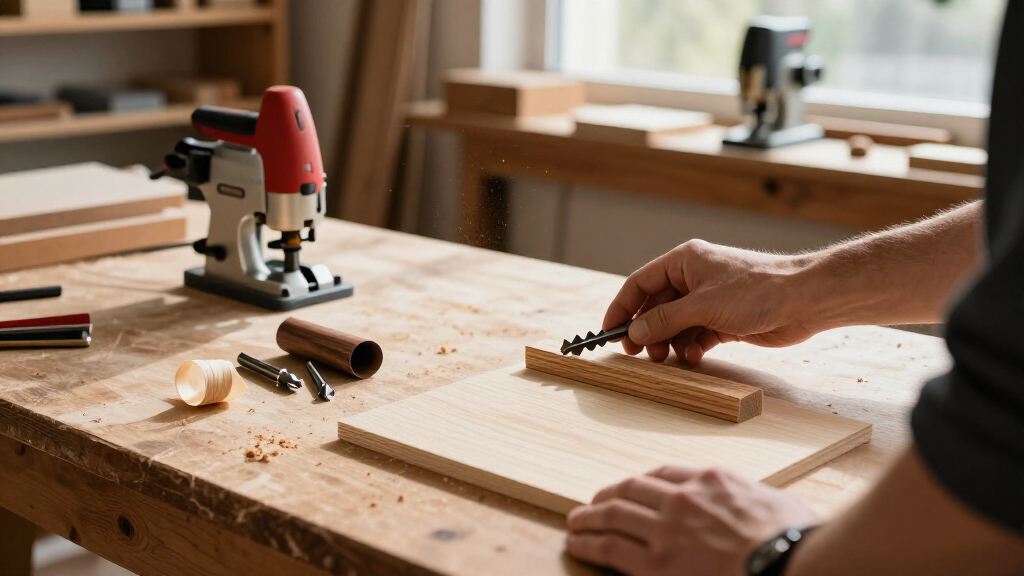
Veneered faces and sheet goods reward sharp, suitable geometry.The five decisions that narrow the field
Work through these in order. Each answer rules out unsuitable bits before you reach for the router.
Material
Dense or abrasive stock wears edges faster. Use a bit rated for the material.
Geometry
Straight for grooves, flush-trim for templates, profiles for edges, spirals for plunging and chip removal.
Cutting steel
HSS suits light work; carbide is the woodworking default; solid carbide serves specialty cuts.
Shank
Match the collet exactly. A larger supported shank can reduce vibration and deflection.
Speed & depth
Respect rated RPM. Remove material in shallow passes and feed steadily.
Choose a bit for the material in front of you
These are starting points. Check the cutter maker’s guidance, test on scrap, and adjust for the specific cut.
Solid wood
Good choices: Sharp carbide-tipped or HSS profiles; spiral bits for grooves and plunge cuts.
Watch: Grain direction can cause tear-out. Test the cut and take light passes, especially in figured or brittle wood.
Plywood & MDF
Good choices: Carbide bits; compression or suitable spiral bits for clean sheet edges.
Watch: Glue and fiber are abrasive. Keep the bit sharp and clear chips and dust.
Melamine & veneer
Good choices: Sharp carbide, often downcut or compression designs for the visible face.
Watch: Support the work, test cut direction, and use a backing board to help reduce breakout.
Plastic & acrylic
Good choices: Bits designed for plastics, with geometry intended to limit melting and chip recutting.
Watch: Follow the maker’s speed and feed guidance, clear chips, and test on scrap.
Aluminum
Good choices: Cutters specifically rated for nonferrous metals, used with suitable machine capability.
Watch: Do not assume a standard woodworking bit or handheld router is appropriate. Follow both tool and cutter maker guidance.
HSS, carbide-tipped, or solid carbide?
Buy for the work you actually do. Abrasive sheet goods quickly expose the limits of a cheap, dulling edge.
HSS
Inexpensive and sharpenable. A practical option for occasional cuts in clean, soft solid wood; it dulls faster in plywood, laminate, and MDF.
Light solid-wood workCarbide-tipped
A durable choice for most woodworking profiles. Its edge holds up better against the fibers and glue lines in engineered panels.
Best everyday valueSolid carbide
Useful for spiral and precision cutters. It can hold an edge well, but costs more and is more brittle if dropped or mishandled.
Choose selectivelyCompatibility, RPM, depth, and chip flow
The right cutter still needs a sound setup. A clean cut comes from matching the bit to the router and the cut plan.
Match the shank to the collet. Common sizes include ¼ inch and ½ inch; metric sizes are also used. Never force a mismatch.
Use a sound collet. Do not run a bit with a damaged collet or insecure fit.
Take multiple light passes. Deep cuts can strain the bit and router, and increase the chance of burning or loss of control.
Keep chips moving. Upcuts lift chips but can lift surface fibers; downcuts press fibers down but may pack chips into the cut.
From stock to a cleaner edge
Follow this short chain whenever a new material or profile enters the shop.
Identify stock
Solid wood, sheet good, plastic, or metal?
Pick geometry
Match the profile and chip direction to the cut.
Check shank
Confirm collet match and condition.
Follow rating
Set speed within maker guidance; clear chips.
Test & repeat
Use scrap, light passes, and a steady feed.
A small, sharp set beats a drawer of dull surprises.
Choose a few accurate bits for your regular work, check material and speed guidance, and replace or sharpen them when cut quality drops. Let the stock—not habit—decide the cutter.
The 5 Decisions That Actually Determine Which Bit You Buy
Selecting a router bit comes down to five decisions made in order: the material you’re cutting, the geometry the cut requires, the cutting-edge steel, the shank diameter, and the speed-and-depth strategy. Skip one and you’ll get burning, tear-out, or a bit that walks out of the collet mid-cut. Each decision narrows the field until, usually, only a couple of bits are even candidates.
Think of it like choosing a drill bit at the hardware store: you wouldn’t grab a masonry bit to hang a cabinet door hinge, and you wouldn’t use a paddle bit for a pilot hole. Router bits follow the same logic — the material and the cut narrow everything else down.
Material comes first because dense and abrasive stock wears edges at wildly different rates. MDF and plywood eat HSS for breakfast. Geometry comes second: the profile has to produce your cut without extra passes — a straight bit for dadoes, a flush-trim for template work, a round-over or chamfer to shape edges, a rabbeting bit for shoulders. If a single spiral bit can do what three straight passes would, that’s the better buy. A real example: cutting a 3/4-inch dado for cabinet shelf placement is a single-pass job for a 3/4-inch straight bit, but a nightmare of repeated fiddly passes with a 1/4-inch bit.
Cutting-edge material is the classic budget-versus-pro fork. HSS is cheap and sharpenable but dulls fast. Carbide-tipped is the workshop standard. Solid carbide is for precision and specialty work — stiffer, sharper for longer, but brittle and pricey. Shank diameter must match your collet, full stop. And speed and depth — bigger diameters need lower RPM, and deep cuts belong in multiple shallow passes.
Never force a mismatched shank into a collet, and never run a bit with a damaged collet. A bit leaving the collet at 22,000 RPM is a shop evacuation, not an oops.
HSS vs Carbide vs Solid Carbide: Which Steel Earns Its Price
Carbide-tipped bits are the right default for almost every home shop because the carbide edge holds its sharpness 20 to 50 times longer than high-speed steel in abrasive materials. That’s not marketing — it’s the difference between resharpening after a project and resharpening after a single sheet of MDF. The glues and hardboard fibers in engineered panels work like sandpaper on an edge every single pass.
A concrete comparison: routing 1/4-inch grooves for cabinet backs, a carbide-tipped bit might still be cutting clean after twenty sheets of plywood, while an HSS bit of the same profile starts scorching the groove walls by sheet three. That’s the abrasion difference in practice — same router, same operator, very different evenings.
HSS still has a place. If you’re cutting clean pine for a weekend birdhouse project, a $12 HSS straight bit does the job and touches up on a diamond stone in two minutes. Where HSS fails is volume and abrasion — run it through plywood, laminate, or MDF and the edge rounds over fast, and a dull bit burns wood, tears grain, and demands more feed force. More force means less control.
Solid carbide is where I’d tell most garage woodworkers to be selective. A solid-carbide spiral bit is genuinely worth it — the whole cutter is one piece of carbide, so it’s rigid and holds an edge beautifully for grooves and plunge cuts. My 1/4-inch solid-carbide upcut has cut dovetail grooves in three hardwood dresser builds and still leaves a surface I don’t need to sand. But solid carbide is brittle. Drop it on concrete and it chips — a mistake that costs a $40 bit in one second. For a large raised-panel cutter or a molded profile, carbide-tipped on a steel body is the smarter, tougher, cheaper choice.
- HSS: cheapest, sharpenable at home, fine for light solid-wood work
- Carbide-tipped: the default for woodworking, longest practical edge life per dollar
- Solid carbide: best for spiral and precision cutters, fragile if dropped
How to Match Your Bit to the Material: Wood, Plywood, Plastics, Aluminum
The best router bit for any material is the one whose steel, geometry, and edge prep suit that material’s density and abrasiveness — sharp carbide for solid wood, compression spirals for veneered sheet goods, melt-resistant geometry for plastics, and purpose-rated cutters for aluminum. Here’s the breakdown I keep taped inside my bit drawer.
| Material | Best bit choices | Watch out for |
|---|---|---|
| Solid wood | Sharp carbide-tipped profiles; spiral bits for grooves and plunging | Tear-out on figured grain — test cut, light passes, mind feed direction |
| Plywood & MDF | Carbide-tipped; compression spiral for clean sheet edges | Glue lines dull edges fast; clear chips and dust aggressively |
| Melamine/veneer panels | Sharp carbide, downcut or compression designs | Face chipping — use a backing board and correct cut direction |
| Plastic & acrylic | Bits designed for plastics, geometry that reduces chip re-cutting | Melting — follow the maker’s speed/feed exactly, test on scrap |
| Aluminum | Bits specifically rated for nonferrous metal | Never assume a woodworking bit works; machine setup must suit the material |
Each row has a story I’ve lived. In solid oak, a sharp carbide round-over leaves a surface you can run a fingernail across without catching. Feed the same work through a birch plywood drawer side and the glue lines start whispering against the edge — by the fourth drawer, an HSS bit is already burning. On melamine, an ordinary upcut leaves a top edge flaked like a pie crust; switch to a downcut and the same panel comes out with an edge you can run your thumb over. Acrylic punishes impatience instantly: one pass at wood speeds and the groove walls turn to melted glossy boogers that never machine out. Aluminum with a wood bit screams, grabs, and welds chips to the flute — it’s the fastest way I know to ruin a $35 cutter and an afternoon.
The sheet-goods row deserves special attention, because that’s where most home shops live. A compression spiral cuts upward on the bottom of the bit and downward on the top, so both faces of a melamine panel exit the cut clean — provided your cut depth engages both sections of the flutes. Picture a 3/4-inch melamine shelf: cut it in one full-depth pass with a compression spiral and both the show face and the bottom face come out chip-free. Take a 1/8-inch skim pass that never reaches the upcut section, and you’ve effectively got a downcut — top clean, bottom ragged. That’s the one geometry where the marketing hype is real.
On solid wood, grain direction is everything. Routing a round-over against the grain on curly maple? You’ll pull chunks you didn’t know existed. A climb-cut cleanup pass can rescue an edge, but climb cutting on a handheld router grabs and runs — only do it if you understand the risk and have the workpiece locked down. Eye protection, always.
Upcut, Downcut, or Compression: Picking the Spiral That Fits the Job
Spiral bits differ by chip direction: upcut spirals pull chips up and out of the groove, downcut spirals push fibers down for a cleaner top edge, and compression spirals do both at once. That one difference — which way chips travel — decides how your cut looks on each face of the workpiece.
Think of it like drilling: an upcut spiral works like a twist drill bit, augering debris out of the hole. A downcut works more like a chisel, shearing fibers downward into the board where they can’t lift the surface.
An upcut spiral is your workhorse for grooves and dados. It clears chips like a chimney, which keeps the cut cool and prevents chips from being re-cut into dust. The tradeoff: it can lift and fray fibers at the surface, leaving a slightly ragged top edge on veneer. On a through-dado in solid wood — say, shelf supports in a pine bookcase carcass — you’ll never notice. On the show face of a veneered cabinet side, you absolutely will.
A downcut spiral is the opposite animal. It presses the fibers down as it cuts, so the visible top face exits glass-clean — this is the bit for veneered panels and shallow mortises where the show surface matters. I used one to plunge hinge mortises in a veneered door and the edges needed zero cleanup. The catch is chip evacuation: chips get pushed down and packed into the cut, which means heat builds and you need serious dust extraction. In a deep groove — a 3/4-inch-deep dado in MDF, for instance — a downcut can literally weld chips into the slot.
The compression spiral splits the difference along its length and is the standard answer for CNC and rail-and-style work on double-sided laminate, where both faces have to be chip-free. Picture a melamine-clad cabinet panel: the bottom flutes shear the bottom face clean going up, the top flutes press the show face clean going down. It only works when your cut depth reaches far enough to engage both the upcut and downcut sections — check the manufacturer’s transition point before you buy. On most bits that transition sits about a third of the way up from the tip, so a 3/4-inch compression spiral typically wants a full 3/4-inch pass to deliver on the promise.
Shank Size, RPM, and Cut Depth: The Setup Mistakes That Ruin Good Bits
Half-inch shank bits run smoother than quarter-inch bits on the same cutter diameter because the thicker shank deflects less under load — less vibration means less chatter, longer edge life, and cleaner cuts. If your router takes both collets, the half-inch version of a bit is almost always the better buy for anything over about a half-inch cutting diameter.
An analogy that helps: a 1/4-inch shank under a big cutter is like a golf pencil holding up a dinner plate — it works until you put weight on it. A 1/2-inch shank is the broom handle. Same plate, completely different stability.
The shank must match your collet exactly. A quarter-inch bit in a worn collet can creep outward under vibration, and the results are dangerous. A classic scenario: you rout ten inches of edge and everything’s fine, then the bit slips a sixteenth deeper mid-pass and ruins the workpiece — or worse, works its way out entirely. Inspect collets for debris and scoring; a bit that slips once has likely marked the collet interior and it should be replaced. This is five-dollar maintenance that protects forty-dollar bits.
Speed is the number people ignore. Larger-diameter bits have higher rim speed at the same RPM — the edge of a 3-inch raised-panel cutter travels roughly twelve times farther per revolution than the tip of a 1/4-inch spiral. That’s why a big panel cutter might be rated for 12,000 RPM maximum while the little spiral is happy at 25,000. Running a big cutter too fast builds heat, dulls the edge, and in the worst case fails the cutter. Read the manufacturer’s rated RPM off the box or their catalog — it’s printed there for a reason.
- Confirm the shank matches the collet and the bit diameter clears your router’s base opening
- Set the router to or below the maker’s maximum RPM for that bit diameter
- Plan the cut in passes — never more than about 1/8 to 1/4 inch of material per pass on a profile cut
- Test on scrap: check the finish, then adjust feed speed
- Feed at a steady pace — too slow burns wood, too fast bogs the router and causes kickback
That feed-rate point trips up more people than any spec. Feeding too slowly is as bad as forcing the bit: a spinning cutter sitting in one spot generates friction heat, glazes the wood, and burns the edge brown. I once watched a friend ease a round-over through oak at a crawl — by the end of one door edge, the wood was scorched black and the bit needed cleaning. If you see smoke or scorch marks, your first suspects are a dull bit, too deep a pass, or a feed that’s crawling.
What a Small Garage Shop Actually Needs (Skip the 100-Piece Set)
A small home shop needs six to ten quality bits, not a hundred mediocre ones — the giant boxed sets are mostly profiles you’ll use once a decade, made with steel thin enough to flex. A sharp, correct $30 bit outperforms a drawer of $4 mystery steel every single day of the week.
It’s the kitchen-knife problem: a hundred-dollar chef’s knife you sharpen beats a block of forty serrated things that came free with a blender. Router bits work the same way.
My honest starter list for a garage shop doing furniture, cabinets, and general work: a pair of quality spiral bits (one upcut, one downcut, 1/4-inch shank), a 1/2-inch carbide straight bit for dadoes, a flush-trim bit with bearing, a round-over set (1/8 and 1/4 inch radius), a chamfer bit, and a rabbeting bit with bearing conversions. That covers edge shaping, joinery, and template work for years. Concrete example: with just the flush-trim and the rabbeting bit, I built an entire run of shaker-style cabinet doors — template-routed rails and stiles, rabbeted glass inserts for two upper doors, no other bits touched.
When you evaluate any bit, look for the tells of quality: consistent dimensions, carbide brazed cleanly with no gaps at the joint, a smooth unmarked shank, and printed speed and material guidance from the maker. A reputable manufacturer publishes its specs. Bits with no RPM rating and no country-of-origin marking are a gamble with your workpiece — and your hands.
Maintenance is free performance. Resin-coated bits run hot; a soak in bit cleaner and a nylon brush restore them — after one pine-heavy project my straight bit looked like it had been dipped in amber, and twenty minutes of soaking brought it back to cutting like new. Inspect for dull edges, hairline cracks, loose carbide, or a scored shank before every use. A bit that’s been dropped gets retired or professionally sharpened — a chipped carbide tip at speed becomes shrapnel. And run dust extraction, especially with MDF; a shop vac on a router isn’t about cleanliness, it’s about not breathing engineered-panel dust and keeping the cut visible.
Frequently Asked Questions
Should I buy 1/4-inch or 1/2-inch shank router bits?
Use whichever shank your router’s collet is designed for, exactly — never force a mismatch. When both sizes are available and compatible, the 1/2-inch shank is usually the better pick: it’s stiffer, deflects less, and vibrates less, especially on cutters over about 1/2 inch in diameter. A bigger shank never makes an unsuitable cut safe, though — geometry and speed still govern that.
What router bit should I use for plywood?
A sharp carbide-tipped bit is the standard starting point, since plywood’s glue layers are abrasive and dull edges quickly. For exposed sheet edges where both faces need to be chip-free, a compression spiral limits breakout on the top and bottom — as long as your cut depth engages both sections of the flutes. Always test on scrap first.
Why is my router bit burning the wood?
Burning usually comes from one of four things: a dull or resin-coated bit, too deep a cut in one pass, wrong speed, or feeding too slowly. Yes, too slowly — a bit lingering in one spot builds friction heat just like a dull one. Clean or replace the bit, drop to shallower passes, verify the maker’s rated RPM, and feed at a steady pace on a test piece.
Can I use woodworking router bits on plastic or aluminum?
Not automatically. Plastics can melt from heat generated by geometry designed for wood, and aluminum requires specific cutting geometry plus a machine setup intended for metal. Choose bits specifically rated for the material, follow the manufacturer’s speed and feed guidance, and verify your router is appropriate for the task before starting.
How do I prevent tear-out when routing solid wood?
Use a sharp bit, take shallow passes, and pay attention to grain direction — routing against the grain on figured wood is the classic tear-out trigger. A backing board or template supports fragile edges, and a downcut spiral presses fibers down rather than lifting them. A climb-cut cleanup pass can rescue a rough edge, but only attempt it with the workpiece secured and full understanding of the added grab risk.
How often should router bits be sharpened or replaced?
There’s no fixed interval — it’s condition-based. Pull a bit from service when it cuts poorly, burns wood despite a sound setup, or shows cracks, loose carbide, or shank damage. Suitable bits can be professionally sharpened several times before they’re spent; a bit that’s been dropped or chipped should be replaced outright. Inspect before every use.
Conclusion
If you take one thing from this guide: stop choosing bits by profile alone and start choosing by material. The same round-over that glides through cherry will scorch MDF and chip melamine — not because it’s bad, but because it’s wrong for that stock. Carbide for sheet goods, downcut spirals for show faces, plastic-rated geometry for plastic, and never assume a woodworking bit belongs in aluminum.
Buy fewer, better bits. Read the RPM rating off the box. Test on scrap. Your cuts will get cleaner, your bits will last longer, and your melamine edges will stop looking like beaver damage — which, at the end of the day, is the whole point.
Fall yard work Picks
leaf blowers
As an affiliate, we earn on qualifying purchases.