
TL;DR

Get business pricing on tools and workshop supplies
- Business-only prices and quantity discounts
- Tax-exempt purchasing
- Multiple users, one account, clear invoices
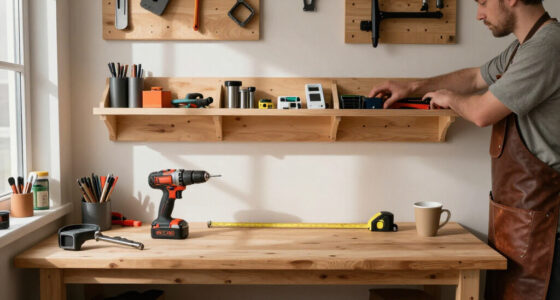
The best wall-mounted storage for a clutter-free shop is a combination: pegboard or slatwall for light hand tools, French cleats for heavy custom holders, and shallow closed cabinets for dust-sensitive gear. Wall-mounted storage frees valuable floor and workbench space and keeps frequently used tools visible. No system has a universal load rating — capacity depends on the shelf, fasteners, anchors, and wall working together, so the weakest link sets the limit.
The last time I tripped over a pile of clamps to reach my chop saw, I finally admitted what my garage shop had become: a floor-storage operation pretending to be a workshop. If you’re stacking tool cases against the wall and excavating for a #2 Phillips, you have the same problem. The fix isn’t a bigger shop — it’s the 200+ square feet of vertical wall space you’re currently ignoring.
Wall-mounted storage frees valuable floor and workbench space, keeps frequently used tools visible at a glance, and turns a ten-minute cleanup into a two-minute one. But the options are a minefield of mismatched expectations: pegboard that sags, slatwall that was never rated for a nail gun, and track systems whose proprietary hooks cost more than the tools they hold.
In this guide, I’ll walk you through the real tradeoffs — load capacity, mounting, workflow, and cost — the way I’d explain them to a friend standing in my shop holding a stud finder. No product roundups, no affiliate fluff. Just what works, what fails, and why.
No storage system has a universal load rating — the true capacity is the weakest link among shelf, bracket, fastener, anchor, and wall. Drywall alone is never…
Match the system to the load: pegboard for light hand tools, French cleats for heavy custom holders, slatwall for baskets and bulk, and shallow closed cabinets…
Layout by workflow, not appearance: daily tools at waist-to-shoulder height, heavy items low, light infrequent items high, and nothing heavy hanging over your…
Leave 15–20% of your wall empty when planning — unused capacity is the margin that keeps the system functional as your tool collection grows.
Environment beats price in unheated or damp shops: metal pegboard and powder-coated steel outlast hardboard, and 10–12 inch shelf depth beats deep shelves for…
Always lock pegboard hooks with retaining clips or locking pegs — standard hooks lift out with the tool, which is a daily frustration that costs two dollars to…
Best Wall-Mounted Storage for a Clutter-Free Shop
The fix isn’t a bigger shop — it’s the vertical wall space you’re currently ignoring. The winning setup is a combination: pegboard or slatwall for light hand tools, French cleats for heavy custom holders, and shallow closed cabinets for dust-sensitive gear.
Match the System to the Load
No single wall system wins everything. Pegboard is economical and flexible, slatwall looks cleaner and handles bulk, and French cleats are the strength champion for heavy custom holders. A wall of chisels wants pegboard; a stack of routers wants cleats.
Pegboard
Affordable and rearrangeable for hand tools and light accessories. Metal versions outlast hardboard in damp or unheated shops.
Slatwall
Horizontal channels accept hooks, baskets, shelves, and bins — cleaner appearance and better for bulkier accessories.
French Cleats
Interlocking beveled strips support custom cabinets, racks, and tool holders. Strong, modular, and often DIY-friendly.
Wall-Track Systems
Proprietary rails with adjustable hooks and brackets — ideal for garden tools, hoses, ladders, and bikes.
Closed Cabinets
Shallow wall cabinets protect dust-sensitive gear and finish supplies while keeping a tidy appearance.
Bins & Magnetic Strips
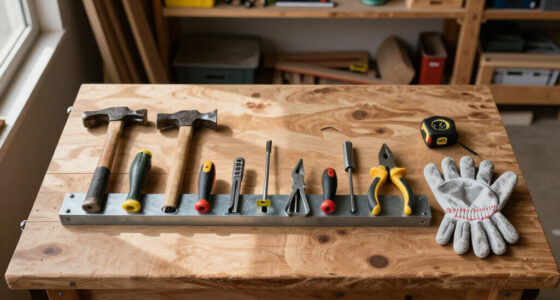
Labeled transparent bins beat every alternative for fasteners; magnetic strips suit drill bits and steel hand tools.
Which System Fits Your Tools
The honest comparison I wish someone had handed me before I bought my first panel.
| System | Best For | Cost Tier | Verdict | Watch Out For |
|---|---|---|---|---|
| Pegboard (hardboard) | Light hand tools, frequent rearranging | Budget | ✓ ~ | Sags and swells in damp shops; hooks lift out |
| Metal pegboard | Heavier hand tools, durability | Mid | ✓ | Proprietary hole patterns can lock you in |
| Slatwall | Baskets, shelves, bulkier accessories | Mid | ✓ | Capacity varies wildly between panel grades |
| French cleats | Heavy cabinets, racks, custom holders | Budget–Mid (DIY) | ✓✓ | Only as strong as anchoring and cleat geometry |
| Wall-track systems | Garden tools, hoses, ladders, bikes | Mid | ✓ ✗ | Proprietary accessories add up fast |
The Wall — Not the Shelf — Decides the Weight
No storage system has a universal load rating. That “holds 200 lbs” sticker means nothing if it’s screwed into drywall with the included hardware. Drywall alone is never structural — ever. Think of it like a chain: every link must hold, and the weakest one sets the limit.
Find Studs
Use a stud finder or strong magnet; mark every stud along the run.
Confirm Wall Type
Wood studs, metal studs, masonry, or concrete — each demands different anchors.
Spread the Load
Distribute heavy loads across at least two studs — never one fastener pair.
Count Dead Weight
Cabinets, brackets, and containers weigh something before a single tool goes in.
Dynamic Loads
Yanking a tool off its hook adds force beyond its resting weight.
Store Tools Where You Use Them
The best layout mirrors how work actually moves through your shop, not how a catalog looks. Group items by task, not category: a “drilling zone” holding the drill, bit index, countersinks, and depth stops together beats a museum-style wall.
Light, infrequent stuff — finishing supplies, seasonal gear. Never heavy items.
Daily drivers — hand tools, sanders, tape measure, measuring and marking tools grouped above the bench.
Heavy items low — portable saws and hardware bins, reducing lifting and falling hazards.
Directly above your work zone — a falling-tool hazard. Never block doors, electrical panels, lighting, or ventilation.
Six Rules Before You Drill One Hole
No universal load rating exists. True capacity is the weakest link among shelf, bracket, fastener, anchor, and wall.
Match system to load. Pegboard for light hand tools, cleats for heavy custom holders, slatwall for bulk, shallow cabinets for dust-sensitive gear.
Layout by workflow, not appearance. Daily tools at waist-to-shoulder height, heavy items low, nothing heavy over your work zone.
Leave 15–20% of the wall empty. Unused capacity is the margin that keeps the system functional as your collection grows.
Environment beats price in unheated or damp shops: metal pegboard and powder-coated steel outlast hardboard.
Lock pegboard hooks with retaining clips or locking pegs — two dollars fixes a daily frustration.
Pegboard vs. Slatwall vs. French Cleats: Which System Fits Your Tools
There’s no single best wall system — pegboard is economical and flexible, slatwall looks cleaner and handles bulkier accessories, and French cleats are the strength champion for heavy custom holders. The right answer depends on what you’re hanging. A wall of chisels and screwdrivers wants pegboard. A stack of routers and random-orbit sanders wants cleats.
Here’s the honest comparison I wish someone had handed me before I bought my first panel:
| System | Best For | Typical Cost Tier | Watch Out For |
|---|---|---|---|
| Pegboard (hardboard) | Light hand tools, frequent rearranging | Budget | Sags and swells in damp shops; hooks lift out |
| Metal pegboard | Heavier hand tools, durability | Mid | Proprietary hole patterns can lock you in |
| Slatwall | Baskets, shelves, bulkier accessories | Mid | Capacity varies wildly — retail panels ≠ garage panels |
| French cleats | Heavy cabinets, racks, custom holders | Budget to mid (often DIY) | Only as strong as your anchoring and cleat geometry |
| Wall-track systems | Garden tools, hoses, ladders, bikes | Mid | Proprietary accessories add up fast |
In my shop, the split is roughly 60% French cleats, 30% metal pegboard, and 10% slatwall by the door for seasonal gear. That mix exists because each system earned its wall space for a specific job.
One quirk worth knowing: pegboard accessories can lift out when you remove a tool unless you use locking hooks or retaining clips. I lost count of how many times a hook came off the wall with the hacksaw before I switched to locking pegs. Two dollars of clips fixed a daily annoyance.
wall-mounted pegboard tool organizer
As an affiliate, we earn on qualifying purchases.
As an affiliate, we earn on qualifying purchases.
Why the Wall — Not the Shelf — Decides How Much Weight You Can Hang
No storage system has a universal load rating; capacity depends on the complete installation. That “holds 200 lbs” sticker on a shelf bracket means nothing if it’s screwed into drywall with the included hardware and misses the stud. Drywall alone is not structural — ever.
Think of it like a chain: shelf material, brackets, fasteners, anchors, and wall framing are all links, and the weakest one sets the limit. I’ve seen a heavy-duty steel shelf rated for 300 lbs peel off a garage wall because the installer used four plastic anchors into 1/2-inch drywall. The shelf was fine. The wall gave up.
Before you drill a single hole, check these in order:
- Find your studs with a stud finder or strong magnet and mark every one along the run.
- Confirm wall type — wood studs, metal studs (weaker; need toggles or backing), masonry, or concrete each demand different anchors.
- Distribute heavy loads across at least two studs, never one fastener pair.
- Count the dead weight of cabinets, brackets, and containers themselves — a “loaded” cabinet’s 40-lb shell counts before you put a single tool inside.
- Account for dynamic loads — yanking a tool off its hook adds force beyond its resting weight.
Rule of thumb from years of hanging heavy stuff: if you’d wince watching it fall, it belongs in studs, masonry, or a properly installed structural backer — not anchors in drywall.
For concrete or block walls, use the anchor the manufacturer specifies for that material, and remember that old, crumbly block holds far less than sound pour concrete. When in doubt on a masonry wall, an epoxy-set anchor beats a sleeve anchor every time.
heavy-duty French cleat wall storage
As an affiliate, we earn on qualifying purchases.
As an affiliate, we earn on qualifying purchases.
Store Tools Where You Use Them: A Layout That Saves Steps
The best wall storage layout mirrors how work actually moves through your shop, not how a catalog looks. Keep everyday tools between waist and shoulder height, store heavy items low to reduce lifting and falling hazards, and reserve high shelves for light, rarely used supplies. That’s the whole framework — everything else is refinement.
Here’s the scenario that proves it. My measuring tools used to live on a shelf across the garage from the bench. Every layout mark meant a twelve-foot round trip, roughly forty times per project. After grouping measuring, marking, and layout tools on a cleat panel directly above the bench tail end, those trips vanished. Same tools, same square footage, completely different workflow.
Group items by task, not by category. A “drilling zone” holding the drill, bit index, countersinks, and depth stops together beats a museum-style wall where all the chisels hang together across the room from where you chop.
- Waist to shoulder: daily drivers — hand tools, sanders, tape measure
- Knee to waist: heavy items like portable saws and hardware bins
- Above shoulder: light, infrequent stuff — finishing supplies, seasonal gear
- Never: directly above your primary work zone (falling-tool hazard), or blocking doors, electrical panels, lighting, or ventilation
Deep shelves hold more, but shallow storage usually wins on visibility — you stop “losing” items at the back. I keep my shelf depth at 10–12 inches for exactly this reason. A 16-inch shelf in a small shop becomes a graveyard for whatever rolls behind the spray cans.
shallow wall-mounted cabinets for garage
As an affiliate, we earn on qualifying purchases.
As an affiliate, we earn on qualifying purchases.
Small Parts, Big Headaches: Bins, Magnetic Strips, and Cabinets That Actually Work
For fasteners and small parts, labeled removable bins beat every alternative — transparent bins reveal contents instantly, while opaque bins demand ruthless labeling. A bin panel of 20–30 small containers within arm’s reach of the bench will change your relationship with screws more than any other single upgrade in this article.
My system is unglamorous: clear bins, one fastener type per bin, a label maker, and a strict rule that the label gets updated the moment a bin’s contents change. Before that, I owned four partially full containers of #8×1-1/4″ screws and could never find one when I needed it. Duplicate bins are how clutter hides in plain sight.
Magnetic strips deserve their niche — they’re perfect for steel hand tools, drill bits, and small accessories mounted right at the point of use. Mine holds hex drivers and a countersink within reach of the drill press. But don’t push them: they should not carry heavy, sharp, or vibration-prone items. A vibrating drill press wall can walk a chisel right off a magnet.
For anything precision — calipers, squares, layout tools — closed cabinets win. They shield tools from dust and impact, which matters more than speed of access for gear you use a handful of times per project. In a shop running even a modest dust collector, fine dust finds every open surface. A shallow 8-inch-deep cabinet with a door keeps my measuring tools clean and my combination square from taking a bench-edge knock.
The practical split most shops land on: open storage for frequently used tools, cabinets for precision instruments, chemicals, and low-use supplies. Flammables get their own treatment — store them only in containers and cabinets rated for that purpose, never in a generic bin above your workbench.
slatwall panel with baskets and hooks
As an affiliate, we earn on qualifying purchases.
As an affiliate, we earn on qualifying purchases.
Plan Your Wall in Five Steps Before You Drill One Hole
A wall-storage layout fails from skipping the inventory step, not from bad hardware. Plan the wall on paper first and you’ll avoid the classic mistake I made twice: mounting a cabinet exactly where the door swings. Here’s the sequence that works.
- Inventory everything you intend to store. Lay it all out on the floor and sort by frequency of use and weight. This alone kills clutter — you’ll find duplicates and tools you forgot you owned.
- Mark studs and utilities. Map stud locations, and note electrical runs, plumbing, gas lines, and your electrical panel clearance before committing to hole placement.
- Map your work zones — bench, stationary tools, assembly area — and assign each stored item to the zone where it gets used.
- Test positions with painter’s tape or paper templates on the wall. Live with the mock-up for a few days. It costs nothing and catches reach-height problems immediately.
- Leave 15–20% of the wall empty. A full wall looks great for one week; then the next tool purchase has nowhere to go and the floor clutter starts again.
Leaving unused capacity isn’t wasted space — it’s the margin that keeps the system maintainable as the collection grows.
The empty-wall rule is the one people resist hardest, and it’s the one that keeps the system alive. When my cleat wall hit 100% coverage, new tools immediately went horizontal. Clearing two panels’ worth of space brought it back to working order in an afternoon.
One more planning note for renters: a freestanding backer panel — a framed 4×8 sheet lag-bolted to a minimal number of studs, or even free-standing against the wall — can carry a full pegboard or cleat system with only a handful of holes to patch later. Get landlord approval first; “removable” doesn’t override structural safety requirements.
Dust, Damp, and Dynamite Conditions: Matching Materials to Your Shop
Shop environment dictates material choice more than most guides admit. Powder-coated steel, corrosion-resistant hardware, sealed plywood, and durable plastics handle humidity, dust, and temperature swings; unfinished hardboard does not. If your garage breathes humid summer air and freezes in January, plan for it now.
Traditional hardboard pegboard deteriorates in damp conditions — it swells around the holes, hooks loosen, and within a couple of seasons you’re re-hanging tools weekly. I learned this the expensive way in an unheated midwest garage. Metal pegboard costs roughly twice as much upfront and simply doesn’t care about moisture. In a climate-controlled basement shop, hardboard is perfectly fine and easy to customize.
Dust is the second front. A single afternoon of router work coats every open surface in fine particles, which is why my precision measuring tools, blades, and bits live behind cabinet doors while the sanders and rough-use hand tools hang in the open. Open systems give you speed and visual inventory; closed cabinets give protection. You need both, in proportion to how dusty your shop runs.
Safety overlaps with environment here. Batteries want a wall zone away from excessive heat, moisture, impact, and conductive debris — a dedicated charging station with ventilation beats a random shelf. Inspect rails, anchors, shelves, and brackets periodically for looseness, corrosion, and damage; a bent hook discovered during inspection is an inconvenience, and one discovered mid-fall is an injury. If you’re in earthquake country, add positive restraints — latches and straps — to cabinets and stored objects.
What’s New Worth Having: Modular Ecosystems, 3D-Printed Holders, and Charging Walls
The biggest shift in wall storage over the past few years is consolidation: modular ecosystems now combine rails, panels, hooks, baskets, shelves, and cabinets in one adjustable platform, so you rearrange holders without re-drilling the wall. Before buying into any proprietary system, check accessory availability, replacement cost, and whether other brands’ components fit. Proprietary lock-in is a real cost.
3D-printed holders have quietly become a maker-shop staple. Custom mounts for specific tools, batteries, and chargers cost pennies of filament once you own a printer — but material strength, heat resistance, and print orientation matter. A holder printed in the wrong orientation for a 6-pound tool will delaminate at the layer lines. PETG printed with layers running perpendicular to the load holds up; cheap PLA near a heat source does not.
Wall-mounted charging stations consolidate batteries and chargers in one zone and clear the workbench, which I consider the single best upgrade for a cordless-heavy shop. Follow the battery manufacturer’s guidance on ventilation and never enclose chargers in a sealed cabinet.
Two caveats on the trend list. First, integrated power and lighting — outlets and task lights built into storage layouts — is genuinely convenient, but adding or modifying electrical circuits must comply with local code, and hardwired work is a job for a licensed electrician. Don’t improvise 120V behind a cabinet. Second, “mobile-to-wall” systems that let tool cases dock on wall racks are excellent if you already own that battery platform; they’re an expensive commitment if you don’t.
Frequently Asked Questions
Is pegboard strong enough for power tools?
Sometimes. Hardboard pegboard holds lighter cordless tools when the panel is properly framed and the hooks are rated for the weight, but heavier tools like a circular saw or nailer belong on reinforced metal pegboard, French-cleat holders, shelves, or dedicated brackets. Remember the system’s capacity includes the panel, its framing, and the fasteners — not just the hook’s rating.
Can I mount wall storage directly to drywall?
Only for genuinely light items, using anchors rated for your specific drywall assembly. Anything heavier — cabinets, lumber racks, tool-laden shelves — must fasten into wood studs, masonry, or a properly installed structural backer. Drywall alone is not a structural support, no matter how good the anchor claims to be.
Are French cleats stronger than pegboard?
For heavy loads, yes. French cleats handle custom cabinets and heavy holders far better than pegboard, provided the cleats are properly sized and anchored into framing. Pegboard still wins for numerous light tools you rearrange often. Many woodworkers run both — cleats for the heavy stuff, pegboard for hand tools.
How deep should shop shelves be?
For hand tools, cans, and small containers, 10–12 inches is the sweet spot — everything stays visible and reachable. Deeper shelves suit bulky equipment but invite stacking and hidden clutter. Also make sure shelf depth doesn’t restrict movement around benches, vehicles, or walkways.
What’s the most affordable wall storage setup?
A properly framed hardboard pegboard, basic solid-shelf brackets, and labeled reused containers — think deli tubs and mason jars — can organize a small shop for under $100. Just budget for the hidden costs: spacers, framing lumber, anchors, hooks, bins, and brackets often exceed the panel price itself.
How often should I inspect mounted storage?
Check after installation, after any major layout change, and then every few months. Look for loose fasteners, bent hooks, cracked panels, sagging shelves, corrosion, and damage around mounting points — and re-tighten before a problem becomes a falling tool.
Conclusion
If you take one thing from this guide, make it this: plan the whole wall before drilling the first hole — inventory your tools, mark your studs, mock up positions with tape, and deliberately leave room to grow. The best wall storage system is the one sized to your actual tools and your actual walls, not the one with the boldest load-rating sticker.
Start small this weekend: one cleat panel or pegboard section over the bench, hung into studs, holding your ten most-used tools. Watch how your workflow changes. That first panel is contagious — and a month from now, you’ll walk into a shop where the floor is for standing, not storing.
Fall yard work Picks
leaf blowers
As an affiliate, we earn on qualifying purchases.