
TL;DR
Get ready for Prime Big Deal Days — try Prime free
Exclusive member deals on October 6–7, plus fast free delivery. Cancel anytime.
Start your free trialAs an affiliate, we earn on qualifying purchases.
Wall-mounted storage turns dead vertical space into usable shop capacity and can cut wasted search-and-stumble time by up to 30%. The formula is simple: anchor into studs, pick the right system per tool category (pegboard for hand tools, slatwall for flexibility, racks for clamps and power tools), and hang everything within the ergonomic zone between your knees and shoulders. Heavy items go low, dust-sensitive gear goes in cabinets, and you re-zone the layout every few months as your workflow changes.
I spent two years tripping over a floor-standing tool cabinet in a garage shop that measured exactly 20 by 22 feet. Two years of moving the same stack of clamps three times per project. The fix wasn’t a bigger shop — it was the four walls I’d been ignoring.
Wall-mounted storage is the cheapest square footage you’ll ever add to a workshop. A few sheets of pegboard, some 2×4 framing, and a Saturday with a stud finder can put 30–40 hand tools within arm’s reach and clear your bench and floor completely. Werkbericht’s shop data puts the efficiency gain at up to 30% — mostly from not hunting for the damn 3/8-inch wrench.
This guide walks through the systems, the anchoring math, the layout logic, and the honest budget-versus-pro-tier tradeoffs. Everything here comes from a working garage shop, not a catalog.
A 4×8 pegboard panel with furring-strip framing costs about $95–100 in materials and stores 30–40 hand tools in 32 square feet of wall.
Anchor every wall-mounted system into studs with 3-inch structural screws — drywall-only mounting is the number one cause of storage failure.
Match the system to the load: pegboard for light hand tools, French cleats for 50+ pound holders, fixed shelves for bins and heavy stock.
Organize walls by workflow station, not tool type — everything the miter saw needs hangs within one step of the miter saw.
Keep heavy items below waist height, dust-sensitive precision tools in closed cabinets, and run a 15-minute re-zone every three months.
How to Organize Your Workshop with Wall-Mounted Storage
Wall-mounted storage turns dead vertical space into usable shop capacity — the cheapest square footage you’ll ever add. A few sheets of pegboard, some 2×4 framing, and a Saturday with a stud finder can put 30–40 hand tools within arm’s reach and clear your bench and floor completely.
Why Walls Beat Floors
Your walls are the only part of the shop that never gets cluttered, never gets sawdust piled on it, and never needs sweeping. Floor space is what everything else competes for — outfeed room, staging room, walking paths. Wall space has exactly one competitor: a window.
The Kitchen Principle
Cooks store knives on magnetic strips above the station where they’re used. Speed under pressure is the reason — a workshop runs on the same physics, just slower. Twenty tool retrievals at fifteen wasted seconds each is five minutes of pure loss per project.
Momentum, Not Tidiness
Before: a five-minute excavation of clamps and folding stands before every crosscut. After a clamp rack and tool wall: thirty seconds. The real payoff is seamless transitions between cutting, measuring, and assembling.
Safety by Elevation
Tools on the floor or balanced on bench edges are trip and falling-object hazards. A tool on a dedicated hook can’t land on your foot, can’t trip you mid-carry, and can’t get buried under a drop cloth.
Pegboard vs. Slatwall vs. Shelves
The tradeoff at the heart of every choice: flexibility, load capacity, cost — pick two. Pegboard is cheap and endlessly rearrangeable but can’t hold much. Fixed shelves carry enormous weight but reorganize never. French cleats and slatwall pay for the middle ground.
| System | Best For | Load Capacity | Cost per 4×8 ft | Flexibility |
|---|---|---|---|---|
| 1/4″ Pegboard | Hand tools, small bins | Light — 1–5 lbs per hook | $15–30 | High — move hooks freely |
| Slatwall (MDF/PVC) | Mixed hand & power tools | Medium — 15–25 lbs per cleat | $50–120 | Very high — hooks slot anywhere |
| French Cleat (plywood) | Heavy cabinets, tool holders | High — 50+ lbs per cleat | $25–40 DIY | High — hang anything you build |
| Fixed Shelf (2×4 + ply) | Bins, finishes, lumber offcuts | High — 100+ lbs per shelf | $30–50 | Low — shelves stay put |
| Wall Cabinet | Dust-sensitive, measuring tools | Medium | $60–200 | Low — but protects contents |
Anchoring Done Right: Weight You Can Trust
Wall-mounted storage fails at the fastener, not the shelf. Drywall-only mounting is the number one cause of failure — anchor every system into studs with 3-inch structural screws. Hang a 12-lb circular saw on one 1/4-inch pegboard hook and the hole will oval out within a month; a French cleat transfers weight into shear along its whole length.
The Ergonomic Zone: Knees to Shoulders
Organize walls by workflow station, not tool type — everything the miter saw needs hangs within one step of the miter saw. Heavy items go low, dust-sensitive precision gear goes in closed cabinets, and prime hook real estate stays between knee and shoulder height.
Heavy & Bulky
Clamps, power tools, lumber offcuts. Keep weight low to prevent injury and make lifting natural.
Daily-Driver Hand Tools
The 30–40 tools you touch every project: wrenches, chisels, tape measures, squares — within arm’s reach, silhouette-labeled on pegboard.
Light & Rarely Used
Seasonal gear, finishing supplies, empty bins. Dust-sensitive precision tools move into closed wall cabinets instead.
From Bare Wall to Working System
One Saturday, in order. Each step builds on the last — anchor first, then match systems to loads, then zone by workflow.
Find & Mark Studs
Stud finder, chalk lines, every anchor point mapped before a single hole is drilled.
Frame & Mount Panels
Furring-strip framing, 3″ structural screws into studs. Never drywall-only.
Match System to Load
Pegboard for hand tools, cleats for 50+ lb holders, shelves for bins and stock.
Zone by Workflow
Hang tools at the station where they’re used — one step from the miter saw.
Re-Zone Quarterly
Fifteen minutes every three months keeps the layout tracking your workflow.
The Formula, Condensed
Everything above compresses into five rules from a working 20×22-foot garage shop — not a catalog.
A 4×8 pegboard panel with furring-strip framing costs about $95–100 in materials and stores 30–40 hand tools in 32 square feet of wall.
Anchor every wall system into studs with 3-inch structural screws — drywall-only mounting is the number one cause of storage failure.
Match the system to the load: pegboard for light hand tools, French cleats for 50+ pound holders, fixed shelves for bins and heavy stock.
Organize walls by workflow station, not tool type — everything the miter saw needs hangs within one step of the miter saw.
Keep heavy items below waist height, dust-sensitive precision tools in closed cabinets, and run a 15-minute re-zone every three months.
The fix was never a bigger shop — it was the four walls being ignored. A standard 1/4-inch pegboard panel with hooks and bins costs under $40 for a 16 ft² starter wall.
Why Walls Beat Floors: The Math on Reclaimed Shop Space
Your walls are the only part of the shop that never gets cluttered, never gets sawdust piled on it, and never needs sweeping. A single 8-foot by 4-foot wall section gives you 32 square feet of storage without consuming one inch of floor. Why does that matter so much in a small shop? Because floor space is what everything else competes for. Your table saw needs outfeed room, your assembly needs staging room, and you need walking paths between them. Wall space has exactly one competitor — a window — and even that is negotiable. In a two-car-garage shop, hanging tools and materials on walls typically frees up 20–30 square feet of floor, and that’s the difference between easing a full sheet of plywood through the shop and doing a three-point-turn with it on a dolly.
Think of it like a restaurant kitchen. Cooks don’t store knives in drawers across the room; everything lives on magnetic strips and rail hooks above the station where it’s used. The reason is speed under pressure: during a dinner rush, four seconds of searching per tool compounds into minutes of missed tickets. A workshop runs on the same physics, just slower. If you handle a tool twenty times per project and each retrieval costs you an extra fifteen seconds of drawer-digging, that’s five minutes of pure waste per project — times every project you’ll ever build.
The contrast is dramatic. Before wall storage, my miter saw sat on a folding stand with clamps leaning against the wall behind it — every crosscut meant a five-minute excavation: move the clamps, unfold the stand, hunt the tape measure, repeat in reverse when I was done. After hanging a clamp rack and tool wall beside the saw, the same operation takes thirty seconds. That’s the real payoff: not tidiness, but momentum between operations. Woodworking is mostly transitions — between cutting and measuring, between cutting and assembling — and wall storage is what makes those transitions seamless instead of disruptive.
There’s a safety angle too, and it’s not theoretical. Tools stacked on the floor or balanced on bench edges are trip hazards and falling-object hazards. Picture carrying a 40-pound glue-up across the shop when your heel catches a clamp lying on the concrete — you’re instinctively going to sacrifice the workpiece to catch your balance. A tool that hangs on a dedicated hook can’t land on your foot, can’t trip you mid-carry, and can’t get buried under a drop cloth and get painted over. The wall doesn’t just store tools; it removes them from the chaos zone where damage actually happens.
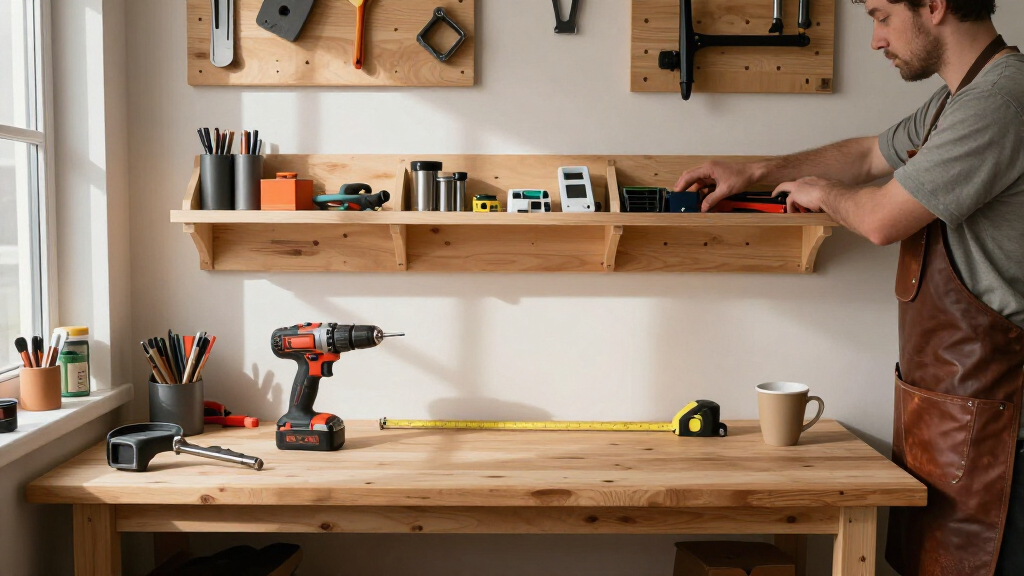
wall-mounted pegboard tool storage
As an affiliate, we earn on qualifying purchases.
As an affiliate, we earn on qualifying purchases.
Pegboard vs. Slatwall vs. Shelves: Which System Fits Which Tools
Matching the storage system to the tool is what separates a shop that works from a shop that just looks organized. The tradeoff at the heart of every choice is the same one: flexibility versus load capacity versus cost — pick two. Pegboard is cheap and endlessly rearrangeable but can’t hold much. Fixed shelves hold enormous weight but reorganize never. French cleats and slatwall sit in between, paying for the middle ground with higher cost or build time. Here’s the breakdown I use after fifteen years of rearranging my own walls.
| System | Best For | Load Capacity | Cost per 4×8 ft | Flexibility |
|---|---|---|---|---|
| 1/4″ pegboard | Hand tools, small bins | Light (1–5 lbs per hook) | $15–30 | High — move hooks freely |
| Slatwall (MDF or PVC) | Mixed hand tools, power tools | Medium (15–25 lbs per cleat) | $50–120 | Very high — hooks and shelves slot anywhere |
| French cleat (plywood) | Heavy cabinets, tool holders | High (50+ lbs per cleat) | $25–40 (DIY) | High — hang anything you build |
| Fixed shelf (2×4 + plywood) | Bins, finishes, lumber offcuts | High (100+ lbs per shelf) | $30–50 | Low — shelves stay put |
| Wall cabinet | Dust-sensitive items, measuring tools | Medium | $60–200 | Low, but protects contents |
Pegboard is the default for a reason: it’s cheap, it lasts 10+ years with basic care, and moving a hook takes two seconds — which matters more than it sounds, because the layout you draw on day one is never the layout you end up needing. But pegboard has limits, and they show up as oval-shaped holes. Hang a 12-pound circular saw on a single 1/4-inch pegboard hook and you’ll hear the hole oval out within a month, because every time you lift the saw off, you’re levering a small amount of MDF out of shape. That’s where French cleats earn their keep — two 45-degree beveled strips of 3/4-inch plywood that lock together, transferring weight into shear along the whole length of the cleat instead of concentrating it on one peg hole. It’s the same reason a picture rail holds a heavy mirror that a single nail wouldn’t. I hang my grinding station, router cabinet, and clamp racks entirely on French cleats; when I rebuilt my sharpening area last spring, the whole wall reorganized in twenty minutes because every holder just lifted off and re-hung elsewhere.
Slatwall splits the difference. It costs more than pegboard but accepts heavier cleats and looks clean enough that it doesn’t scream “garage” — which is a real consideration if your shop shares space with a laundry area or a household door. The other underrated factor: slatwall cleats mount with a simple downward click, so reconfiguring doesn’t leave a field of empty peg holes staring at you. If you’re renting or you reconfigure yearly, modular slatwall pays for itself in flexibility; if you’re settled and handy with a saw, French cleats deliver 80% of the same adaptability at a third of the price and a fun afternoon of table-saw work.
As an affiliate, we earn on qualifying purchases.
Anchoring Done Right: Studs, Fasteners, and Weight You Can Trust
Wall-mounted storage fails at the fastener, not the shelf. Every mounting method that matters comes down to one rule: anchor into studs or masonry, never drywall alone. A drywall anchor rated at 30 pounds holds 30 pounds in perfect lab conditions — add vibration from a compressor two feet away and a hooked tool getting yanked off its hanger, and that rating is fiction.
Wood studs sit 16 inches on center in most houses (sometimes 24). Find them with a stud finder, mark them with painter’s tape, and drive 3-inch structural screws — not drywall screws — through shelving cleats and into the stud face. Drywall screws are hardened and brittle; they snap under shear load. Structural screws cost three times more and are worth every cent.
For concrete or block walls, use sleeve anchors or wedge anchors sized for the load, and wear safety glasses when drilling — sleeve anchors can spit concrete chips like little bullets.
- Find and mark every stud in the wall section (16″ or 24″ on center).
- Level a line where the top cleat or rail will sit.
- Pre-drill, then drive 3″ structural screws into at least two studs per 4-foot span.
- Hang the system, load it gradually, and check for gap or bow at the wall.
- Re-torque screws after two weeks — wood and drywall compress under sustained load.
Warning: if you’re mounting into an unknown wall that might contain wiring or plumbing, or the wall is load-bearing framing you’d need to modify, stop and get a licensed contractor or electrician to look first. Cutting into a live circuit is a genuinely bad afternoon.
Weight distribution matters as much as anchoring. Keep heavy items — lumber, power tools, finish quarts — at or below waist height. A falling random orbit sander bruises; a falling stack of maple offcuts breaks bones.
As an affiliate, we earn on qualifying purchases.
Layout by Zones: Hang Tools Where You Actually Use Them
Your wall layout should mirror your workflow, not a catalog photo. The organizing principle is simple: group tools by the station where they’re used, and hang them inside the ergonomic zone between your knees and shoulders. Anything above shoulder height should be light and rarely used; anything below knee height should be heavy.
Walk through your last project mentally. If you rip a board, walk to the bench for a pencil, walk back for the square, then dig through a drawer for calipers — those three tools belong on the wall at the saw, within one step. My layout went from useless to functional the day I stopped organizing by tool type (“all measuring tools together”) and started organizing by operation (“everything the miter saw station needs”).
Three rules that hold up in any small shop:
- Saw station wall: pencils, combination square, tape measure, blade wrenches, and a cleat for the dust collector hose.
- Bench wall: pegboard with chisels, mallets, drivers, and pliers — outlines traced in marker so missing tools jump out instantly.
- Assembly zone: clamps on a vertical pipe-clamp rack and glue bottles on a small shelf, because assembly is when you have both hands full.
Trace tool outlines on pegboard with a silver marker. It feels fussy until the day you notice the chisel missing at a glance instead of at the end of a project. That one habit has saved me more lost tools than any lock on the door.
Give dust some respect too. Open pegboard in a shop running even a modest 650-CFM dust collector still collects a film. Precision tools — calipers, dial indicators, squares — live in a closed cabinet with a door. Rough tools can wear the dust.
As an affiliate, we earn on qualifying purchases.
Building Your First Tool Wall: A Weekend, About $100, No Special Skills
You can build a genuinely capable tool wall in a weekend for around $100, and it will outperform most $400 store-bought systems. Here’s the exact build I’d repeat in any new shop.
- Pick the wall: the one behind your workbench, ideally 8 feet of clear span with no outlets in the way.
- Frame it flat: rip 2×2 furring strips and screw them to the studs, creating a 1.5-inch air gap so pegboard hooks have clearance and the panel sits rigid.
- Mount 1/4-inch pegboard (or 3/8-inch if you plan to hang anything over 5 pounds per hook) with 1-inch screws into the furring strips, 12 inches on center.
- Add one French cleat rail across the top for heavier DIY holders — a holder for the circular saw, a shelf for the nailer kit.
- Load tools by frequency: daily drivers at chest height, occasional tools high, heavy and seasonal low.
My first tool wall was exactly this build: one sheet of pegboard, two 8-foot 2x2s, a box of structural screws, and $25 of assorted hooks and small bins. Total cost landed around $95, and it cleared an entire floor-standing cabinet out of the shop. The cabinet went on Craigslist; the wall stayed.
Budget versus pro tier, honestly: the store-bought slatwall systems are nicer looking and faster to install, and the metal-locker-grade wall cabinets will outlive you. But for a small garage shop, DIY plywood and pegboard gets you 90% of the function at 25% of the cost. Spend the savings on a good stud finder and structural screws — the parts that actually keep everything on the wall.
Keeping It Working: Maintenance and When to Re-Zone
A tool wall is a system, not a project — it needs tune-ups. Plan on a 15-minute reorganization pass every three months. Move the hooks that migrated, re-hang the tools that ended up on the bench, and pull anything you haven’t touched in a year. If a tool hasn’t left its hook in twelve months, it belongs in a labeled bin in deep storage, not prime wall real estate.
Check the hardware too. Screws loosen as wood compresses and as you yank tools off hangers. A quick once-over with a driver each season catches a failing cleat before it dumps your router collection on the floor. Wipe pegboard down with a dry cloth during the pass — dust buildup in the holes makes hooks sloppy over time.
Re-zone when your work changes. When I added a benchtop mortiser, the chisel wall had to move two feet left, and the pegboard layout from the previous year was suddenly wrong. That’s the argument for pegboard and French cleats over fixed shelves: reconfiguration takes minutes, not demolition. Modern modular systems lean into this — some now add LED task lighting, integrated outlets, even digital inventory tracking on the high end. For most home shops, a marker outline and a quarterly review do the same job for free.
A storage system you never revisit becomes a wall of forgotten tools. The quarterly pass is what keeps the wall a tool, not decoration.
Frequently Asked Questions
What is the best wall-mounted storage for small hand tools?
A 1/4-inch or 3/8-inch pegboard with assorted hooks and small plastic bins handles most hand tools — screwdrivers, wrenches, pliers, chisels — for under $50 in panel and hooks. Trace each tool’s outline in marker so a missing tool is obvious at a glance. For anything heavier than about 5 pounds per hook, move up to a French cleat or slatwall cleat.How much weight can wall-mounted shelves actually hold?
It depends entirely on the anchoring. A 3/4-inch plywood shelf on 2×4 cleats screwed into studs with 3-inch structural screws can hold 100+ pounds per shelf. The same shelf hung with drywall anchors might fail at 30. Screw into at least two studs per 4-foot span, and re-torque the fasteners after two weeks because wood and drywall compress under sustained load.Is pegboard or slatwall better for a garage workshop?
Pegboard wins on cost — $15–30 per 4×8 sheet versus $50–120 for slatwall — and it’s fine for light hand tools. Slatwall wins on weight capacity (15–25 pounds per cleat) and clean looks, and it accepts heavier hooks and shelves. In a humid garage, choose PVC slatwall or sealed pegboard, since bare MDF pegboard swells and sags in moisture.How do I keep dust off tools stored on open walls?
Run your dust collection on every machine operation — even a 650-CFM collector makes a real difference — and keep precision tools like calipers, squares, and dial indicators in a closed wall cabinet with a door. Rough hand tools can handle a dust film; a monthly wipe-down with a dry cloth keeps pegboard holes tight and hooks snug.Where should heavy tools and materials be mounted on the wall?
Below waist height, always. A falling hand plane dents the floor; a falling stack of hardwood offcuts breaks a foot. Reserve the ergonomic zone between knee and shoulder for the tools you grab daily, put light and rarely used items above shoulder height, and mount lumber, power tools, and finish containers on low racks and shelves.Can I install wall storage myself, or do I need a professional?
Basic pegboard, cleat, and shelf installation into known wood studs is a straightforward DIY job with a stud finder, drill, and level. Call a licensed contractor if the wall is concrete you’re unsure about anchoring into, if you suspect wiring or plumbing behind the drywall, or if the project involves electrical work like adding outlets or lighting — and always shut off power at the breaker and wear safety glasses before drilling.Conclusion
Start with one wall — the one behind your bench — and build it this weekend. One sheet of pegboard, two furring strips, a box of structural screws, and honest anchoring into studs will do more for your shop’s usable space than any rolling cabinet at four times the price.
The best shop wall is never finished; it’s a living map of how you work. Build it sturdy, re-zone it quarterly, and trace those tool outlines. Six months from now, when you reach for a chisel without looking up from your work, you’ll wonder why you waited.
Fall Picks
fall essentials
As an affiliate, we earn on qualifying purchases.