
TL;DR

Get business pricing on tools and workshop supplies
- Business-only prices and quantity discounts
- Tax-exempt purchasing
- Multiple users, one account, clear invoices
Choosing the right lighting for safety and precision means matching lux levels to the task, spreading light evenly, controlling glare, and using low-flicker fixtures with suitable color rendering. Aim for roughly 100–200 lux in circulation areas and 500–1,000 lux or more at precision workstations, then verify those levels at the work surface rather than trusting lumens or wattage alone.
A bright workshop can still hide a spinning cutter. One exposed LED, a polished machine table, and the wrong viewing angle can produce a white flare that wipes out the very detail you need to see. The room feels bright, yet the cut line disappears into a patch of sharp, silvery glare.
Choosing useful lighting starts with a simple shift: effective lighting is a safety system, not merely a matter of brightness. The right setup helps people detect offcuts on the floor, read a steel rule without leaning forward, distinguish brown from red wiring, and spot sanding scratches before the finish makes them glow like scratches in black glass.
You will learn how to set practical light levels, compare fixture specifications, place task lights, control shadows, and check the finished installation under real working conditions. The goal is not to turn your garage into an operating theater. It is to put the right light in the right place, whether you are breaking down plywood, sharpening a plane iron, wiring a control box, or inspecting a sprayed cabinet door.
Measure illuminance at the actual work plane: roughly 100–200 lux may suit circulation, while precision work often needs 500–1,000 lux or more.
Use evenly spaced ambient fixtures plus adjustable task lights; adding raw lumens will not fix glare, reflections, or body shadows.
Choose CRI 90 or higher for finishing, wiring, inspection, and other work where accurate color affects quality or safety.
Specify verified low-flicker lighting around rotating machinery because temporal modulation can make moving parts appear slower or stationary.
Test the installation with machines running, daylight changing, doors open, and workers in their normal positions.
Workshop visibility field guide
Choosing the Right Lighting for Safety and Precision
Effective lighting is a safety system, not merely a matter of brightness. Match illuminance to the task, spread light evenly, control glare and shadows, and verify performance where the work actually happens.
Put the right lux where the task lives.
Lumens describe light leaving a fixture. Lux describes light arriving on a surface. Mounting height, beam spread, wall color, dirt, cabinets, and your own body determine how much usable light reaches the bench.
Illuminance rises with visual demand.
Use these ranges as practical starting points, then confirm applicable workplace standards and individual needs.
Measure under real working conditions.
A bright reading beneath a ceiling fixture can hide a weak zone at the front edge of the bench.
Five numbers. Five different jobs.
No single specification proves that a fixture will produce safe, accurate light. Compare output, delivered illuminance, color quality, color appearance, and temporal stability together.
| Specification | What it tells you | Practical workshop use | Useful target or check |
|---|---|---|---|
| Lumens | Total light leaving the source | Compare fixture output, then assess distribution and mounting height. | Output alone is insufficient |
| Lux | Light reaching one square metre | Measure on the saw table, bench, floor, or inspection surface. | 100–200 to 1,000+ lux |
| CRI | How faithfully colors appear | Important for wiring, finishing, printing, matching, and inspection. | 80 general; 90+ critical |
| Color temperature | Whether white light appears warm or cool | Neutral-to-cool light often supports detail work and alertness. | Often 4,000–5,000 K |
| Flicker performance | How steadily the source emits light over time | Reduces discomfort and misleading motion around rotating equipment. | Verified low-flicker driver |
Important distinction: wattage measures electrical consumption, not brightness, coverage, color quality, or visibility at the task.
Remove glare and shadows before adding lumens.
One exposed LED above a polished machine table can create a white flare that erases a cut line. Useful lighting protects contrast instead of overwhelming it.
Build an even ambient field.
Use sensible spacing and broad distribution to avoid bright islands beside dark corners. Gradual transitions reduce repeated visual adaptation.
Shield the source.
Diffusers, deeper housings, matte finishes, and careful sightlines prevent small, intense LEDs from becoming distracting points of glare.
Aim across the work.
Place adjustable light at an angle that reveals texture and markings without reflecting directly from metal, glass, screens, or glossy coatings.
For right-handed work
Position the task light above and to the left when practical, so the working hand is less likely to block the beam.
For reflective surfaces
Shift the lamp or viewing angle until the reflection moves away from the cut line, scale, bevel, defect, or inspection area.
Design from the task outward.
A robust lighting plan connects the visual demand to a measurable target, then tests the installed result under the same conditions in which people will work.
Define the hazard, detail, color, surface, and movement that must be seen.
Set lux, uniformity, CRI, color temperature, and flicker requirements.
Coordinate ambient and task fixtures around sightlines and reflections.
Check the work plane with people, machines, doors, and extraction in place.
Clean lenses, track depreciation, test backup systems, and replace failed drivers.
The best fixture is not the brightest one. It is the one that makes the relevant detail consistently visible without glare, misleading motion, or hard shadow.
Test the room as people actually use it.
Commissioning should reproduce real work: changing daylight, open doors, running machines, normal posture, reflective materials, and the gradual loss of output caused by dirt and aging.
Start With the Lux Level Your Work Actually Needs
Choosing the right lighting for safety and precision starts by measuring how much light reaches the task, then matching that reading to the work. Basic circulation often needs roughly 100–200 lux, while machining, layout, inspection, and fine assembly commonly call for 500–1,000 lux or more, subject to local standards and worker needs [1].
Think of lumens as water leaving a hose and lux as the water landing in your bucket. A fixture may advertise 8,000 lumens, but mounting height, beam angle, dirty lenses, dark walls, and fixture spacing decide how much reaches your bench. Watts only describe electrical consumption; they do not tell you whether a knife line is visible at the work plane.
In a typical one-car shop, you might measure 650 lux directly below a ceiling fixture but only 240 lux at the front edge of the bench. Your shoulders block part of the beam, a wall cabinet shades the surface, and the dark rubber mat absorbs stray light. A modest adjustable task lamp can fix that weak zone more effectively than replacing every ceiling fixture.
- Map the work areas. Mark walkways, storage, machine tables, assembly benches, sharpening stations, and finishing surfaces.
- Set a target range. Reserve higher levels for fine layout, inspection, wiring, and machine setup.
- Measure at working height. Place a lux meter on the bench, saw table, inspection surface, or floor where visibility matters.
- Test normal positions. Stand where you work, open cabinet doors, switch on dust collection, and check whether your body creates a dark pocket.
- Compare the result with local rules. Regulated workplaces and high-risk tasks may require a qualified lighting professional.
A phone light-meter app can help you compare one location with another, but its sensor and calibration may produce shaky absolute readings. For final verification, use a calibrated meter. The useful number is illuminance at the actual work surface, not the brightest reading you can find in the room.
As an affiliate, we earn on qualifying purchases.
Use This Spec Check to Avoid Buying the Wrong Fixture
Choosing the right lighting for safety and precision gets easier when you separate specifications that sound similar. Compare lumens, lux, CRI, color temperature, and flicker by the job each one performs; no single number proves that a fixture will produce safe, accurate light at your bench.
| Specification | What it tells you | Practical workshop use |
|---|---|---|
| Lumens | Total light leaving the source | Useful for comparing fixture output, but not coverage at the bench |
| Lux | Light reaching one square metre | Measure it on the saw table, bench, floor, or inspection panel |
| CRI | How faithfully colors appear | Choose 80 for many general tasks and 90 or higher for finishing, wiring, or inspection |
| Color temperature | Whether white light looks warm or cool | About 4,000–5,000 K gives many work areas a clear neutral-to-cool appearance |
| Flicker performance | How steadily the source emits light over time | Low-flicker equipment reduces discomfort and misleading motion around rotating tools |
Suppose you are matching walnut drawer fronts after finish. A high-output fixture with a CRI of 70 may give you plenty of lux while muddying the warm red-brown difference between two boards. Under a CRI 90-plus source, the mismatch can jump out before glue-up rather than after the oil hits and the color blooms.
Color temperature does not measure brightness or color accuracy. A 5,000 K lamp can have weak color rendering, while a 4,000 K lamp can reveal subtle grain and finish defects beautifully. For color-critical work, conventional CRI is only a starting point because saturated red rendering may expose differences that the average CRI value hides [2].
Check the photometric file or distribution chart when one is available. A broad batten spreads light differently from a narrow high-bay fixture, even if both claim the same lumen output. In a garage with an eight-foot ceiling, a wide distribution usually gives smoother coverage and fewer hard pools than an intense beam designed for a much taller building.
As an affiliate, we earn on qualifying purchases.
Remove Glare and Shadows Before Adding More Lumens
More light is not always safer. Improve visibility by shielding exposed sources, spreading ambient light evenly, and adding adjustable task lighting from an angle that avoids reflections and hand shadows. This approach raises useful contrast without creating bright islands, black corners, or painful glare across the room.
Your eyes behave like a camera changing exposure. When you glance from a bare LED strip to a dark planer bed, your vision needs time to adapt, and small hazards vanish during that adjustment. A diffuser, deeper fixture housing, pale matte ceiling, and closer fixture spacing can create a calmer field than one fierce lamp in the middle.
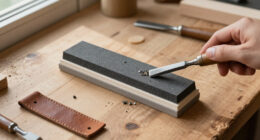
At a sharpening station, an overhead light directly behind you throws your head and shoulders across the stone. Move an adjustable lamp above and to the left if you work right-handed, and its beam skims across the bevel without your hand blocking it. The scratch pattern becomes a faint silver fan instead of a gray blur.
- Shield the source so LEDs do not sit directly in your normal sightline.
- Use diffusers where small, intense diodes create pinpoints of glare.
- Angle task lights across the work instead of bouncing them straight back from metal, glass, screens, or glossy finish.
- Light from more than one direction around machine setup areas, while keeping enough shadow to read depth and surface shape.
- Choose matte finishes for nearby walls, machine guards, and bench accessories where practical.
Do not erase every shadow. A shallow raking light can expose tear-out, ripples, and sanding swirls that flat frontal lighting misses. During finish inspection, move a broad lamp low across the panel; defects appear as dark waves in a bright amber sheen. You are using shadow as a measuring tool, much like blue layout dye reveals a scribed line.
Lighting for safety works through contrast. You need the blade, workpiece, controls, floor hazards, and background to remain visually separate—not merely flooded with light.
As an affiliate, we earn on qualifying purchases.
Choose Color and Flicker Performance That Protects Accuracy
Choosing the right lighting for safety and precision means selecting a stable source that shows colors honestly. For many workshops, 4,000–5,000 K provides a clean working appearance, CRI 80 suits general activity, and CRI 90 or higher serves finishing, inspection, printing, healthcare tasks, and color-coded electrical work [1].
A cool lamp does not automatically reveal more detail. Color temperature describes the visual shade of white, from warm cream to crisp blue-white; it says nothing about glare or flicker. A badly shielded 5,000 K fixture can feel like a sheet of ice overhead, while a diffused 4,000 K fixture produces a quiet, even field with clearer edges.
Imagine tracing a fault in a crowded control box. Under weak color rendering, brown, red, and orange insulation can drift toward the same dull rust tone. That is inconvenient on a hobby circuit and dangerous in regulated electrical work, where you should switch off and verify isolation, use suitable PPE, and bring in a licensed electrician for work beyond your competence or local authorization.
Flicker deserves the same attention as color. Poor LED drivers or incompatible dimmers can pulse rapidly even when your eyes do not see an obvious flash. Around a spinning chuck, blade, or fan, that pulsing may create a stroboscopic effect that makes movement look slower or momentarily stationary.
Test fixtures with the intended dimmers and controls before fitting out the entire shop. Look for manufacturer data on temporal light modulation, ask for verified low-flicker performance, and observe machinery at different speeds. A phone camera can reveal dark rolling bands in some cases, but it cannot replace proper measurements because the camera shutter and frame rate alter what you see.
If color matching drives your work, inspect samples under the shop lights and the light where the finished piece will live. A cherry cabinet may glow copper under warm household lamps but look flatter under cool shop LEDs. That comparison keeps shop accuracy tied to the real destination.
adjustable ambient workshop lights
As an affiliate, we earn on qualifying purchases.
As an affiliate, we earn on qualifying purchases.
Place Each Light Where Your Body and Machines Cannot Defeat It
Good placement combines even overhead lighting with task lights aimed from outside your line of sight. Position fixtures so your head, hands, fences, guards, and open cabinet doors do not block the beam. Test every workstation from the posture and direction you actually use, not from an empty room.
Over a table saw, two parallel fixture rows usually control shadows better than one row centered over the blade. With light arriving from both sides, your body cannot turn the fence scale into a dark stripe when you stand at the feed position. Keep fixtures clear of long stock paths and account for the dusty haze that a weak extraction setup can throw into a bright beam.
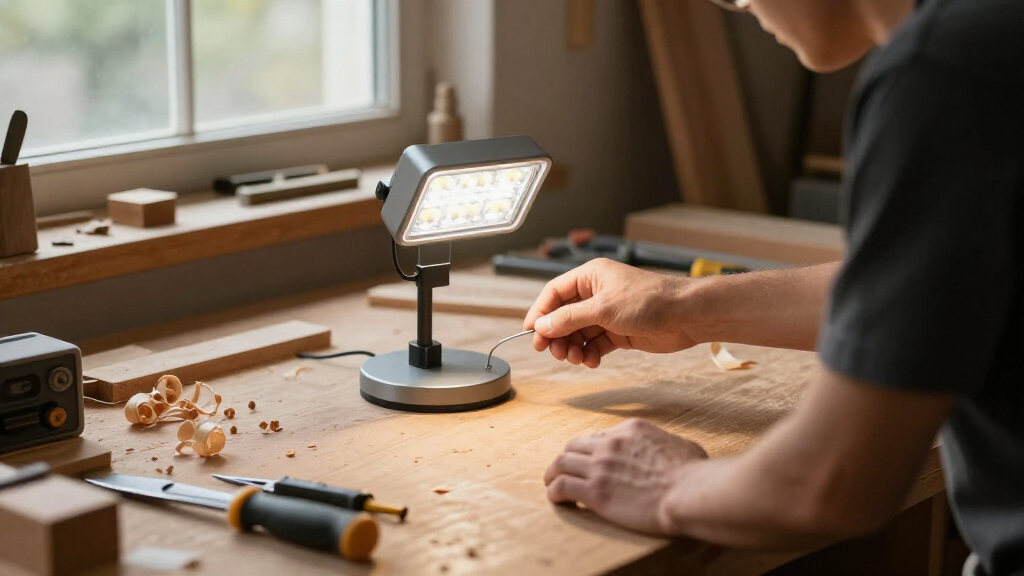
A bench needs a different arrangement. Broad ambient light lets you move safely, while an articulated lamp gives you raking light for dovetails, carving, and surface inspection. If you are right-handed, placing the task lamp above and to your left often keeps your hand from throwing a shadow over the pencil line; reverse the arrangement if you are left-handed.
Vertical lighting also matters. A ceiling layout can deliver a fine lux reading on the floor yet leave shelves, tool boards, faces, safety signs, and breaker labels in gloom. Wall-washing light or a carefully placed vertical fixture helps people detect protruding stock and read labels without craning toward a shelf with a handheld torch.
One small garage illustrates the payoff. Four broad ceiling fixtures delivered about 550 lux across most of the assembly area, but the drill-press chuck stayed dark beneath the machine head. A shielded magnetic task light, mounted to the side and aimed across the bit, made the center punch mark snap into view without reflecting into the operator’s eyes.
Keep temporary cords away from walkways and spinning equipment. For new hardwired circuits, modifications near panels, or damp-location wiring, turn off and lock out power where applicable, confirm the circuit is dead, wear suitable PPE, and use a licensed electrician as required by local code and permits.
Build a Lighting System That Survives Dust, Moisture, and Failure
Safe workshop lighting must suit the room, remain clean, and keep critical routes visible during a failure. Select sealed or protected fixtures where dust and moisture reach them, plan routine cleaning, and provide compliant emergency lighting for exits, stairs, firefighting equipment, and controls in workplaces where rules require it.
Fine wood dust turns a clear lens into a beige veil. Even a well-designed fixture loses useful output as dust coats its diffuser, and a layer above the fixture can trap heat around drivers. In a busy shop, tie lens inspection to filter changes or another recurring maintenance job rather than waiting until the room looks dim.
An IP rating describes resistance to solid particles and water under defined test conditions. It does not automatically cover solvent vapor, corrosive chemicals, physical impact, or an explosive atmosphere. A finishing room, wash-down area, cold outbuilding, or space with combustible dust may need equipment selected by a qualified professional for the exact hazard classification.
Emergency planning needs more than a rechargeable torch in a drawer. A power failure can leave offcuts on the floor, a staircase at the back wall, and a machine coast-down area in total darkness. Regulated premises need suitable exit signs, backup power, test records, and fixtures arranged around escape routes and critical safety equipment.
Smart controls can trim wasted energy through occupancy sensing, schedules, dimming, and daylight response. Set them conservatively around machinery. A sensor that loses sight of someone standing still at a bench must not plunge the room into a sudden, sharp silence of darkness; use suitable coverage, delay times, minimum light levels, and manual overrides.
Serviceability affects lifetime cost. A budget fitting with a sealed, nonreplaceable driver may become scrap after one electronic failure, while a repairable fixture can accept a new driver or lens. In a small home shop, you may accept the cheaper unit; over a stairwell or production cell, easy access and replaceable parts earn their keep.
Test the Finished Setup Like You Are About to Make a Cut
Test lighting under real operating conditions at every work surface and normal viewing position. Record lux levels, inspect glare and shadows, run machines, open storage doors, test controls, and simulate loss of normal power where appropriate. A clean-room reading taken before equipment arrives cannot confirm safe performance.
Begin after dark if daylight normally changes the room, then repeat during the day. A south-facing garage door can pour hard sunlight across a polished cast-iron top at noon, while the same area becomes a gray cave in winter. Blinds, diffusing shades, or separate lighting zones can tame that swing without keeping every fixture at full output.
Place the meter where the work happens: on the bandsaw table near the blade, at the front and rear of the bench, on the finishing panel, and on the floor along the exit route. Record the lowest useful readings as well as the average. One bright center point can hide a weak corner that swallows a clamp, cable, or narrow offcut.
Now work through a real job. Mark a line on dark walnut, read a fine steel rule, change a router bit with the machine isolated, and inspect a sanded surface from several angles. Run the dust collector and major machines so you can see whether vibration, airborne dust, or moving guards change visibility.
Ask an older family member or colleague to repeat the test when that person uses the shop. Older eyes often need more light and usually react more strongly to glare. Raising useful illumination, improving vertical light, and softening exposed sources can help more than fitting one dazzling fixture.
Recheck the system after several months. Clean the lenses, compare measurements, test sensor coverage, and inspect emergency batteries according to their required schedule. Lighting ages quietly; a written baseline turns a vague feeling that the shop looks dingy into a maintenance decision backed by numbers.
Frequently Asked Questions
How many lux do I need in a home workshop?
Plan around 100–200 lux for basic movement and roughly 500–1,000 lux or more for detailed bench work, depending on contrast, age, task size, and applicable standards. Measure at the bench or machine table because a ceiling-level estimate says little about the light reaching your cut line.
Are brighter workshop lights always safer?
No. Excess brightness can create glare, harsh reflections, deep contrast, and eye fatigue, particularly around polished steel or glossy finishes. Safer visibility comes from even ambient light, shielded sources, useful contrast, and task lights positioned outside your normal sightline.
Is 4,000 K or 5,000 K better for precision work?
Both can work well, and many people find 4,000–5,000 K clear and comfortable for detail work. Give greater weight to measured lux, glare control, low flicker, and color rendering; a poor 5,000 K fixture will not outperform a well-diffused, high-CRI 4,000 K fixture.
What CRI should I choose for a woodworking shop?
CRI 80 serves many general machine and assembly tasks. Choose CRI 90 or higher when matching boards, inspecting stain, evaluating finish, reading colored wiring, or finding fine surface defects, and examine saturated red performance when color differences carry real weight.
Where should I put a task light at my workbench?
Place it above and to the side, commonly opposite your dominant hand, so your hand and shoulder do not cover the work with shadow. Aim the beam across the surface for layout and finish inspection, and shield the lamp so you cannot see the bright LED directly.
Can LED lighting make rotating machinery look stationary?
Yes. LED drivers with strong temporal modulation can create a stroboscopic effect that makes a rotating part appear slower or briefly still. Use verified low-flicker fixtures, test them with the planned dimmers, keep guards in place, isolate power before adjustments, and never judge machine motion by sight alone.
When do I need IP-rated or specialist workshop fixtures?
Use suitable protected fixtures where dust, moisture, wash-down, cold, heat, vibration, or chemicals reach the lighting. An IP code only covers defined particle and water exposure, so combustible dust, corrosive vapor, impact risk, and hazardous locations require properly certified equipment and qualified professional guidance.
Conclusion
Treat workshop lighting as part of the machine setup. Start with measured lux at the work surface, then correct glare, shadows, color quality, and flicker before chasing a higher lumen number. If the installation involves new fixed wiring, hazardous dust, emergency systems, or regulated premises, bring in licensed electrical and lighting professionals and follow local code, permit, isolation, and PPE requirements.
Your final test is wonderfully plain: can you see the pencil line, blade edge, wire color, floor offcut, and nearest exit without squinting or shifting your head? When every answer is yes, the shop stops feeling merely bright. It feels calm, controlled, and ready for the clean whisper of a sharp tool meeting wood.
Fall yard work Picks
leaf blowers
As an affiliate, we earn on qualifying purchases.