
TL;DR

Get business pricing on tools and workshop supplies
- Business-only prices and quantity discounts
- Tax-exempt purchasing
- Multiple users, one account, clear invoices
Maximizing workshop storage space means going vertical first: pegboard, French cleats, and floor-to-ceiling shelving can double or triple capacity without moving a single wall. Pair that with under-bench drawers, labeled small-parts containers, ceiling racks for bulky items, and a twice-yearly purge, and even a one-car garage shop can hold a full woodworking kit.
My first “workshop” was a 10 x 12 corner of a garage shared with a lawnmower, two bicycles, and a water heater I was legally not allowed to box in. Every project started the same way: a 20-minute excavation to find the clamp that was definitely there last week. Sound familiar?
Here’s the thing I finally learned after a decade of small-shop woodworking: you almost never need more shop — you need better storage. Going vertical alone can double or even triple your storage capacity without expanding your workshop’s footprint by a single inch. That’s not a slogan; it’s geometry. Think of it this way: if your garage floor is 240 square feet, your walls represent another 500-plus square feet of surface that’s currently holding air. A kitchen designer would never leave that much wall bare — neither should you.
This guide walks through how to maximize storage space in your workshop the way a real home-shop woodworker does it: honest about budget builds versus pro-tier systems, specific about dimensions and materials, and realistic about what a small garage shop actually needs. No product roundups, no fluff — just the layout logic and builds that work.
Sort every tool by frequency of use before planning storage — weekly-use tools get prime wall space within arm’s reach of the bench; seasonal items go overhead.
French cleats built from two sheets of 3/4-inch plywood (~$60) can reclaim roughly 150 square feet of hangable storage on a single garage wall, outperforming p…
Convert under-bench voids into drawers or rolling caddies — 20+ cubic feet of dead space under a typical bench is the best storage in the shop.
Label small-parts bins by exact spec ("#8 x 1-1/4 cabinet screws"), never by category word, and store them at point of use.
Run a one-minute daily put-away rule plus a quarterly purge; without a maintenance rhythm, even the best storage system reverts to clutter within a year.
Start With a Brutal Audit: What You Actually Own (and Use)
Before you buy a single shelf bracket, spend one Saturday pulling every tool, screw box, and mystery bucket into the driveway. You cannot plan storage for inventory you haven’t seen in three years. Lay it all out and sort it into three piles: weekly use, monthly use, and seasonal or rarely touched. That third pile is where half your floor space is hiding.
Why frequency — not tool type — is the sorting key: storage design is really a question of retrieval cost. A tool you grab forty times a session can afford to sit two steps from the bench; a tool you touch twice a year can live on a ceiling rack where its awkwardness costs you nothing. When people sort by type instead, everything ends up equally accessible and equally buried — which is another way of saying nothing is accessible. Frequency-based zoning is the difference between a shop that flows and a shop where you walk in circles.
Be honest. The bench grinder you’ve used twice since 2019 doesn’t deserve prime real estate on your main wall. Neither does the router table insert you keep meaning to mount. According to Werkbericht’s workshop-organization reporting, a systematic declutter and categorization pass is the single highest-return step in any storage project — it reduces time spent hunting for tools dramatically and exposes trip hazards you’ve stopped noticing. It also changes what you buy downstream: an honest audit often reveals you already own duplicates you were about to purchase again.
- Pull everything out — yes, everything, into daylight where you can count it.
- Sort by frequency of use, not by tool type. Frequency dictates location.
- Purge or relocate anything unused for over a year — sell it, donate it, or move it to the attic.
- Measure your space: wall lengths, ceiling height, and the clearances you need around machines (my table saw needs 8 feet behind it for sheet goods, and that zone is sacred).
- Sketch a zone map — measuring zone near the bench, finishing zone near ventilation, fasteners at point of use.
The audit stings a little. My driveway audit turned up four tape measures, three partial jars of the same finish, and a biscuit joiner I’d forgotten buying. A friend of mine found two identical block planes — he’d bought the second because he couldn’t find the first. That’s the point: the audit converts embarrassment into floor space, and duplication into store credit.
As an affiliate, we earn on qualifying purchases.
Go Vertical: How Your Bare Walls Become Your Biggest Cabinet
Vertical storage is the highest-capacity move in a small workshop. A standard two-car garage devotes maybe 8% of its surface area to tool storage while the walls stand empty from 4 feet up to the ceiling. Filling that band is like discovering a room you already owned.
Two systems dominate, and choosing between them matters. Pegboard is the budget classic — a 4 x 8 sheet of 1/4-inch pegboard runs about $20, and with 1/8-inch holes on 1-inch centers it handles hand tools beautifully. Its weakness is weight: anything over roughly 10 pounds per hanger sags or tears out. French cleats are the woodworker’s answer — rip a 3/4-inch plywood sheet at 45 degrees, screw one half to the studs, and hang anything from cabinets to tool holders that come off the wall in seconds when your needs change.
The deeper reason French cleats matter isn’t strength — it’s that they make storage relocatable. When I bought a benchtop planer, my layout needed to shift: the clamp rack moved one bay left and a new planer stand hung in its place, all in ten minutes with zero new holes in the wall. With fixed shelving, that same change means demo, patching drywall, and rebuilding. The cleat system is essentially an insurance policy against your own future tool purchases.
| Feature | Pegboard | French Cleat |
|---|---|---|
| Cost per 4×8 area | $20–$35 | $50–$70 (plywood) |
| Weight capacity | ~10 lb per hanger | 100+ lb per cleat section |
| Reconfiguration | Instant, move hooks | Fast, lift hanger off |
| Best for | Hand tools, layout tools | Cabinets, clamps, heavy jigs |
My own shop uses both: pegboard over the bench for chisels and squares, and a floor-to-ceiling French cleat wall for clamp racks and a mobile cabinet stack. That one cleat wall — 24 feet of hanging surface built from two sheets of plywood — stores what used to eat 40 square feet of floor. To put that in perspective: 40 square feet is roughly the footprint of a midsize car. I effectively parked a car’s worth of storage on a wall.
One safety note: when you anchor anything to the wall, hit the studs or use proper toggles, and keep heavy storage off the wall side of any electrical panel — code requires 36 inches of clear working clearance in front of it. The tradeoff to know going in: a fully loaded cleat wall puts serious load on your framing, so fasten into studs at least every 16 inches, and don’t shy from construction adhesive on the wall-side cleat if your studs are spaced oddly.
garage workshop pegboard organizer
As an affiliate, we earn on qualifying purchases.
As an affiliate, we earn on qualifying purchases.
Small Parts Without the Chaos: Drawers, Bins, and Labels That Stick
Small-part storage is where most workshops quietly fall apart. Screws, biscuits, dowels, sandpaper, drill bits — these items are tiny individually and monstrous collectively. The fix is a labeled, layered system: clear containers, dedicated drawers, and a labeling habit you never break.
Use clear stackable bins so you can identify contents without opening anything. Screw a strip of bins to the underside of a shelf and you’ve stacked storage two-deep in the same vertical space. For drawers, dividers beat open dumps every time — a drawer of loose mixed fasteners is functionally a junk drawer, no matter how nice the cabinet is. The physics is simple: small items have terrible surface-area-to-volume ratios, so they waste shelf space unless you subdivide. One drawer with six dividers holds what three undivided drawers scatter. Think of a hardware store’s fastener aisle: hundreds of skus in ten linear feet, purely because everything is subdivided and labeled. Your bin wall is that aisle, miniaturized.
Label everything, and be specific. “#8 x 1-1/4 inch cabinet screws” on the bin saves you the dig-and-guess routine; “SCREWS” does not. Here’s why specificity compounds: a vague label forces you to open the bin to verify, an open bin invites “I’ll just toss this in there,” and within a month the label is a lie and the system is dead. A label maker costs $30 and pays for itself the first month. Some woodworkers color-code by category — blue for wood screws, red for machine bolts — and that works too, as long as you commit to the system.
A concrete example of the whole system working: my fastener wall is a 4-foot bank of 30 clear bins, sorted left to right in project order — finish nails, brads, pocket screws, assembly screws, bolts, then specialty (hinges, drawer slides, knockdown fittings). When I’m building a cabinet, I start at the left of the wall and work right, grabbing exactly what each stage needs. Nothing gets opened, nothing gets guessed, and nothing comes back mixed.
- Clear bins beat opaque — visibility eliminates the search.
- Label by exact spec, not by category word.
- Store at point of use: drill bits near the drill press, sandpaper near the finishing bench.
- One bin, one item — mixed bins always end up mixed worse.
The real-world payoff is measurable. Before my small-parts wall, I averaged ten minutes per project just hunting fasteners — I once burned forty minutes mid-bookcase hunting for #8 screws, found them in a coffee can labeled “MISC,” and stripped two of them because they were actually drywall screws. After the bin wall, retrieval takes under a minute. Multiply that by every session you’ll ever work — at two sessions a week, that’s over 15 hours a year reclaimed — and a $100 bin wall looks like the cheapest tool you’ll ever buy. The hidden benefit is fewer mid-project interruptions: every break in flow to hunt for a #8 screw is a chance to lose momentum or, worse, substitute the wrong fastener and pay for it later.
under-bench storage drawers for woodworking
As an affiliate, we earn on qualifying purchases.
As an affiliate, we earn on qualifying purchases.
Steal Space You Forgot You Had: Under the Bench, Over the Door, Up at the Rafters
Every workshop has dead zones — storage space in places you walk past daily without registering. The space under your workbench, above the door frame, between studs, and up at the ceiling joists can absorb the bulky, low-frequency items eating your prime real estate. The organizing principle across all of these: match the item’s retrieval frequency to the space’s convenience. Dead zones are inconvenient, which makes them perfect for things you rarely need.
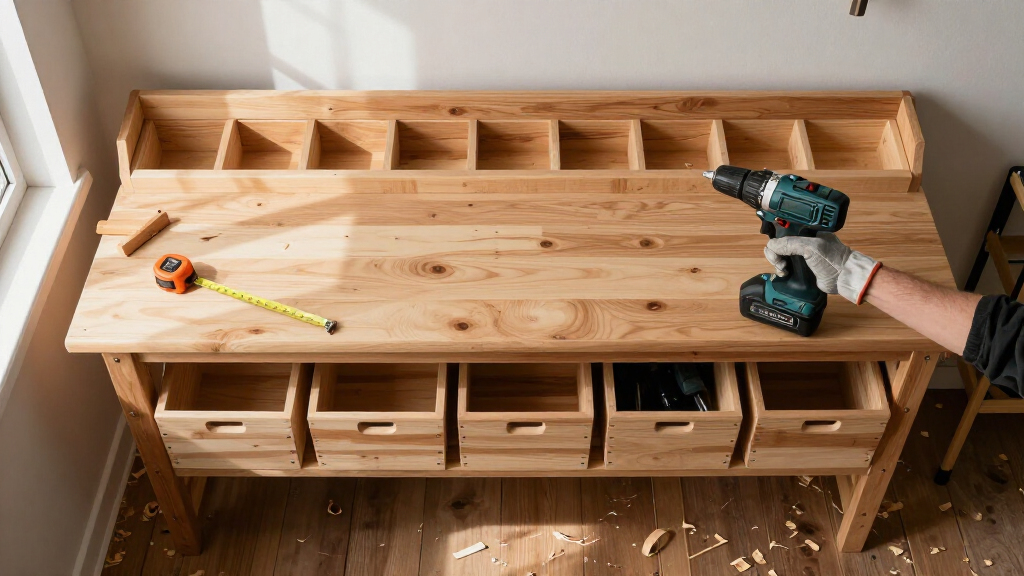
Start under the bench. Most home-shop benches are four legs and a top, with 20-plus cubic feet of nothing underneath. To visualize that: 20 cubic feet is a full-size refrigerator’s worth of storage you’re currently using to store one dust pile. Two rows of drawers on full-extension slides turn that void into the best storage in the shop — heavy, near-at-hand, and dust-sheltered. In my bench, the top row holds bench dogs, holdfasts, and sharpening gear; the bottom row takes the nail guns and the sander collection. Full-extension slides matter more than they sound: a standard slide that stops two inches short means the back of every drawer is a dark hole where screws go to disappear. On a budget, rolling tote caddies under the bench cost a fraction of drawer boxes and still move out of the way — my first version was two plywood boxes on casters, built for $40 in an afternoon, and they carried clamps and glue bottles for three years before I upgraded.
Overhead, ceiling-mounted racks handle what you touch twice a year. Ladders, lumber offcuts longer than 4 feet, that canoe. A simple 2×4 and plywood rack hung from the ceiling joists keeps long stock flat and off the floor where it warps — and warping isn’t cosmetic; a bowed 2×4 is firewood, so overhead storage is also lumber preservation. Here’s a concrete scenario: my rack holds seasonal items in labeled zones — holiday decorations and the screen doors on one end, lumber sorted by species (maple over here, pine over there) on the other — so a mid-project “I need one more 4-foot oak offcut” run means a stepladder and sixty seconds, not a floor excavation. Two rules: keep at least 7 feet of clearance below the rack if you’re running sheet goods through the shop, and never hang anything heavy over your table saw’s outfeed path.
Warning: ceiling racks are load-rated for a reason. Screw into joists, not drywall alone, and stay well under the manufacturer’s weight rating — a sagging rack dropping a bundle of maple is a hospital visit, not an inconvenience. For anything touching structure or electrical, a licensed professional is worth the call.
Above the doorway and between wall studs, shallow 6-inch-deep niches hold spray cans, finish bottles, and safety gear. The stud-bay niche is the classic example of matching storage to behavior: my respirator cartridges live in a stud-bay shelf right next to the shop door, which is exactly where they need to be when I’m walking in to spray. If they lived across the shop, I’d skip them — and every woodworker knows how that story ends. Two more examples from my shop: the stud bays beside my finishing bench hold spray cans standing upright in a wire shelf (no more cans rolling off benches), and the 8 inches above the door frame store the router collet wrenches and manual dust-collection blast gates — awkward little items that otherwise migrate into every drawer in the shop.
As an affiliate, we earn on qualifying purchases.
Modular Beats Permanent: Why Adjustable Systems Win Over Five Years
The best storage system for a growing workshop is one you can reconfigure in an afternoon. Fixed, built-in storage feels satisfying on day one and becomes a cage by year three, when the random orbital sander collection has tripled and the layout no longer fits. Modular and adjustable systems — track shelving, French cleats, stackable cases — flex as your tool list changes.
The underlying logic is that your tool inventory is a moving target, but built-in storage is static. Every fixed shelf, cabinet, or rack you install is a bet that your needs won’t change — and it’s a bet you will eventually lose, because tools get added, upgraded, and replaced constantly. This is common advice from pro shop builders for good reason: design for the shop you’ll have in five years, not the one you have now. My first bench had a fixed lower shelf sized perfectly for a shop vac I replaced eight months later with a 650 CFM dust collector that didn’t fit anywhere. Fixed shelf, meet reciprocating saw. I rebuilt that base as cleat-hung cabinets and haven’t regretted it once — and when I added a second dust-collection stage last spring, it slid into the new system without cutting a single board.
Budget versus pro tier, honestly stated: a full retail modular cabinet wall can run $2,000–$4,000 and it’s genuinely excellent — heavy slides, keyed locks, powder-coated finish. But a stack of shop-built plywood cabinets on a French cleat delivers 90% of the function for about $250 in sheet goods and a weekend. The honest tradeoff is time and finish quality: retail cabinets arrive perfect and flat; shop-built ones take two days of your life and will never look powder-coated. For a small garage shop, DIY wins unless your time is worth more than your money right now.
- Track shelving — reposition shelf heights without tools as inventory shifts.
- Stackable tool cases — one battery platform, one cabinet footprint.
- Cleat-hung cabinets — rearrange whole banks of storage in minutes.
- Fold-down work surfaces — a wall-mounted assembly table that disappears when not in use.
Newer trends like app-based layout planners and IoT bins that track inventory are real, but treat them as icing. The cake is still walls, drawers, and labels — no app ever held a 6-foot level.
Keep It That Way: The Maintenance Habits That Prevent Relapse
Organization decays without a maintenance rhythm. Every shop I’ve watched descend back into clutter did so gradually — one unlabeled bin, one clamp left on the bench, one “I’ll sort that later” pile that became furniture. The fix is a scheduled, light-touch routine rather than heroic weekend reorganizations.
Why light-touch beats heroic: a big annual cleanup works, but it doesn’t hold, because it depends on willpower — and willpower is exactly what’s missing at 9 p.m. on a Tuesday when you’re tired and the chisel just needs to land somewhere. Small, frequent habits survive fatigue; grand gestures don’t. Think of it like dental hygiene: daily brushing keeps the quarterly deep clean short, and skipping daily brushing means the deep clean eventually can’t keep up. The workshop version of the undone root canal is the bench that disappears under a foot of miscellany until you’re planing a board on top of a stack of rags and a biscuit tin.
Adopt the one-minute rule: if putting a tool away takes less than a minute, it goes back immediately, every time, no exceptions. Because your vertical wall puts each tool at arm’s reach, compliance is nearly painless — the system does the enforcing. Concrete example: a cordless drill hanging on a cleat hook three steps from the bench gets hung up every time; that same drill buried in a drawer across the shop gets left on the bench “just for tonight,” and by Friday the bench holds a drill, two squares, a tape measure, and half a sandwich. This is why good storage and good habits aren’t competing strategies; the storage design is what makes the habit possible.
Then schedule a quarterly purge — the classic scenario it prevents goes like this: you buy a box of 500 #8 screws because you “ran out,” not realizing a three-quarters-full bin of the same screws is buried behind the sandpaper. An hour, bin by bin, catches the duplicate before your wallet does.
- Daily: tools return to their outlined or labeled home before the lights go off. (A silver Sharpie outline around each hanging tool is the cheapest inventory system ever invented — a missing wrench is visible from across the shop.)
- Weekly: five-minute floor sweep and a quick check that bins went back to the right slots.
- Quarterly: full audit — purge dead stock, relabel anything ambiguous, note what’s overflowing.
- Yearly: rethink the zone map. Your workflow changed; your layout should too.
The payoff goes beyond tidiness. Proper storage genuinely improves safety — fewer trip hazards on the floor, fewer blade edges grabbed blindly, less rust on cast-iron surfaces left under damp tarps. And tools last longer, which means the storage you build is effectively paying you back in tools you don’t have to replace. In my shop, the nightly sweep once caught a chisel rolling toward the edge of the bench — the kind of thing that ends a bare foot’s evening, caught because the routine forced one last look around.
Frequently Asked Questions
What are the best storage solutions for a small workshop?
For small workshops, the biggest wins are wall-mounted systems: pegboard for hand tools, French cleats for heavy items and cabinets, and floor-to-ceiling shelving. Add under-bench drawers or rolling totes and a ceiling rack for long lumber. In a one-car garage, these four moves alone can double or triple usable storage without touching the floor plan.
Is French cleat storage better than pegboard?
They solve different problems. Pegboard is cheap ($20–$35 per 4×8 sheet) and perfect for lightweight hand tools under about 10 pounds per hanger. French cleats cost more in plywood but handle 100+ pound cabinets and reconfigure in seconds. Most shops benefit from running both: pegboard over the bench, cleats everywhere else.
How can I organize tools on a tight budget?
DIY storage beats retail on value. Two sheets of 3/4-inch plywood ripped at 45 degrees give you a full French cleat wall for about $60. Repurposed pallets make sturdy racks, and clear stackable bins from any big-box store handle small parts for under $50 total. Skip the $2,000 cabinet systems until you know your layout works.
How much weight can a ceiling storage rack hold in a garage workshop?
Depends entirely on the rack and the mounting. Racks lag-bolted directly into ceiling joists typically carry 200–600 pounds when properly installed; anything hung from drywall alone is asking for failure. Stay well under the manufacturer’s rated load, keep heavy items near joists, and never hang storage over your table saw’s outfeed path. If you’re unsure about the structure, have a professional verify it.
How often should I declutter and reorganize my workshop?
Schedule a quarterly one-hour purge — trash dead stock, relabel ambiguous bins, and note what’s overflowing. Do a full layout rethink once a year, because your workflow changes with new tools. Between purges, a one-minute daily put-away rule keeps the system from decaying back into clutter.
Conclusion
If you take one thing from this: your walls are the cheapest square footage you’ll ever own. Before you dream about a bigger shop, spend a weekend and a couple hundred dollars turning your bare vertical surfaces and under-bench voids into working storage. A one-car garage with a full cleat wall, a bin wall, and a ceiling rack holds a complete woodworking kit — I know because mine does.
Start this Saturday with the driveway audit. Pull everything out, sort by how often you touch it, and watch your storage plan draw itself. The clamp you can never find is in there somewhere — and by Sunday night, it’ll have an outlined spot on the wall where it lives forever.
Fall yard work Picks
leaf blowers
As an affiliate, we earn on qualifying purchases.