
TL;DR

Get business pricing on tools and workshop supplies
- Business-only prices and quantity discounts
- Tax-exempt purchasing
- Multiple users, one account, clear invoices
The perfect workbench matches your actual work, fits your measured space, and stands rock-solid under force. Prioritize a rigid frame, a thick top suited to your material (hardwood for wood, steel for metal), and a height at your elbow — roughly 34–38 inches for standing work. Storage, mobility, and power features matter, but they’re upgrades; stability and worktop quality are the core purchase.
I learned the workbench lesson the cheap way: a $99 big-box bench that skated across my garage floor every time I hand-planed a board. Three months later I built a replacement from 2x4s and a butcher-block top, and suddenly my cuts got straighter. Same hands. Different bench.
A workbench is the workshop’s central work surface, storage hub, and clamping platform all at once. It’s the one tool that touches every project. Buy it wrong and you fight it daily; buy it right and it disappears under your work, doing its job silently.
This guide walks through what actually matters when selecting a bench: matching it to your work, sizing it to your space, choosing a top material, getting stability that holds, and deciding where your money goes furthest. Real numbers, real tradeoffs, no fluff.
Match the bench to your primary work: hardwood top and vise for woodworking, steel and heat resistance for metalwork, static-dissipative surfaces for electroni…
A depth of 24–30 inches and length of 48–72 inches fits most home shops; measure doorways and stairs before buying, not after delivery.
Set standing bench height near elbow level (34–38 inches for most adults), lower for heavy hand-tool work, higher for detail work.
Judge stability by rigidity — mass, wide base, leveling feet, anchoring — not by the manufacturer’s static weight rating.
Buy a strong base and quality top first; vises, storage, lighting, and mobility are upgrades, and a bench with replaceable parts beats a cheaper disposable one.
How to Select the Perfect Workbench for Your Workshop
The perfect workbench matches your actual work, fits your measured space, and stands rock-solid under force. A workbench is the workshop’s central work surface, storage hub, and clamping platform all at once — the one tool that touches every project. Buy it wrong and you fight it daily; buy it right and it disappears under your work.
“A $99 big-box bench skated across my garage floor every time I hand-planed a board. Three months later I built a replacement from 2x4s and a butcher-block top — and suddenly my cuts got straighter. Same hands. Different bench.”
Start With Your Work
Before comparing specs or prices, answer one question: what will you do on this bench every week? The work defines the bench — not the other way around.
Woodworking
Thick hardwood top (1.5–2″ minimum), quality vise, bench dog holes, and maximum rigidity. Hand-planing pushes sideways with real force — mass is a feature.
Metalworking
Steel construction, heat-resistant or replaceable surface, chemical resistance, and a high weight rating. Sparks and grinding grit destroy wood tops.
Electronics
Smooth, static-dissipative surface, integrated lighting, cable management channels, and shallow drawers for small parts and precision work.
General DIY
Versatility: durable easy-clean top, drawers, pegboard, adjustable features. A top you can abuse without guilt.
Measure First: Size & Height
The most common mistake in workshop planning is buying the bench before measuring the room. Account for drawer swing, walking clearance, space behind for clamps — and the doorways, stairs, and corners between the delivery truck and your shop.
Dimension Sweet Spots
Getting Your Height Number
Stand relaxed, bend your elbow to 90°
Measure floor to your elbow crease
Use that as your standing baseline
Subtract 2–4″ for heavy hand-tool work
The Ergonomics Ladder
Seated precision work — lower bench for detailed, close-up tasks at a stool or chair.
Heavy manual work — chiseling and planing feel better 2–4″ below elbow for leverage over the tool.
General standing work — the elbow-height standard for most adults.
Fine detail work — slightly higher so you’re not hunching over the surface.
Sharing the shop with someone of a different height? That’s the case for an adjustable-height bench — it costs more and gives up a little rigidity, but if you alternate sitting and standing, it’s worth every dollar.
Worktop Materials Compared
The worktop is the part you touch on every task, and material determines how it ages. A dropped chisel on maple dents; on steel it chips. MDF is flat and cheap but swells at the first glue spill left overnight.
| Material | Best For | Weakness | Cost Tier |
|---|---|---|---|
| Hard maple / butcher block | Woodworking, vises, clamping | Cost, weight, needs finish | MID–HIGH |
| Steel | Metalwork, heat, sparks, chemicals | Hard on edges and tools, loud | MID–HIGH |
| MDF | Budget general DIY, flat assembly | Moisture, edge damage, sagging | LOW |
| Laminate | Easy-clean craft and assembly work | Chips under heavy impact | LOW–MID |
| Composite / ESD surfaces | Electronics, chemical exposure | Not for impact work | MID |
Why Weight Ratings Lie
A manufacturer’s weight rating tells you how much static load the bench carries — nothing about racking, sway, or behavior when you’re hammering through a joint. A bench can hold 1,000 pounds of tools and still wobble the moment you plane a board. Real stability comes from four things:
Mass
A heavy bench resists lateral force. My 3″ hard maple top weighs almost as much as the frame — that’s the point.
Wide Base
A wide stance resists lateral force and keeps the bench planted during planing, sawing, and hammering.
Leveling Feet
Kill the micro-rock that develops on uneven garage slabs — and nearly every garage slab is uneven.
Anchoring
Mounting a vise or bench grinder? Anchoring to floor or wall is non-negotiable — the vise’s lever arm works against you.
Where Your Money Goes Furthest
Buy a strong base and quality top first — stability and worktop quality are the core purchase. Everything else is an upgrade, and a bench with replaceable parts beats a cheaper disposable one.
Spending priority when budget is limited — relative importance to long-term accuracy and safety.
Start With Your Work: What This Bench Actually Has to Do
Before you compare specs or prices, answer one question: what will you do on this bench every week? The work defines the bench — not the other way around. A general-purpose bench is a compromise by design, and sometimes that compromise costs you accuracy.
Woodworking demands rigidity above all. Hand-planing a board pushes sideways with real force; a wobbly bench turns that force into movement, and movement ruins surfaces. You want a thick top (1.5–2 inches minimum for a serious wood bench), bench dog holes, a good vise, and enough mass that the bench stays put. My 3-inch hard maple top weighs almost as much as the frame holding it — and that’s the point.
Metalworking flips the requirements. Sparks, heat, oil, and grinding grit destroy wood tops, so you want steel construction, a heat-resistant or replaceable surface, and chemical resistance. Electronics work needs the opposite: a smooth, static-dissipative surface, good lighting, cable management, and shallow drawers for small parts. General DIY sits in the middle — versatility, drawers, a pegboard, and a top you can abuse without guilt.
- Woodworking: thick hardwood top, vises, bench dogs, maximum rigidity
- Metalworking: steel frame, heat-resistant top, high weight rating
- Electronics: static-dissipative surface, lighting, cable channels, shallow storage
- General DIY: durable easy-clean top, drawers, adjustable features, pegboard
The mistake I see most often: someone buys a pretty multi-purpose bench, then mounts a vise on it and discovers the frame racks the first time they crank the handle. A bench that does everything adequately often does nothing well.
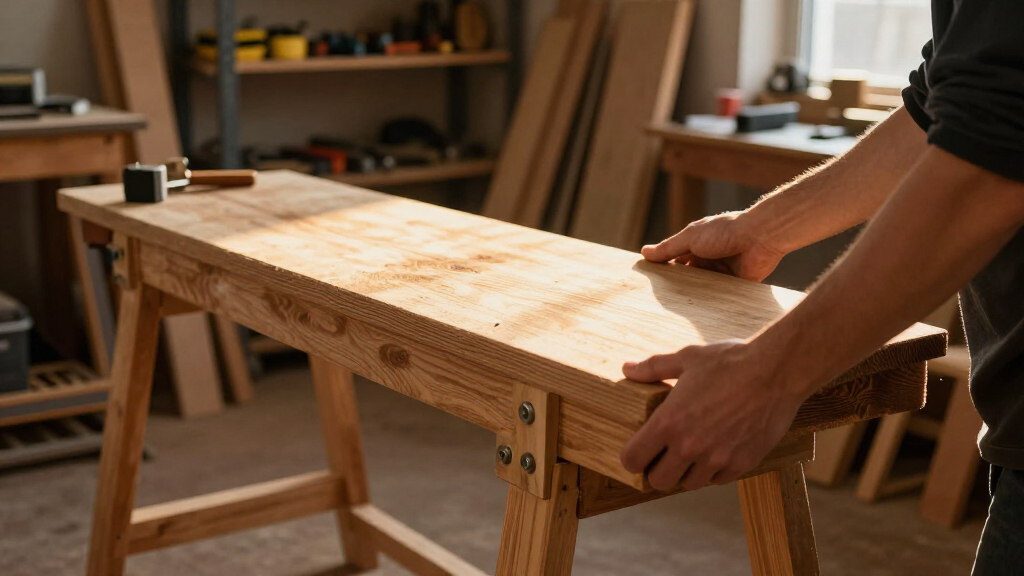
woodworking workbench with hardwood top
As an affiliate, we earn on qualifying purchases.
As an affiliate, we earn on qualifying purchases.
Measure First: Size and Height That Fit You and Your Space
The most common mistake in workshop planning is buying the bench before measuring the room. For a general home workshop, a bench 24–30 inches deep and 48–72 inches long suits most work. Deeper isn’t always better — past about 30 inches you can’t reach tools at the back without leaning, and you burn floor space you’ll want for material handling.
Measure more than the bench footprint. Account for drawer and door swing, walking clearance (30–36 inches minimum around the bench), space behind it for clamps and cables, and — this one bites people constantly — the doorways, stairs, and corners between the delivery truck and your shop. I’ve watched a friend disassemble a bench in his driveway because it wouldn’t turn the corner into his basement.
Height is where ergonomics get personal. For standing work, aim near your elbow — for most adults that’s 34–38 inches. Seated precision work wants lower, around 28–32 inches. Heavy manual work like chiseling and planing actually feels better 2–4 inches below elbow height because you get better leverage over the tool. Fine detail work wants slightly higher so you’re not hunching.
Here’s a quick framework to get your number:
- Stand relaxed and bend your elbow to 90 degrees.
- Measure from the floor to your elbow crease.
- Use that as your baseline for general standing work.
- Subtract 2–4 inches if you mostly do heavy hand-tool work.
- Share the shop with someone a different height? That’s the case for an adjustable-height bench.
Adjustable benches cost more and give up a little rigidity versus a fixed leg set, but if you alternate between sitting and standing — or your teenager uses the shop too — they’re worth every dollar.
As an affiliate, we earn on qualifying purchases.
Worktop Materials Compared: Which Surface Survives Your Abuse
The worktop is the part you touch on every task, and material choice determines how it ages. Hardwood and butcher block dominate woodworking because they’re rigid, repairable, and kind to your tools — a dropped chisel on maple dents; on steel it chips. MDF is flat and cheap but swells at the first glue spill left overnight.
Here’s how the common options stack up:
| Material | Best For | Weakness | Typical Cost Tier |
|---|---|---|---|
| Hard maple / butcher block | Woodworking, vises, clamping | Cost, weight, needs finish | Mid to high |
| Steel | Metalwork, heat, sparks, chemicals | Hard on edges and tools, loud | Mid to high |
| MDF | Budget general DIY, flat assembly | Moisture, edge damage, sagging | Low |
| Laminate | Easy-clean craft and assembly work | Chips under heavy impact | Low to mid |
| Composite / ESD surfaces | Electronics, chemical exposure | Not for impact work | Mid |
Thickness matters as much as material. A thicker top means more stiffness and better holding power for vises and holdfasts — holdfasts especially need at least 1.5 inches of material to grip properly in a dog hole. My favorite budget trick: a strong base with a replaceable sacrificial top. Glue a quarter-inch hardboard skin over your good top, plane or replace it when it’s wrecked, and your real surface stays pristine for decades.
Also think in terms of maintenance: a wooden bench protected with an oil finish can be sanded and re-finished endlessly. Laminate can’t. If your work involves finishes, solvents, or glue, ask yourself what happens when it spills — because it will.
adjustable height workbench for workshop
As an affiliate, we earn on qualifying purchases.
As an affiliate, we earn on qualifying purchases.
Stability: Why Weight Ratings Lie and Wobble Doesn’t
A bench’s job is to not move while you work. The manufacturer’s weight rating tells you how much static load the bench carries — it says nothing about racking, sway, or how the bench behaves when you’re hammering through a joint. A bench can hold 1,000 pounds of evenly distributed tools and still wobble the moment you plane a board.
Real stability comes from four things: mass, a wide base, leveling feet, and the option to anchor to floor or wall. A heavy bench with a wide stance resists lateral force. Leveling feet kill the micro-rock that develops on uneven garage slabs — and nearly every garage slab is uneven. If you mount a vise or run a bench grinder, anchoring is non-negotiable; the lever arm of a vise converts your cranking force into bench movement you can feel across the whole top.
Test any bench before you buy, or check reviews for these specific failure modes:
- Side-to-side wobble from a narrow stance or thin legs
- Racking — parallelogram skewing when you push diagonally on the top
- Deflection — visible top flex under a heavy tool like a vise or grinder
- Caster creep on mobile benches with weak locks
On mobile benches, locking casters must be genuinely robust. I’ve had 3-inch locking casters hold a 250-pound bench dead still while routing — and I’ve had “locking” casters that let the bench drift a quarter inch per pass. If a mobile bench moves under hand pressure with the casters locked, walk away.
Weight capacity tells you what a bench can hold. Rigidity tells you whether you can actually work on it. Judge the second one with your hands, not the spec sheet.
Distribute heavy equipment evenly too. A 60-pound bench grinder bolted at one end creates both a tipping concern and an unbalanced resonance — vibration loves an asymmetric setup. And never store heavy tools on high shelves above the bench; that’s a tipping hazard waiting for a reaching hand.
As an affiliate, we earn on qualifying purchases.
Vises, Storage, and Power: The Upgrades That Earn Their Keep
For many shops, the vise matters as much as the bench. A quality woodworking vise with wide jaws and bench-dog compatibility effectively doubles your clamping options; an engineer’s vise handles metal and impact work; a quick-release mechanism saves your wrist hundreds of cranks a year. Check jaw width, opening capacity, and whether the mounting point in your bench is thick enough to hold it solidly.
Storage should follow how you actually work, not how a catalog looks. Drawers for hand tools and small parts, cabinets for dust-sensitive gear, open shelves for the stuff you grab hourly, pegboard for visibility. One honest warning from a small garage shop: don’t let storage eat your work surface or legroom. A bench buried under drawer banks leaves you an 18-inch strip of actual workspace, and you’ll end up working on the tablesaw anyway.
Power and lighting are where modern benches genuinely improve. Built-in outlets, USB ports, cable channels, and task lighting reduce clutter and extension-cord spaghetti. But treat bench electrical with respect:
- Keep outlets and strips away from water, sparks, and metal debris zones
- In a wood shop, fine dust is combustible — keep electrical enclosures sealed and clean
- For anything beyond a simple listed power strip, or any hardwired additions, have a licensed electrician do the work and check local code requirements
The accessories I’d buy first, in order: a good vise, bench dogs and holdfasts, task lighting, a power strip mounted where you can reach it, and an anti-fatigue mat if you stand for long sessions. Everything else can wait until you know what’s missing.
Mobile vs. Fixed — and Where Your Budget Goes Furthest
Mobile benches solve the small-shop problem: one bay of a two-car garage can’t hold a fixed layout. A well-built mobile bench with heavy locking casters and a rigid frame gives you flexibility without giving up much stability. But fixed benches still win on pure rigidity, load capacity, and permanent tool installation — if you’re bolting down a vise and never moving it, fixed is simpler and stiffer.
Foldable and wall-mounted benches save serious space for apartment and shared-garage woodworkers, though you sacrifice stiffness and storage. Modular systems — where you add drawers, shelves, and tool panels over time — let a budget stretch across years instead of one painful credit card statement.
On budget, be honest about tiers. A basic DIY-grade bench costs little; a heavy-duty adjustable or modular system costs several times more. The trap is the cheapest bench that must be replaced entirely. A better play: spend on a strong base frame and a quality worktop, then add vise, storage, and lighting later. If parts are replaceable — top, feet, casters, drawer slides — the bench can last decades. If nothing is, it’s disposable.
| Option | Best For | Tradeoff |
|---|---|---|
| Fixed/stationary | Maximum stability, vises, permanent installs | Zero flexibility |
| Mobile with locking casters | Small or shared garages | Slightly less rigid, needs quality locks |
| Foldable / wall-mount | Apartments, vehicle access | Less stiffness, minimal storage |
| Modular system | Growing shops, phased budgets | Higher long-term cost |
My rule after twenty years in garage shops: spend first on stability, worktop quality, and fit for the task. Everything else is an upgrade, and upgrades are fun. Replacing a wobbly bench is not.
Frequently Asked Questions
What is the ideal height for a workbench?
For standing work, start at your elbow height — for most adults that’s 34–38 inches. Heavy hand-tool work like planing and chiseling feels better 2–4 inches lower for leverage, while fine detail work suits slightly higher to reduce bending. If multiple people or both sitting and standing tasks are involved, an adjustable-height bench is worth considering.
How deep and long should a workbench be?
A depth of 24–30 inches suits most general workshops — deeper tops make back-edge tools hard to reach and eat floor space. Length of 48–72 inches covers most home-shop work; go longer only if you handle large sheet goods or keep tools permanently mounted. Always verify you have 30–36 inches of walkway clearance around the bench.
Is a wood or metal workbench better?
Neither is universally better. Wood — especially hard maple or butcher block — is repairable, kind to tool edges, and ideal for woodworking. Steel is stronger, resists heat, sparks, and chemicals, and is the right call for metal fabrication or automotive work. Many general shops end up with a wood-topped bench plus a small steel station for grinding and hot work.
Does a workbench need to be anchored to the floor?
Not always, but anchoring is strongly recommended when you use a vise, run equipment with lateral forces, or do heavy planing and hammering. A very heavy bench with a wide base and leveling feet may stay planted for lighter work. If your bench moves at all under hand pressure, anchor it — movement translates directly into lost accuracy.
How much should I spend on a workbench?
Spend in this order: stability, worktop quality, then fit for your task — features last. A basic DIY-grade bench is inexpensive; heavy-duty adjustable and modular systems cost substantially more. The best value is often a strong frame with a quality, replaceable worktop that you upgrade with a vise, storage, and lighting over time, rather than a cheap bench you’ll replace entirely.
Can I build a workbench myself instead of buying?
Yes, and building gives you exact control over height, size, storage, and materials — often for less money than a comparable purchased bench. The four non-negotiables are a rigid frame, a flat level top, strong joinery or fasteners, and adequate diagonal bracing to prevent racking. Pair a built base with a purchased butcher-block top for a fast path to a professional-grade bench.
Conclusion
If you remember one thing: let the work choose the bench. Measure your space, measure your elbow, test the bench for wobble with your own hands, and spend your budget on the frame and top before the features. A modest bench that’s rigid, the right height, and suited to your work will outperform an expensive one that isn’t — every single project.
My first bench moved when I planed. My second one doesn’t. That difference shows up in every cut, every joint, every glue-up — and it’s the difference between fighting your shop and enjoying it. Now go measure your garage.
Fall yard work Picks
leaf blowers
As an affiliate, we earn on qualifying purchases.