
TL;DR

Get business pricing on tools and workshop supplies
- Business-only prices and quantity discounts
- Tax-exempt purchasing
- Multiple users, one account, clear invoices
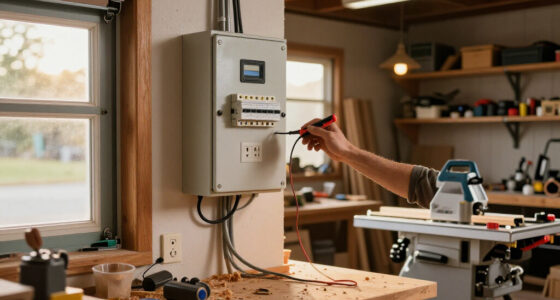
Set up a dry, well-lit bench or wall area where you can unplug tools, remove batteries, clean dust, and inspect cords, guards, switches, and accessories. Keep approved supplies organized by task, follow each tool’s manual for products and service intervals, and take damaged equipment out of use until it has been repaired or checked.
A power tool that looks clean can still hide packed sawdust around a vent, a nicked cord, or a guard that no longer snaps back. A dedicated maintenance station gives you one clear place to catch those problems before the next cut, and it can fit on a short bench or a strip of garage wall.
This guide walks you through choosing the spot, laying out supplies, controlling dust, handling cordless batteries, and building a maintenance routine you can repeat. You’ll also see where a home-shop setup should stop: routine cleaning and inspection belong at your bench, while electrical, battery, or mechanical faults may call for qualified service.
The goal is a station that makes care easier than putting it off. A clean brush, a labeled bin, and a checklist beside the vise can save the aggravation of discovering a damaged blade or blocked vent halfway through a project.
Choose a dry, well-lit bench or wall area with room to lay down and inspect your largest tool.
Unplug corded tools and remove batteries before cleaning, adjusting, or inspecting; let hot tools cool.
Use only cleaning products, lubricants, and service steps approved for the tool’s exact model.
Brush or vacuum dust as the manual permits; compressed air can drive debris deeper or spread fine particles.
Inspect cords, guards, switches, batteries, and accessories; remove damaged tools from service until repaired or checked.
Workshop Field Guide / Tool Care
Setting Up a Dedicated Maintenance Station for Your Power Tools
Create one clear place to disconnect, clean, inspect, and organize your tools—so routine care is easy to repeat before the next cut.
01 / Setup sequence
Build the station in five practical steps
A compact bench or wall area is enough when the layout supports safe handling, clear visibility, and a predictable place for every supply.
Clear and light
Choose a dry, stable spot. Aim a task light at the tool and keep the surface clear of offcuts and dust.
Isolate power
Unplug corded tools and remove batteries before cleaning, adjusting, or inspecting. Let hot tools cool.
Group supplies
Keep brushes, cloths, approved lubricants, and matching hex keys together by task or tool family.
Label storage
Separate clean accessories from used items awaiting inspection. Keep manuals close at hand.
Leave room
Make a clear landing area for your largest tool. Store heavy items low and stable.
02 / Layout & supplies
Make the right action the easy action
Plan around the tool in your hands: a circular saw needs room for its base and blade, while a trim router takes less space. A clear bench helps prevent dropped parts and rushed inspections.
- ✓Keep the station away from standing moisture, excessive dust, and ignition sources.
- ✓Provide ventilation when a product label calls for it; keep fumes away from heaters, pilot lights, and sparks.
- ✓Use a shallow tray for small parts and a stable mat to keep tools from sliding during inspection.
- ✓Adapt pegboard hooks, labeled drawers, or modular bins as your tool collection changes.
03 / Routine & limits
Catch small problems before the next job
A clean exterior can hide packed dust around a vent, a nicked cord, or a guard that no longer returns freely. Scan the same points every time.
After use / quick scan
Inspect before storage
- 01Power disconnected; hot tool cooled.
- 02Housing and vents clear using a manual-approved brush or vacuum.
- 03Cord, plug, or battery housing sound; no visible damage.
- 04Switch, guard, and accessory fit checked; store tool dry.
Know when to stop
Take damaged equipment out of use until repaired or checked. Electrical, battery, or mechanical faults may need qualified service. A home maintenance station is for routine care, not a repair shop by default.
04 / Dust & cordless care
Keep debris and batteries under control
Cleaning methods and battery guidance vary by model. Use the tool and battery manuals as the authority, and protect yourself from fine dust during cleanup.
- ✓Brush or vacuum dust as the manual permits. Compressed air can drive debris deeper or spread fine particles.
- ✓Use compatible chargers; store and charge batteries according to manufacturer guidance.
- ✓Keep batteries dry and away from extreme heat. Do not use one that is swollen, cracked, leaking, unusually hot, or otherwise damaged.
- ✓Wear eye protection or other protective equipment when the task requires it.
05 / Traceability
A repeatable sequence beats memory
Put the order where everyone can see it. A short checklist beside the bench makes shared-shop care more consistent and helps separate questionable accessories from ready-to-use ones.
Disconnect
Unplug or remove battery; let tool cool.
Clean
Remove debris with an approved method.
Inspect
Check cord, vents, switch, guard, and accessory.
Sort
Separate clean spares from used items.
Store
Return tool and supplies to labeled places.
Choose a spot where you can inspect tools without rushing
A power tool maintenance station works best in a dry, well-lit area with enough clear space to handle a tool and its accessories safely. Keep it away from standing water, heavy dust, and ignition sources, and provide ventilation when a product label calls for it. A stable bench or a compact wall section can both work.
Think about the actual tool in your hands. A trim router needs less footprint than a circular saw with its blade removed and base plate exposed; a benchtop planer may need room to set aside its tables and dust hood. In a one-car garage, a 24-inch-deep bench with a bright task light can be more useful than a wide station that becomes a landing pad for offcuts. The point is not simply to fit the tool: room to lay it down without balancing parts reduces the chance that a small component gets lost or a heavy tool slips while you inspect it.
Before you mount anything, stand at the proposed spot with a drill or sander and mimic the steps you’ll take: disconnect power, lay down the tool, open its case, and reach for a brush. If the cord crosses a walkway or you have to balance a battery on an edge, rearrange the layout. Good lighting matters too; a small magnetic or adjustable lamp can reveal fine cracks in a cord jacket that disappear in dim garage light.
Keep the work surface clear enough to see small parts. A shallow tray catches screws if a manual-approved adjustment requires removing a cover, and a rubber mat keeps a polished aluminum base from skittering across plywood. For products that need ventilation, follow the label and keep fumes away from heaters, pilot lights, and sparks. A tidy surface also makes it easier to notice dust or leaked material that might otherwise be mistaken for ordinary shop mess.
As an affiliate, we earn on qualifying purchases.
Set up the station in five practical steps
- Clear and light the area. Remove offcuts and dust, check that the bench is stable, and aim a task light at the tool rather than into your eyes.
- Make power isolation easy. Put a visible reminder at the station: unplug corded tools and remove batteries before cleaning, adjusting, or inspecting. Let a hot tool cool first.
- Group supplies by task. Place brushes and lint-free cloths together, keep approved lubricants separate, and store hex keys with the tool family they fit.
- Make clean storage obvious. Label bins for clean accessories, used blades or bits awaiting attention, and ready-to-use items. Keep manuals nearby in a binder or through QR links to manufacturer instructions.
- Leave room for the next tool. Store heavy items low and keep a clear landing space on the bench so maintenance doesn’t require moving a stack of clamps.
That sequence turns “I should check this later” into a small routine. For example, after sanding a maple cabinet door, you can unplug the sander, remove its battery, brush the pad and vent openings as the manual permits, inspect the cord or battery housing, and return a clean abrasive to a labeled drawer. Doing these steps in the same order makes it less likely that you’ll start cleaning before disconnecting power or put a questionable accessory back with ready-to-use ones.
Use an inspection checklist that takes seconds to scan: power disconnected, housing and vents clear, cord or battery sound, switch and guard working, accessory fit for use, tool stored dry. A checklist is especially useful when several people share the shop; memory varies, but a mark beside “guard returns freely” gives the next person a concrete signal. It also helps reveal recurring problems, such as a vent that clogs after every sanding session, so you can adjust extraction or cleanup habits.
Make your setup adaptable. Pegboard hooks, labeled drawers, or modular bins can shift as your tool collection changes. A dedicated maintenance station helps keep power tools clean when the brush, cloth, and inspection card have a predictable home. You don’t need a service-cart budget; you need a layout that doesn’t bury the brush under a pile of router bits. A modest arrangement is easier to maintain if each item has a clear place and the routine does not require resetting the whole bench.
As an affiliate, we earn on qualifying purchases.
Stock supplies that match your tools and their manuals
A useful station holds basic cleaning and inspection supplies, plus only the lubricants and tools approved for the equipment you own. Start with lint-free cloths, soft brushes, a small inspection light, common hex keys, labels, spare consumables, and a simple checklist. Add specialized items only when a manual calls for them. This keeps the station practical while reducing the chance that a convenient but unsuitable product gets applied to a tool.
It’s tempting to keep one spray lubricant and one solvent beside every tool. Resist that shortcut. The wrong cleaner can affect plastic housings, insulation, coatings, or internal components, and a lubricant that suits one mechanism may be wrong for another. Check the exact model manual before applying anything; if it says a tool is sealed or specifies a service procedure, follow that direction. The tradeoff is a little more time checking instructions in exchange for avoiding damage that may be difficult to see until the tool performs poorly or fails.
For example, a woodworker who owns a circular saw, cordless drill, and random-orbit sander can label three small trays: “saw blades,” “drill bits,” and “sanding discs.” Keep clean spares in one bin and used accessories in a separate tray for inspection. That small separation makes a chipped carbide tooth easier to spot and keeps a dusty sanding disc from going straight back onto the tool.
A compact shop doesn’t need a wall of specialty chemicals. Store products in their original, labeled containers and follow their handling directions. Put manuals in a binder or create QR codes that point to the manufacturer’s current service page. Tool-specific instructions are more useful than a generic maintenance chart when models differ in lubrication, cleaning, and adjustment needs. If you cannot confirm a product or procedure is approved, leaving it out is safer than guessing.
Keep small parts controlled. A magnetic parts dish works for screws, while labeled bags can hold model-specific wrenches or guards. If you remove a part as directed for routine care, note its location and return it before the tool goes back into storage. This prevents a seemingly minor disassembly from turning into a missing-fastener problem the next time the tool is used.
As an affiliate, we earn on qualifying purchases.
Control fine dust without driving it deeper into the tool
Power tool cleaning can put fine dust into the air, so your station needs a sensible way to contain debris. Use a brush or vacuum suitable for the tool and follow its manual; use compressed air only when the manufacturer permits it. An air nozzle can push dust deeper inside a housing or turn settled debris into a cloud you breathe. The cleanup method matters because visible dust is only part of the problem: fine particles can stay airborne or lodge in places that are harder to clean later.
For a small garage shop, a shop vacuum with a suitable filter and a brush attachment is often enough for routine exterior cleanup. Keep the nozzle near the dust source, work slowly around vents, and avoid forcing it against delicate parts. If you sand MDF or dense hardwood, don’t treat a quick puff of air as cleanup; fine dust can hang in the room long after the visible plume settles. A vacuum may take longer than blowing dust away, but it captures debris instead of relocating it around the shop.
Imagine you finish sanding a walnut tabletop and brush the sander over the bench. A dark ribbon of dust comes off the pad, but the fine layer around the vents is harder to see. With the tool unplugged and its battery removed, a soft brush and a nearby vacuum can lift that residue while it’s still close to the source. A respirator and eye protection may be appropriate for dusty tasks; follow the product and shop safety guidance you use.
Dust extraction numbers depend on the tool, hose, hood, and collector, so there is no single CFM figure that guarantees clean maintenance. A collector that captures chips at a planer may not capture fine sanding dust at the point of work. Check the machine and collector guidance, keep filters maintained, and pay attention to what escapes at the hood. Capture dust at the source during machining, then clean the tool and station with methods that suit that tool. If dust continues escaping, treat it as feedback that the hood, filter, or setup needs attention rather than assuming the collector’s rating alone settles the question.
Ventilation also matters when labels require it for cleaning products. Keep flammable products away from ignition sources, and don’t mix cleaners. A dedicated maintenance area should make the safe choice easy: a vacuum hose or brush within reach, a clear bench, and eye protection stored where you can grab it.
dust collection vacuum for workshop
As an affiliate, we earn on qualifying purchases.
As an affiliate, we earn on qualifying purchases.
Store and charge batteries by the maker’s instructions
Cordless batteries belong in a dry place away from extreme heat, and you should charge them only with compatible chargers according to the battery and tool maker’s guidance. Charging and storage advice varies by manufacturer, so the manuals are the authority. A tidy charger shelf can help, but a neat row of batteries is not a substitute for checking each pack. Organization helps prevent mix-ups; inspection helps catch damage that organization cannot reveal.
Keep a small inspection space beside the charger, not directly over a dusty bench where debris can settle into contacts. Before use or charging, look for a cracked case, swelling, leaking, unusual heat, or other damage. Remove a damaged battery from service and follow the manufacturer’s handling or service instructions; don’t test it in a tool to see whether it still works. Testing it can expose the tool and user to a fault rather than establish that the pack is safe.
For instance, after a long summer day in a hot garage, a battery pack may feel warmer than usual. Let it cool as directed before charging, and don’t leave it beside a heater or in direct sun. If the case is swollen or cracked, label it clearly and keep it out of your normal battery rotation while you seek the proper service route.
Organize chargers with their matching battery system. A label or dedicated shelf can prevent a rushed mix-up when several platforms share similar-looking packs. Keep cords tidy, don’t cover chargers, and follow any instructions about charging location and ventilation. Some shops use a simple log for pack condition or service dates; that can help when several batteries rotate through daily work. A log is most useful as a record of observations and service, not as a replacement for checking the pack before use.
Battery care is model-specific. The same rule applies to storage charge levels, temperature ranges, and charging practices: check the instructions for the exact pack rather than relying on a universal tip from another tool owner. Following the maker’s limits protects the pack and helps avoid applying a practice that is appropriate for a different battery system.
Use a repeatable inspection routine after each job
After each job, remove debris, inspect the tool and its accessories, and store everything dry and ready for the next use. Disconnect the tool first: unplug corded models and remove batteries before cleaning, adjusting, or inspecting. Let hot tools cool, and follow the manual for any task that goes beyond a basic exterior check. The short routine helps you find small changes while they are still easy to identify, and makes the tool’s condition clearer before the next job.
Run your eyes over the cord, plug, switch, housing, and guard. Look for cuts, crushed insulation, cracked plastic, loose fittings, or a guard that binds instead of returning freely. Check blades, bits, and sanding accessories for visible damage or wear. A cracked guard or damaged cord means the tool should stay out of use until the part is replaced or a qualified service provider checks it.
Consider the difference between two end-of-day habits. One woodworker tosses a dusty circular saw into its case with a dull blade still installed. Another takes a minute to isolate power, brush off the base and vents as instructed, inspect the cord and lower guard, and put the blade in a protected slot. The second tool is easier to check before the next cut, and the blade’s condition is less likely to surprise them halfway through a sheet. The inspection also creates a useful moment to notice whether dust buildup or accessory wear is becoming a recurring issue.
Schedule deeper checks according to the model manual and the work the tool sees. A drill used occasionally to assemble shop cabinets may have different service needs from one that runs all day on a remodeling crew. There is no single correct interval for every power tool, and not every tool needs lubrication. Only lubricate or adjust what the manual specifies. Using the manual’s intervals alongside actual use avoids both neglect and unnecessary servicing that could introduce problems.
Write down the date and any issue you find. A short log such as “October 8: saw guard sticky; removed from rack for service” helps prevent a warning from disappearing into memory. Don’t make electrical or mechanical repairs beyond your skill and the manufacturer’s directions. A useful log records what you observed and what happened next, so the same unresolved issue does not quietly return to the ready rack.
Know when routine care needs a qualified repair
A maintenance station is for routine cleaning, inspection, and the service steps the manufacturer assigns to the user. It is not automatically a repair shop. If you find a damaged cord, failing switch, cracked guard, swollen battery, or a mechanical fault you can’t diagnose from the manual, stop using the tool and arrange the appropriate service. Keeping that boundary clear prevents a routine cleanup from becoming an improvised repair with unknown consequences.
That boundary protects your time as well as your safety. A loose external accessory may be simple to replace when the manual describes the procedure, but a tool that sparks abnormally, smells burnt, runs erratically, or trips a breaker needs a proper diagnosis. Don’t open an electrical housing or improvise a battery repair because a video makes it look quick. A symptom that seems minor can have a cause inside the tool that is not visible during a bench inspection.
For example, if a circular saw’s lower guard catches halfway through its travel, mark the saw “do not use,” remove it from the ready rack, and contact an authorized or otherwise qualified service provider. A strip of tape holding the guard open is not a temporary fix. Keep the saw’s model information and the symptom in your maintenance log so the service conversation starts with useful details.
Some shop work also reaches beyond tool maintenance. Electrical changes to outlets or circuits should go to a licensed professional, with power isolated and verified as required. Structural changes or roof work call for qualified professionals and any applicable permits; wear suitable PPE for routine shop tasks, and don’t let a maintenance bench become an excuse to take on work outside your training.
Labeling matters here. A bright “service required” tag on a damaged tool is clearer than leaving it on the bench and hoping you remember. Store it apart from ready-to-use equipment until it has been repaired and checked. That separation turns an individual observation into a clear warning for anyone who shares the shop.
Frequently Asked Questions
What should I keep at a power tool maintenance station?
Start with lint-free cloths, soft brushes, labels, basic hand tools, spare consumables, manuals, and an inspection checklist. Add lubricants or other products only when your tool’s manual approves them. A small vacuum attachment can help with dust if it suits the tool.
How often should I maintain my power tools?
Remove debris and inspect tools after use, then follow the model’s manual for periodic checks, lubrication, and service. The right schedule varies by tool and how hard you use it. A cordless drill used for occasional cabinet assembly won’t necessarily need the same attention as a tool used every workday.
Can I use compressed air to clean a power tool?
Use compressed air only if the manufacturer allows it. Air can force dust farther into a tool and spread fine particles through the shop. A brush or suitable vacuum is often a better choice for routine cleanup.
How should I store and charge tool batteries?
Use compatible chargers and follow the instructions for the exact battery and tool. Keep packs dry and away from extreme heat, and don’t charge or use a swollen, cracked, leaking, unusually hot, or otherwise damaged battery. Follow the maker’s directions for damaged-pack handling.
Do all power tools need lubrication?
No. Some tools require periodic lubrication, while others are sealed or have specific service procedures. Check the manual for the exact model, and don’t assume that a lubricant suitable for one tool belongs in another.
What should I do if I find a damaged cord or guard?
Stop using the tool and take it out of the ready-to-use area. Replace the part or have the tool checked by a qualified service provider according to the manufacturer’s guidance. Tag it clearly so nobody grabs it for the next job.
Conclusion
Build the station around one habit: disconnect, clean, inspect, and put away. A small bench with a brush, vacuum access, labeled bins, and the right manuals will do more for a garage shop than a crowded wall of products.
Before your next project, clear one patch of bench and give your tools a place to land. The next time a blade guard moves freely and a battery is ready when you reach for it, that little square of order will feel like part of the craft.
Halloween Picks
halloween
As an affiliate, we earn on qualifying purchases.