TL;DR

Get tools and workshop supplies delivered free — and shop member deals
- Fast, free delivery on millions of items
- Access to Prime Big Deal Days deals on October 6–7
- Prime Video, Amazon Music and more included
A simple hand-tool workholding system needs a stable bench, a way to clamp or brace the work, and a bench hook or stop to resist the force of the tool. Match the fixture to the job: a bench hook for crosscuts, a planing stop or dogs for board work, and a vise or auxiliary board for small parts. Test for sliding, rocking, and rotation before you cut.
A sharp plane can still send a board skittering across the bench. The problem often isn’t the iron; it’s the hold. Workholding is the quiet partner in every hand-tool cut, keeping the wood steady while leaving room for your hands and tools.
You can build a useful system without filling a garage with hardware. Start with a stable bench, one dependable way to clamp the work, and a few movable stops or hooks. In this guide, you’ll see how to match those pieces to planing, crosscutting, and small-part work, how to protect delicate surfaces, and how to check a setup before the first stroke.
Think of a stop as a curb for the workpiece: it gives force somewhere useful to go. A good workholding setup keeps the material still, but it also makes the cut visible and comfortable. That combination is what turns building a simple, yet effective workholding system for hand tools from a hardware project into a better way to work.
Stabilize the bench before adding workholding hardware; a bench that slides can defeat even a strong clamp.
Match the fixture to the tool force: bench hooks catch crosscut strokes, and stops or dogs resist forward planing force.
Use a vise for edge work and many small parts, but pads or scrap shims help prevent jaw marks.
Check for sliding, lifting, rotation, and rocking separately; each motion can need a different contact point.
Dry-run the full tool path before cutting so the blade or plane does not hit a clamp, stop, or bench.
Hand Tool Shop Guide · Workholding
Building a Simple Yet Effective Workholding System for Hand Tools
A steady workpiece makes every cut easier to control. Build around a stable bench, a dependable way to secure the work, and a stop or hook that meets the tool’s force.
01 / The principle
Let the fixture meet the force
The best hold is positioned where the work wants to move. Clamp count matters less than contact placement.
A bench hook catches the board against forward saw strokes; a planing stop or dogs resist the forward push of a plane. Match the fixture to the job, then keep the working area accessible.
Foundation
Stable bench
Check for rocking, sliding, or twisting under a firm push before adding hardware. Weight or bracing can help a light bench.
Secure
Useful restraint
Use a clamp, vise, holdfast, or stop where it blocks the force without obstructing the cut.
Reference
Movable stops
A bench hook or planing stop gives the work a simple, repeatable surface to register against.
02 / Build the starter setup
Five steps from bench to first stroke
Start with portable pieces that cover common sawing, planing, and small-part work.
Stabilize
Push the bench; correct rocking or sliding.
Read the force
Identify where the tool will push or pull.
Place the hold
Choose a vise, clamp, hook, or stop.
Protect & adjust
Add pads or scrap shims; set a comfortable height.
Dry-run
Move the tool through its full path before cutting.
03 / Choose by task
Three holds, three working directions
Keep the setup simple: one fixture should intercept the force and leave room for hands and tools.
| Task | Useful fixture | How it resists movement | Watch for |
|---|---|---|---|
| Crosscutting | Bench hook | Fence and cleat catch saw strokes | Lifting or creeping at bench edge |
| Planing boards | Planing stop or dogs | End stop meets forward push | Sliding, rotation, or plane collision |
| Edge work | Front vise | Jaws restrain sideways pressure | Jaw marks; use pads or shims |
| Small parts | Auxiliary board + stop | Creates a larger, safer reference | Loose part near the cutting path |
04 / Workholding in practice
Choose the simplest effective hold
Portable fixtures can cover many jobs without permanently modifying the bench.
Crosscut · Bench hook
Catch the saw stroke
A flat base, top fence, and lower cleat register stock against the bench edge. Fit the cleat snugly; leave enough room for the saw to travel. A replaceable sacrificial top handles a worn kerf.
Planing · Stop or dogs
Resist the forward push
A removable stop is quick for one-way force. Dogs paired with a vise can control longer boards and help keep them flat, when the bench has compatible holes.
05 / Before the cut
Check four kinds of movement
Test with the tool unpowered and the workpiece in place. Each motion may need a different contact point.
Press in the tool’s working direction. Confirm a stop or clamp takes the load.
Watch for a hook or board lifting away from the bench edge.
Push sideways at an end; add a second contact if the stock can pivot.
Press opposite corners and check both the workpiece and bench.
06 / A useful rule
Secure the work. Preserve the path.
Enough pressure prevents movement; pads spread pressure and protect delicate or finished surfaces.
Set the work at a comfortable height, verify the fixture contacts the work squarely, and move the plane or saw through its entire path. No clamp, stop, or bench edge should meet the tool.
Start with a stable bench and a hold that matches the cut
A hand-tool workholding setup works when the bench stays put and the fixture opposes the force your tool applies. Before buying a vise or drilling dog holes, check whether the bench rocks, slides, or twists under a firm push. The most useful hold for a cut is the one that keeps the board still while leaving the tool path clear.
Try this with a scrap board: set it on the bench and press forward as if you were planing. If the bench shifts or a leg lifts, the fixture cannot solve the whole problem. Tighten loose joints, add weight to a light bench, or brace it against a wall if the arrangement allows. A 20-pound portable table may be fine for carving a small spoon, but it can walk across a smooth garage floor under hard planing strokes. This is a tradeoff between portability and resistance: extra mass and bracing improve stability, while a light bench is easier to move but asks you to use gentler cuts or secure it before demanding work.
Then ask which way the work wants to move. Sawing across a board pushes it into a bench hook; planing along the grain pushes it toward a stop; edge work often needs a vise to resist sideways pressure. Direction matters more than clamp count. Two clamps placed poorly can leave a board free to rotate, while one well-positioned stop can keep it firmly registered. The goal is not to immobilize every surface; it is to place contact where it intercepts the tool’s force without blocking the cut.
Set the work at a height where your shoulders stay relaxed and you can see the cut. Lower benches can help you put body weight into a plane, while higher surfaces can suit detail work. There is no single right height: plane a short scrap, check your posture, and move the work if your wrists or shoulders start to complain. A comfortable stance matters because fatigue changes how consistently you control the tool and how much sideways force you apply to the work.
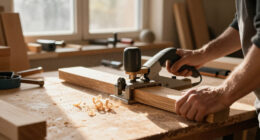
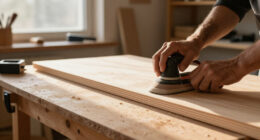
woodworking bench with workholding clamps
As an affiliate, we earn on qualifying purchases.
As an affiliate, we earn on qualifying purchases.
Use a bench hook to make crosscuts feel controlled
A bench hook holds stock for a crosscut by catching against the bench edge while its fence bears against the board. The saw’s forward strokes push the work into the hook instead of sliding it away. That direct, simple relationship makes the hook a dependable fixture for hand sawing small and medium parts.
A basic hook has a flat board with a fence screwed or glued across its top and a cleat beneath one end that catches the front edge of the bench. Place the work against the top fence, then let the lower cleat register against the bench edge. For a 1-by-4-inch pine offcut, this gives you a broad, steady surface and keeps your fingers away from the saw line. The bench edge is part of the fixture: if the cleat misses it or the edge is rounded, the hook can lift instead of transferring the saw’s push into the bench.
Make the hook wide enough to support your common stock, but leave space for the saw to travel without striking the bench. If you regularly cut a narrow strip, add a sacrificial top that you can replace once the kerf gets ragged. A thin piece of hardwood or plywood is enough; the hook does not need fancy joinery to work well. A wider base supports irregular or broad stock, but takes more storage space and can make the saw path harder to reach. Size it around the material you cut most often, then use a second small hook if your work varies widely.
Here’s a useful shop test: hold the hook in place with one hand, set a scrap against the fence, and make a few gentle saw strokes. If the hook lifts or creeps, improve the cleat’s fit or add a non-slip surface beneath the base. A bench hook is a small jig with a large payoff when you cut tenons, shelf parts, or short stock that would be awkward to hold by hand. It is quick to reposition, though it does not grip the work from above; for stock that tends to tip or lift, add a clamp or choose a different hold.
hand tool workholding clamps and stops
As an affiliate, we earn on qualifying purchases.
As an affiliate, we earn on qualifying purchases.
Keep boards from creeping when you plane
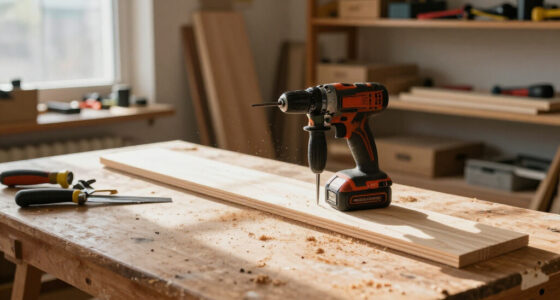
A planing stop or bench dogs keep a board from moving forward under the plane. A stop gives the board an end to push against; dogs work with a vise or clamp to press the board down and hold it along the bench. Both approaches resist the forward force of planing while keeping the plane’s sole clear. The important distinction is where the restraint comes from: a stop is simple and fast for a board pushed in one direction, while dogs and a vise can control a longer span and are more adaptable when the work also needs to stay flat.
The simplest option is a fixed or removable planing stop at the far end of the board. Set the board against it, then take a light pass with a sharp plane. If the board creeps, check that the stop contacts the end squarely and that the bench itself does not slide. A wooden stop is easy to make and kind to the workpiece, though it can get chewed by repeated contact. A replaceable face absorbs that wear; a fixed stop is ready at hand but may obstruct other jobs, while a removable one takes a moment to install and can be lost or misaligned.
Bench dogs suit benches with compatible holes and a vise that can push the board against them. A dog near each end helps control a long board, but don’t place one where it will collide with the plane or your hands. For a short panel, one stop and a patch of high-friction material may be enough. Setup keeps the work secure only when the contact points prevent both sliding and rotation. Dogs add flexibility across different board lengths, but they depend on a compatible bench and take more setup than a simple end stop.
Imagine flattening a 30-inch cabinet door rail. A stop at the end resists the plane’s push, while a low-profile holdfast or dog can prevent the rail from lifting. If you need a clamp, position it outside the plane’s travel and use a scrap pad to protect the edge. Test with a dry run: push the plane over the full path without cutting and confirm nothing catches or shifts. This check matters because a hold that resists force at the near end may still allow the far end to pivot as the plane moves across it.
As an affiliate, we earn on qualifying purchases.
Choose a vise, clamp, or stop for each kind of work
A woodworking vise, clamp, and stop solve different holding problems, so you don’t need to treat one as a universal answer. A vise grips an edge or small part, a clamp applies pressure between surfaces, and a stop resists movement in a particular direction. You can start with the tool that covers your actual projects and add the others as gaps appear. Thinking in terms of force makes the choice clearer: a clamp can press a board down, but unless it has something to push against, it may not stop the board sliding in the direction of a plane stroke.
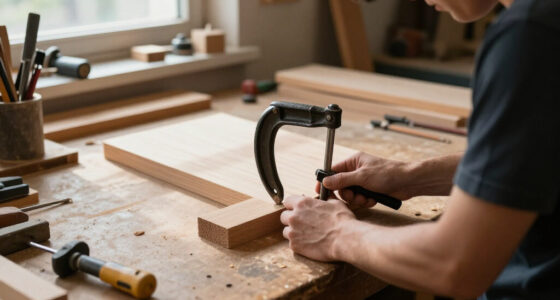
A front vise is especially useful for edge work, such as planing the long edge of a board or sawing a shoulder. Add wooden jaw liners or pads so the metal jaws do not dent the stock. A pair of clamps can cover many similar jobs, especially on a bench without a vise, but keep them below or beside the tool path. Tighten just enough to stop movement; a clamp can bow a thin panel or leave a crescent mark if you crank it down. A vise is quicker to adjust repeatedly, while clamps are cheaper and more portable but can take longer to position and may obstruct access.
For a small garage shop, a bench hook, one or two clamps, and a removable stop can cover a surprising amount of work. A pro-grade vise adds speed and stiffness, but it does not replace a stable bench or a correctly placed stop. If you work on long boards every week, a vise and dogs may earn their footprint; if you mostly make small boxes, a clamp and auxiliary board might be more useful. This is a choice about repeated setup time as much as holding strength: permanent hardware pays off when you use it often, while portable fixtures preserve clear bench space between projects.
| Fixture | Best for | Watch for |
|---|---|---|
| Bench hook | Crosscutting short stock | Saw clearance and cleat fit |
| Planing stop | Resisting forward planing force | End contact and board lift |
| Vise | Edge work and small parts | Jaw marks and tool clearance |
| Clamp | Flexible, temporary holds | Pressure dents and obstructed paths |
When choosing, ask what force the fixture must resist and where your hands and tool need to travel. A good workholding setup is effective as the job requires, not as complicated as the catalog allows. A useful test is whether the fixture controls the likely movement without making the next cut awkward; if it solves one problem by blocking the tool, choose a different contact point.
As an affiliate, we earn on qualifying purchases.
Hold small parts without putting fingers near the edge
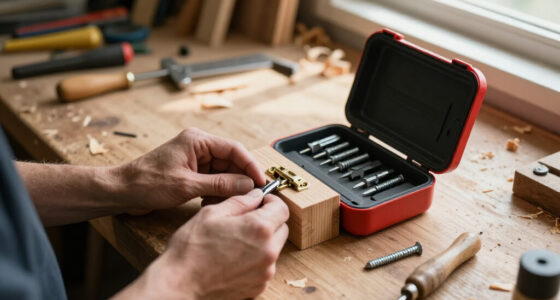
Small parts need a larger, more secure holding surface because your fingers cannot safely resist tool pressure near a cutting edge. A vise, handscrew clamp, small-parts holder, or sacrificial board with a stop can steady the work while giving your hands a safer place to apply pressure. Choose the arrangement that keeps the tool path well away from your fingertips. The larger carrier also makes a tiny piece easier to control: it gives you a surface to register against and reduces the chance that the part will turn when the grain changes.
Say you are paring a hinge mortise in a narrow cabinet door. Clamping the door flat to an auxiliary board gives the door more support, and a short stop at one end prevents it from creeping. You can then hold the chisel with both hands and make controlled cuts. If the door’s finish is delicate, place clean scrap pads between the clamp and the surface. The auxiliary board takes some of the pressure and vibration that would otherwise be concentrated at the clamp points, though it adds height and must be secured so the whole assembly cannot tip.
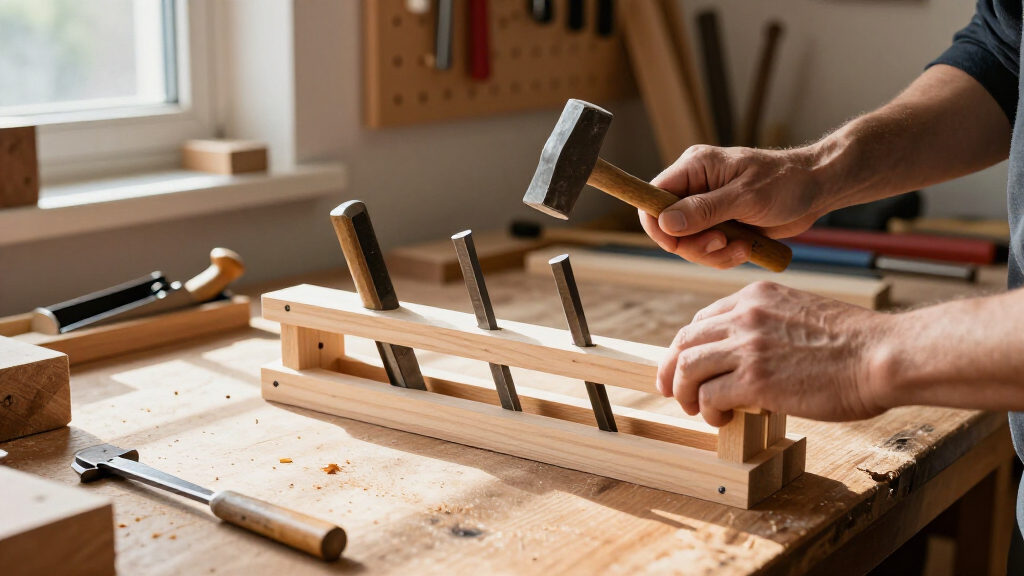
For a tiny chamfer on a block, a handscrew clamp can grip the block while its handles give you a safer way to position it. A simple wooden cradle with a fence can also work for repeated parts. Avoid holding a loose piece in your palm while pushing a chisel or saw toward your hand; even a sharp edge can skate when the grain changes. A dedicated holder may take longer to make than the cut itself, so it makes most sense when the part is too small to control safely or when you will repeat the operation.
Small parts are where a makeshift fixture earns its keep. A scrap board screwed to a bench hook can become a miniature work surface, and a replaceable face can absorb knife and chisel marks. Keep the part from rocking as well as sliding; a narrow piece that tips under pressure is still poorly held, even if a clamp stops it from moving forward. If it rocks, widen the support or add a second contact point so the force is spread across the part instead of concentrated at one edge.
Make a portable starter system in five practical steps
You can build a starter workholding system from a stable surface, a bench hook, a removable stop, and one or two clamps. This combination handles common crosscuts, planing, and small-part jobs without permanently modifying your bench. Build the fixtures from straight scrap, then adjust them to the stock and tools you actually use. Keeping the first system portable lets you learn where support is needed before committing to holes or permanent hardware.
- Check the bench. Push on the corners and work surface; fix rocking or sliding before adding fixtures.
- Build a bench hook. Fit its lower cleat to your bench edge and leave room for saw teeth beneath the cut.
- Add a removable planing stop. Use a cleat or clamp-on block at the end of the board’s travel.
- Set aside padded clamps. Keep scrap shims nearby for softwood, veneer, and finished parts.
- Dry-run each setup. Move the tool through its full path and check for sliding, rocking, rotation, and collisions.
For example, a new hobbyist can make the hook from a 12-inch piece of plywood and two cleats, then use a clamp-on stop for planing. The dimensions should suit your bench and work, so treat those measurements as a starting point rather than a universal spec. If your bench has dog holes, add dogs later when you know where they help. Waiting lets you place them around real work rather than guessing at hole locations that may not suit your most common board lengths.
Portable fixtures also suit shared spaces. A hook and stop can hang on a wall or store flat under the bench, then come out when you need them. That beats leaving permanent hardware in the way of assembly or sanding. The best starter system is the one you can set up quickly, inspect easily, and adapt without a full shop rebuild. Its limitation is that each setup requires a little attention; if a fixture keeps taking time to align, that repeated friction is useful evidence that a permanent stop or vise might now be worthwhile.
Fix workpiece movement before it becomes a bad cut
If a workpiece moves, stop and identify whether it slides, lifts, rotates, or rocks; each motion points to a different weakness in the hold. A stop handles sliding in one direction, a clamp or dog can control lift, and spaced contact points help resist rotation. Adding more pressure without diagnosing the motion can mark the wood while leaving the real problem in place. Treat movement as feedback: it tells you which force the setup is failing to oppose.
Consider a board that creeps forward during planing. The stop may sit too far away, touch only one corner, or move with the bench. If the board pivots around the stop, add a second contact point or a vise. If it lifts, check for a holdfast or clamp positioned low enough to press it down without entering the plane’s path. Each correction addresses a different movement, so a second clamp is useful only if it restrains the motion you observed.
Slippery contact surfaces cause trouble too. Dust on the bench can act like ball bearings under a smooth board, while a polished finished face may slide against bare wood. Brush off the bench, use a clean pad, or add a strip of suitable non-slip material. Keep pads thin enough that the work stays close to the bench and does not flex under pressure. Softer or thicker pads can protect a finish but may compress unevenly, changing the board’s angle as you plane.
Before cutting, place the tool at the start and end of its path and move it without cutting. This catches a clamp handle that a saw might hit or a vise jaw that blocks the plane. Secure the work, then check the whole stroke; a setup that holds at rest can still fail when the tool applies force at an angle. If anything shifts in the dry run, adjust the contact points and repeat it before making a cut.
Frequently Asked Questions
What is the simplest workholding setup for hand tools?
Start with a stable bench, a way to clamp or brace the work, and a bench hook or stop. A hook helps with crosscuts, while a stop resists forward planing force. For example, a bench hook and one clamp can cover many small-shop tasks before you fit a permanent vise.
Do I need a woodworking vise?
No. A vise is handy for edge work and small parts, but clamps, holdfasts, and stops can handle many jobs. If you often plane board edges, a vise can save setup time; if you mostly cut short parts, a bench hook and padded clamp may cover your needs.
How do I hold a board for planing?
Use a planing stop, bench dogs, or a clamp arrangement that resists the plane’s forward push and prevents the board from lifting. Keep the plane’s path clear and test a dry stroke first. A board that rocks or creeps needs a better contact point before you plane it.
How tight should a clamp be?
Tighten a clamp only until the work stops moving. Excess pressure can dent softwood, bow a thin panel, or crush an edge. Scrap pads spread the load, especially when you clamp finished or delicate surfaces.
Can I build a workholding system without drilling my bench?
Yes. A portable bench hook, clamp-on stops, and an auxiliary board can provide useful holding without permanent changes. They work well in a shared garage where you need to clear the bench or store fixtures flat after a project.
Why does my workpiece still move?
The fixture may not oppose the tool’s force, the bench may be unstable, or the contact surfaces may be dusty or slippery. Check whether the board slides, lifts, rotates, or rocks, then adjust the stop or add a second contact point. More clamp pressure alone may leave the cause untouched.
Conclusion
Build your workholding around the forces your tools create: a hook for the saw, a stop for the plane, and a vise or padded clamp for edges and small parts. Start with a stable bench and a few movable fixtures, then add hardware only when a repeated job shows you what is missing.
Before the next cut, push the work in the direction the tool will push it. If it stays put and your tool has a clear path, you’re ready. The board should feel like part of the bench, not a guest trying to leave.
Fall yard work Picks
leaf blowers
As an affiliate, we earn on qualifying purchases.