
TL;DR

Get tools and workshop supplies delivered free — and shop member deals
- Fast, free delivery on millions of items
- Access to Prime Big Deal Days deals on October 6–7
- Prime Video, Amazon Music and more included
Start with your band saw’s built-in dust port and manual, then add a pickup near the blade if the saw’s design supports it without blocking adjustments or service access. Match duct size and airflow to the saw and collector specifications, keep the hose path short and smooth, and test both pickups. Collection helps control chips and airborne dust, but it does not replace ventilation, suitable respiratory protection, or material-specific safety precautions.
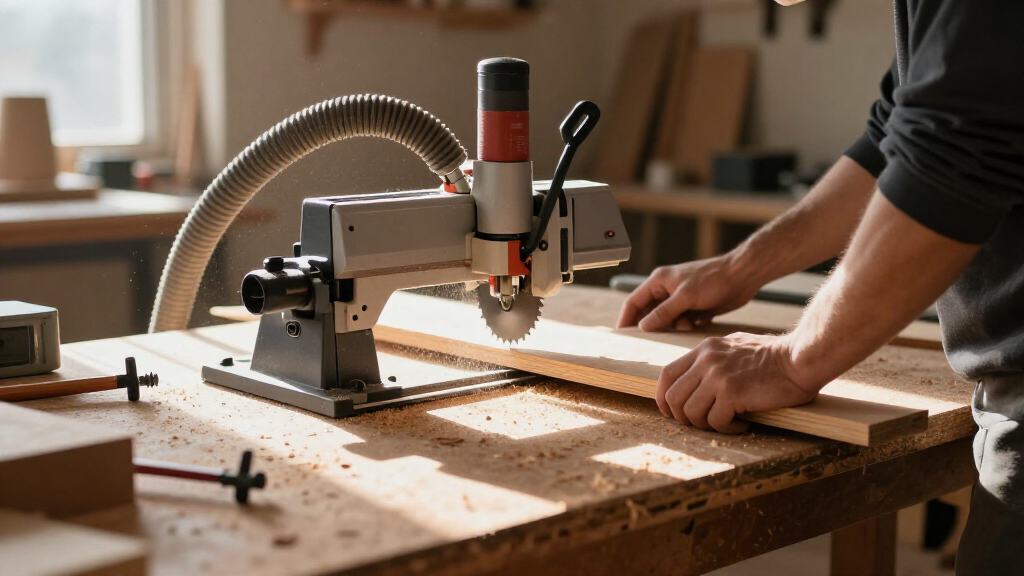
A band saw can leave a neat curve in a board and a gritty crescent of dust around the table before you finish the cut. The lower blade area and wheel housing make that mess hard to catch with one distant hose. A well-placed pickup can pull chips and some fine dust away before they spread across your bench.
This guide walks you through how to create a band saw dust collection system around your own machine: where to connect, when a second pickup helps, and how to match ducting to the collector you already own. You’ll also learn what to check when dust still escapes, and why collection is only one layer of dust protection.
Think of the setup as a small airflow path, not just a hose attached to a port. A short, open route with pickups close to the cut often beats a bigger collector fighting a long run, sharp bends, and a clogged filter.
Begin with the manufacturer’s lower wheel housing port, manual, and airflow requirements.
Add a blade-area pickup only when it fits securely and leaves safe access to the guides, tracking, tensioning, and blade.
Keep ducting compatible with the collector, short, smooth, sealed, and clear of the workpiece path.
If dust escapes, inspect placement, hose restrictions, leaks, filter condition, and bin fill before changing equipment.
Use suitable respiratory protection and ventilation; disconnect power before cleaning, and follow material-specific collection guidance.
Workshop guide · Dust control
How to Create a Dust Collection System for Your Band Saw
Build a short, smooth airflow path around your own machine. Start at the lower housing, add a blade-area pickup when the design allows, and test the whole setup before relying on it.
01 / Plan the capture
Two zones, one clear work area
A distant hose can miss the gritty crescent around the table. Treat the setup as an airflow path, with pickups placed near the dust and chips.
Use the built-in port
Check the saw manual and begin at the lower wheel housing port. It gathers heavier chips around the wheel and gives you a manufacturer-defined starting point.
Add only if it fits
A blade-area pickup can intercept lighter dust before it spreads. Skip it if there is no secure mounting point or safe clearance through every adjustment.
Keep access usable
Preserve reach to guides, tracking, tensioning, blade-change fasteners, and cleaning points. Keep hoses away from the cut line and workpiece path.
02 / Build the system
Five steps from port to test cut
Measure and plan first. Install and test every connection with the machine disconnected from power.
Read both manuals
Find the saw’s port guidance and the collector’s duct and airflow specifications.
Map the pickups
Locate where dust gathers and decide whether a second pickup fits safely.
Choose fittings
Measure ports and choose compatible hose or duct. Use a suitable reducer if needed.
Route and secure
Keep the path short and smooth. Seal joints and secure hoses clear of stock.
Run and inspect
Make a test cut. Check both pickups, connections, and places where dust escapes.
03 / Airflow matters
Protect the path to the collector
Port diameter alone does not tell you the airflow a system needs. Match duct size to the saw and collector specifications.
Airflow path · Qualitative comparison
Illustrative relationship only. These bars are not measured airflow ratings.
Trace the system
04 / Troubleshoot + protect
When dust still escapes
Visible chips are only part of the picture: fine dust can remain airborne after the larger debris settles.
Check capture at source
Inspect where dust gathers after a test cut. Adjust pickup position only when safe clearance and service access remain intact.
Inspect the whole route
Look for a kinked or blocked hose, tight bends, undersized sections, loose joints, and leaks that draw room air.
Restore collector performance
Check filter condition and bin fill. Empty the bin before it is overfull; clean or replace filters as the manufacturer directs.
Use layered dust protection
Collection helps control chips and some airborne dust. Use suitable respiratory protection and general workshop ventilation as well.
Match collection to the material
Metal, some plastics, and composites may need different collection methods and can create fire, explosion, or equipment hazards. Follow supplier and collector guidance.
Clean with power disconnected
Disconnect power before cleaning, changing a hood, or adjusting the setup. Brush and vacuum dust around wheels and guides; do not blow it into the room with compressed air.
Judge upgrades by fit and airflow
Cartridge filters, remote starts, and model-specific ports can make installation easier. Verify current specifications; performance still depends on layout and maintenance.
Quick answers
Common setup questions
Use the machine and collector manuals to settle model-specific questions before choosing fittings.
Where should I connect collection?
Start with the manufacturer-provided lower housing port. Add a blade-area pickup if the design supports it safely.
Is one port enough?
Sometimes. A second pickup may improve capture where dust escapes above the lower housing.
What hose size do I need?
Use the saw and collector specifications. Port size alone does not determine the required airflow.
Can I use a shop vacuum or make a hood?
A shop vacuum may collect some chips, but fine-dust capture and airflow may be limited; check its guidance and filtration. A homemade hood must fit securely, clear moving parts, and preserve service access.
Start with your saw’s ports and service clearances
Start by locating the manufacturer’s dust port and checking the manual for its intended use and airflow requirements. On many band saws, the lower wheel housing provides the first connection point, while the blade area may need a separate pickup. A built-in port is a useful starting point, but it cannot catch every chip thrown beyond the housing.
With the machine disconnected from power, inspect around the lower wheel, blade guides, table opening, and upper enclosure. Note where dust gathers after a typical cut, and mark places where a hose, hood, or adapter could fit without obstructing the blade, workpiece, or adjustments. For example, if a hose crosses the table’s right side, it may snag a wide board as you feed it through a resaw cut.
Before building an adapter, check that you can still reach blade tensioning, tracking controls, guides, and the fasteners used for blade changes. A hood that captures dust beautifully but has to be removed for every small adjustment will soon get left off. Favor a secure, removable fitting that keeps service access straightforward.
Record the port diameter and the collector’s requirements before shopping for fittings. Port size alone does not tell you the airflow the saw needs. A reducer can join mismatched parts, but a sudden narrow restriction may make the whole system less effective.
As an affiliate, we earn on qualifying purchases.
Use two pickups to catch dust at the lower housing and blade
A practical band saw dust collection system often combines a pickup at the lower wheel housing with a second near the blade when the saw’s design supports it. The lower port gathers material falling into the housing; a blade-area pickup can catch dust that escapes before it reaches that port. Neither placement is universal, so follow the saw’s manual and preserve safe clearances.
For a real example, imagine cutting a stack of dry oak strips. The lower port may pull in the heavier chips that tumble around the wheel, while fine particles and lighter shavings scatter above the table. A carefully fitted upper pickup may reduce that plume. If your saw has no safe upper mounting point, improving the lower connection and room ventilation may make more sense than crowding the blade with a homemade hood.
Keep a homemade hood firmly attached and well away from moving parts. It must not touch the blade, pinch stock, hide the cut line, or restrict blade guides. Make adjustments with the machine off and disconnected from power. If you cannot confirm a safe clearance through the full range of adjustment, skip that pickup.
Some saws have model-specific ports or adapters, and newer fittings may make installation easier. Their availability and specifications change. Check current manufacturer information and judge the design by its actual fit and airflow path, not the label or the number of ports.
As an affiliate, we earn on qualifying purchases.
Match the duct path to your collector’s airflow
Match hose and duct size to the specifications from both the saw and collector manufacturers, then keep the route as open and direct as your shop allows. A large collector cannot make up for a long, narrow, leaky path with several sharp bends. Each restriction can reduce airflow at the pickup where you need it.
Compare a collector beside the saw, connected by a short, smooth hose, with one across a small garage and routed behind a bench. The second arrangement may be more convenient for floor space, but its added length, elbows, and joints can cut performance. A band saw next to a wall might need one gentle bend; try not to add three tight turns simply to hide the hose.
Use smooth ducting where practical and secure the hose so it cannot snag a board, brush your sleeve, or pull an adapter loose. If port sizes differ, use a reducer suited to the equipment rather than forcing a hose over a fitting or sealing a loose joint with a wad of tape. Look for gaps at connections; a leak can pull air from the room instead of carrying dust from the saw.
Collector ratings and duct details vary, so do not pick a hose size from the port diameter alone. Check the manual for required airflow and compatible connections. If you add a second pickup, consider how the collector is meant to serve both ports; an open branch can reduce suction at the other one unless the layout and controls suit simultaneous use.
As an affiliate, we earn on qualifying purchases.
Build a clean installation in five practical steps
To create a dust collection system for your band saw, plan the ports and airflow path first, then install and test each connection with the machine disconnected from power. A compact garage setup can be simple: connect the lower port, add a safe blade-area pickup if the saw supports one, and route the hose where it stays out of the work zone.
- Read the manuals. Find the saw’s dust-port guidance and the collector’s hose, duct, and airflow specifications.
- Map the pickups. Identify where the lower housing gathers dust and whether a second blade-area pickup fits without blocking adjustments.
- Choose compatible fittings. Measure ports, select the appropriate hose or duct, and use reducers only when required by the layout.
- Route and secure the path. Keep it short and smooth, seal connections, and prevent hoses from snagging stock or interfering with the saw.
- Run a cut and inspect. Check both pickup areas and joints; revise placement if dust escapes or airflow seems weak.
For instance, you might connect the lower port with a short hose first, make a test cut in scrap pine, and note where shavings collect. If the table still gets a fan of dust above the cut, examine whether a safe second pickup would help before buying a larger collector.
A shop vacuum may collect some chips on a small saw, but fine-dust capture and airflow can be limited. Check the vacuum and tool guidance, and use suitable filtration. A system that catches visible chips can still leave fine dust airborne.
air filtration system for workshop
As an affiliate, we earn on qualifying purchases.
As an affiliate, we earn on qualifying purchases.
Check why dust is escaping before upgrading equipment
When dust still escapes, inspect pickup placement, leaks, restrictions, bin fill, and filter condition before replacing the collector. Weak capture often comes from an avoidable bottleneck: a packed filter, an overfull bin, a kinked hose, or a port positioned too far from the dust stream.
Use a repeatable test. Make a similar cut with the same stock and blade, then look at the lower housing, table, upper enclosure, and the connections. If the housing stays fairly clean but dust spreads around the blade, the lower port may be doing its job while the blade area needs attention. If chips collect at the hose joint, reseat and seal that connection according to the fitting design.
Check airflow at each pickup as the equipment manuals direct. If you use a branch or two pickups, see whether the collector is designed to serve both at once. A gate or suitable branch arrangement may help balance the system, but do not assume that adding an open hose automatically improves capture.
Filters need cleaning or replacement on the schedule set by their manufacturer. Empty the bin before it is overfull, and inspect ducting for blockages. Newer cartridge-filter collectors, remote starts, and purpose-made fittings can make maintenance easier, but the collector, filter, duct layout, and pickup position still determine performance.
Protect your lungs and keep the saw safe to service
Dust collection reduces the material escaping into your shop, but it does not remove every fine particle from the air. Wood dust is a respiratory hazard, and the smallest dust can linger after visible chips settle. Use suitable respiratory protection and general workshop ventilation for the material and work you are doing.
Take a practical example: after cutting a batch of dry maple, the table may look clean while a faint haze or fine residue remains nearby. Keep protection on during dusty work rather than judging exposure by the size of the chips you can see. A useful article should help readers build a layered approach: capture dust at the saw, use appropriate PPE, and keep the shop ventilated.
Disconnect power before cleaning around the wheels and guides, clearing a blockage, or changing a hood. Brush and vacuum buildup; do not use compressed air to blast dust into the room. Accumulation can interfere with blade tracking, guides, or wheel operation, so inspect regularly and clean before it affects the cut.
Do not assume a wood-dust collector suits every material. Metal dust and dust from some plastics or composites can need different collection methods and may create fire, explosion, or equipment hazards. Follow the material supplier’s guidance and collector manufacturer’s requirements. Keep ignition sources away from combustible dust, and use equipment designed for the intended material.
Frequently Asked Questions
Where should I connect dust collection on a band saw?
Start with the manufacturer-provided port, commonly found at the lower wheel housing. Check the manual and inspect the blade area for a safe second pickup location. Keep every fitting clear of moving parts and adjustments.
Is one dust port enough?
Sometimes. A lower housing port may collect much of the heavier debris, while dust thrown around the blade can escape it. Test your saw with a typical cut and add a second pickup only if the design allows it safely.
What hose or duct size do I need?
Use the saw and collector manufacturers’ specifications. Port diameter alone does not define the airflow needed, and a long or sharply bent narrow hose can restrict performance. Use a suitable reducer when the fittings differ.
Can I use a shop vacuum on a small band saw?
A shop vacuum may collect some chips, especially on a small saw, but fine-dust capture and airflow may be limited. Check the vacuum and saw guidance and use suitable filtration. Keep respiratory protection and ventilation in your plan.
Why is dust still escaping after I connect the collector?
Check pickup placement, loose joints, kinks, long runs, sharp bends, a full bin, and a clogged filter. Also check whether the collector is meant to serve two pickups at once. Dust near the blade may call for a safe blade-area pickup rather than more suction at a distant port.
Can I use the same collector for metal dust?
Do not assume a wood-dust collector is suitable for metal. Metal dust may need purpose-built collection and precautions. Follow the material supplier’s guidance and the collector manufacturer’s requirements.
Conclusion
Build your setup around the dust path your saw actually creates: start at the lower housing, add a safe blade-area pickup when it fits, and give both a clear route to a compatible collector. Then test a real cut and fix the leak, restriction, or placement problem you can see.
Keep your respirator close and your hose out of the board’s path. A clean cut should leave the curve you wanted on the wood, not a gray drift settling across the whole garage.
Halloween Picks
halloween
As an affiliate, we earn on qualifying purchases.