
TL;DR

Get tools and workshop supplies delivered free — and shop member deals
- Fast, free delivery on millions of items
- Access to Prime Big Deal Days deals on October 6–7
- Prime Video, Amazon Music and more included
Plan your workshop around the projects you do, the tools they require, and the largest workpieces you need to move. Separate dusty cutting and sanding from clean assembly or electronics work, protect clear paths to exits and panels, and use mobile stations only when they lock firmly for operation.
A table saw can fit in a garage and still make the room unusable. The trouble starts when a full sheet of plywood hits the freezer, a bicycle blocks the outfeed path, or your electronics bench gets dusted with fine sanding grit. Square footage alone does not make a functional workshop; the work has to move through it safely.
This guide shows you how to plan a workshop for varied projects, from furniture and home repairs to bike maintenance and small electronics. You’ll map work zones, check machine clearances against real materials, and choose storage, lighting, power, and dust controls that support different projects without becoming difficult to rearrange.
Think of the room like a kitchen: the stove, sink, and prep counter each have a job, but the paths between them matter just as much. A sensible layout saves setup time and gives you room to work without turning every project into furniture Tetris.
Measure the full feed path for your largest board or panel; machine footprint alone will not reveal a blocked cut.
Separate sanding and cutting from electronics and clean assembly, then clean between dusty and delicate tasks.
Use mobile stations where they save floor space, and lock and stabilize each one before operating a tool.
Store frequent-use tools near their work zone, keep heavy loads low, and secure wall or overhead storage to suitable structure.
Plan lighting, extraction, ventilation, safe power, clear exits, and equipment service access as part of the layout.
Start with your biggest workpiece, not the room’s square footage
A workshop layout for multi-purpose projects should start with a list of tasks and the largest things you’ll handle. Room dimensions matter, but a 4-by-8-foot sheet of plywood, a long door slab, or a bicycle on a repair stand can dictate clearances more than the room’s total area. Write down each regular project, its tools, and the space needed to feed, turn, assemble, or store its materials.
For example, a small garage shop might handle cabinet panels on a track saw, trim boards on a miter saw, and soldering at a bench. The track saw needs a stable surface and room to lay out a full sheet; the miter saw needs support on both sides for long stock. The soldering station needs good task lighting and a clean surface away from sawdust. Sketch each task at working scale, including the operator and the material’s path.
Measure the room, then mark doors, windows, outlets, fixed shelving, the electrical panel, and any water heater or furnace. Check the dimensions against the actual machines and manuals. A machine’s footprint is only the starting point: a table saw may need several feet of unobstructed feed and outfeed space to handle a long board safely.
A paper sketch or simple room-planning tool can help you try different placements before moving heavy equipment. Digital drawings are useful for catching obvious collisions, but verify the measurements in the shop with tape on the floor. Measure the work’s full travel path, then leave accessible routes to the exit and safety equipment.
garage workshop layout planning tools
As an affiliate, we earn on qualifying purchases.
As an affiliate, we earn on qualifying purchases.
Separate dusty cutting from clean assembly and electronics
Distinct work zones keep incompatible jobs from contaminating one another. Put cutting and sanding where you can capture dust at the tool, keep clean assembly and electronics away from the dust stream, and make a clear place for finishing, storage, and cleanup. The zones can share a room; they need sensible boundaries and a cleanup routine.
Imagine sanding a pine tabletop, then setting a circuit board on the nearest open surface. The dust looks harmless on your sleeve, but fine particles can settle into switches, connectors, and wet finishes. In a compact shop, park a small electronics bench at the clean end of the room or use a foldaway surface with a cover. Sweep or vacuum before opening sensitive parts, and avoid using compressed air to blow dust around.
Dust collection needs to match the tool and the way you work. A portable extractor with a suitable hood can serve a track saw or sander, while a larger collector may suit machines used for repeated, high-volume chip and dust production. Check the tool maker’s extraction guidance and the collector’s airflow specifications; a CFM number by itself does not tell you how much air reaches the tool after hose, filter, and duct losses.
Finishes and solvents bring a different concern: fumes and vapors. Store them according to their labels, use ventilation suited to the product, and keep ignition sources away when the product calls for it. Capture dust and fumes near the source, and wear eye, hearing, and respiratory protection appropriate to the job.
dust collection system for workshop
As an affiliate, we earn on qualifying purchases.
As an affiliate, we earn on qualifying purchases.
Give every machine enough room for the material to move
Machine clearance means room for the operator and the entire workpiece, not just a gap between tools. There is no single aisle width that works for every shop, because a short block and a long board have different handling needs. Follow each machine’s manual, then test the actual material path and your stance before fixing equipment in place.
Suppose you put a table saw in the center of a single-car garage. A narrow scrap may pass easily, while an eight-foot board needs clear space behind the blade and a way to support its end without tipping. A full sheet of plywood is wider still; many small shops handle it more safely with a track saw on a support surface than by feeding it across a compact table saw. Choose the setup to fit the stock you actually use.
Leave walkways, exits, electrical panels, and fire equipment clear. A dust hose stretched across the main path or a mobile bench left in front of the door can become a trip hazard during an ordinary afternoon, then a serious obstacle in an emergency. Route cords and hoses along walls or overhead supports designed for the load, and keep them clear of moving machine parts.
Before you commit to a layout, tape machine footprints and feed paths onto the floor. Walk the path while holding a board of the longest typical size, or mock up a sheet with cardboard if space is tight. Clearance is a working dimension; that quick test often reveals a collision that a neat overhead plan misses.
mobile workbench with locking casters
As an affiliate, we earn on qualifying purchases.
As an affiliate, we earn on qualifying purchases.
Make a small shop flexible with stations that lock solid
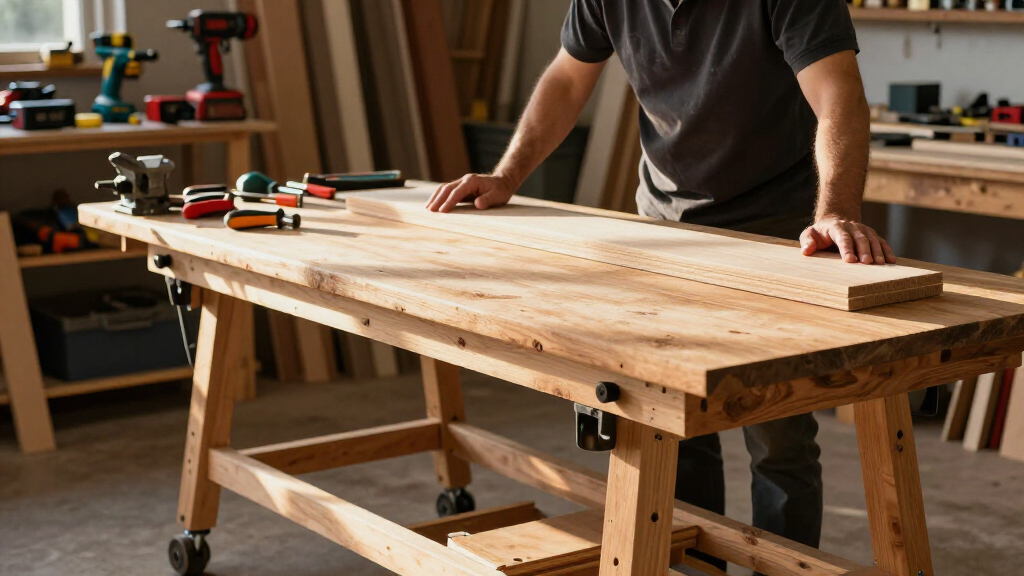
Mobile benches, folding tables, and multi-function tools let one small shop serve several jobs. Flexibility works only when each station stays stable under load and returns to a predictable place. Lock casters before operating equipment, and check for wobble, rocking, or a worktop that shifts when you lean on it.
In a one-car garage, a rolling assembly bench can double as an outfeed table, while a folding wall surface can host model-making or electronics work. A miter saw station might sit on a mobile base so you can roll it out for long stock, then park it against a wall. The catch: every move requires restoring the support wings, locking the wheels, and reconnecting dust collection without kinking the hose.
Write down a short reset sequence for each station. For instance: roll the bench into position, lock all casters, check that the floor is clear, connect extraction, and verify the workpiece has support. This is less glamorous than buying another machine, but it prevents a tool from becoming unstable because you were in a hurry.
Fixed machines still earn their footprint when you use them often or need precise alignment. If you use a table saw weekly and a benchtop drill press twice a year, a fixed saw and a stowed drill press may make more sense than giving both permanent floor space. Choose mobility by frequency and task, not by the assumption that every machine should roll.
As an affiliate, we earn on qualifying purchases.
Put tools, lighting, and power where the work happens
Good storage and lighting reduce setup friction and help you see the cut, mark, or connection clearly. Keep everyday tools near their point of use, group them by task, and place heavy items low enough to lift without reaching overhead. Combine general room lighting with task lights positioned to reduce shadows and glare on the work surface.
Consider a bench where you measure and assemble small parts. A tape, square, pencils, clamps, and frequently used fasteners belong within easy reach; an occasional router bit set can live farther away in a labeled drawer. If you make a dozen trips across the room for common tools, the layout is asking you to work around it. Clear labels and a simple outline on a tool board can make misplaced tools obvious.
Plan power around actual tool locations and cord reach, but do not treat electrical work as a casual weekend experiment. Have a licensed electrician assess circuit capacity, outlet placement, and installation against local electrical code, especially before adding stationary equipment or changing wiring. Turn power off at the correct breaker and verify it is de-energized before any permitted work; wear appropriate PPE and follow equipment instructions.
Keep cords out of walkways and away from blades, belts, and hot surfaces. Wall and overhead storage can free floor space, but mount it into suitable structure with hardware rated for the load. Convenient storage is useful only when it stays secure; a heavy toolbox perched over the bench is a poor trade for one extra square foot.
Build comfort and cleanup into the layout from day one
A comfortable workshop gives you room to work, clean, and service equipment without dismantling the whole shop. Set bench height for the task and the people using it: detailed handwork often feels better at a higher surface, while heavy planing may suit a lower one. Leave access to machine adjustments, filters, belts, and dust ports before surrounding a tool with cabinets.
For example, if you crouch to reach a sander’s switch or stretch across a bench to see a pencil line, the station is fighting your body. Test a bench height with a mock task before building it permanently. A stack of scrap wood under a portable worktop can help you compare positions without committing to a new cabinet.
Make cleanup part of the workflow. Put a broom, dustpan, vacuum hose, and waste bin near the dirty-work zone, and plan where offcuts go so they do not accumulate in the aisle. Keep a clear floor around machines to spot dropped screws and avoid tripping over extension leads. A shop that looks tidy only on moving day is not a useful design.
Noise and airborne particles also affect comfort, especially in a residential garage near family or neighbors. Use hearing protection for loud operations, and choose extraction and ventilation that suit the machine and material. Requirements vary with location and process, so check local rules and product instructions when the work involves hazardous dust, fumes, or structural changes. Leave room for maintenance; an accessible filter gets cleaned more often than one buried behind a stack of lumber.
Use this five-step layout check before you move machines
A quick layout check catches the expensive mistakes before you haul a machine across the garage. Work through the sequence with tape, a notebook, and the actual dimensions of your equipment and materials. A Saturday spent measuring beats an afternoon spent moving a table saw twice.
- Measure the room: record walls, doors, windows, fixed utilities, outlets, and the electrical panel.
- List your projects: write down the tools, materials, and support surfaces each job needs.
- Test the largest stock: map the full path for your longest board, widest panel, bike, or other bulky item.
- Mark zones and routes: separate dusty work from clean work and keep exits and safety equipment accessible.
- Mock up and adjust: tape footprints on the floor, move a sample workpiece through the space, then confirm stability, power, lighting, and extraction.
Say you are fitting woodworking, bicycle service, and small electronics into a 12-by-20-foot garage. The mock-up may show that a permanent assembly table blocks bike access, while a locking mobile bench can serve as both assembly surface and saw outfeed. It may also reveal that electronics work needs a covered wall bench at the clean end of the room.
Use a comparison table only when you are choosing between genuinely different setups; a drawing and a floor test often tell you more than a generic “ideal layout.” Check tool manuals and local requirements before installation. Test movement before buying or building, and keep the plan flexible enough to change when your projects do.
Frequently Asked Questions
How do I start planning a workshop layout?
Measure the room, doors, windows, outlets, and fixed obstacles, then list your regular projects and the tools each one needs. Sketch zones and test the route for the largest workpiece with tape on the floor before you move equipment.
How much space should I leave between tools and benches?
There is no one clearance that suits every machine and material. Check the machine manual, account for the full length and width of the stock, and mock up the operator’s movement and support needs. A long board needs more than the space between two machine bases.
Can woodworking and electronics share a workshop?
Yes, if you control dust and keep sensitive work away from cutting and sanding. Put the electronics bench in a cleaner zone, cover it during dusty jobs, capture dust at the tool, and clean the room before handling exposed parts.
What dust collector airflow does a small workshop need?
There is no single CFM figure that suits every shop: the needed airflow depends on the tool, hood, hose length, duct layout, and material. Check the tool maker’s extraction guidance and the collector’s performance under the setup you plan to use. A good connection at the source matters more than a headline airflow number on its own.
Where should I put the workbench?
Place it where task lighting is good, common tools are close, and there is enough room for the work and your movement around it. Do not block an exit, panel, machine feed path, or the route used to move bulky materials through the shop.
How can I fit several activities into a single-car garage?
Use vertical storage, folding surfaces, and locking mobile stations for tasks that do not need permanent floor space. Keep an assembly surface available, group tools by task, and test each station’s stability before use so a flexible layout remains safe.
Conclusion
Plan around the work that has to pass through your shop: the longest board, widest panel, dirtiest process, and cleanest task. Mark the routes, separate dust from delicate work, and give each station enough room to operate and reset.
Then test the layout with tape on the floor before you move a machine. A good workshop feels less like a crowded garage and more like a well-tuned hand plane: every move has room, and nothing catches.
Fall yard work Picks
leaf blowers
As an affiliate, we earn on qualifying purchases.