TL;DR

Get business pricing on tools and workshop supplies
- Business-only prices and quantity discounts
- Tax-exempt purchasing
- Multiple users, one account, clear invoices
Installing a jointer comes down to three things: a stable, unstressed base; an outfeed table set dead even with the knives at top dead center; and infeed/outfeed tables that are coplanar with a fence square to them. Set depth of cut by lowering the infeed table (start at 1/32″), then verify everything with a straightedge, a machinist’s square, and a test cut on scrap before trusting the machine.
Here’s a truth that took me two ruined walnut boards to learn: a jointer that isn’t installed right doesn’t just cut badly — it makes you think you’re the problem. You fight the feed, blame your technique, and chase wind you introduced with a wrench three weeks ago.
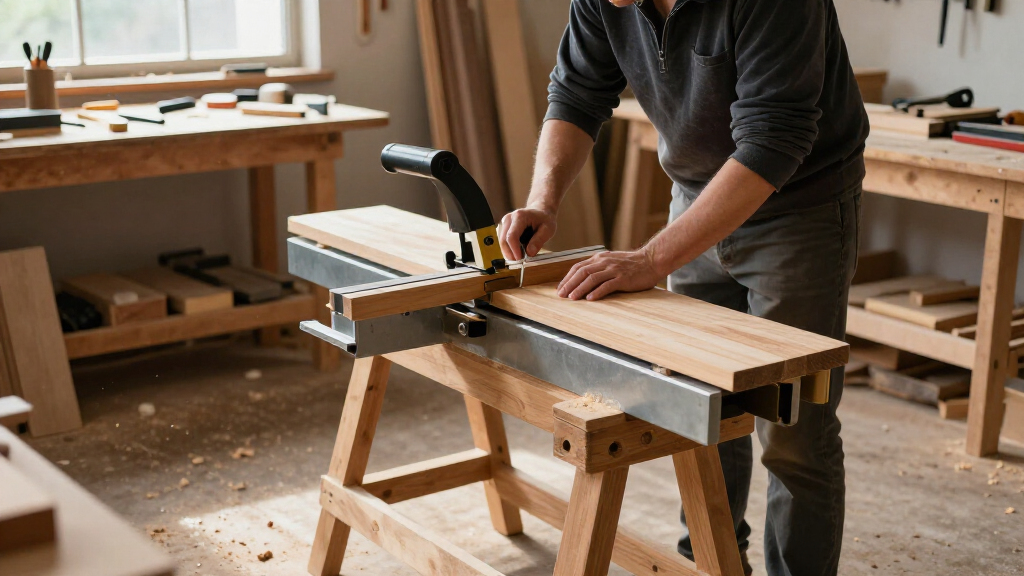
A jointer flattens one face of a board and squares an adjoining edge. That’s it. But those two jobs only happen if the machine sits stable, the outfeed table lines up with the knives, and the tables are coplanar. Get those wrong by even a little and every board comes out bowed, tapered, or out of square.
This guide walks through the whole installation, from picking a spot on the floor to the scrap-board test cut that tells you whether you nailed it. I’ll flag where the manual wins over generic advice, because cutterhead designs differ between machines — especially between straight-knife and spiral-head models.
The outfeed table must sit exactly level with the knives or inserts at top dead center — it’s the reference surface for the finished cut, and being off by thou…
Stable beats level: the jointer doesn’t need to read bubble-level to the floor, but it must not rock or twist. Shim the base and verify the tables are coplanar…
Set depth of cut by lowering the infeed table, and start at 1/32 inch while dialing in — shallow cuts make setup problems easy to diagnose instead of buried un…
Verify with a machinist’s square (not a framing square) at multiple points along the fence, and diagnose problems using the symptom table: concave = outfeed lo…
Disconnect power before touching the cutterhead, confirm the guard returns freely, use push blocks, and leave any new circuit or 240V work to a licensed electr…
Installing a Jointer with Proper Height & Alignment
A jointer flattens one face of a board and squares an adjoining edge — but only if the machine sits stable, the outfeed table lines up with the knives, and the tables are coplanar. Get those wrong by even a little and every board comes out bowed, tapered, or out of square.
“A jointer that isn’t installed right doesn’t just cut badly — it makes you think you’re the problem.”
Pick the Right Spot Before You Bolt Anything Down
Installing a jointer starts with floor space, not wrenches. For an 8-inch jointer, figure a 16-foot clear path for furniture-scale stock — 8 feet each side of the cutterhead. Measure your longest typical board and double it.
120V vs 240V Circuits
Most benchtop and mid-size jointers run 120V, but larger machines want a 240V circuit. A new circuit run is licensed-electrician territory — not a DIY splice.
Chips Are Serious
Plan for a 4-inch port minimum and a collector pulling 400–650 CFM at the machine for a small shop. Anything less and the chute packs solid mid-session.
Firm Beats Flat
A sloping or bumpy garage floor is fine — you’ll shim it — but it must be firm. No springy garage-loft platforms. Fix lighting before the machine weighs 300 pounds.
Stable Doesn’t Mean Level
A jointer tilted 2 degrees to the floor cuts perfectly if the tables are coplanar; a level jointer on a twisted base cuts garbage. Level is about the room. Stable and untwisted is about the cut.
Position the machine
Follow the manual’s mounting instructions on a mobile base or factory stand.
Adjust leveling feet
Tune until the machine doesn’t rock when you push on a corner.
Shim uneven concrete
Hard plastic shims, stacked and glued, at each foot point.
Check tables for twist
Straightedge diagonally across both tables — no gaps beyond a few thousandths.
Torque to spec
Over-torqued stand bolts can bow the base and put tables back into twist.
One 1/16-inch shim under a short foot fixed what a dozen fence adjustments couldn’t.
A friend chased “out of square” edges for a month. The base was under tension, and the tables were twisted relative to each other. Check the foundation before you blame the adjustments.Set the Outfeed Table Dead Even With the Knives
Think of the cutterhead like a record player needle and the outfeed table like the platter: the knives cut the groove, and the outfeed table must support the board at exactly the height the cut left it. Always disconnect power first — unplug the machine, no exceptions.
The Straightedge Kiss Test
- Rotate the cutterhead by hand until a knife is at top dead center.
- Lay a straightedge across the outfeed table, spanning the cutterhead.
- The knife edge should just kiss the underside — a whisper of contact at TDC.
- The straightedge should rock like a slow see-saw: not dead still (knife low), not shoved upward (knife high).
- Check consistency near the fence and near the outside edge.
- Straight-knife head: repeat for every knife — a high knife takes the full cut, a low one takes none.
Depth-of-Cut Reference Scale
Set depth of cut by lowering the infeed table. Start shallow — shallow cuts make setup problems easy to diagnose instead of buried under tear-out and feed resistance.
The Symptom Table: Read the Cut, Find the Cause
A test cut on straight, defect-free scrap is the only verification that counts. Joint the board, then check the result with a straightedge and a machinist’s square. Change one setting at a time and retest.
| Symptom | Root Cause | Fix | Verified? |
|---|---|---|---|
| Concave face | Outfeed table too low — board drops off the cutting plane after the knives | Raise outfeed table to knife circle at TDC | ✓ |
| Convex face | Outfeed ~0.010″ under the knife circle | Raise outfeed; verify with dial indicator | ✓ |
| Snipe-like bite at trailing end | Outfeed 1/32″ too high — board climbs before knives finish | Lower outfeed table slightly; re-test | ✓ |
| Tapered edge | Tables not coplanar — step or twist between infeed and outfeed | Shim base; check diagonal straightedge rocking | ~ |
| Out-of-square edge | Fence not square to tables (or twisted base mimicking it) | Machinist’s square at multiple points along fence | ~ |
| Dished edges, “dull knives” | Outfeed 0.008″ low — knives were fine all along | One adjustment restored glass-smooth cuts | ✓ |
Coplanar Tables, Square Fence, Even Knives
Height sets the cut; coplanarity and fence squareness affect the shape and angle of the result. Do not assume a new machine is perfectly adjusted — and remember the manual wins over generic advice, because cutterhead designs differ between straight-knife and spiral-head models.
Coplanar, No Step
Infeed and outfeed tables must sit in one flat, unstressed plane — no step, no twist. Lay a straightedge across both and look for light gaps.
90° With a Machinist’s Square
Never a framing square. Check squareness at more than one point along the fence — a fence can be square at one spot and off at another.
Knives vs Spiral Inserts
Straight knives must all be set evenly to spec. Spiral and helical heads use replaceable carbide inserts and have different — often simpler — setup procedures.
Finish With Safety, Not Optimism
Disconnect power before touching the cutterhead
Unplug the machine. No exceptions, even for a “quick look” at knife height.
Confirm the guard returns freely
The cutterhead guard must swing back on its own after every pass. Check before the first cut of every session.
Use push blocks, keep hands clear
Hands never travel over the cutterhead. Push blocks are cheap; fingers are not.
Leave new circuits to a licensed electrician
Any new circuit or 240V work is professional territory — not a DIY splice.
Pick the Right Spot Before You Bolt Anything Down
Installing a jointer starts with floor space, not wrenches. You need enough room to feed long boards in and out, swing the fence through its full range, and reach the switch without stepping over anything. For an 8-inch jointer, figure a 16-foot clear path for furniture-scale stock — 8 feet each side of the cutterhead — or you’ll be catching board ends on the workbench forever.
My first jointer lived in a corner because that’s where the outlet was. Six months of wrestling 6-foot oak through a 4-foot gap taught me that placement is a setup decision, not a decorating one. Measure your longest typical board and double it.
Three things to settle before the machine lands:
- Power: most benchtop and mid-size jointers run 120V, but larger machines want a 240V circuit. If you need a new circuit run, that’s licensed-electrician territory — not a DIY splice.
- Dust collection: a jointer throws serious chips. Plan for a 4-inch port minimum and a collector pulling in the 400–650 CFM range at the machine for a small shop. Anything less and the chute packs solid mid-session.
- Floor condition: a sloping or bumpy garage floor is fine for stability — you’ll shim it — but it must be firm. No springy garage-loft platforms.
Lighting matters too. You want to see the surface of the board and the cutterhead guard clearly from the operator position. If you’re working in a dim corner, fix that now, before the machine weighs 300 pounds and moving it means a two-person job and a dolly.
Stable Doesn’t Mean Level: Mounting the Machine Right
Here’s the distinction that confuses everyone: a jointer does not need to be level to the floor. It needs to be stable and not twisted. The Earth’s gravity doesn’t care whether your tables read bubble-level — but the wood absolutely cares whether the tables are in a flat, unstressed plane relative to each other.
Follow the manufacturer’s mounting instructions. On a mobile base or factory stand, that usually means leveling feet adjusted until the machine doesn’t rock when you push on a corner. Shim the stand on uneven concrete — I use hard plastic shims, stacked and glued, at each foot point. Then check the tables themselves for twist: lay a good straightedge diagonally across both tables and look for rocking or gaps bigger than a few thousandths.
Level is about the room. Stable and untwisted is about the cut. A jointer tilted 2 degrees to the floor cuts perfectly if the tables are coplanar; a level jointer on a twisted base cuts garbage.
Anecdote time: a friend chased “out of square” edges for a month, adjusting his fence repeatedly. Turned out his stand had one short foot, the base was under tension, and the tables were twisted relative to each other. One 1/16-inch shim under the offending corner fixed what a dozen fence adjustments couldn’t. Check the foundation before you blame the adjustments.
Anchor the stand if your manual calls for it — especially on a longer machine where leverage from a heavy board can tip or walk the unit. And torque the fasteners to spec, not to “feels tight.” Over-torqued stand bolts can bow the base and put the tables right back into twist.
Set the Outfeed Table Dead Even With the Knives
Setting table height is the heart of installing a jointer. On most machines, you adjust the outfeed table so its surface sits exactly level with the knives or inserts at their highest point — top dead center. The infeed table then gets lowered to set your depth of cut. Think of the cutterhead like a record player needle and the outfeed table like the platter: the knives cut the groove, and the outfeed table has to support the board at exactly the height the cut left it, or the whole “record” plays back wrong.
- Disconnect power. Unplug the machine. No exceptions, even for a “quick look” at knife height.
- Rotate the cutterhead by hand (using the pulley or the method in your manual) until a knife is at its highest point.
- Lay a straightedge across the outfeed table, spanning the cutterhead. The knife edge should just kiss the underside of the straightedge — a whisper of contact, lifting it fractionally at top dead center. A good visual: the straightedge should rock on the knife like a slow see-saw, not sit dead still (knife too low) nor get shoved visibly upward (knife too high).
- Adjust the outfeed table up or down until that light touch is consistent across the full width of the table — check near the fence and near the outside edge.
- Repeat for each knife if you have a straight-knife head. All knives must be set evenly to the manufacturer’s spec; a high knife takes the full cut, a low one takes none.
What goes wrong when you miss, with concrete symptoms: set the outfeed table 1/32 inch too high and the board rides up onto it before the knives finish, leaving a snipe-like bite at the trailing end — you’ll feel the board literally climb as the tail passes the cutterhead. Set it too low — say 0.010 inch under the knife circle — and the board drops off the cutting plane the instant it clears the knives, leaving the face slightly convex and the last few inches dragged down. I once spent an evening blaming “dull knives” for dished edges on cherry before a dial indicator showed my outfeed table was 8 thousandths low; one adjustment, and the same knives cut glass-smooth.
Spiral and helical cutterheads simplify this. Instead of setting individual knives, you’re aligning the outfeed table with the cutting circle described by the carbide inserts. The procedure is the same straightedge check, but the manual’s spec sheet takes precedence — insert heights and head geometry vary by brand, so follow their numbers, not a forum thread.
Coplanar Tables and a Square Fence: Where Accuracy Actually Lives
Table alignment means the infeed and outfeed tables must be coplanar — same plane, no step between them other than your intentional infeed drop, and no twist. Fence alignment means the fence sits at a true 90 degrees to the tables for standard edge jointing. These two settings determine the shape and angle of what comes out of the machine; knife height determines how much comes off.
Think of the two tables like the two halves of a bridge deck: drivers don’t care if the whole bridge slopes gently uphill, but a 1/8-inch lip where the decks meet will bounce every car. Same deal here — the knives take their cut, and the outfeed table has to carry the board forward on exactly the plane the cut left behind. A twist between the tables is like a bridge deck banked to one side: every board exits leaning.
To check coplanarity, lock both tables, then lay a precision straightedge across the outfeed and infeed tables at the same height. Look for light under the straightedge at the seams or a rocking motion when you span the cutterhead gap. If you can slide a 0.002-inch feeler gauge under the straightedge anywhere along the seam, that’s your limit — a dollar bill is roughly 0.004 inch thick, so if a bill slides under with ease, you’re out of spec. Check at both edges — near the fence and near the front. A table can read flat on one side and twisted on the other, and only the twisted side will tell you, by cutting taper.
For the fence, use a machinist’s square of at least 6 inches, not a hardware-store framing square — those can be out by a degree or more, which compounds over a wide panel glue-up. Concrete example: a fence that’s off by just 1 degree puts a 12-inch-wide panel nearly 1/16 inch out of square at the far edge — enough to see daylight in the glue line and force a flush-trim pass that thins your panel unevenly. Set the square base on the outfeed table and bring the fence to the blade. Then check squareness at more than one point along the fence, because a long fence can be square at one end and off at the other if it’s bent or the pivot is worn — I’ve seen a fence knocked out by a drop onto concrete read true at the pivot end and a full degree out at the far end.
| Symptom | Likely Cause | Fix |
|---|---|---|
| Concave face or edge | Outfeed table too low | Raise outfeed to knife height |
| Convex (bowed) result | Outfeed table too high | Lower outfeed slightly |
| Tapered edge | Tables twisted / not coplanar | Re-shim base, check table gibbs |
| Edge not square to face | Fence off 90° | Re-square with machinist’s square |
| Step or snipe at board end | Outfeed height mismatch or technique | Support the board fully through the cut |
Change one setting at a time and retest. Adjust two things at once and you’ll never know which one fixed — or caused — the problem. It’s like tuning a carburetor and the ignition timing on the same afternoon: when the engine finally runs right, you still don’t know which change did it, and when it runs worse, you’ve doubled your troubleshooting.
The Test Cut That Tells You the Truth
A test cut is the only verification that counts. Straightedges and squares are diagnostic tools; the wood is the judge. Joint a straight, defect-free scrap board — something stable like maple or poplar, 3/4 inch thick, 2 to 3 feet long — and check the result against your references.
- Set a shallow depth of cut — 1/32 inch — while checking setup. Deep cuts remove material faster but demand more feed force and can tear out, muddying your diagnosis.
- Joint one face fully, then check it against a straightedge held across and along the surface. No light gaps means flat.
- Joint one edge with the face tight to the fence. Check the edge for straightness, then check edge-to-face square with your machinist’s square.
- Flip the square check end for end. Square at both ends? Done. Out at one end only? Your fence or tables have twist.
Real-world example: after installing my current 8-inch jointer, my test board came out with a slight concave edge — a shallow dish maybe 0.004 inch deep at the middle. That’s the classic outfeed-too-low signature. I raised the outfeed table a quarter turn of the adjuster, re-cut, and the second board was dead straight. Total diagnosis time: ten minutes. Without the test cut, I’d have glued up a twisted panel and found out the hard way.
Grain direction matters even in testing. Feed so the grain runs downhill relative to the cutterhead — read the board before you feed it. Feeding against wild, reversing grain will tear out even on a perfectly aligned machine, and you’ll wrongly blame your setup.
Safety Checks Before the First Real Board
Installing a jointer includes safety verification — it’s not a finishing touch. Before every first session and after any setup change, confirm the guard, fasteners, and your own habits are in order. The cutterhead is the most exposed spinning tool in most home shops; treat it that way. For perspective, a jointer cutterhead spinning at 4,500 RPM with three knives makes over 22,000 cuts per minute — anything your hand drifts into gets taken off, not nicked.
- Guard returns freely. The spring-loaded fence-mounted or pork-chop guard must snap back over the cutterhead when you release it. Test it with a scrap stick: push the guard aside with the board as if mid-cut, then let go — it should slam home instantly. A sluggish guard is a shop emergency waiting to happen.
- All fasteners tight. Table locks, fence locks, knife gib screws, stand bolts — walk them all after setup and again after the first few hours of vibration. Example habit: after I set up a machine, I mark each verified fastener with a paint pen dot; any dot that’s misaligned after a month of use tells me something has loosened.
- Push blocks, always. Never feed by hand over the cutterhead. Use push blocks with rubber or foam pads and keep your body out of the line of kickback. A classic near-miss scenario: jointing the last 6 inches of a short board, hand sliding forward to follow it — that’s exactly the moment the push block exists for.
- Respect stock minimums. Most manuals specify a minimum board length (commonly 12 inches) and thickness. Shorter stock is a kickback and finger hazard — a 6-inch offcut can ride up over the guard and be launched back at you before you can react.
- Eyes and ears on. Safety glasses at minimum; hearing protection because a jointer under load runs 90+ dB — about as loud as a lawnmower at arm’s length, which nobody stands next to unprotected for an hour.
One more thing: any wiring beyond plugging into an existing rated outlet — new circuits, 240V conversions, motor changes — belongs to a licensed electrician working to local code. Saving $150 on an electrician isn’t worth a garage fire. And if your test cuts stay wrong after careful adjustment, or you find a machined surface that’s genuinely out of flat on a new machine, call the manufacturer. Casting defects happen; that’s what warranties are for.
Frequently Asked Questions
How high should the outfeed table be relative to the knives?
The outfeed table should sit exactly level with the knives or inserts at their highest point — top dead center. Check it by rotating the cutterhead by hand (power disconnected) and laying a straightedge across the outfeed table; the knife edge should just kiss its underside. A high outfeed table causes snipe and convex cuts; a low one leaves the board concave.Does my jointer need to be perfectly level to the floor?
No. The machine needs to be stable and untwisted, not bubble-level. A jointer tilted slightly relative to the floor cuts perfectly as long as the tables are coplanar and the base isn’t under stress. Shim the stand or leveling feet until nothing rocks, then check the tables for twist with a straightedge before making any cut adjustments.How do I check if the infeed and outfeed tables are coplanar?
Lock both tables at the same height and lay a precision straightedge across both, spanning the cutterhead gap. Look for light gaps or rocking, and repeat the check near the fence and near the front edge — a table can be flat on one side and twisted on the other. A step or twist at the seam will show up as tapered cuts in your stock.How deep should each jointer pass be?
Start at 1/32 inch, especially while checking setup or working figured wood. A 1/16-inch cut removes material faster but requires more feed force and increases tear-out on reversing grain. For wide, dense hardwoods, two shallow passes beat one aggressive one in both surface quality and control.Is setup different for a spiral cutterhead versus straight knives?
Yes, mostly in the cutterhead step. Straight-knife machines require each knife to be set individually and evenly to spec using a jig or dial indicator — fiddly and precise. Spiral or helical heads use factory-indexed carbide inserts, so you align the outfeed table with the cutting circle rather than adjusting individual knives. Table and fence alignment procedures are identical for both.Conclusion
If you remember one thing, make it this: the outfeed table is the reference, and everything else serves it. Stable base, coplanar tables, outfeed set to the knives, fence square, then a scrap-board test cut to prove it. Change one variable at a time, and let the wood — not your confidence — tell you when the setup is right.
A properly installed budget jointer will out-cut a sloppily set pro machine every single time. Ten minutes with a straightedge and a square is the cheapest accuracy you’ll ever buy. Now go flatten something.
Fall Picks
fall essentials
As an affiliate, we earn on qualifying purchases.