TL;DR

Get business pricing on tools and workshop supplies
- Business-only prices and quantity discounts
- Tax-exempt purchasing
- Multiple users, one account, clear invoices
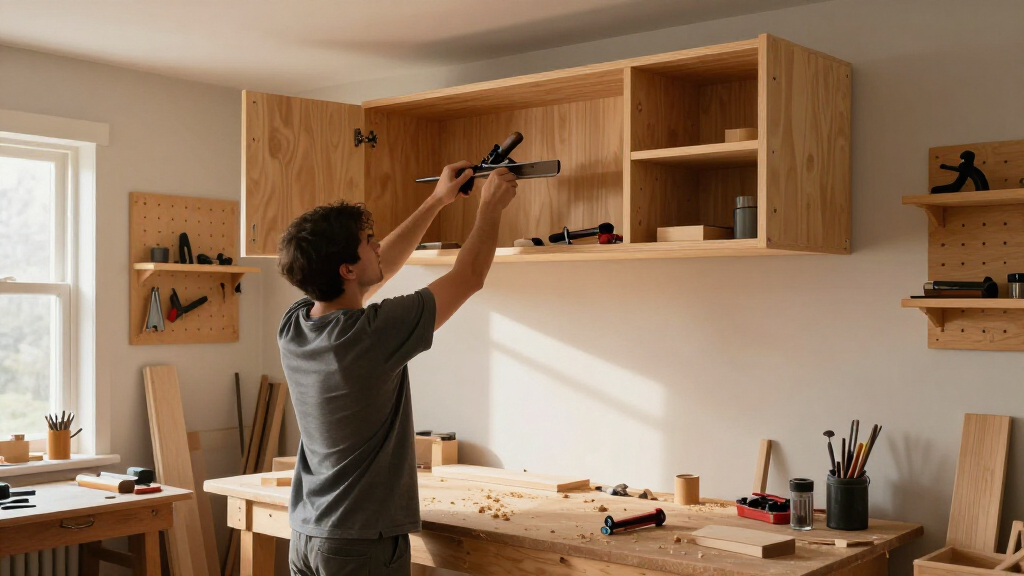
Overhead wall cabinets add useful storage without taking up floor space, but the best layout depends on what you store, how often you reach for it, and the wall’s ability to carry the load. Measure the room and items first, keep heavy or frequent-use belongings within comfortable reach, and fasten cabinets to suitable structural support. Shallow, well-lit cabinets often serve a small shop better than deeper boxes that crowd the workbench.
The floor in a small garage shop can disappear fast: a planer on wheels, a shop vacuum, a stack of lumber, and suddenly there’s nowhere to stand. Overhead wall cabinets can reclaim that floor area, but a cabinet that crowds your bench or holds a heavy box above your head has only moved the problem.
This guide shows you how to plan overhead storage around the real shape of your room and the things you own. You’ll learn how to choose cabinet depth and height, organize shelves by weight and frequency, and think through safe support before you load a box with paint or hardware.
A cabinet should work like a well-tuned tool: it saves effort every time you use it. A few careful measurements can make the difference between a tidy wall and an awkward obstacle course.
Measure the items you plan to store before settling on cabinet depth and shelf spacing.
Treat about 18 inches above a kitchen countertop as a planning reference, then check reach, appliance clearances, and the actual work below.
Keep heavy belongings low and frequent-use items within comfortable reach; use upper shelves for light, occasional-use storage.
Match fasteners and support to the wall construction, cabinet weight, and expected load; drywall alone generally cannot support a loaded cabinet.
Use shallow cabinets, simple finishes, and good lighting to preserve working room and keep a compact space from feeling crowded.
Measure the things you own before choosing cabinet size
Start with the items you plan to store. Their height, depth, weight, and frequency of use should shape the cabinet interior before you settle on a cabinet size. A box that fits the wall but not your cordless drill case is wasted capacity. Measuring also reveals when the item that takes up the most room is too heavy or awkward to store overhead, so you can plan a lower home for it instead.
In a one-car garage, you might want to store sanding discs, glue, and a compact nailer above a bench. Measure the tallest case, then leave room to lift it off the shelf without scraping the cabinet frame. That extra clearance matters: a case that technically fits but must be tilted or dragged out is likely to get left in the way below. For a laundry room, measure detergent bottles and the open lid of the washer; the right depth may be quite different because the lid’s path and the bottles’ shape determine what can fit comfortably.
Group belongings into everyday, occasional, and seasonal piles. Keep the tape measure and fasteners you reach for each week at a comfortable height, and put holiday string lights or spare furnace filters higher. This small-shop version of maximizing storage space makes each shelf earn its keep without turning every trip for a screwdriver into a step-stool chore. Frequency is part of sizing because a shelf that is technically accessible can still be inconvenient if you must move several other things to get to the item you use daily.
- Measure the largest item in each group, including its case or handle, and allow enough room to take it out without catching on the frame.
- Check shelf spacing against tall bottles, bins, and tool cases; unused vertical gaps waste capacity, while shelves set too close together make useful items awkward to remove.
- Note item weight so dense objects do not end up overhead by default. A heavy item may fit but still be a poor choice if lowering it requires an extended reach or two hands.
For example, a 12-inch-deep cabinet can be a sensible home for boxes of screws and safety glasses, while a bulky circular-saw case may need a deeper shelf or a lower storage spot. The deeper option adds capacity, but it can also push the cabinet farther into the room and hide smaller objects behind the case. Capacity only helps when you can get things in and out cleanly, so include the space your hands need as well as the item’s dimensions.
Map the wall so the cabinets clear doors, lights, and equipment
Measure the whole wall, not just the empty rectangle. A useful plan accounts for the ceiling, windows, door swings, trim, pipes, outlets, and lights, as well as what sits below the cabinets. These details determine where a cabinet can go and how it will feel in use. One overlooked obstruction can turn a neat row into a door that clips a light fixture or a cabinet that blocks the view of a work surface.
In a garage, mark the highest point of a raised overhead door track and the travel path of the door. The clearance can change with the door’s position, so check the full path rather than only its parked height. In a laundry room, check how far the washer lid lifts and whether a cabinet door will collide with it; losing even a small part of the lid’s opening can make loading bulky items frustrating. In a home shop, measure from the bench surface to the cabinet front with its door open; a cabinet that seems shallow while shut can still interfere with a long workpiece or limit where you can stand.
Use painter’s tape to mark the planned cabinet edges on the wall. Then open nearby doors, stand at the bench, and walk through the room as you normally would. A mock-up takes minutes and can reveal that the cabinet blocks a task light or catches the corner of a sheet of plywood. It also helps you judge scale: a cabinet may clear every obstruction and still leave too little visual or working space above the bench.
Record both vertical and horizontal measurements, including the opening arc of cabinet doors. The arc matters because cabinet doors need room to swing and because the open door can occupy the same space as your head, a workpiece, or an appliance lid. If a window or long board makes a full-width run awkward, shorter cabinets can preserve sightlines and leave room for a light or open shelf. That may reduce total enclosed storage, but the remaining open space can make routine tasks easier and keep the wall from feeling crowded. In a cramped shop, the best layout often looks less like a wall of boxes and more like a deliberate gap where your hands and materials need to move.
Set cabinet height for the work happening underneath
Choose cabinet height around the counter, appliance, and people using the room. In kitchens, roughly 18 inches between countertop and upper cabinet is a common planning reference, not a rule for every space. Workbench height, equipment clearance, reach, and local or appliance requirements can change the right measurement. The gap is a compromise: too little can constrain work below, while too much can make stored items difficult to reach and leave the wall’s upper area less useful.
Suppose you use a bench for hand sanding and small assembly. A cabinet hung too low may bump a tall cabinetmaker’s head or limit how you clamp a panel; mounted higher, the same cabinet may be harder for another family member to reach. Stand at the bench, hold a typical workpiece, and check the reach before fixing a final line on the wall. Consider how work changes, too: a cabinet can clear ordinary bench tasks but obstruct a tall panel held upright or a lamp aimed at a precise cut.
Keep frequent-use items in the reachable zone and reserve the top shelves for things you need only now and then. A lightweight box of seasonal gloves is a better high-shelf resident than a cast-iron vise or a gallon jug of finish. Heavy things are simply harder to lower safely when your arms are extended, and reaching for them can also pull your balance forward. If you cannot comfortably lift an item down while standing securely, its overhead location is not practical storage.
Place for the reach you have, not an imaginary average. If a person who uses the room cannot comfortably reach an item, it is not convenient storage.
In a laundry nook, you may need to place the bottom of a cabinet higher to clear a top-loading washer lid. In a kitchen, follow the appliance maker’s clearance guidance around a range or hood. Treat any standard dimension as a starting mark, then check the actual room and the people who work in it. A small change in height can trade easier access for more clearance, so test both with the appliance open and with a typical task underway.
Choose a depth that stores more without crowding your bench
Pick the shallowest cabinet that comfortably fits your belongings. Deeper boxes hold more, but they can steal working space, shade a bench, and make small rooms feel boxed in. A shallow cabinet can be more useful when it keeps the counter and the user’s elbows clear. The key is to compare the added capacity with the space it takes from the work below; storage that makes the room harder to use can simply move clutter from the floor to the wall.
Picture a 24-inch-deep bench with a cabinet projecting far over its front edge. You might gain room for large tool cases, yet lose the clear wall space needed to stand a long board upright or to position a work light. You may also find yourself leaning forward to see or reach the bench, which makes detailed work less comfortable. For screws, sanding pads, safety glasses, and small hand tools, a shallower box may use the wall more gracefully because those items do not need the extra depth.
Depth also affects visibility and access. Items pushed to the back can disappear behind the first row, especially in a dark garage, so the nominal shelf capacity may be greater than the useful capacity. Adjustable shelves, bins with labels, or a pull-down insert can make a deep cabinet easier to manage, though moving hardware and accessories add cost and complexity. These aids help only if they preserve enough room for the items and do not make routine retrieval a slower, more awkward task.
| Choice | Works well for | Tradeoff to check |
|---|---|---|
| Shallow cabinet | Small parts, bottles, glasses, and narrow rooms | Large cases may not fit, so they need another storage location |
| Deeper cabinet | Bulky cases and larger bins | Can crowd the work surface and hide items at the back, reducing clear space and visibility |
| Open shelf | Visible, quick-grab items such as shop towels | Contents collect dust and need regular tidying; the open view can also make a busy wall feel cluttered |
A practical compromise in a garage shop is often shallow overhead wall cabinets over the bench, with deeper storage on a lower cabinet or rolling cart. The lower position makes bulky or heavy objects easier to handle, while the overhead space stays clear for small supplies. Closed doors hide visual clutter, while a short open shelf beside them can hold the tool you grab every hour. This combination gives up some overhead volume but often improves access, visibility, and working room where those benefits matter most.
Anchor the cabinet to support that matches its load
A loaded overhead cabinet needs a fastening system suited to both the wall and the expected weight. Drywall alone generally is not suitable support for a loaded cabinet. The cabinet’s own weight, the contents, wall construction, fasteners, and how the load is distributed all affect what the installation can safely carry.
Before installation, identify whether you have wood studs, masonry, or another wall structure, then follow the cabinet maker’s installation instructions and fastener specifications. A cabinet full of jars, paint, or metal hardware weighs far more than an empty box. A row of cabinets also needs proper alignment and support at the joints, not just a couple of convenient screws.
For example, if your garage wall has wood studs spaced behind drywall, mark their locations and plan the cabinet rail or mounting points around them. If the wall is masonry or the studs do not line up with the cabinet, use a fastening approach designed for that wall and load, or get a qualified installer. Do not guess at a universal weight rating: there isn’t one.
Installation can involve lifting a heavy cabinet overhead, working on a ladder, and drilling into walls where wiring or plumbing may run. Wear eye protection and suitable work gloves, get another person to help with lifting, and stop if the wall or hidden services are uncertain. If the work involves electrical or gas equipment nearby, have a licensed professional handle that work; power must be off before any electrical work, and applicable permits and code requirements still matter.
Organize shelves so daily tools stay easy to reach
Sort cabinet contents by how often you use them and how safely you can lift them. The everyday shelf should hold light, useful items; the highest shelf should hold lightweight belongings you rarely need. This arrangement keeps storage convenient instead of turning it into a daily reach-and-strain routine.
In a small woodworking shop, keep sanding discs, pencils, glue brushes, and hearing protection together in labeled bins near the bench. Put spare router bits or a backup box of screws higher if you only reach for them occasionally, but store heavy power tools below waist or chest level. A cordless drill may feel manageable until you lower it one-handed from a high shelf while balancing on a step stool.
Use adjustable shelves when your storage changes with the season or project. Dividers can stop cans from tipping, and simple labels help a second person find the right box without rummaging. Under-cabinet task lighting can brighten a bench, but position the light so it does not shine into your eyes or cast a hard shadow over a cut line.
- Put frequent-use items on the easiest shelf to reach.
- Keep dense and heavy items low, even if they fit overhead.
- Contain small parts in labeled bins so they do not migrate into a jumble.
- Review the layout after a few weeks and move anything that causes awkward reaching.
Think of the cabinet like a tool chest turned upright: the right item is easy to find, and the heavy drawer is never above your head. The result is faster work and fewer small irritations.
Make overhead storage feel lighter in a small room
Cabinets preserve floor area, but they do not automatically make a room feel larger. Depth, finish, lighting, and visual clutter all shape how the wall reads. A long run of dark, deep boxes can feel like a low ceiling even when it stores a mountain of gear.
In a narrow laundry room, pale cabinet fronts and simple pulls can keep the wall quiet. In a garage, matching doors can hide mismatched bottles and half-empty boxes, while a light strip below the cabinets brightens the counter. Glass fronts may help you spot contents, but they also show clutter; use them for tidy bins or display pieces rather than a jumble of rags and spare parts.
Cabinets that reach close to the ceiling reduce the dusty gap that is annoying to clean, and they can add useful storage without taking up floor space. The cost is access: the top shelf may need a step stool, so keep it for light, infrequently used things. Leave room for a safe place to stand while you reach, and do not make the step stool itself hard to retrieve.
A balanced wall may mix closed overhead wall cabinets with a short open shelf or a clear section for task lighting. That contrast keeps the room from feeling like a row of lockers. Like a well-set workbench, the wall should hold what you need while leaving your hands and eyes room to do the job.
Frequently Asked Questions
How high should I install overhead cabinets?
It depends on what sits below and who needs to reach the shelves. About 18 inches above a kitchen countertop is a common reference, but check appliance clearances, work needs, and comfortable reach in your room.
How deep should wall cabinets be?
Choose a depth that fits your largest planned items while leaving enough room to work below and move around the cabinet. Shallow cabinets often suit small parts and narrow rooms; bulky cases may need deeper storage placed where it will not crowd a bench.
Can I install a loaded cabinet without fastening it to studs?
The cabinet needs a support system rated for its weight and contents, and that system must suit the wall material. Studs are commonly used in framed walls; other walls or layouts may need suitable backing or a specified fastening method. Follow the manufacturer’s guidance or ask a qualified installer.
How much weight can an overhead wall cabinet hold?
There is no universal capacity. It depends on the cabinet, fasteners, wall construction, installation, and how the contents are distributed. Check the cabinet’s specifications and installation instructions, and keep dense or heavy objects out of high shelves.
Are cabinets that reach the ceiling a good idea?
They can add useful storage and remove a dust-catching gap, but the top shelves may be hard to reach. Store lightweight, rarely used belongings up high, and leave heavy or fragile items lower where you can handle them safely.
Should I use open shelves or closed cabinets in my garage?
Closed cabinets hide clutter and protect contents from dust, while open shelves make grab-and-go items visible. A useful garage mix is closed storage for small parts and supplies, plus a short open shelf for items such as shop towels that you use constantly.
Conclusion
Measure your belongings, map the wall, and set cabinet height around the work and the people doing it. Then match the mounting system to the wall and the loaded cabinet, keeping heavy items where you can lift them safely.
Good overhead storage gives the floor back without stealing your reach or your light. Leave the wall ready for the next project, not just the next box.
Fall yard work Picks
leaf blowers
As an affiliate, we earn on qualifying purchases.