TL;DR

Get tools and workshop supplies delivered free — and shop member deals
- Fast, free delivery on millions of items
- Access to Prime Big Deal Days deals on October 6–7
- Prime Video, Amazon Music and more included
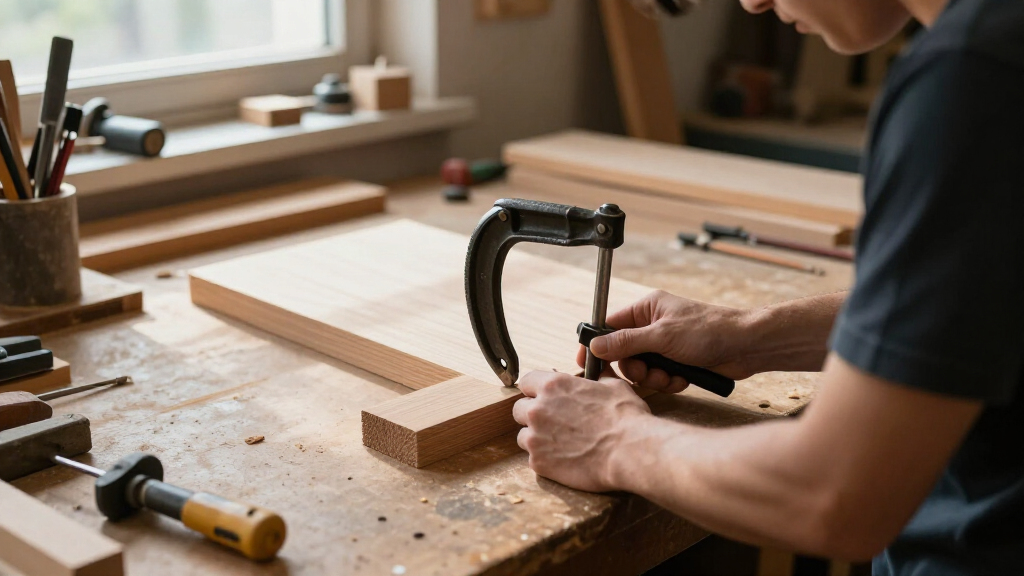
Clamps hold materials steady for cutting, drilling, gluing, assembly, and repair. Bar and F-clamps handle many woodworking jobs, pipe clamps reach across wide glue-ups, and spring or trigger clamps make quick light-duty holds; choose by opening capacity, throat depth, pressure, jaw shape, and workpiece geometry.
A clamp that misses the joint by half an inch can turn a simple glue-up into a crooked, slippery mess. In a small shop, you feel that mistake right away: the board shifts, glue beads up on your fingers, and the clock keeps ticking.
Clamps hold materials in place while you cut, drill, glue, weld, assemble, or repair them. This guide explains the main types of clamps, what each one does well, and how to pick the right size and pressure for the job. You’ll also see where a quick trigger clamp saves time, where a screw clamp earns its keep, and how a few scrap-wood pads can protect a finished surface.
Think of choosing a clamp like choosing a wrench: reach, grip, and force all matter. A bigger clamp is not automatically better. The useful one fits the work, puts pressure where you need it, and stays out of the way of your hands and tools.
Check both opening capacity and throat depth; a clamp can open wide enough yet fail to reach the joint.
Use bar, F-, or pipe clamps for longer woodworking glue-ups, and distribute pressure so panels stay flat.
Use pads or scrap blocks to protect soft or finished surfaces from concentrated jaw pressure.
Choose trigger and spring clamps for quick, lighter holds; use screw clamps when a joint needs sustained pressure.
Dry-fit a glue-up or cutting setup, then check that the work cannot shift and that clamps clear the tool path.
Understanding the Different Types of Clamps and Their Uses
Clamps steady materials for cutting, drilling, gluing, assembly, and repair. The best choice fits the workpiece, reaches the pressure point, and holds firmly without damage or getting in the way.
Match the clamp to the shape of the job
01 / The lineupReach for a long bar when boards need to meet, a compact screw when firm direct pressure matters, and a shaped clamp when ordinary parallel jaws cannot hold the work reliably.
Bar & F-clamps
Slide along a rail or bar to hold larger pieces during glue-ups, furniture assembly, and general workshop work.
Pipe clamps
Use fittings on a length of pipe to reach across wide panels. Pipe stiffness and support affect how evenly pressure is applied.
C- & G-clamps
A screw mechanism gives sturdy, controlled pressure for repairs, metal parts, and small robust workpieces. Pad soft surfaces.
Trigger & spring
Quick-grip triggers free one hand; spring clamps close under spring pressure. Both suit temporary, lighter holds.
Hand-screw
Independently adjustable jaws can angle to grip irregular shapes and spread pressure across a wider area.
Corner & band
Right-angle clamps help hold frames and boxes square; band clamps wrap around a perimeter during frame assembly.
Toggle clamps
Over-center action locks work in the same position, useful on workbenches and repeated routing or production setups.
Vise & bench clamps
Secure material for cutting, filing, carving, or assembly. A vise is fixed in place; a clamp is generally portable.
Screw-style clamps
Choose a screw clamp when a joint needs sustained pressure and gradual adjustment. Tighten only until the work stops moving.
Two measurements. One secure fit.
02 / Reach & pressureCapacity is not reach
Opening capacity is the widest jaw gap. Throat depth is the distance from the bar or frame to the pressure point. For an 18-inch panel, a clamp may open wide enough to fit while its shallow throat still cannot reach the center seam.
Firm is enough
Close a glue joint and keep it aligned; avoid crushing the wood or squeezing out most of the glue. A broad pad helps protect soft pine or a finished surface from a concentrated jaw.
Make a glue-up calm and predictable
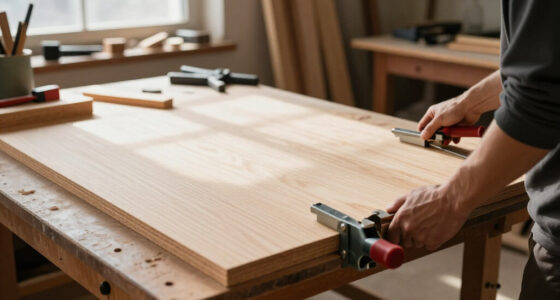
03 / Woodworking sequenceFor long joints, bar, F-, or pipe clamps can draw boards together. Distribute pressure along the seam, with clamps above and below a panel to help prevent bowing. Use a straightedge or winding sticks to check flatness.
Dry-fit
Arrange clamps, pads, and a square before glue is out.
Place
Align jaws with the joint and spread pressure along it.
Tighten
Close gradually until the boards meet and stay aligned.
Check
Inspect flatness, squareness, and whether the joint shifted.
Clear
Confirm clamps stay outside the cutting or tool path.
Pressure note: More force can bow boards or starve a glue joint. For a wide tabletop, use suitable long-reach clamps and check panel alignment as you tighten.
Quick checks that prevent common mistakes
04 / Safe setupProtect the surface. Put pads or scrap blocks between jaws and delicate or finished work.
Align the pressure. Keep the clamp square to the work and aimed at the joint or cut.
Test for movement. Nudge the work before cutting, drilling, or sanding; secure it against pivoting.
Mind pinch points. Keep fingers clear when tightening or releasing. Wear eye protection when drilling or cutting.
Inspect the tool. Check threads, bars, and springs for damage before relying on a clamp.
Respect the environment. Ordinary workshop clamps are not automatically suitable for welding heat, sparks, or lifting.
Match the clamp to the job before you tighten it
The right clamp holds the work securely at the point where pressure is needed, without crushing the material or blocking your next move. Start with the workpiece: its thickness, shape, surface, and the force the task needs. Then check the clamp’s opening and reach. These measurements matter more than a label such as “heavy duty.”
Opening capacity is the widest gap between the jaws. Throat depth is the distance from the frame or bar to the jaw’s pressure point. Imagine clamping a panel that is 18 inches wide: a clamp may open wide enough to fit across it, but a shallow throat might not reach the seam in the middle. You need both measurements to work for your setup.
Match pressure to the material. A steel bracket may tolerate firm screw pressure; a soft pine rail can dent under a small, hard jaw. When you glue two boards edge to edge, tight means the joint closes and stays aligned. It does not mean turning the handle until the wood groans and most of the glue squeezes out.
A clamp improves accuracy when it stops the work from shifting, but only if the clamp itself sits square and puts pressure in the right direction. For instance, when drilling a row of holes in a narrow board, secure the board to the bench and check it cannot pivot. Keep your hands clear of the bit, and wear eye protection when you drill or cut.
As an affiliate, we earn on qualifying purchases.
Choose a bar, F-clamp, or pipe clamp for woodworking glue-ups
Bar, F-, and pipe clamps suit woodworking because they span long distances and hold boards together while glue sets. Bar and F-clamps slide along a rail or bar; pipe clamps use fittings mounted on a length of pipe. The design gives you adjustable reach, though the rail, bar, or pipe affects how much room you have and how the clamp behaves under load.
For a small cabinet side made from two boards, a few bar clamps can pull the edges together while you check the panel for flatness. Place clamps above and below the panel so the pressure does not tip the boards into a slight bow. Use a straightedge or winding sticks to spot misalignment before the glue grabs.
Pipe clamps are handy when you need a longer span for a tabletop or bench top. You can choose a pipe length to fit the job, but reach and stiffness depend on the pipe and fittings. A long, lightly supported clamp can sag or pull unevenly, so distribute pressure along the joint and check that the panel stays flat. There is no fixed clamp count for every glue-up; the length, board thickness, and joint fit all matter.
Before opening the glue bottle, do a dry run. Arrange clamps, pads, and a square within reach, then rehearse tightening them in sequence. On a four-foot panel, that practice helps you work calmly instead of fumbling with a clamp while wet glue leaves a shiny trail across the bench. More pressure is not better if it bows the boards or starves the joint of glue.
As an affiliate, we earn on qualifying purchases.
Use C-clamps and G-clamps when compact, firm pressure matters
C-clamps and G-clamps use a screw and compact frame to apply firm pressure over a relatively small area. Their shape is useful for holding metal parts, repairs, and sturdy workpieces that need a tight, direct grip. They are less forgiving on soft wood because a small jaw concentrates force and can leave a round dent.
For example, when you attach a small steel angle to a hardwood jig, a C-clamp can keep the parts from creeping as you mark or drill. Set the clamp so its screw pad presses squarely against the work. If the surface is finished or delicate, put a scrap-wood block or purpose-made pad between the jaw and the workpiece.
The screw gives you more control than a spring clamp, but it rewards a light hand. Tighten until the parts stop moving and make firm contact; then pause and inspect for bowing or slipping. A clamp that sits at an angle can walk off the edge as you turn the handle. If a part needs to stay square, check it with a square after tightening.
For metalworking repairs, make sure the clamp’s jaws and frame fit the job, and keep them away from heat or sparks unless the clamp is designed for that environment. Ordinary workshop clamps are not automatically welding clamps. If a repair involves hot work, use equipment rated for the task and protect yourself from sparks, hot metal, and pinch points.
As an affiliate, we earn on qualifying purchases.
Reach for trigger and spring clamps when speed beats force
Trigger clamps and spring clamps make quick, light-duty holds when you want fast setup or a free hand. A trigger clamp advances its jaw with a squeeze and usually releases with a lever; many models can reverse to spread parts apart. A spring clamp opens by squeezing its handles, then closes under spring pressure. Both are convenient, but they generally provide less sustained force than a substantial screw clamp.
Picture fitting a thin back panel to a small cabinet. A row of trigger clamps can hold the panel while you check its position and fasten it. Spring clamps are useful for holding a dust cover, a template, or lightweight trim while you mark it. Their speed is a real benefit when the work is small and the pressure demand is modest.
For a wide tabletop glue-up, though, a trigger clamp may flex or fall short of the pressure and reach you need. Use screw-style clamps for the main joint pressure, then use lighter clamps to keep edges or cauls aligned. A caul is a straight board placed across the assembly to spread pressure and help keep parts level; it works like a flat shoe distributing your weight across soft ground.
Before cutting or routing, confirm the clamp cannot slide into the blade or cutter path. A fast clamp is only useful if it holds steadily and leaves your tool a clear route. Check the work by nudging it gently, then keep your fingers away from pinch points as you tighten or release the clamp.
As an affiliate, we earn on qualifying purchases.
Keep frames square with corner, band, and hand-screw clamps
Corner, band, and hand-screw clamps solve awkward shapes that ordinary parallel jaws struggle to grip. A corner clamp holds two pieces at a set angle, often 90 degrees; a band clamp wraps around an assembly; and a hand-screw clamp has two jaws you can adjust independently. Each design helps you control a different kind of geometry.
When you assemble a picture frame, a corner clamp can hold each miter while you check the angle and add glue. It is especially useful for small boxes or cabinet components, though a single corner clamp may not control every corner of a larger assembly. Check diagonal measurements across a rectangular frame: matching diagonals are a practical sign that the frame is square.
A band clamp wraps around the outside of a frame and applies pressure around its perimeter. That makes it useful for a small stool, a picture frame, or another shape where ordinary jaws would press in the wrong places. Protect delicate corners with pads, and tighten the band gradually so the assembly does not twist as the strap takes up slack.
Hand-screw clamps let you angle their jaws to grip irregular stock or hold a piece at a specific angle. For example, you can steady a tapered leg on a bench while you mark a mortise. Adjust both screws so the jaws sit flat; a tilted jaw can pinch one edge and let the piece rotate. Check your layout marks remain visible before tightening fully.
Use toggle clamps and bench holding for repeatable work
Toggle clamps lock over-center to hold a workpiece in the same position repeatedly, while a vise or bench clamp secures work for hand operations. A toggle clamp is often mounted to a jig or bench; once adjusted, you can open and close it quickly without resetting a screw each time. A vise is typically fixed to the bench, while a clamp is portable and attaches temporarily.
Suppose you are routing a dozen matching shelf supports. A toggle clamp on a jig can hold each blank against a fence at the same stop, which makes repeated positioning easier. Check the jig and clamp are firmly attached, and test the setup with the router unplugged before making a cut. Keep hands outside the cutter path and use eye and hearing protection.
A bench vise is a good home-shop choice for filing a bracket, carving a small part, or holding a board while you shape an edge. Use jaw liners when you need to protect a finished or soft surface. A vise is not a lifting device, and neither is an ordinary clamp; do not suspend loads unless the equipment carries a rating for that purpose.
Repeatability depends on the full setup. If a stop block shifts or the toggle clamp sits at a poor angle, every part can come out wrong in the same way. For a batch of small parts, mark the fence position, clamp a test piece, and verify its location before you run the whole stack.
Pick clamps by reach, jaw shape, and how often you use them
Choose a clamp by checking its reach, opening, pressure, jaw contact, and setup speed against the actual work. Budget clamps can handle occasional repairs and light assembly; a small shop rarely needs a wall covered in every size. Pay for stronger, smoother adjustment where a clamp sees frequent use or holds a large assembly that would be costly to remake.
Use this quick selection sequence before you buy or set up:
- Measure the opening: include the workpiece and any pads or cauls you plan to use.
- Check the throat: confirm the jaw reaches the pressure point, not just the edge.
- Match the force: use screw clamps for sustained firm pressure and quick clamps for lighter temporary holds.
- Protect the surface: choose broad or padded jaws for wood, plastic, and finished parts.
- Test the setup: dry-fit the clamp and make sure it will not block the saw, drill, router, or your hands.
Imagine you are repairing a loose drawer front. A trigger clamp might hold a small section while you align it; a deeper F-clamp may be needed to reach a recessed joint. If the drawer has a glossy finish, pads prevent the jaw from leaving a dull crescent. The best choice depends on the job, the material, and how much room you have around it.
Store clamps clean and dry. Wipe off glue, check threads and pads, and look for bent bars or weak springs. A clamp with damaged threads can slip under pressure, so set it aside for repair or replacement instead of trusting it on a valuable glue-up.
Frequently Asked Questions
Which clamp should I use for woodworking?
Bar or F-clamps handle many general woodworking jobs, while pipe clamps suit wide glue-ups and corner clamps help with frames or boxes. Match the clamp to the workpiece dimensions and the point where you need pressure.
How many clamps do I need for a glue-up?
There is no fixed number: the panel’s length, joint fit, and pressure distribution all matter. Dry-fit the assembly and place enough clamps to close the joint evenly while keeping the boards aligned and flat.
How tight should I make a clamp?
Tighten until the work cannot move and the joint closes. More force can dent the wood, bow a panel, or squeeze too much glue from the joint.
Can clamps damage wood?
Yes. Small, hard jaws can leave dents, especially in soft pine or on a finished surface. Add pads or scrap blocks and tighten gradually while checking the surface.
Are trigger clamps strong enough for a glue-up?
Trigger clamps work for light assembly and smaller jobs, but they may not deliver the sustained, even pressure needed for a large panel. Use screw-style bar or pipe clamps for the main pressure on a wide glue-up.
What is the difference between a clamp and a vise?
A clamp is usually portable and attaches temporarily to the work or bench. A vise is generally fixed to a bench and holds work between its jaws for tasks such as filing, carving, and assembly.
Conclusion
Before you clamp, ask three questions: will it reach, will it hold, and will it protect the work? Those checks will get you farther than buying the biggest clamp on the rack. A modest set of bar clamps, a few quick clamps, and pads cut from scrap wood can handle a surprising range of small-shop jobs.
Set the clamp square, tighten only until the work stops moving, and check alignment before you start cutting or walk away from the glue. A good clamp leaves the joint closed and the wood unmarked—quiet proof that the setup did its job.
Fall Picks
fall essentials
As an affiliate, we earn on qualifying purchases.